

Winter Kale Container Growing: Don’t let the frosty weather fool you! You can absolutely enjoy fresh, homegrown kale even when Jack Frost is nipping at your nose. Imagine stepping outside on a crisp winter morning and harvesting vibrant, nutrient-packed kale leaves for your smoothie or a hearty soup. Sounds dreamy, right? Well, it’s totally achievable with the right know-how!
For centuries, kale has been a staple in diets across the globe, prized for its resilience and nutritional benefits. From the hearty stews of medieval Europe to modern-day health trends, kale has proven its staying power. But what if you don’t have a sprawling garden? That’s where the magic of container gardening comes in.
I know what you’re thinking: “Winter? Kale? Containers? Sounds complicated!” But trust me, it’s not. This DIY guide is designed to break down the process of winter kale container growing into simple, manageable steps. We’ll cover everything from choosing the right container and soil to protecting your precious greens from the harshest winter elements. Why struggle with bland, store-bought vegetables when you can have fresh, flavorful kale right outside your door? Let’s get started and transform your balcony, patio, or even a sunny windowsill into a thriving winter kale oasis!
DIY Winter Kale Container Garden: A Beginner’s Guide
Hey there, fellow gardening enthusiasts! I’m so excited to share my tried-and-true method for growing vibrant, delicious kale right through the winter, even if you only have a small balcony or patio. Forget those sad, wilted greens at the grocery store – with a little planning and effort, you can enjoy fresh, homegrown kale all season long. This guide will walk you through every step, from choosing the right container to harvesting your leafy bounty. Let’s get started!
Choosing the Right Kale Variety
Before we dive into the nitty-gritty, let’s talk kale varieties. Not all kale is created equal, especially when it comes to winter hardiness. Some varieties are much better suited to cold weather than others. Here are a few of my favorites:
* **’Red Russian’:** This is a personal favorite. It has beautiful, flat, fringed leaves with a slightly sweet flavor that gets even sweeter after a frost. It’s incredibly cold-hardy.
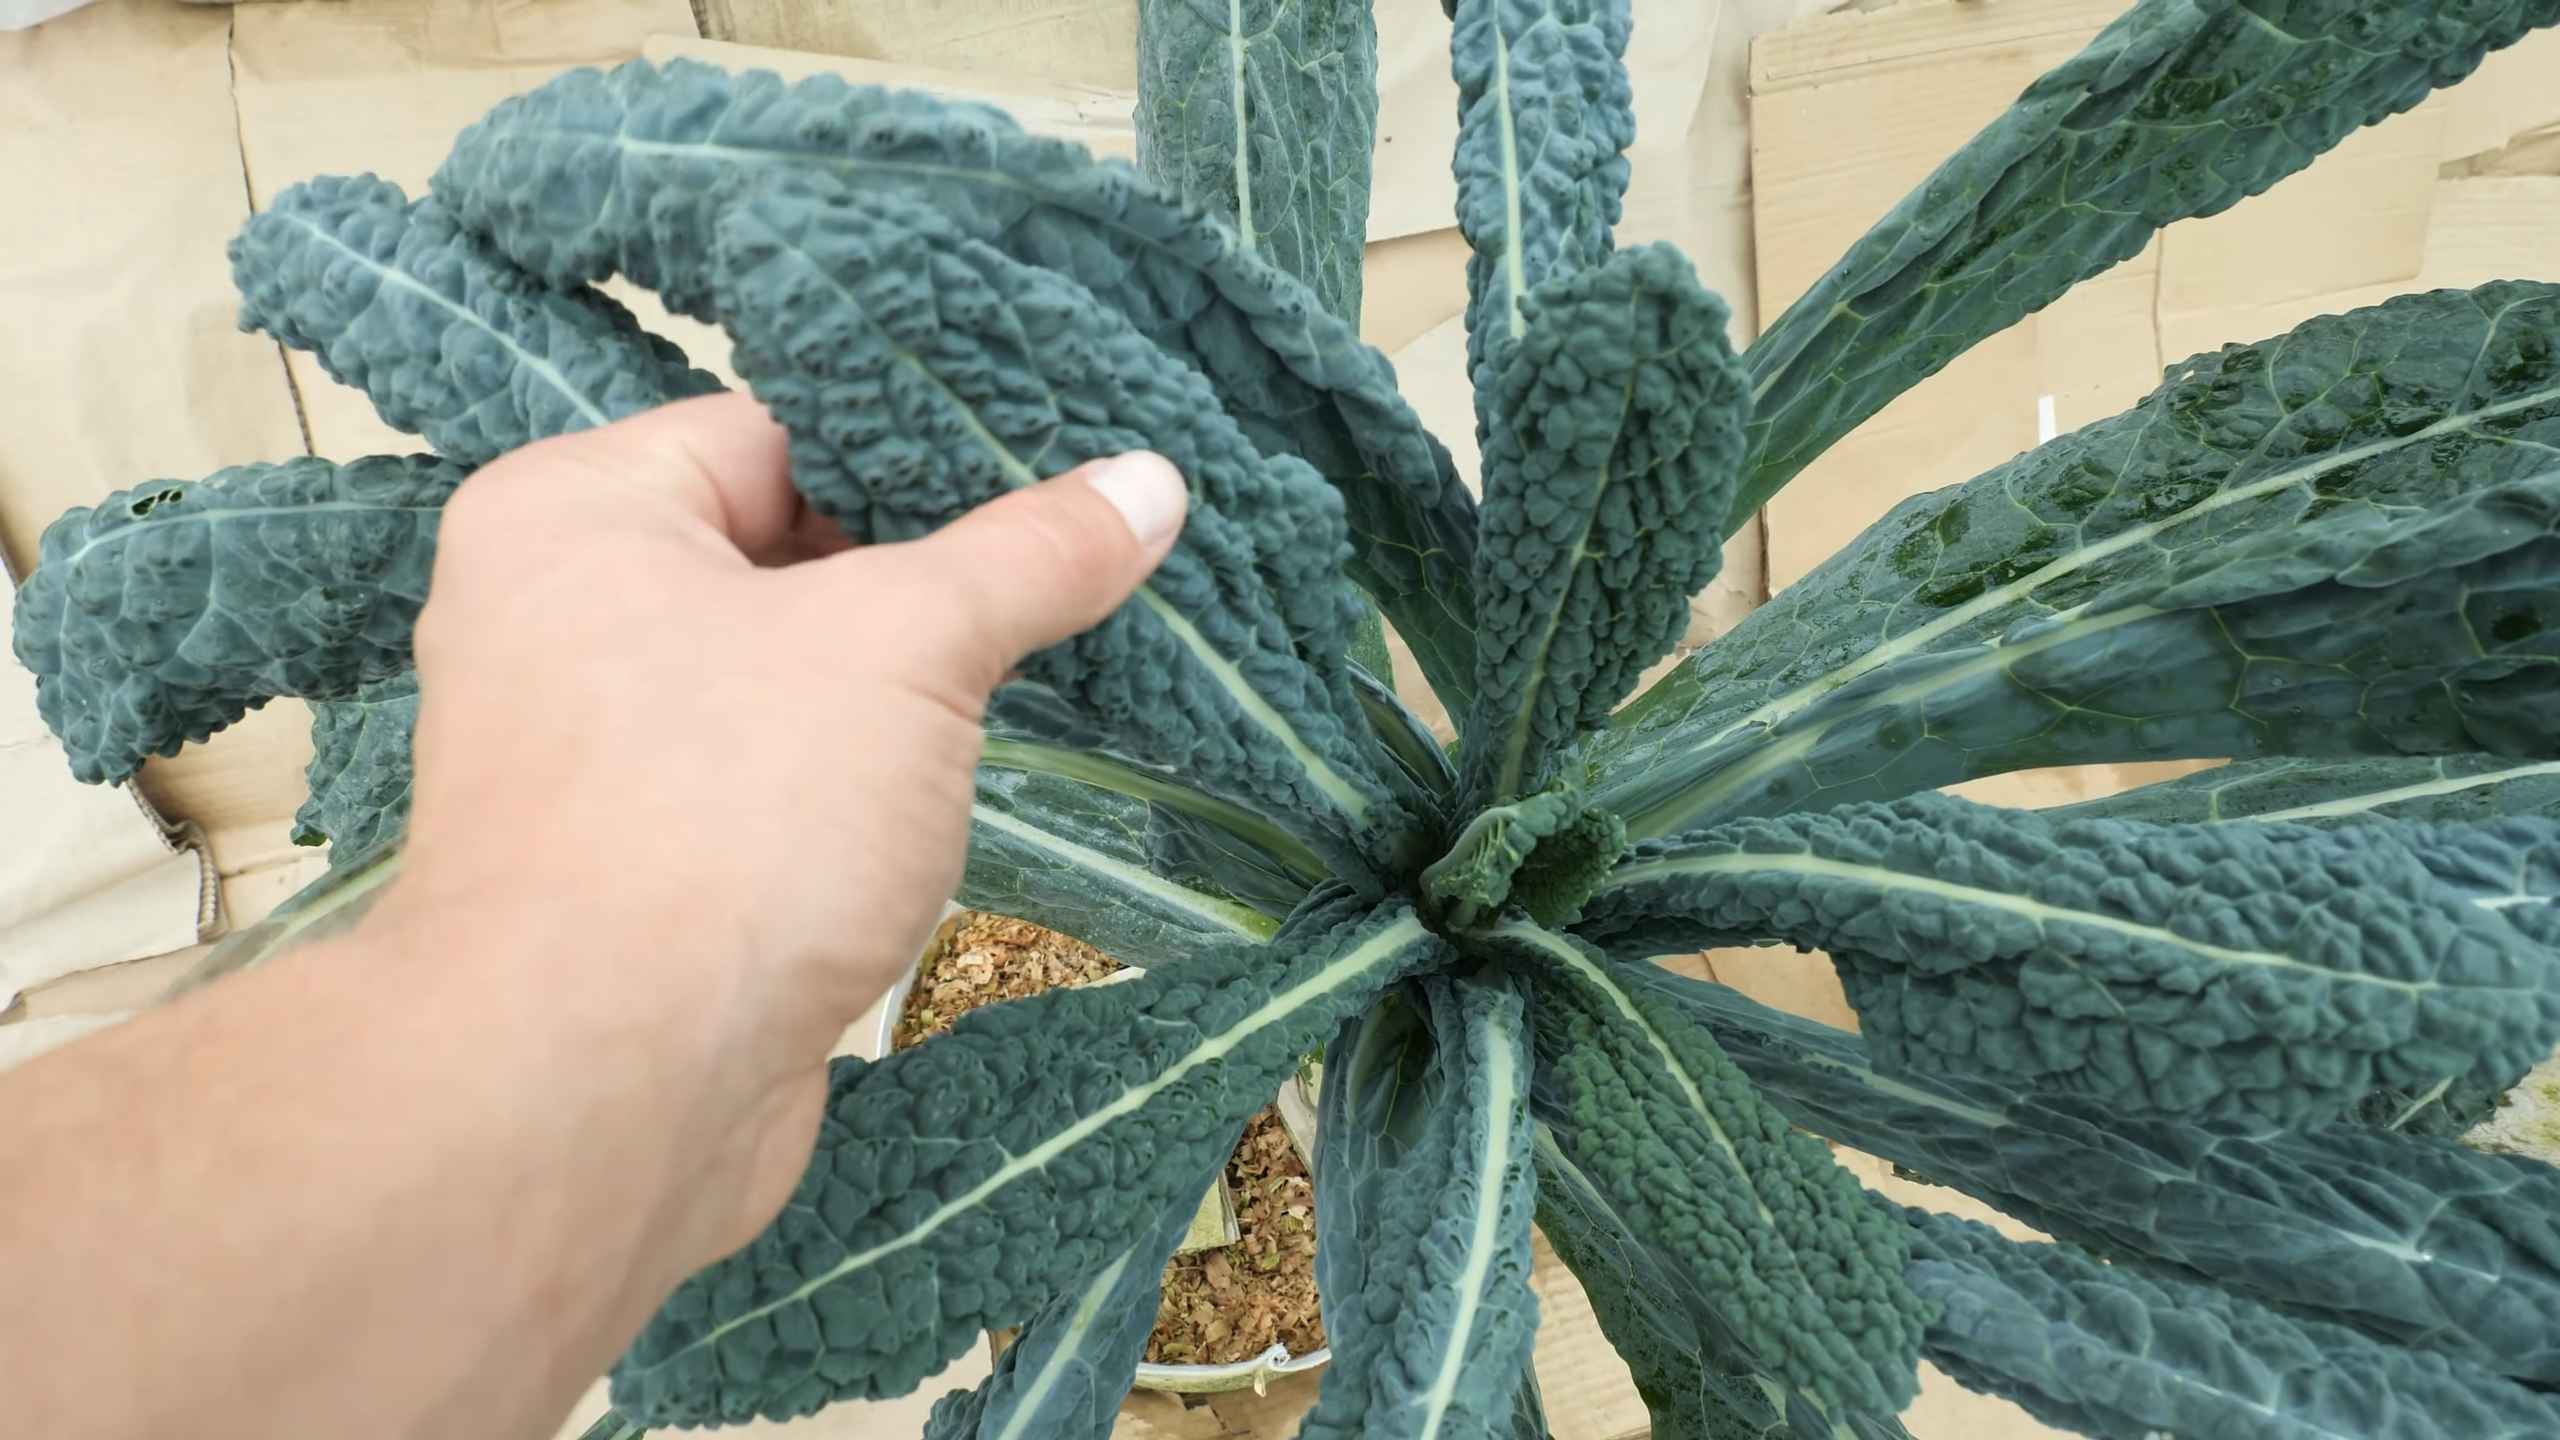
* **’Lacinato’ (Dinosaur Kale):** With its dark, almost black, bumpy leaves, Lacinato kale is not only visually striking but also incredibly flavorful. It holds up well in cold weather and is a great addition to soups and stews.
* **’Winterbor’:** As the name suggests, ‘Winterbor’ is specifically bred for winter growing. It’s a curly kale variety that’s extremely hardy and productive.
* **’Dwarf Blue Curled Vates’:** This is a compact variety, perfect for smaller containers. It’s also very cold-hardy and produces a good yield of curly, blue-green leaves.
Gathering Your Supplies
Okay, now that we’ve picked our kale, let’s gather everything we need. Here’s a checklist:
* **Container:** Choose a container that’s at least 12 inches in diameter and 12 inches deep. Kale needs room for its roots to grow. Make sure the container has drainage holes!
* **Potting Mix:** Don’t use garden soil! It’s too heavy and doesn’t drain well in containers. Opt for a high-quality potting mix specifically designed for container gardening. I like to use a mix that contains compost, peat moss, and perlite or vermiculite for good drainage.
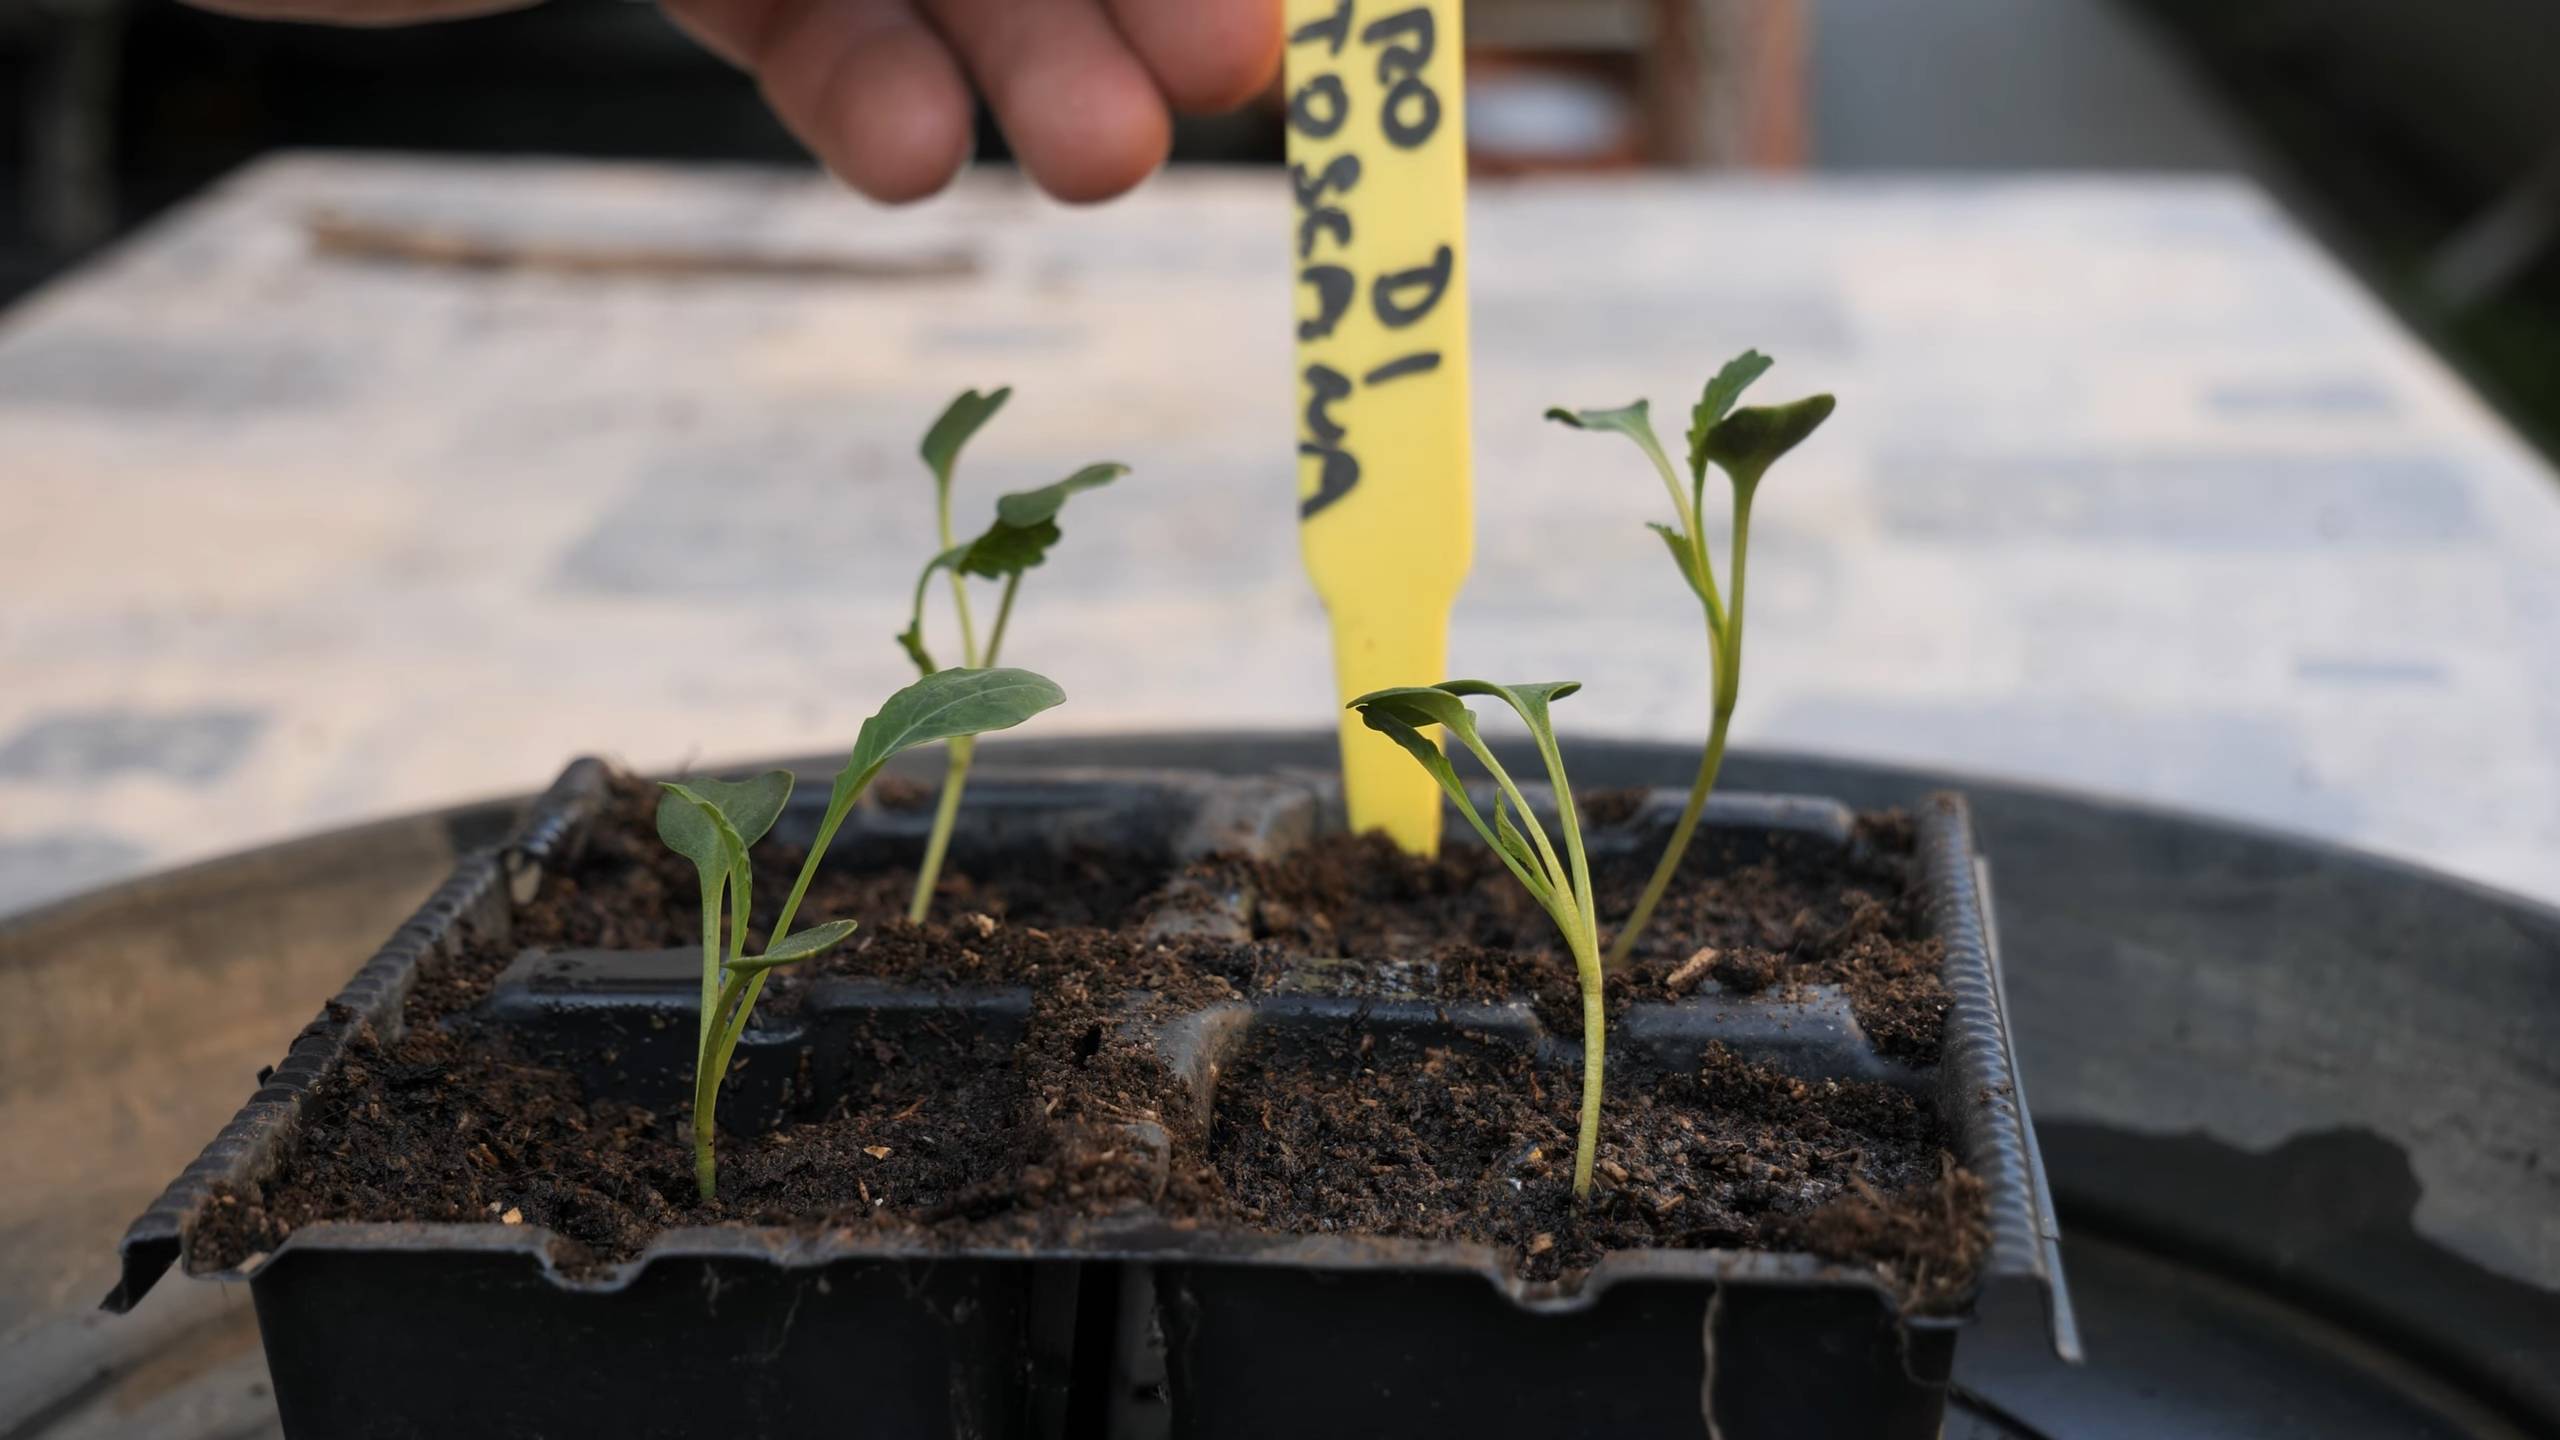
* **Kale Seedlings or Seeds:** You can start kale from seed indoors 6-8 weeks before your first expected frost, or you can buy seedlings from a local nursery. Seedlings are a quicker option, but starting from seed is more economical.
* **Slow-Release Fertilizer:** Kale is a heavy feeder, so a slow-release fertilizer will provide it with the nutrients it needs throughout the growing season. Choose a balanced fertilizer with an NPK ratio of around 10-10-10 or 14-14-14.
* **Watering Can or Hose:** You’ll need a way to water your kale regularly.
* **Gardening Gloves:** Protect your hands!
* **Optional: Row Cover or Cold Frame:** If you live in an area with very harsh winters, a row cover or cold frame can provide extra protection for your kale.
Planting Your Kale
Alright, let’s get our hands dirty! Here’s how to plant your kale in containers:
1. **Prepare the Container:** Fill your container with potting mix, leaving about an inch or two of space at the top.
2. **Add Fertilizer:** Mix the slow-release fertilizer into the top few inches of the potting mix, following the instructions on the fertilizer package.
3. **Plant Seedlings (if using):** If you’re using seedlings, gently remove them from their pots and loosen the roots slightly. Dig a hole in the potting mix that’s large enough to accommodate the root ball. Place the seedling in the hole and backfill with potting mix, gently firming the soil around the base of the plant. Space seedlings about 6-8 inches apart if you’re planting multiple plants in the same container.
4. **Sow Seeds (if using):** If you’re starting from seed, sow the seeds about 1/4 inch deep and 1 inch apart. Gently cover the seeds with potting mix and water thoroughly. You’ll need to thin the seedlings later, once they’ve developed a few true leaves, to give them enough space to grow.
5. **Water Thoroughly:** After planting, water the kale thoroughly until the water drains out of the bottom of the container. This will help settle the soil and ensure that the roots are well-hydrated.
Caring for Your Winter Kale
Now that your kale is planted, it’s time to provide it with the care it needs to thrive throughout the winter.
1. **Sunlight:** Kale needs at least 6 hours of sunlight per day. Place your container in a sunny location, such as a south-facing balcony or patio. If you don’t have a sunny spot, you can supplement with grow lights.
2. **Watering:** Water your kale regularly, especially during dry spells. The soil should be consistently moist but not waterlogged. Check the soil moisture by sticking your finger into the soil. If the top inch feels dry, it’s time to water.
3. **Fertilizing:** Even with slow-release fertilizer, kale may need supplemental feeding during the growing season. You can use a liquid fertilizer, such as fish emulsion or seaweed extract, every few weeks. Follow the instructions on the fertilizer package.
4. **Pest Control:** Kale can be susceptible to pests, such as aphids, cabbage worms, and flea beetles. Inspect your plants regularly for signs of infestation. If you find pests, you can try hand-picking them off, spraying the plants with insecticidal soap, or using a biological control agent, such as Bacillus thuringiensis (Bt) for cabbage worms.
5. **Weed Control:** Keep your container free of weeds. Weeds compete with kale for nutrients and water.
6. **Protection from Extreme Cold:** While kale is cold-hardy, it can still be damaged by extreme cold. If you live in an area with very harsh winters, you can protect your kale by covering it with a row cover or moving it to a cold frame or unheated garage during the coldest periods.
Harvesting Your Kale
The best part! You can start harvesting kale leaves once they’re about 4-6 inches long. Here’s how:
1. **Harvest Outer Leaves:** Harvest the outer leaves first, leaving the inner leaves to continue growing. This will allow you to harvest kale continuously throughout the winter.
2. **Cut or Snap Leaves:** You can either cut the leaves off with a knife or scissors, or you can simply snap them off with your fingers.
3. **Wash and Store:** Wash the kale leaves thoroughly before using them. You can store them in the refrigerator for up to a week.
Troubleshooting
Even with the best care, you might encounter some problems while growing winter kale. Here are a few common issues and how to address them:
* **Yellowing Leaves:** Yellowing leaves can be a sign of nutrient deficiency, overwatering, or underwatering. Check the soil moisture and fertilize if necessary.
* **Stunted Growth:** Stunted growth can be caused by a lack of sunlight, poor soil, or pests. Make sure your kale is getting enough sunlight and that the soil is well-drained and fertile.
* **Holes in Leaves:** Holes in leaves are usually caused by pests, such as cabbage worms or flea beetles. Inspect your plants regularly and take action to control pests.
* **Bolting:** Bolting (when the plant starts to flower) can occur if the weather gets too warm. If your kale starts to bolt, harvest the leaves immediately, as they will become bitter.
Extending the Harvest
Want to keep your kale harvest going even longer? Here are a few tips:
* **Succession Planting:** Plant new kale seedlings every few weeks to ensure a continuous supply of fresh leaves.
* **Overwintering:** In mild climates, you can overwinter your kale plants and harvest them again in the spring. Simply cut back the plants in the fall and cover them with a layer of mulch.
* **Seed Saving:** If you let your kale plants bolt, you can collect the seeds and save them for planting next year.
Enjoying Your Homegrown Kale
Now that you’ve harvested your delicious winter kale, it’s time to enjoy it! Kale is incredibly versatile and can be used in a variety of dishes. Here are a few ideas:
* **Salads:** Add chopped kale to salads for a boost of nutrients and flavor.
* **Smoothies:** Blend kale into smoothies for a healthy and refreshing drink.
* **Soups and Stews:** Add kale to soups and stews for extra vitamins and minerals.
* **Sautéed Kale:** Sauté kale with garlic and olive oil for a simple and delicious side dish.
* **Kale Chips:** Bake kale leaves in the oven for a healthy and crunchy snack.
Growing winter kale in containers is a rewarding experience that allows you to enjoy fresh, homegrown greens even during the
Conclusion
So, there you have it! Growing your own winter kale in containers isn’t just a gardening project; it’s a gateway to fresh, nutritious greens right outside your door, even when the snow is falling. We’ve walked through the steps, from selecting the right container and soil to protecting your precious kale from the harshest winter elements. But why is this DIY trick a must-try?
Firstly, the taste. Store-bought kale, while convenient, often lacks the vibrant flavor and crispness of homegrown varieties. Imagine the satisfaction of harvesting leaves that are bursting with freshness, ready to be tossed into salads, smoothies, or sautéed as a delicious side dish. This is especially true in winter, when locally sourced produce can be scarce and expensive.
Secondly, the health benefits. Kale is a nutritional powerhouse, packed with vitamins, minerals, and antioxidants. By growing your own, you control the growing environment, ensuring that your kale is free from harmful pesticides and herbicides. You’re essentially creating a mini-farm that provides you with a constant supply of healthy greens.
Thirdly, the sheer joy of gardening. There’s something incredibly rewarding about nurturing a plant from seed (or seedling) to harvest. Watching your kale thrive, even in the face of winter’s challenges, is a testament to your green thumb and a source of immense satisfaction. It’s a fantastic way to connect with nature, relieve stress, and add a touch of beauty to your outdoor space.
But don’t stop there! Experiment with different varieties of kale. Lacinato (dinosaur) kale offers a unique texture and flavor, while Red Russian kale adds a splash of color to your container garden. You can also try companion planting. Consider adding herbs like thyme or rosemary to your container, not only for their culinary benefits but also for their ability to deter pests. Another variation is to use different types of containers. While we’ve focused on standard pots, you could also use raised beds or even repurposed containers like old buckets or tubs. Just make sure they have adequate drainage.
And speaking of drainage, remember that proper drainage is crucial for preventing root rot, especially during the wetter winter months. Consider adding a layer of gravel to the bottom of your container to improve drainage. Also, be mindful of watering. While kale needs consistent moisture, overwatering can be just as detrimental as underwatering. Check the soil moisture regularly and water only when the top inch feels dry.
Ultimately, the success of your winter kale container growing endeavor depends on your willingness to experiment and adapt. Don’t be afraid to try new things, learn from your mistakes, and most importantly, have fun!
We wholeheartedly encourage you to give this DIY trick a try. It’s a simple, affordable, and incredibly rewarding way to enjoy fresh, healthy kale throughout the winter months. And once you’ve harvested your first batch of homegrown kale, we’d love to hear about your experience! Share your photos, tips, and stories with us in the comments below. Let’s build a community of winter kale enthusiasts and inspire others to embrace the joys of container gardening. Let us know what worked for you, what challenges you faced, and any creative solutions you came up with. Your insights could be invaluable to other gardeners who are just starting out. Happy growing!
Frequently Asked Questions (FAQ)
What is the best variety of kale to grow in containers during the winter?
While many kale varieties can tolerate cold weather, some are better suited for winter container growing than others. Dwarf Blue Curled Vates is a popular choice due to its compact size and excellent cold hardiness. Red Russian kale is another great option, offering both visual appeal and good frost resistance. Lacinato (dinosaur) kale can also thrive in containers, but it may require a slightly larger pot due to its larger size. Ultimately, the best variety depends on your personal preferences and the specific climate conditions in your area. Experiment with different varieties to see which ones perform best for you.
How much sunlight does winter kale need in containers?
Kale needs at least 6 hours of sunlight per day to thrive. However, during the winter months, sunlight can be limited, especially in northern climates. If you’re growing your kale indoors or in a sheltered location, consider supplementing with grow lights to ensure that it receives adequate light. Position the grow lights about 6-12 inches above the plants and keep them on for 12-14 hours per day. If you’re growing your kale outdoors, try to place the containers in a location that receives the most sunlight possible. South-facing locations are generally ideal.
What type of soil is best for growing kale in containers?
Kale prefers well-draining soil that is rich in organic matter. A good potting mix for container-grown kale should consist of a blend of compost, peat moss (or coconut coir), and perlite or vermiculite. Avoid using garden soil, as it can be too heavy and may not drain properly. The compost will provide essential nutrients, while the peat moss or coconut coir will help retain moisture. The perlite or vermiculite will improve drainage and aeration. You can also add a slow-release fertilizer to the potting mix to provide a steady supply of nutrients throughout the growing season.
How often should I water my winter kale in containers?
The watering frequency for winter kale in containers depends on several factors, including the weather, the size of the container, and the type of soil. In general, you should water your kale when the top inch of soil feels dry to the touch. Avoid overwatering, as this can lead to root rot. During periods of heavy rain or snow, you may need to reduce watering frequency. Conversely, during dry spells, you may need to water more frequently. Always check the soil moisture before watering to ensure that your kale is receiving the right amount of water.
How can I protect my winter kale from frost and snow?
Protecting your winter kale from frost and snow is crucial for ensuring a successful harvest. There are several ways to do this. One option is to move the containers to a sheltered location, such as a garage, shed, or greenhouse, during periods of extreme cold. Another option is to cover the plants with frost blankets or row covers. These covers will help trap heat and protect the leaves from frost damage. You can also mulch around the base of the plants with straw or leaves to insulate the roots. If you live in an area with heavy snowfall, be sure to brush off any accumulated snow from the leaves to prevent them from breaking.
When is the best time to harvest winter kale from containers?
You can begin harvesting kale leaves as soon as they are large enough to eat, typically when they are about 4-6 inches long. Harvest the outer leaves first, leaving the inner leaves to continue growing. This will encourage the plant to produce more leaves. Avoid harvesting more than one-third of the plant at a time, as this can stress the plant and reduce its overall yield. The best time to harvest kale is in the morning, after the dew has dried. The leaves will be crisper and more flavorful at this time.
Can I grow kale from seed directly in containers during the winter?
While it is possible to grow kale from seed directly in containers during the winter, it is generally more successful to start with seedlings. Starting with seedlings gives the plants a head start and allows them to establish themselves before the onset of harsh winter weather. If you do choose to grow kale from seed, sow the seeds indoors about 6-8 weeks before the last expected frost. Transplant the seedlings into containers when they are about 2-3 inches tall. Be sure to harden off the seedlings before transplanting them outdoors to acclimate them to the colder temperatures.
What are some common pests and diseases that affect winter kale in containers?
While winter kale is generally resistant to pests and diseases, it can still be susceptible to certain problems. Common pests include aphids, cabbage worms, and flea beetles. These pests can be controlled with insecticidal soap or neem oil. Common diseases include powdery mildew and downy mildew. These diseases can be prevented by ensuring good air circulation and avoiding overwatering. If you notice any signs of pests or diseases, take action immediately to prevent them from spreading.
Can I fertilize my winter kale in containers?
Yes, fertilizing your winter kale in containers is important for ensuring healthy growth and a good harvest. Use a balanced fertilizer that is specifically formulated for vegetables. Apply the fertilizer according to the package directions. You can also supplement with compost tea or liquid seaweed extract to provide additional nutrients. Avoid over-fertilizing, as this can lead to excessive leaf growth and reduced cold hardiness.
How long will my winter kale plants last in containers?
With proper care, your winter kale plants can last throughout the entire winter and even into the spring. Kale is a biennial plant, meaning that it typically lives for two years. However, in colder climates, it may only last for one year. To extend the life of your kale plants, be sure to protect them from frost and snow, water them regularly, and fertilize them as needed. You can also prune the plants to remove any dead or damaged leaves.
Leave a Comment