

Vinegar laundry soap recipe: Sounds a little crazy, right? I know, I know, the thought of using vinegar in your laundry might conjure up images of overpowering smells and questionable cleaning power. But trust me, this isn’t your grandma’s harsh, pungent vinegar cleaning solution! We’re talking about a surprisingly effective, eco-friendly, and budget-conscious way to get your clothes sparkling clean.
For centuries, people have been using natural ingredients for cleaning. Think about it – before the advent of commercial detergents, our ancestors relied on the power of plants, minerals, and, yes, even vinegar! While the exact origins of using vinegar in laundry are a bit murky, its antimicrobial and deodorizing properties have been recognized for ages. It’s a testament to the enduring wisdom of simple, natural solutions.
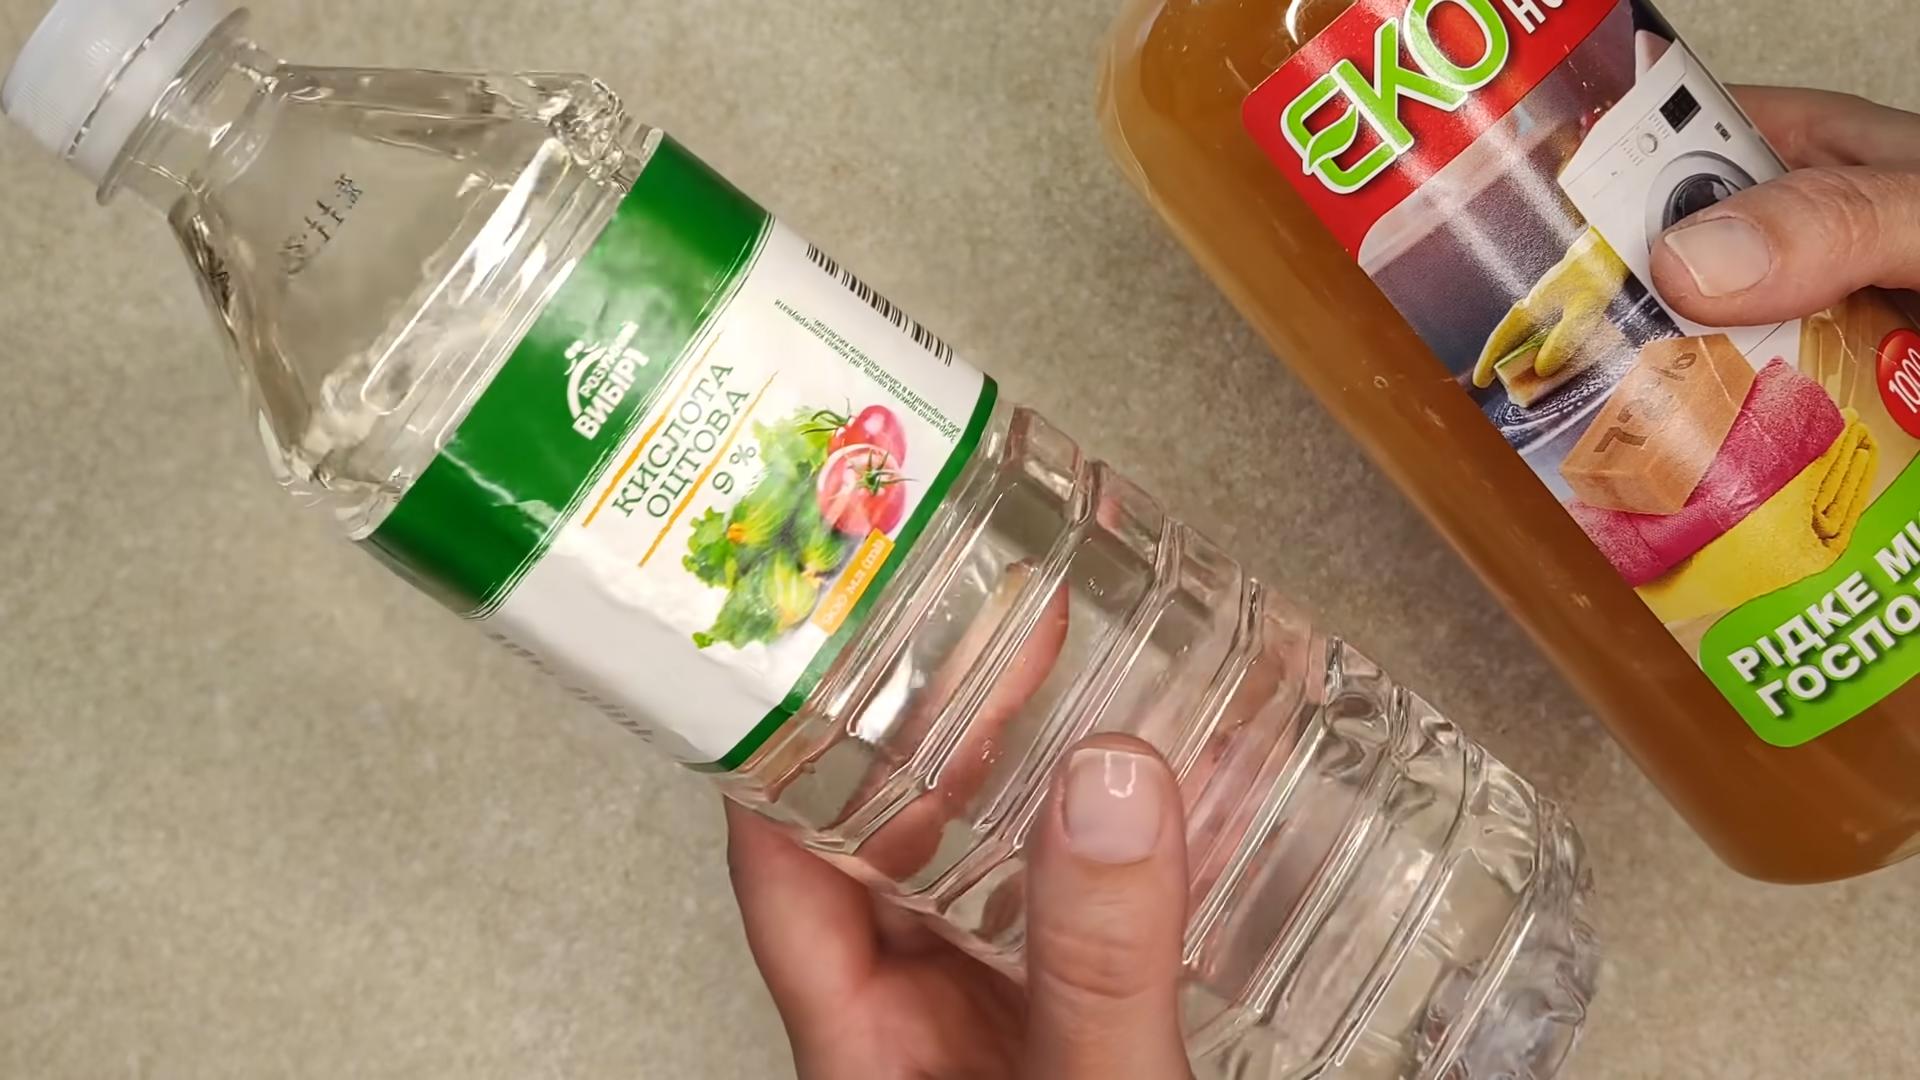
So, why should you ditch the store-bought stuff and embrace a vinegar laundry soap recipe? Well, for starters, many commercial detergents are packed with harsh chemicals that can irritate sensitive skin, pollute our waterways, and leave behind residues on your clothes. Plus, let’s be honest, those big bottles can be expensive! This DIY recipe is a fantastic alternative for anyone looking to reduce their environmental impact, save some money, and create a gentler cleaning solution for their family. I’m going to show you how to make a simple, effective, and surprisingly pleasant-smelling laundry soap using vinegar. Get ready to revolutionize your laundry routine!
Grow Your Own Pretty Pink Radishes in Pots: A DIY Guide
Hey there, fellow gardening enthusiasts! I’m so excited to share my experience growing vibrant pink radishes in pots. It’s a surprisingly easy and rewarding project, perfect for beginners and seasoned gardeners alike. Plus, who can resist those adorable, peppery pink globes? Let’s dive in!
Choosing the Right Radish Variety
First things first, you’ll need to select the right radish variety. While any radish can technically be grown in a pot, some are better suited than others. For pink radishes, I highly recommend these:
* ‘French Breakfast’: These are classic, elongated radishes with a beautiful pink top and white bottom. They’re known for their mild flavor and quick growth.
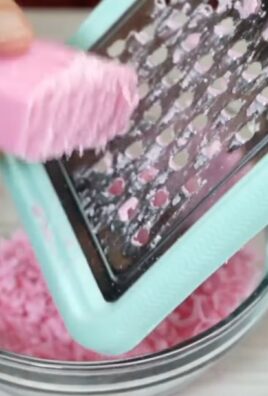
* ‘Pink Beauty’: As the name suggests, these are stunningly pink and round. They mature quickly and have a crisp, slightly spicy taste.
* ‘Cherry Belle’: A popular and reliable choice, ‘Cherry Belle’ radishes are bright red, but they can sometimes have a pinkish hue, especially when grown in slightly cooler conditions.
Gathering Your Supplies
Before we get our hands dirty, let’s make sure we have everything we need. Here’s a checklist:
* Radish Seeds: Choose your favorite pink variety! Make sure the seeds are fresh for the best germination rate.
* Pots: Select pots that are at least 6 inches deep and wide. Radishes need room to grow downwards. I prefer using terracotta pots because they allow for good drainage.
* Potting Mix: Use a high-quality, well-draining potting mix. Avoid using garden soil, as it can become compacted in pots.
* Watering Can or Hose: For gentle watering.
* Fertilizer (Optional): A balanced liquid fertilizer can give your radishes a boost.
* Trowel or Small Shovel: For filling the pots with soil.
* Plant Labels: To keep track of what you’ve planted.
* Sunny Location: Radishes need at least 6 hours of sunlight per day.
Step-by-Step Planting Guide
Alright, let’s get planting! Follow these steps for radish-growing success:
1. Prepare the Pots: Fill your pots with potting mix, leaving about an inch of space at the top. Gently tap the pot to settle the soil.
2. Sow the Seeds: Radish seeds are small, so be careful not to overcrowd them. Sow the seeds about ½ inch deep and 1 inch apart. You can sow a few extra seeds per pot to ensure good germination.
3. Cover the Seeds: Lightly cover the seeds with potting mix.
4. Water Gently: Water the pots gently until the soil is evenly moist. Avoid overwatering, as this can cause the seeds to rot.
5. Label the Pots: Write the radish variety and planting date on a plant label and stick it in the pot. This will help you keep track of your progress.
6. Place in a Sunny Location: Place the pots in a sunny location that receives at least 6 hours of sunlight per day. A south-facing balcony or windowsill is ideal.
Caring for Your Radishes
Now that your radishes are planted, it’s time to provide them with the care they need to thrive.
1. Watering: Radishes need consistent moisture to grow quickly and develop a good flavor. Water the pots whenever the top inch of soil feels dry to the touch. Avoid letting the soil dry out completely, as this can cause the radishes to become tough and bitter.
2. Thinning: Once the seedlings emerge and have a few true leaves, thin them out to about 2 inches apart. This will give the remaining radishes enough space to grow. Simply snip off the unwanted seedlings at the soil level with scissors. Don’t pull them out, as this can disturb the roots of the remaining plants.
3. Fertilizing (Optional): If you want to give your radishes a boost, you can fertilize them with a balanced liquid fertilizer every two weeks. Follow the instructions on the fertilizer label. I usually dilute the fertilizer to half strength to avoid burning the plants.
4. Weed Control: Keep the pots free of weeds, as they can compete with the radishes for nutrients and water. Hand-pull any weeds that appear.
5. Pest Control: Radishes are generally pest-resistant, but they can sometimes be attacked by flea beetles. These tiny beetles can chew small holes in the leaves. If you notice flea beetles, you can try spraying the plants with insecticidal soap. You can also cover the plants with row covers to prevent the beetles from reaching them.
Harvesting Your Pink Radishes
The best part! Radishes are incredibly fast growers, and you can usually harvest them in as little as 3-4 weeks after planting.
1. Check for Maturity: Radishes are ready to harvest when they reach the desired size. ‘French Breakfast’ radishes are typically harvested when they are about 2-3 inches long, while ‘Pink Beauty’ and ‘Cherry Belle’ radishes are harvested when they are about 1 inch in diameter.
2. Harvesting: Gently pull the radishes from the soil. If the soil is dry, you may need to water it first to make it easier to pull the radishes.
3. Cleaning: Wash the radishes thoroughly to remove any dirt.
4. Enjoy! Radishes are best eaten fresh. You can eat them raw in salads, as a snack with dip, or pickled. The greens are also edible and can be used in salads or stir-fries.
Troubleshooting Tips
Even with the best care, you might encounter a few challenges along the way. Here are some common problems and how to fix them:
* Radishes are not forming bulbs: This is usually caused by overcrowding, lack of sunlight, or poor soil. Make sure you thin the seedlings properly, provide at least 6 hours of sunlight per day, and use a well-draining potting mix.
* Radishes are tough and bitter: This is often caused by inconsistent watering or harvesting the radishes too late. Water the plants regularly and harvest the radishes when they are the right size.
* Radishes are splitting: This can be caused by uneven watering. Try to keep the soil consistently moist.
* Leaves are yellowing: This could be a sign of overwatering or nutrient deficiency. Make sure the pots have good drainage and fertilize the plants if necessary.
Succession Planting for Continuous Harvest
To enjoy a continuous supply of pink radishes, try succession planting. Sow a new batch of seeds every 1-2 weeks. This will ensure that you always have radishes ready to harvest.
Extra Tips for Radish-Growing Success
* Choose the right pot size: Make sure your pots are deep enough to accommodate the radish roots.
* Use a well-draining potting mix: This will prevent the roots from rotting.
* Water regularly: Radishes need consistent moisture to grow quickly and develop a good flavor.
* Thin the seedlings: This will give the remaining radishes enough space to grow.
* Harvest the radishes when they are the right size: This will ensure that they are tender and flavorful.
* Protect from pests: Cover the plants with row covers to prevent flea beetles from reaching them.
* Enjoy your harvest! Radishes are a delicious and nutritious addition to any meal.
Experimenting with Different Varieties
Don’t be afraid to experiment with different varieties of pink radishes. Each variety has its own unique flavor and texture. Try growing a few different varieties side-by-side to see which ones you like best.
Radishes as Companion Plants
Radishes are great companion plants for other vegetables. They can help to deter pests and improve soil health. Try planting radishes alongside carrots, lettuce, or spinach.
Enjoying Your Homegrown Radishes
Growing your own pink radishes is a rewarding experience. Not only will you have a delicious and nutritious vegetable to enjoy, but you’ll also have the satisfaction of knowing that you grew it yourself. So, get out there and start planting! I promise, you’ll be munching on those peppery pink beauties in no time! Happy gardening!
Conclusion
So, there you have it! Ditching the expensive, chemical-laden detergents and embracing this simple, effective, and eco-friendly vinegar laundry soap recipe is a game-changer for your laundry routine. We’ve walked you through the process, highlighting just how easy it is to create a powerful cleaning solution right in your own kitchen.
But why is this DIY trick a must-try? Beyond the cost savings, which are significant, you’re gaining control over the ingredients that come into contact with your clothes and, ultimately, your skin. Many commercial detergents contain harsh chemicals that can irritate sensitive skin, trigger allergies, and even leave behind residues that build up over time. With this vinegar-based laundry soap, you’re opting for a gentler, more natural approach that’s kinder to your body and the environment.
Think about the reduced plastic waste alone! No more bulky detergent bottles ending up in landfills. You can reuse containers you already have, further minimizing your environmental footprint. And let’s not forget the cleaning power. Vinegar is a natural deodorizer and stain fighter, working wonders on everything from everyday dirt to stubborn odors.
Ready to take it to the next level? Consider these variations:
* Scent Boost: While vinegar’s odor dissipates during the wash cycle, you can add a few drops of your favorite essential oils to the soap mixture for a subtle, natural fragrance. Lavender, lemon, and tea tree oil are excellent choices. Start with a small amount (5-10 drops) and adjust to your preference.
* Borax Boost: For extra cleaning power, especially for heavily soiled items, add 1/2 cup of borax to the recipe. Borax is a natural mineral that helps to boost the cleaning action of the soap.
* Washing Soda Addition: Similar to borax, washing soda (sodium carbonate) can enhance the cleaning power. Use 1/2 cup in addition to the vinegar and baking soda. Be cautious when using washing soda, as it can be irritating to the skin in its concentrated form.
* DIY Dryer Sheets: Extend the natural cleaning power to your dryer by making reusable dryer sheets. Simply soak small cloths in a diluted vinegar solution (1/4 cup vinegar to 1 cup water) and add a few drops of essential oil. Wring out the excess liquid and toss one in the dryer with each load.
We are confident that once you try this vinegar laundry soap recipe, you’ll be amazed by the results. It’s a simple, cost-effective, and eco-friendly way to keep your clothes clean, fresh, and free from harsh chemicals.
So, what are you waiting for? Gather your ingredients, follow the instructions, and experience the difference for yourself. We encourage you to try this DIY trick and share your experience with us in the comments below! Let us know what variations you tried, what scents you added, and how it worked for your laundry needs. Your feedback will help others discover the benefits of this amazing homemade laundry solution. We can’t wait to hear from you!
FAQ
Frequently Asked Questions About Vinegar Laundry Soap
Q: Will my clothes smell like vinegar after washing?
A: No, the vinegar smell will dissipate during the wash cycle and especially during the drying process. Vinegar is a volatile acid, meaning it evaporates easily. You won’t be left with a lingering vinegar odor on your clothes. If you are still concerned, you can add a few drops of your favorite essential oil to the soap mixture for a pleasant scent.
Q: Is vinegar laundry soap safe for all types of fabrics?
A: Generally, yes. Vinegar is safe for most washable fabrics, including cotton, linen, and synthetic blends. However, it’s always a good idea to test a small, inconspicuous area of delicate fabrics like silk or wool before washing an entire garment. Avoid using vinegar on fabrics that are known to be damaged by acids, such as rayon.
Q: Can I use any type of vinegar for laundry soap?
A: White distilled vinegar is the best choice for laundry soap. It’s clear, inexpensive, and has a consistent acidity level. Avoid using other types of vinegar, such as apple cider vinegar or balsamic vinegar, as they may contain coloring agents that could stain your clothes.
Q: How much vinegar laundry soap should I use per load?
A: The amount of soap you use will depend on the size of your washing machine and the soil level of your clothes. As a general guideline, use about 1/4 to 1/2 cup of vinegar laundry soap per load. For heavily soiled items, you may need to use a bit more.
Q: Can I use this vinegar laundry soap in a high-efficiency (HE) washing machine?
A: Yes, this vinegar laundry soap is safe to use in both standard and high-efficiency washing machines. It’s low-sudsing, which is important for HE machines. However, always consult your washing machine’s manual for specific recommendations.
Q: How long does vinegar laundry soap last?
A: Vinegar laundry soap has a long shelf life. It can be stored in an airtight container at room temperature for several months without losing its effectiveness. However, it’s best to use it within a reasonable timeframe (e.g., 6 months) to ensure optimal performance.
Q: Can I add fabric softener to my wash when using vinegar laundry soap?
A: You don’t need to add fabric softener when using vinegar laundry soap. Vinegar acts as a natural fabric softener by helping to remove detergent residue and relax the fibers in your clothes. If you still prefer to use a fabric softener, consider using a natural option like white vinegar or a few drops of essential oil on a damp cloth in the dryer.
Q: My vinegar laundry soap separated. Is it still okay to use?
A: Separation is normal, especially if the soap has been sitting for a while. Simply shake the container well before each use to re-combine the ingredients. The soap is still perfectly effective even if it separates.
Q: Can I use this recipe for hand washing clothes?
A: Yes, this recipe is suitable for hand washing clothes. Dilute the vinegar laundry soap in a basin of water and gently wash your clothes. Rinse thoroughly with clean water.
Q: What if I have hard water? Will this recipe still work?
A: Hard water can reduce the effectiveness of any laundry soap. If you have hard water, you may need to use a slightly larger amount of vinegar laundry soap per load. You can also add a water softener like borax or washing soda to the wash to help improve the cleaning performance.
Q: Can I use this recipe to wash cloth diapers?
A: While some people successfully use vinegar laundry soap for cloth diapers, it’s important to research and follow specific guidelines for cloth diaper washing. Vinegar can sometimes affect the absorbency of certain diaper materials. Consult with cloth diapering resources for the best practices.
Q: I have sensitive skin. Is this vinegar laundry soap safe for me?
A: This vinegar laundry soap is generally considered to be gentler than commercial detergents, which often contain harsh chemicals that can irritate sensitive skin. However, everyone’s skin is different. If you have very sensitive skin, it’s always a good idea to test the soap on a small area of clothing that will come into contact with your skin before washing an entire load. You can also reduce the amount of baking soda in the recipe, as baking soda can sometimes be irritating to sensitive skin.
Q: What are the benefits of using vinegar laundry soap compared to commercial detergents?
A: The benefits are numerous! Vinegar laundry soap is:
* Cost-effective: It’s significantly cheaper than buying commercial detergents.
* Eco-friendly: It reduces plastic waste and uses natural, biodegradable ingredients.
* Gentle: It’s less likely to irritate sensitive skin.
* Effective: It cleans, deodorizes, and softens clothes naturally.
* Versatile: You can customize it with essential oils for a personalized scent.
Q: Where can I find the ingredients for this vinegar laundry soap recipe?
A: All the ingredients are readily available at most grocery stores. White distilled vinegar, baking soda, and essential oils can typically be found in the cleaning supplies or baking aisles. Borax and washing soda are often located in the laundry detergent section.

Leave a Comment