

Vinegar and dish soap mix 鈥?sounds like a recipe for a kitchen disaster, right? But trust me, this simple concoction is actually a secret weapon for any home gardener! For generations, resourceful gardeners have been turning to natural solutions to combat common plant problems, and this blend is a modern twist on those time-tested techniques.
I know what you’re thinking: why would I need this? Well, are you tired of battling aphids, whiteflies, or other pesky insects that are turning your beautiful garden into a buffet? Are you looking for a way to keep your plants healthy without resorting to harsh chemicals that could harm beneficial insects or even your family? Then you’re in the right place!
This DIY article will show you exactly how to create and use a vinegar and dish soap mix to effectively control garden pests. It’s a safe, affordable, and surprisingly effective way to keep your plants thriving. Plus, it’s incredibly satisfying to know you’re using a natural solution to protect your green babies. Let’s get started and reclaim your garden, one spray at a time!
DIY Drain Cleaner: Vinegar and Dish Soap Power!
Hey everyone! Tired of those slow-draining sinks and tubs? I know I am! Store-bought drain cleaners can be harsh and expensive. That’s why I’m going to share my go-to DIY drain cleaner using just two simple ingredients: vinegar and dish soap! It’s surprisingly effective, eco-friendly, and super easy to make. Let’s get started!
What You’ll Need
Before we dive in, let’s gather our supplies. This is a pretty straightforward project, so you probably already have everything you need.
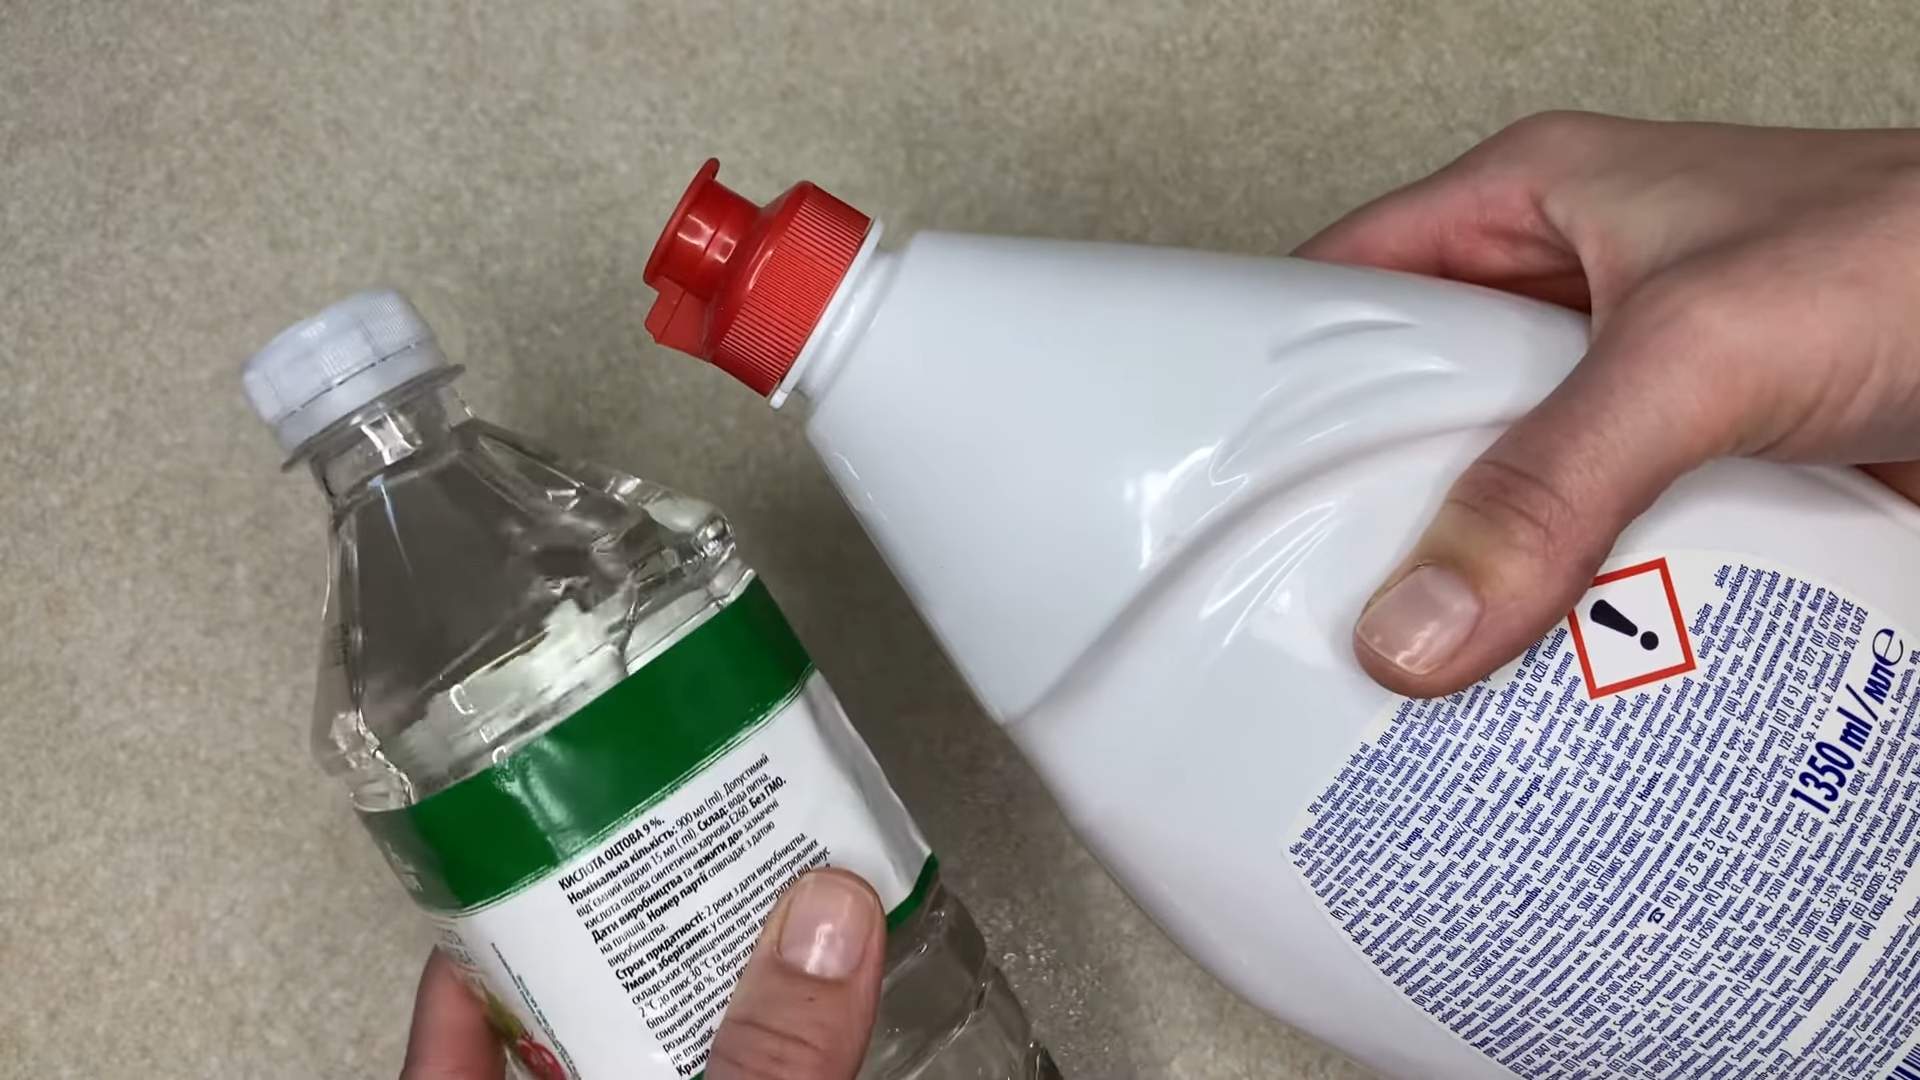
* White Vinegar: The star of the show! White vinegar’s acidity helps break down grease and grime.
* Dish Soap: Any dish soap will do, but I prefer using a grease-fighting formula for extra cleaning power.
* Boiling Water: This helps flush everything down the drain.
* Measuring Cup: For accurate measurements.
* Kettle or Pot: To boil the water.
* Optional: Baking Soda: For extra stubborn clogs, we can add baking soda to the mix.
* Optional: Plunger: If the drain is severely clogged, a plunger might be necessary.
Understanding the Science Behind It
Okay, so why does this simple mixture work? It’s all about chemistry!
* Vinegar’s Acidity: White vinegar contains acetic acid, which is a mild acid that helps dissolve grease, soap scum, and mineral deposits that contribute to drain clogs.
* Dish Soap’s Surfactants: Dish soap contains surfactants, which are molecules that reduce the surface tension of water. This allows the water to penetrate and loosen the clog, making it easier to flush away.
* Boiling Water’s Power: The hot water helps to melt away greasy buildup and dislodge debris. It also helps to activate the vinegar and dish soap, making them more effective.
* Baking Soda (Optional): When combined with vinegar, baking soda creates a fizzing action that can help to break up stubborn clogs.
Step-by-Step Instructions: The Basic Method
This is the simplest method, perfect for drains that are just starting to slow down.
1. Clear the Area: Remove any standing water from the sink or tub. You want the vinegar and dish soap to directly target the clog.
2. Pour in the Dish Soap: Measure out about 1/4 cup of dish soap and pour it directly down the drain.
3. Add the Vinegar: Next, pour 1 cup of white vinegar down the drain, following the dish soap.
4. Let it Sit: This is the crucial part! Let the mixture sit for at least 30 minutes. For really stubborn clogs, I sometimes let it sit overnight. The longer it sits, the more time the vinegar and dish soap have to work their magic.
5. Flush with Boiling Water: After the waiting period, carefully pour a kettle or pot of boiling water down the drain. The hot water will help to flush away the loosened debris.
6. Check the Drain: Run the water to see if the drain is flowing more freely. If it’s still slow, repeat the process.
Dealing with Stubborn Clogs: The Baking Soda Boost
If the basic method doesn’t quite do the trick, let’s bring in the baking soda for some extra cleaning power!
1. Clear the Area: Just like before, remove any standing water from the sink or tub.
2. Pour in the Baking Soda: Pour about 1/2 cup of baking soda down the drain. Try to get it as close to the drain opening as possible.
3. Add the Vinegar: Now, pour 1 cup of white vinegar down the drain, following the baking soda. You’ll notice a fizzing reaction 鈥?that’s the baking soda and vinegar working together!
4. Let it Fizz: Let the mixture fizz for about 30 minutes. The fizzing action helps to break up the clog.
5. Flush with Boiling Water: After the fizzing has subsided, carefully pour a kettle or pot of boiling water down the drain.
6. Check the Drain: Run the water to see if the drain is flowing more freely. If it’s still slow, repeat the process or move on to the next step.
When All Else Fails: The Plunger Power
Sometimes, even the vinegar, dish soap, and baking soda combo isn’t enough to clear a really stubborn clog. That’s when it’s time to bring out the plunger!
1. Add Water: Make sure there’s enough water in the sink or tub to cover the cup of the plunger.
2. Position the Plunger: Place the plunger over the drain opening, making sure it creates a good seal.
3. Plunge Away: Push and pull the plunger up and down vigorously for several minutes.
4. Remove the Plunger: Lift the plunger to see if the water drains. If it does, congratulations! You’ve cleared the clog.
5. Repeat if Necessary: If the water is still draining slowly, repeat the plunging process.
6. Final Flush: Once the drain is clear, flush it with hot water to remove any remaining debris.
Preventative Measures: Keeping Your Drains Clear
The best way to deal with drain clogs is to prevent them from happening in the first place! Here are a few tips to keep your drains flowing smoothly:
* Use Drain Strainers: These inexpensive devices catch hair and other debris before they can enter the drain. I have them in all my sinks and tubs!
* Avoid Pouring Grease Down the Drain: Grease solidifies as it cools, creating a sticky mess that can clog your pipes. Instead, pour grease into a container and dispose of it in the trash.
* Flush with Hot Water Regularly: Run hot water down your drains for a few minutes each week to help flush away any buildup.
* Don’t Overuse Garbage Disposals: Garbage disposals can handle small amounts of food waste, but they’re not designed to grind up large quantities. Avoid putting things like coffee grounds, eggshells, and fibrous vegetables down the disposal.
* Regular Maintenance: Use the vinegar and dish soap method (or the baking soda version) every month or two as a preventative measure.
Troubleshooting Tips
Sometimes, things don’t go exactly as planned. Here are a few troubleshooting tips to help you overcome common problems:
* The Mixture Isn’t Fizzing: If you’re using the baking soda method and the mixture isn’t fizzing, it could be that your baking soda is old and has lost its potency. Try using a fresh box of baking soda.
* The Drain is Still Clogged After Multiple Attempts: If you’ve tried all the methods above and the drain is still clogged, it’s possible that the clog is located deeper in the plumbing system. In this case, you may need to call a professional plumber.
* The Drain Smells Bad: If your drain smells bad, it could be due to bacteria buildup. Try pouring a cup of bleach down the drain (be careful not to mix bleach with vinegar or baking soda!) and let it sit for 30 minutes before flushing with hot water.
* Be Careful with Boiling Water: Always use caution when handling boiling water to avoid burns.
Safety First!
While this DIY drain cleaner is much safer than commercial drain cleaners, it’s still important to take precautions:
* Wear Gloves: Protect your hands from the vinegar and dish soap.
* Avoid Mixing with Other Cleaners: Never mix vinegar with bleach or other harsh chemicals, as this can create dangerous fumes.
* Ventilate the Area: Open a window or turn on the exhaust fan to ensure proper ventilation.
* Keep Out of Reach of Children and Pets: Store vinegar and dish soap in a safe place where children and pets cannot access them.
Why I Love This DIY Method
I’ve been using this DIY drain cleaner for years, and I absolutely love it! Here’s why:
* It’s Effective: It really works! It clears most clogs quickly and easily.
* It’s Affordable: Vinegar and dish soap are inexpensive and readily available.
* It’s Eco-Friendly: It’s a much more environmentally friendly option than harsh chemical drain cleaners.
* It’s Safe: It’s safer to use than commercial drain cleaners, especially if you have children or pets.
* It’s Easy: It’s so simple to make and use!
So, there you have it! My go-to DIY drain cleaner using vinegar and dish soap (and sometimes baking soda!). Give it a try, and let me know how it works for you! I’m confident that you’ll be amazed at how effective
Conclusion
So, there you have it! This simple yet incredibly effective DIY cleaning solution using vinegar and dish soap is more than just a trend; it’s a game-changer for your cleaning routine. We’ve explored how this dynamic duo tackles grime, grease, and everyday messes with ease, offering a natural and budget-friendly alternative to harsh chemical cleaners.
Why is this DIY trick a must-try? Because it simplifies your life. Imagine replacing a cabinet full of specialized cleaners with just two readily available ingredients. Think of the money you’ll save, and the peace of mind knowing you’re reducing your exposure to potentially harmful chemicals. This vinegar and dish soap mix is a powerful, versatile cleaner that can be used on a multitude of surfaces, from kitchen countertops to bathroom tiles.
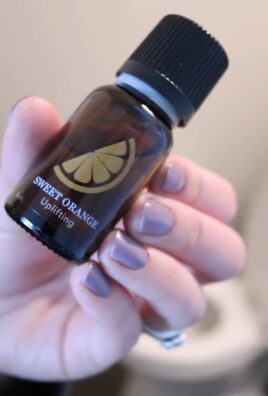
But the benefits don’t stop there. This solution is incredibly customizable. Want to boost its cleaning power? Add a few drops of your favorite essential oil, like lemon or tea tree, for an extra antibacterial kick and a refreshing scent. For tougher stains, consider pre-treating the area with baking soda before applying the vinegar and dish soap mixture. Experiment with different ratios of vinegar and dish soap to find the perfect balance for your specific needs. Some prefer a 1:1 ratio, while others find a slightly more diluted solution works best.
The key is to experiment and discover what works best for you and your home.
Beyond its cleaning prowess, this DIY solution is also environmentally conscious. By reducing your reliance on commercially produced cleaners, you’re minimizing plastic waste and reducing the number of harsh chemicals entering our waterways. It’s a small change that can make a big difference.
We understand that trying something new can sometimes feel daunting, but we urge you to give this vinegar and dish soap mix a try. It’s easy to make, safe to use, and incredibly effective. You might be surprised at just how much you love it!
Don’t just take our word for it. We encourage you to try this DIY cleaning solution and share your experiences with us. Let us know what surfaces you’ve used it on, what variations you’ve tried, and what results you’ve achieved. Your feedback will not only help us refine this recipe but also inspire others to embrace the power of natural cleaning.
Ready to ditch the harsh chemicals and embrace a simpler, more effective cleaning routine? Grab your vinegar, dish soap, and a spray bottle, and get ready to experience the magic of this DIY cleaning solution. You won’t regret it!
Frequently Asked Questions (FAQ)
What kind of vinegar should I use?
White distilled vinegar is the best option for cleaning. It’s inexpensive, readily available, and has a high acidity level, making it effective at cutting through grease and grime. Avoid using other types of vinegar, such as apple cider vinegar or balsamic vinegar, as they may contain sugars or coloring that could leave a residue on surfaces.
What kind of dish soap should I use?
Any standard dish soap will work, but avoid using dish soaps that contain added moisturizers or lotions, as these can leave a film on surfaces. A simple, clear dish soap is generally the best choice. Consider using an eco-friendly dish soap to further reduce your environmental impact.
What is the best ratio of vinegar to dish soap?
A common starting point is a 1:1 ratio of vinegar to dish soap. However, you can adjust this ratio based on your specific cleaning needs. For lighter cleaning tasks, you can use a more diluted solution, such as 1 part vinegar to 2 parts water with a squirt of dish soap. For tougher stains and grease, you can try a stronger solution with a higher concentration of vinegar. Experiment to find what works best for you.
Can I use this solution on all surfaces?
While this vinegar and dish soap mix is generally safe for most surfaces, it’s always a good idea to test it in an inconspicuous area first, especially on delicate or porous materials like natural stone or wood. Avoid using it on surfaces that are sensitive to acid, such as marble or granite, as the vinegar can etch the surface. It’s also not recommended for use on waxed furniture.
Why does my solution sometimes leave streaks?
Streaking can occur if you’re using too much dish soap or if the surface isn’t properly rinsed after cleaning. Try using less dish soap in your solution or wiping the surface with a clean, damp cloth after cleaning to remove any residue. Using distilled water instead of tap water can also help prevent streaking, as tap water can contain minerals that leave deposits.
How long does the solution last?
This DIY cleaning solution doesn’t have a long shelf life due to the lack of preservatives. It’s best to mix up a fresh batch each time you need it. However, if you have leftover solution, you can store it in a sealed spray bottle for up to a week. Be sure to label the bottle clearly to avoid confusion.
Can I add essential oils to the solution?
Yes, adding essential oils can enhance the cleaning power and scent of your solution. Lemon, tea tree, lavender, and eucalyptus are all popular choices for their antibacterial and antifungal properties. Add a few drops of your favorite essential oil to the solution after mixing the vinegar and dish soap. Be sure to use pure essential oils and avoid using fragrance oils, as they don’t have the same cleaning benefits.
Is this solution safe for pets and children?
While this DIY cleaning solution is generally safer than harsh chemical cleaners, it’s still important to keep it out of reach of children and pets. Vinegar can be irritating if ingested, and dish soap can cause stomach upset. Store the solution in a clearly labeled bottle and keep it in a secure location. If your pet or child ingests the solution, contact your veterinarian or poison control center immediately.
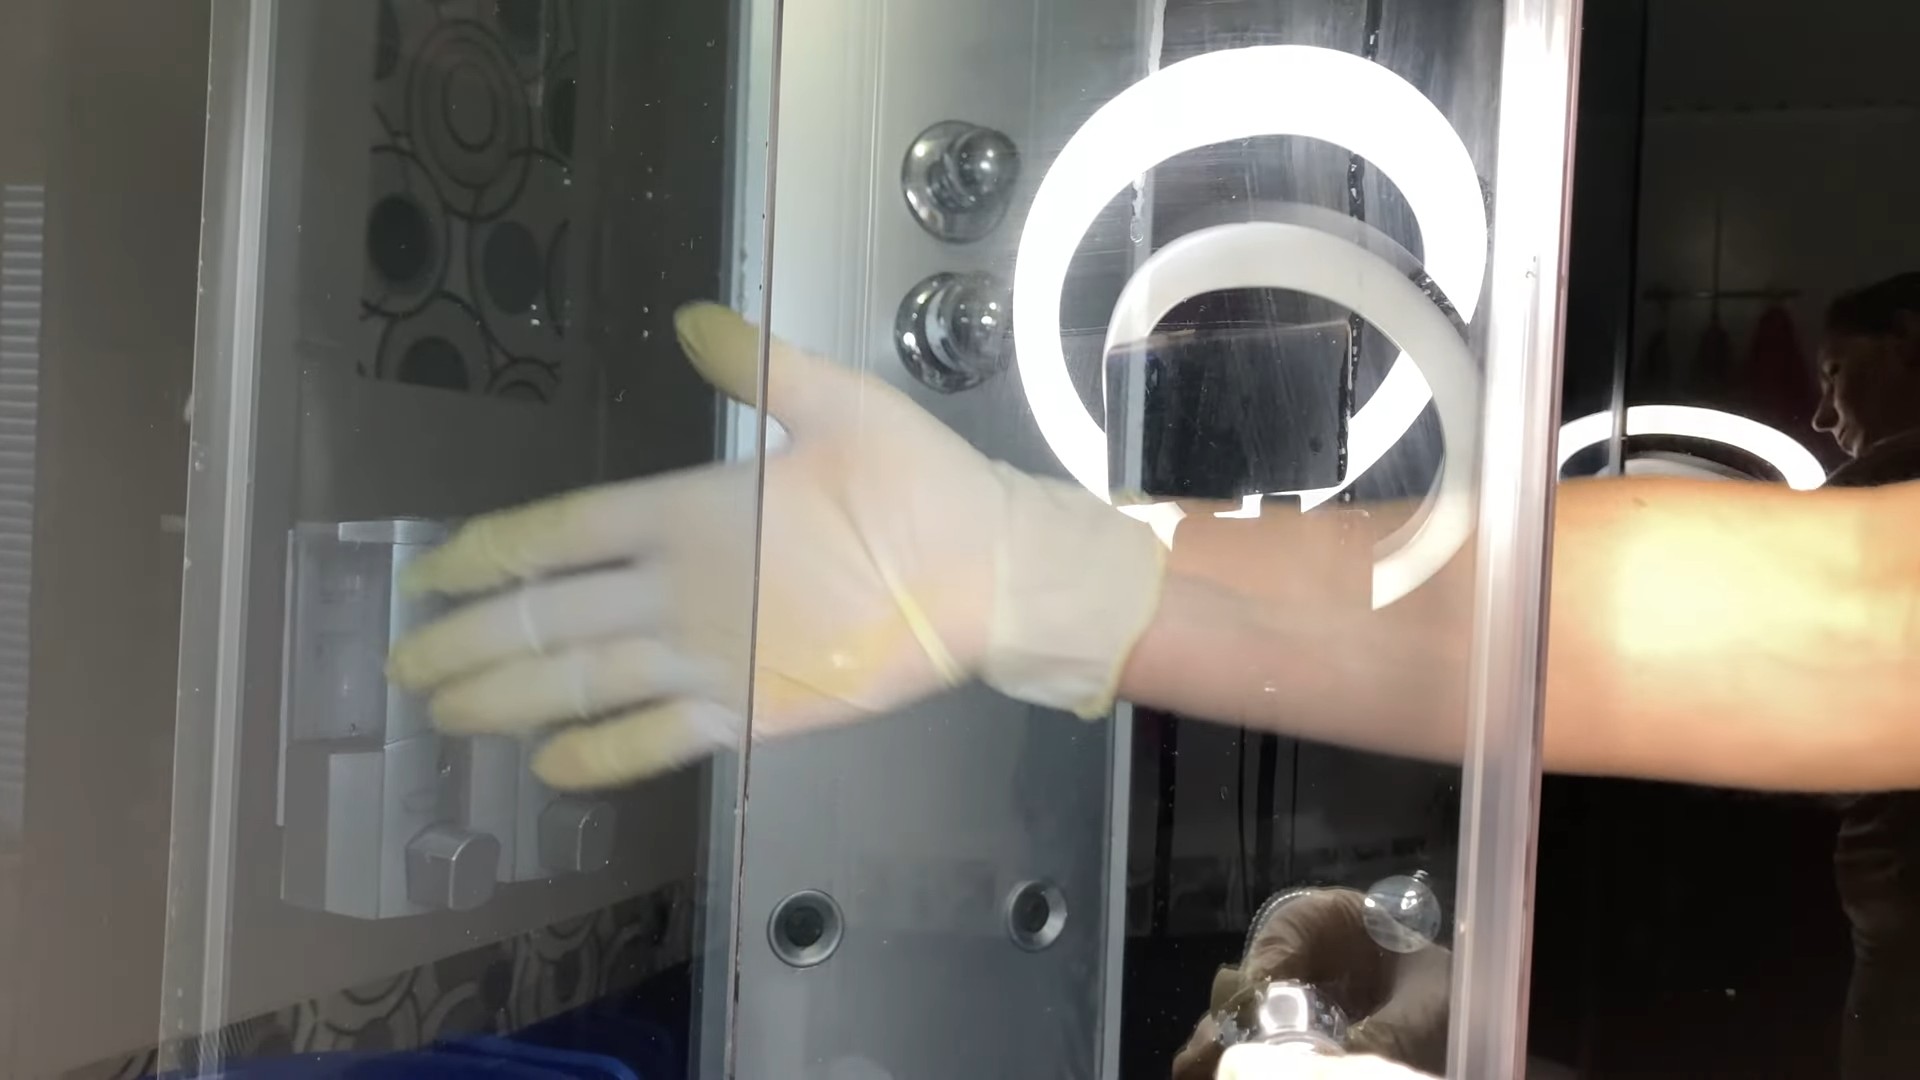
Can I use this solution to clean my windows?
Yes, this vinegar and dish soap mix can be used to clean windows, but it’s important to use a very diluted solution to avoid streaking. Mix 1 part vinegar with 10 parts water and a tiny squirt of dish soap. Apply the solution to the window with a spray bottle and wipe clean with a microfiber cloth or squeegee.
What are some other uses for this DIY cleaning solution?
This versatile solution can be used for a variety of cleaning tasks, including:
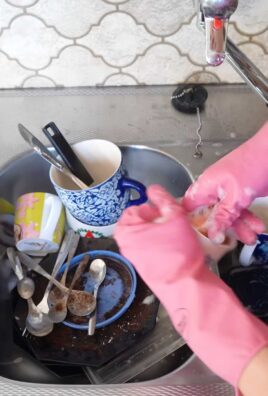
* Cleaning kitchen countertops and appliances
* Scrubbing bathroom tiles and fixtures
* Removing soap scum from shower doors
* Cleaning floors (test in an inconspicuous area first)
* Degreasing stovetops and ovens
* Cleaning mirrors and glass surfaces
* Removing stains from carpets and upholstery (test in an inconspicuous area first)
Remember to always test the solution in an inconspicuous area before using it on a large surface. With a little experimentation, you’ll discover just how many uses this simple yet effective DIY cleaning solution has.
Leave a Comment