

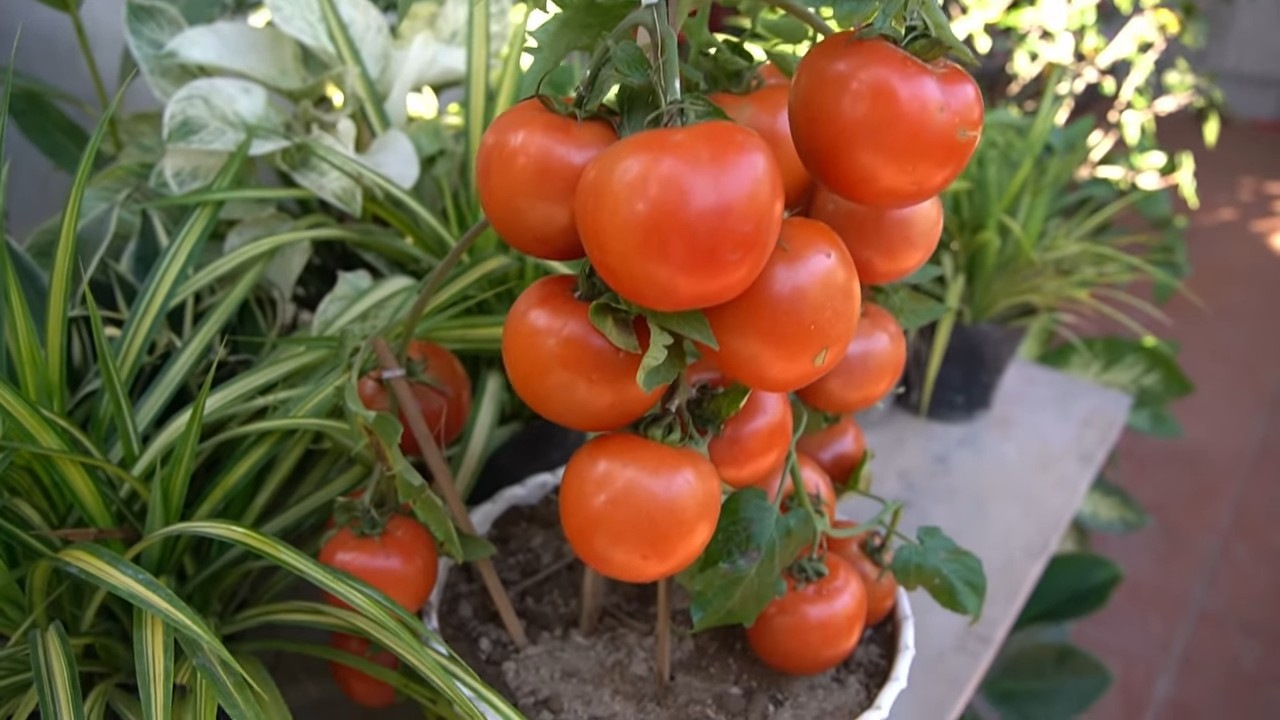
Tomato cutting propagation: Ever dreamt of multiplying your tomato plants without spending a dime on new seeds? I know I have! Imagine turning one healthy tomato plant into several, all bursting with juicy, sun-ripened goodness. That’s the magic of tomato cutting propagation, and it’s easier than you might think! This DIY guide will unlock the secrets to cloning your favorite tomato varieties, ensuring a bountiful harvest year after year.
The practice of propagating plants through cuttings has been around for centuries, with evidence suggesting its use in ancient civilizations. While we might not know exactly when tomato cutting propagation specifically began, the underlying principle of vegetative propagation has long been a cornerstone of horticulture. It’s a technique that allows us to bypass the genetic variability that can occur with seeds, ensuring that the new plants are identical to the parent plant.
Why is this DIY trick so essential? Well, for starters, it’s incredibly cost-effective. Instead of buying new seedlings every season, you can simply take cuttings from your existing plants. More importantly, tomato cutting propagation allows you to preserve the unique characteristics of your favorite tomato varieties. If you’ve found a tomato that’s particularly disease-resistant, flavorful, or productive, cloning it through cuttings is the best way to ensure you can enjoy its benefits again and again. Plus, it’s a fun and rewarding project that connects you more deeply to the growing process. Let’s dive in and learn how to make your tomato dreams a reality!
Turning Tomato Cuttings into Thriving Plants: A DIY Propagation Guide
Hey there, fellow gardening enthusiasts! Have you ever looked at your tomato plants and thought, “I wish I had more of these!” Well, I’m here to tell you that you absolutely can, and it’s easier than you might think. We’re going to dive into the wonderful world of tomato cutting propagation. This is a fantastic way to clone your favorite tomato varieties, extend your growing season, and even save plants that have suffered damage. Let’s get started!
Why Propagate Tomato Cuttings?
Before we jump into the how-to, let’s quickly cover why you might want to propagate tomato cuttings:
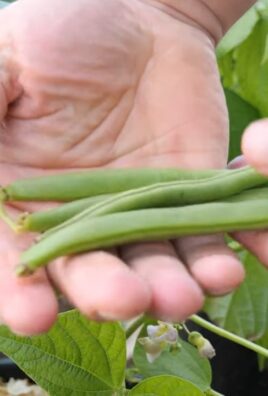
* Clone Your Favorites: If you have a tomato plant that produces exceptionally delicious or disease-resistant fruit, propagation allows you to create genetically identical copies.
* Extend the Growing Season: You can take cuttings from your existing plants late in the season and root them indoors to get a head start on next year’s garden.
* Rescue Damaged Plants: If a branch breaks off your tomato plant, don’t despair! You can often root that broken branch and turn it into a new plant.
* Save Money: Why buy more tomato seedlings when you can create your own for free?
* Experimentation: It’s a fun and rewarding way to learn more about plant biology and gardening techniques.
What You’ll Need
Here’s a list of the supplies you’ll need to successfully propagate tomato cuttings:
* Healthy Tomato Plant: Choose a plant that is vigorous and free from disease.
* Sharp, Clean Cutting Tool: A sharp knife, pruning shears, or even a clean razor blade will work. Make sure it’s sterilized with rubbing alcohol to prevent the spread of disease.
* Rooting Hormone (Optional): While not strictly necessary, rooting hormone can significantly increase your success rate.
* Potting Mix: Use a well-draining potting mix specifically designed for seedlings. Avoid using garden soil, as it can be too heavy and may contain pathogens.
* Small Pots or Containers: Choose pots that are at least 3-4 inches in diameter.
* Watering Can or Spray Bottle: For gentle watering.
* Clear Plastic Bag or Humidity Dome (Optional): To create a humid environment.
* Warm, Bright Location: Indirect sunlight is ideal.
Taking the Cuttings
This is a crucial step, so pay close attention!
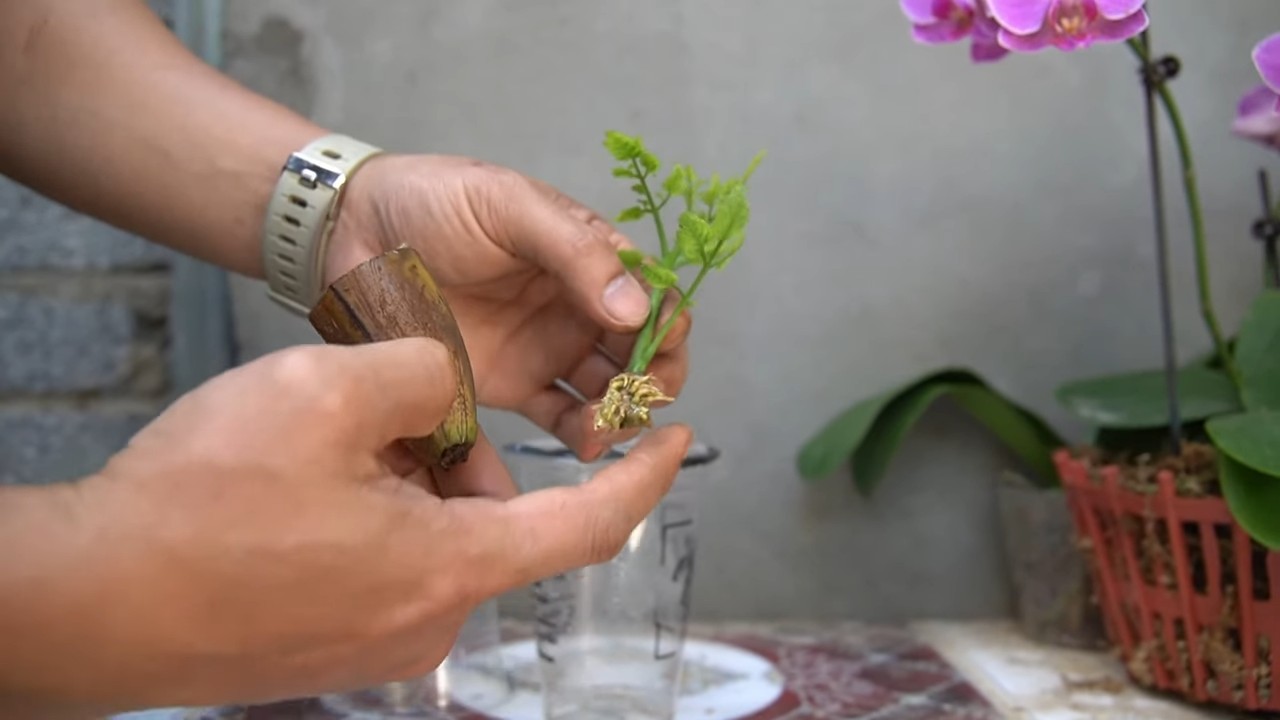
1. Choose the Right Stem: Look for a healthy, non-flowering stem that is about 4-6 inches long. The stem should be relatively thick and have several leaves. Avoid stems that are too woody or too thin.
2. Make the Cut: Using your sterilized cutting tool, make a clean cut just below a leaf node (the point where a leaf grows out of the stem). Cutting just below the node encourages root growth.
3. Remove Lower Leaves: Carefully remove the leaves from the bottom 2-3 inches of the stem. This will prevent the leaves from rotting when they are buried in the potting mix. It also encourages the plant to focus its energy on root development rather than leaf maintenance.
4. Prepare the Cutting (Optional): Some gardeners gently scrape the bottom inch of the stem with a knife. This can encourage root formation. I’ve had success both with and without this step, so it’s up to you.
5. Apply Rooting Hormone (Optional): If you’re using rooting hormone, dip the cut end of the stem into the hormone powder or liquid. Tap off any excess.
Planting the Cuttings
Now that you have your cuttings, it’s time to get them planted!
1. Prepare the Potting Mix: Moisten the potting mix with water until it’s damp but not soggy.
2. Fill the Pots: Fill your small pots or containers with the moistened potting mix.
3. Make a Hole: Use a pencil or your finger to create a hole in the center of the potting mix, deep enough to accommodate the bottom 2-3 inches of the cutting.
4. Plant the Cutting: Gently insert the cutting into the hole, making sure that the bottom nodes are buried in the potting mix.
5. Firm the Soil: Gently firm the soil around the base of the cutting to provide support.
6. Water Gently: Water the cutting gently to settle the soil. Avoid overwatering, as this can lead to rot.
Creating a Humid Environment
Tomato cuttings need a humid environment to prevent them from drying out before they can develop roots.
1. Use a Plastic Bag or Humidity Dome: Place a clear plastic bag over the pot, making sure that the bag doesn’t touch the leaves. You can also use a humidity dome if you have one.
2. Ventilation: If you’re using a plastic bag, poke a few small holes in the bag to allow for some ventilation. This will prevent the buildup of excessive moisture, which can lead to fungal diseases.
3. Location: Place the pot in a warm, bright location that receives indirect sunlight. Avoid direct sunlight, as this can overheat the cuttings.
Caring for Your Cuttings
Patience is key! It can take several weeks for tomato cuttings to develop roots.
1. Watering: Keep the potting mix consistently moist, but not soggy. Water gently when the top inch of soil feels dry to the touch.
2. Humidity: Maintain a high level of humidity by keeping the plastic bag or humidity dome in place. Mist the cuttings with water occasionally to increase humidity.
3. Ventilation: Remove the plastic bag or humidity dome for a few hours each day to allow for ventilation. This will help prevent fungal diseases.
4. Light: Provide bright, indirect sunlight. If you don’t have a suitable location, you can use a grow light.
5. Check for Roots: After a few weeks, gently tug on the cutting. If you feel resistance, it means that roots have developed. You can also gently remove the cutting from the pot to check for roots.
Transplanting Your Rooted Cuttings
Once your cuttings have developed a good root system, it’s time to transplant them into larger pots or into your garden.
1. Harden Off: Before transplanting your cuttings outdoors, you’ll need to harden them off. This means gradually exposing them to outdoor conditions over a period of several days. Start by placing them in a sheltered location for a few hours each day, gradually increasing the amount of time they spend outdoors.
2. Choose a Location: Select a sunny location with well-draining soil for your tomato plants.
3. Prepare the Soil: Amend the soil with compost or other organic matter to improve its fertility and drainage.
4. Dig a Hole: Dig a hole that is large enough to accommodate the root ball of the cutting.
5. Transplant the Cutting: Gently remove the cutting from its pot and place it in the hole. Backfill the hole with soil and firm gently.
6. Water Thoroughly: Water the newly transplanted cutting thoroughly.
7. Provide Support: Tomato plants need support to prevent them from falling over. Use stakes, cages, or trellises to provide support.
Troubleshooting
Even with the best care, you may encounter some problems when propagating tomato cuttings. Here are some common issues and how to address them:
* Cuttings Rotting: This is usually caused by overwatering or poor ventilation. Make sure the potting mix is well-draining and provide adequate ventilation.
* Cuttings Wilting: This is usually caused by lack of humidity. Make sure the cuttings are in a humid environment.
* Cuttings Not Rooting: This can be caused by a variety of factors, including poor cutting technique, lack of rooting hormone, or unfavorable environmental conditions. Try taking cuttings from different parts of the plant, using rooting hormone, and providing a warm, humid environment.
* Fungal Diseases: Fungal diseases can be a problem in humid environments. Provide adequate ventilation and avoid overwatering. You can also use a fungicide if necessary.
Advanced Tips and Tricks
Want to take your tomato cutting propagation skills to the next level? Here are a few advanced tips and tricks:
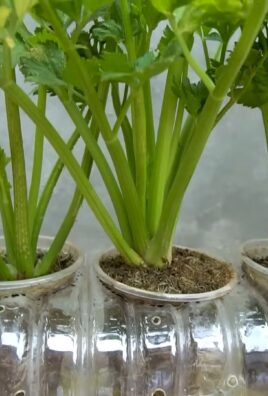
* Water Propagation: You can also root tomato cuttings in water. Simply place the cutting in a glass of water, making sure that the leaves are above the water line. Change the water every few days. Once roots develop, you can transplant the cutting into potting mix.
* Air Layering: Air layering is a technique that involves rooting a stem while it is still attached to the parent plant. This can be a good option for propagating difficult-to-root varieties.
* Grafting: Grafting is a technique that involves joining two plants together so that they grow as one. This can be used to combine
Conclusion
So, there you have it! Transforming tomato cuttings into thriving new plants is not just a fun gardening experiment; it’s a remarkably effective way to expand your tomato patch, preserve your favorite varieties, and save money. This simple DIY trick unlocks a world of possibilities for any gardener, regardless of experience level.
Why is this a must-try? Because it’s incredibly rewarding to witness the miracle of life unfold before your eyes. Taking a seemingly discarded cutting and nurturing it into a productive plant is an experience that connects you more deeply to the natural world. Beyond the emotional satisfaction, this method offers tangible benefits. You’re essentially cloning your best-performing tomato plants, ensuring you get more of what you love. Forget relying solely on seeds, which can sometimes yield unpredictable results. With tomato cutting propagation, you’re in control.
But the beauty of this technique lies in its adaptability. Feel free to experiment with different types of tomato cuttings. While suckers are ideal, you can also try using stem cuttings from healthy, vigorous plants. Consider varying the rooting medium. While water works well, you might find that a mixture of perlite and vermiculite provides even better results. You can even try dipping the cut end in rooting hormone powder to further encourage root development, although this isn’t strictly necessary.
Think about the possibilities! Imagine having a continuous supply of your favorite heirloom tomatoes, all propagated from a single, exceptional plant. Picture sharing your bounty with friends and neighbors, knowing that you’ve created these plants from scratch. Envision a garden bursting with vibrant, healthy tomato plants, all thanks to this simple, cost-effective technique.
Don’t be intimidated if you’re new to gardening. Tomato cutting propagation is surprisingly forgiving. Even if your first attempt isn’t a resounding success, don’t give up! Gardening is a journey of learning and experimentation. Each attempt will teach you something new, and with a little patience and persistence, you’ll be amazed at what you can achieve.
We wholeheartedly encourage you to give this DIY trick a try. It’s a fantastic way to get more involved in your garden, save money, and enjoy a more abundant harvest. And most importantly, we want to hear about your experiences! Share your successes, your challenges, and your tips in the comments below. Let’s create a community of tomato-growing enthusiasts, all learning and growing together. What varieties did you propagate? What rooting methods did you find most effective? What challenges did you encounter, and how did you overcome them? Your insights could be invaluable to other gardeners. So, grab your clippers, select a healthy tomato cutting, and embark on this exciting gardening adventure. Happy propagating!
Frequently Asked Questions (FAQ)
What exactly is tomato cutting propagation, and why should I do it?
Tomato cutting propagation is a method of creating new tomato plants from cuttings taken from existing plants. Instead of starting from seeds, you’re essentially cloning a part of a mature plant to grow a new one. This is beneficial because it allows you to replicate the exact characteristics of the parent plant, ensuring you get the same delicious tomatoes you love. It’s also a cost-effective way to expand your tomato garden, especially if you have a particularly productive or disease-resistant plant. Plus, it’s a fun and rewarding gardening project!
What kind of tomato cuttings work best for propagation?
The best cuttings to use are suckers, which are the small shoots that grow between the main stem and the branches of the tomato plant. These suckers are already primed to grow and root easily. However, you can also use stem cuttings from healthy, vigorous parts of the plant. Aim for cuttings that are about 4-6 inches long and have several leaves. Remove the lower leaves to expose the nodes where roots will emerge.
How do I root tomato cuttings? Can I just stick them in soil?
While you can try rooting tomato cuttings directly in soil, the success rate is generally higher if you start them in water or a rooting medium. To root in water, simply place the cuttings in a glass or jar filled with water, ensuring that the lower nodes are submerged. Change the water every few days to keep it fresh. Roots should start to appear within a week or two. Alternatively, you can use a rooting medium such as perlite, vermiculite, or a mixture of the two. Moisten the medium and insert the cuttings, making sure the nodes are buried. Keep the medium consistently moist but not waterlogged.
How long does it take for tomato cuttings to root?
The time it takes for tomato cuttings to root can vary depending on factors such as temperature, humidity, and the variety of tomato. Generally, you can expect to see roots emerging within 7-14 days. Once the roots are about an inch long, the cuttings are ready to be transplanted into soil.
What kind of soil should I use for transplanting rooted tomato cuttings?
Use a well-draining potting mix that is rich in organic matter. A mixture of compost, peat moss, and perlite works well. Avoid using garden soil, as it can be too heavy and may contain diseases or pests.
How often should I water my newly transplanted tomato cuttings?
Keep the soil consistently moist but not waterlogged. Water deeply whenever the top inch of soil feels dry to the touch. Avoid overwatering, as this can lead to root rot.
Do I need to fertilize my tomato cuttings?
Yes, once the cuttings have been transplanted into soil and have established themselves, you can start fertilizing them with a balanced liquid fertilizer diluted to half strength. Fertilize every two weeks during the growing season.
What kind of light do tomato cuttings need?
Tomato cuttings need bright, indirect light to thrive. Avoid placing them in direct sunlight, as this can scorch the leaves. A sunny windowsill or a grow light are good options.
Can I propagate tomato cuttings indoors?
Yes, tomato cutting propagation can be done indoors, especially during the colder months. Just make sure the cuttings receive adequate light and warmth.
What are some common problems I might encounter when propagating tomato cuttings, and how can I fix them?
Some common problems include:
* **Rotting:** This is usually caused by overwatering or poor drainage. Make sure the soil is well-draining and avoid overwatering.
* **Lack of root development:** This can be due to insufficient light, low humidity, or using unhealthy cuttings. Ensure the cuttings receive bright, indirect light and maintain a humid environment.
* **Wilting:** This can be caused by underwatering or transplant shock. Keep the soil consistently moist and provide shade for the first few days after transplanting.
Can I propagate any type of tomato plant using cuttings?
Yes, you can propagate most types of tomato plants using cuttings. However, some varieties may be easier to propagate than others. Heirloom varieties, in particular, often propagate well from cuttings.
Is it better to propagate from cuttings or seeds?
Both methods have their advantages. Propagating from cuttings allows you to replicate the exact characteristics of the parent plant, while starting from seeds offers more genetic diversity. Cuttings also mature faster than plants grown from seed. The best method depends on your goals and preferences. If you want to preserve a specific variety or get a head start on the growing season, cuttings are a great option.
How many times can I propagate from the same tomato plant?
You can propagate from the same tomato plant multiple times throughout the growing season, as long as the plant remains healthy and vigorous. Just be sure to take cuttings from healthy, non-diseased parts of the plant.
What if my tomato cutting develops flowers before it roots?
If your tomato cutting develops flowers before it roots, it’s best to pinch them off. The plant needs to focus its energy on root development, not flower production. Removing the flowers will encourage the plant to put its resources into growing roots.
Leave a Comment