

Tire gardening isn’t just about recycling; it’s about unlocking a world of creative and efficient growing spaces, especially when you’re dreaming of plump, vibrant pumpkins! Have you ever imagined transforming old, discarded tires into thriving mini-gardens bursting with life? I’m here to tell you, it’s easier than you think, and the results are incredibly rewarding.
For generations, resourceful gardeners have sought innovative ways to maximize their yields, often turning to readily available materials. While the exact origins of tire gardening are hard to pinpoint, the practice embodies the spirit of resourcefulness that has always been at the heart of gardening. It’s a nod to the “make do and mend” philosophy, a tradition of ingenuity passed down through families and communities.
But why should you consider tire gardening, particularly for pumpkin growth? Well, pumpkins are notorious for being space hogs! They need room to spread their vines and develop those glorious gourds. Tires offer a contained environment, helping to warm the soil faster in the spring, retain moisture, and provide a physical barrier against pests. Plus, they add a unique, rustic charm to your garden. So, if you’re short on space, looking for a sustainable gardening solution, or simply want to try something new and exciting, then stick around! I’m going to share some fantastic DIY tricks and hacks to help you grow the biggest, best pumpkins you’ve ever seen, all thanks to the humble tire!
DIY Tire Garden: Growing Pumpkins Like a Pro!
Hey there, fellow gardening enthusiasts! I’m so excited to share one of my favorite DIY gardening hacks with you: growing pumpkins in repurposed tires! It’s a fantastic way to recycle, add a rustic touch to your garden, and, most importantly, grow some seriously impressive pumpkins. Trust me, once you try this, you’ll be hooked.
Why Use Tires for a Pumpkin Garden?
Before we dive into the how-to, let’s talk about why this method is so great:
* Excellent Drainage: Tires naturally have openings that allow for excellent drainage, preventing your pumpkin roots from becoming waterlogged.
* Warms the Soil: The black rubber absorbs heat from the sun, warming the soil and giving your pumpkins a head start, especially in cooler climates.
* Weed Control: The tire acts as a barrier, suppressing weed growth around your pumpkin plants.
* Easy to Contain: It keeps the sprawling pumpkin vines somewhat contained, preventing them from taking over your entire garden.
* Recycling at its Best: You’re giving old tires a new life, which is always a win for the environment!
* Rustic Charm: Let’s be honest, they look pretty cool in the garden, especially when overflowing with vibrant pumpkin vines.
Materials You’ll Need
Okay, let’s gather our supplies. Here’s what you’ll need to create your tire pumpkin garden:
* Old Tires: The number of tires depends on how many pumpkin plants you want to grow. One tire per plant is ideal. Look for tires without exposed steel belts if possible.
* Cardboard or Landscape Fabric: To line the bottom of the tire and prevent weeds from growing up from below.
* Good Quality Soil: Pumpkin plants are heavy feeders, so you’ll need nutrient-rich soil. I recommend a mix of compost, topsoil, and well-rotted manure.
* Pumpkin Seeds or Seedlings: Choose your favorite pumpkin variety! Giant pumpkins need more space.
* Watering Can or Hose: For watering your pumpkin plants.
* Gardening Gloves: To protect your hands.
* Shovel or Trowel: For moving soil.
* Optional: Paint (outdoor paint) to decorate your tires.
* Optional: Straw or Mulch to help retain moisture.
Step-by-Step Guide: Building Your Tire Pumpkin Garden
Alright, let’s get our hands dirty! Here’s a detailed step-by-step guide to building your tire pumpkin garden:
1. Preparing the Tires
* Cleaning: First things first, give those tires a good scrub with soap and water to remove any dirt, grime, or debris. Let them dry completely.
* Painting (Optional): If you want to add a splash of color to your garden, now’s the time to paint your tires. Use outdoor paint that’s designed to withstand the elements. Let the paint dry completely before moving on to the next step. I like to use bright colors or even create fun designs!
* Placement: Choose a sunny spot in your garden that receives at least 6-8 hours of direct sunlight per day. Pumpkins are sun-loving plants! Place your tires in the chosen location. Make sure they are stable and won’t roll around.
2. Preparing the Tire Base
* Weed Barrier: Line the bottom of each tire with cardboard or landscape fabric. This will prevent weeds from growing up into your pumpkin patch. Make sure the cardboard or fabric covers the entire bottom of the tire. You can overlap pieces if needed.
* Drainage Layer (Optional): If your soil is heavy clay, you might want to add a layer of gravel or small stones at the bottom of the tire for extra drainage. This will help prevent root rot.
3. Filling the Tires with Soil
* Soil Mixture: Now comes the fun part! Fill each tire with your prepared soil mixture. Remember, pumpkins need nutrient-rich soil, so don’t skimp on the compost and manure.
* Filling Level: Fill the tires almost to the top, leaving a few inches of space at the rim. This will help prevent soil from washing away when you water.
* Soil Compaction: Gently compact the soil with your hands or a trowel. You don’t want it to be too dense, but you also don’t want it to be too loose.
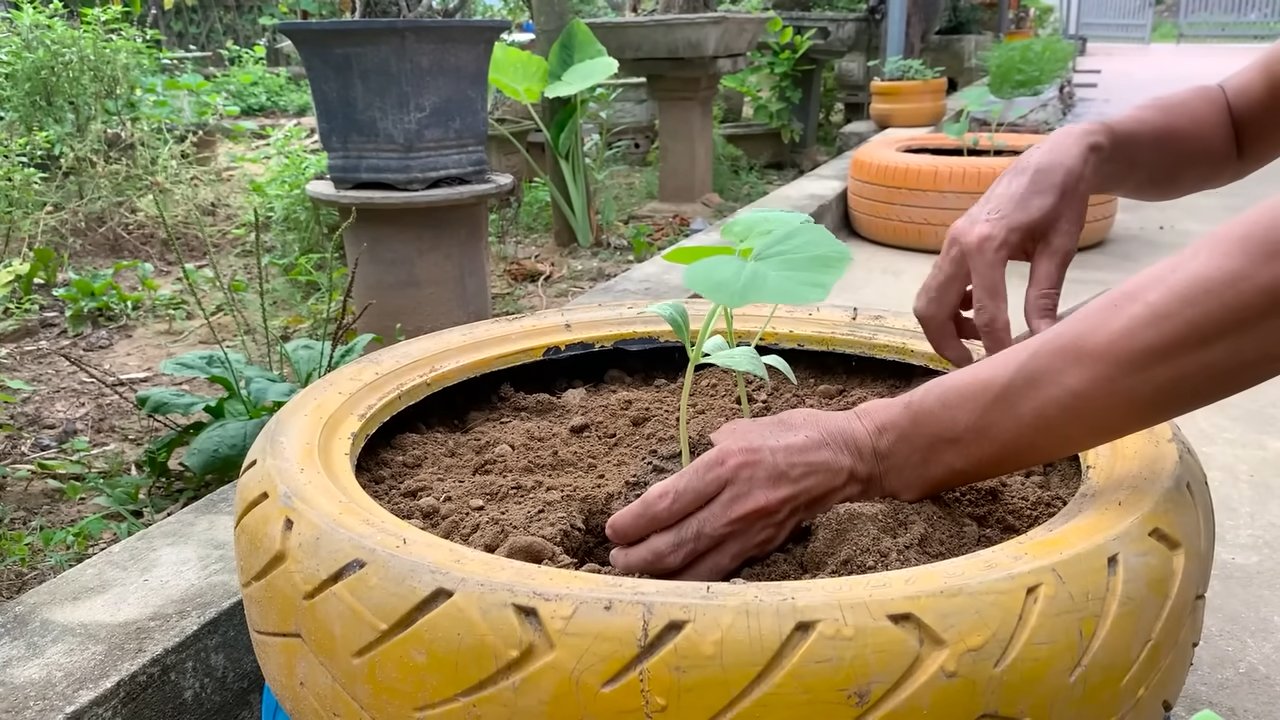
4. Planting Your Pumpkin Seeds or Seedlings
* Seed Starting (Optional): If you’re starting from seeds, you can either direct sow them into the tire garden or start them indoors a few weeks before the last frost. Starting them indoors will give them a head start.
* Planting Seeds: If direct sowing, plant 2-3 seeds in the center of each tire, about 1 inch deep. Water gently. Once the seedlings emerge, thin them to one strong plant per tire.
* Planting Seedlings: If planting seedlings, dig a hole in the center of each tire that’s large enough to accommodate the root ball. Gently remove the seedling from its container and place it in the hole. Backfill with soil and water thoroughly.
5. Watering and Maintenance
* Watering: Water your pumpkin plants regularly, especially during dry spells. Pumpkins need a lot of water, especially when they’re developing fruit. Water deeply, ensuring the soil is moist but not waterlogged.
* Fertilizing: Feed your pumpkin plants with a balanced fertilizer every few weeks. You can also add compost tea or liquid seaweed extract to give them an extra boost.
* Weed Control: Even though the tire acts as a weed barrier, you might still need to pull out a few weeds from time to time.
* Pest Control: Keep an eye out for common pumpkin pests like squash bugs, squash vine borers, and aphids. You can use organic pest control methods like insecticidal soap or neem oil to control these pests.
* Pollination: Pumpkins require pollination to produce fruit. If you’re not seeing any pumpkins developing, you might need to hand-pollinate the flowers. To do this, use a small paintbrush to transfer pollen from the male flowers to the female flowers. The female flowers have a small, immature pumpkin at the base.
* Mulching (Optional): Add a layer of straw or mulch around your pumpkin plants to help retain moisture and suppress weeds.
6. Training the Vines
* Vine Direction: As your pumpkin vines grow, you can train them to grow in a specific direction. This will help keep them from taking over your entire garden. You can use stakes or trellises to support the vines.
* Pruning (Optional): If your pumpkin vines are getting too long, you can prune them back. This will encourage the plant to focus its energy on producing fruit.
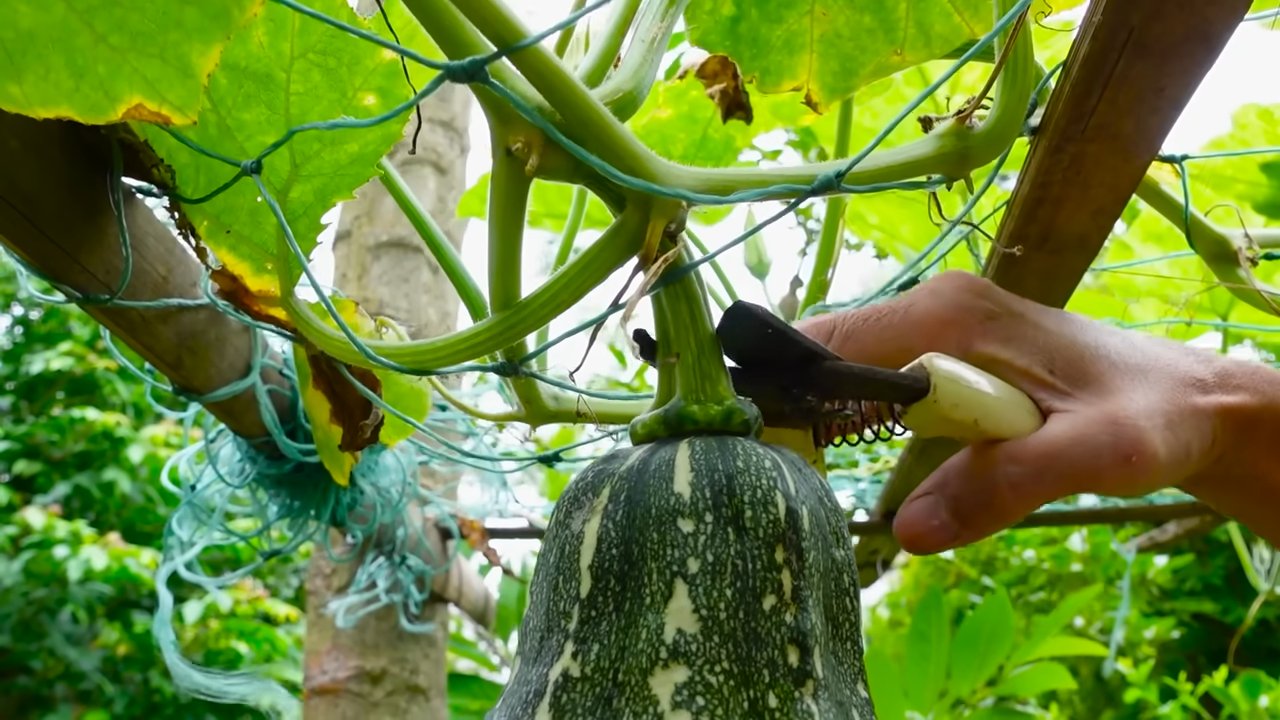
7. Harvesting Your Pumpkins
* Ripeness: Pumpkins are typically ready to harvest in the fall, when they’ve reached their mature color and the stem is hard and dry.
* Harvesting: Use a sharp knife or pruning shears to cut the pumpkin from the vine, leaving a few inches of stem attached.
* Curing: Cure your pumpkins in a warm, dry place for a few weeks to harden the skin and improve their storage life.
Troubleshooting Tips
* Poor Drainage: If your soil is heavy clay and you’re experiencing drainage problems, add more compost and organic matter to improve drainage. You can also add a layer of gravel or small stones at the bottom of the tire.
* Pest Problems: Regularly inspect your pumpkin plants for pests and take action immediately if you see any.
* Lack of Pollination: If you’re not seeing any pumpkins developing, try hand-pollinating the flowers.
* Nutrient Deficiencies: If your pumpkin plants are looking pale or stunted, they might be lacking nutrients. Fertilize them with a balanced fertilizer or compost tea.
Extra Tips for Super-Sized Pumpkins
Want to grow a truly massive pumpkin? Here are a few extra tips:
* Choose the Right Variety: Some pumpkin varieties are known for producing larger fruit. Look for varieties like ‘Atlantic Giant’.
* Limit the Number of Pumpkins: If you want to grow a really big pumpkin, limit the plant to just one or two fruits. This will allow the plant to focus all of its energy on those pumpkins.
* Provide Extra Nutrients: Feed your pumpkin plants with extra fertilizer and compost tea.
* Protect the Pumpkins: Protect your pumpkins from pests and diseases. You can also shade them from the hot sun to prevent sunburn.
Enjoy Your Tire Pumpkin Garden!
And there you have it! You’ve successfully created your own tire pumpkin garden. Now sit back, relax, and watch your pumpkins grow. I hope you have as much fun with this project as I do. Happy gardening!
Conclusion
So, there you have it! Transforming old tires into vibrant pumpkin patches is not just a quirky gardening trend; it’s a sustainable, space-saving, and surprisingly effective way to cultivate a bountiful harvest. We’ve explored the numerous benefits, from the enhanced soil warming that encourages faster growth to the built-in pest protection and the sheer aesthetic appeal of repurposed tire planters. This DIY trick is a must-try for anyone looking to add a touch of creativity and eco-consciousness to their garden.
But why is this method so compelling? Beyond the environmental advantages of upcycling, tire gardening offers tangible benefits for your pumpkin plants. The dark color of the tire absorbs sunlight, creating a warmer microclimate around the roots, which is especially beneficial in cooler climates or during the early stages of growth. This warmth translates to faster germination, stronger seedlings, and ultimately, larger and healthier pumpkins. Furthermore, the tire acts as a barrier against some common garden pests, providing a degree of protection without the need for harsh chemicals.
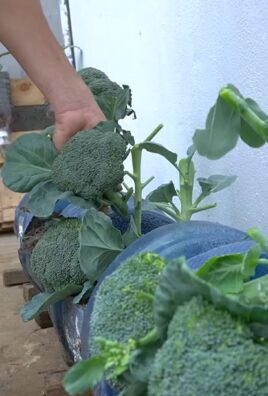
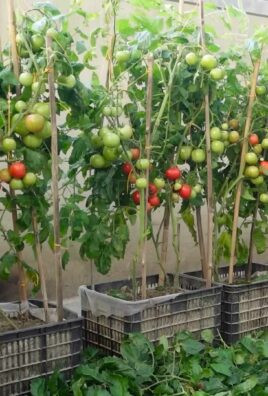
Don’t be afraid to experiment! While we’ve focused on pumpkins, this method is incredibly versatile. Consider using tire planters for other vining crops like watermelons, cantaloupes, or even cucumbers. You can also adapt the design by painting the tires in vibrant colors to match your garden’s aesthetic or stacking them to create raised beds of varying heights. For smaller gardens, consider cutting the tires in half to create two smaller planters. The possibilities are truly endless!
Ready to give tire gardening a try? We encourage you to embrace this simple yet rewarding DIY project. Gather your old tires, prepare your soil, and get ready to witness the magic of repurposed materials transforming into a thriving pumpkin patch. Remember to document your progress and share your experiences with us! We’d love to see your creative variations and hear about the successes (and even the challenges) you encounter along the way. Share your photos and stories on our social media channels using #TireGardeningPumpkins. Let’s inspire others to embrace sustainable gardening practices and cultivate a greener future, one pumpkin at a time. This method of tire gardening is not only good for the environment, but it is also a fun and engaging way to get involved in the growing process.
Frequently Asked Questions (FAQ)
What kind of tires are best for tire gardening?
Ideally, you should use tires that are in relatively good condition, meaning they don’t have significant damage like large cuts or exposed steel belts. Passenger car tires are generally a good size for most garden vegetables, including pumpkins. Avoid using tires that are heavily worn or have been exposed to hazardous materials. It’s also a good idea to clean the tires thoroughly before using them to remove any dirt, debris, or chemicals. Consider checking with local tire shops; they often have used tires they are willing to give away or sell at a low cost.
Are tires safe to use for gardening? Won’t chemicals leach into the soil?
This is a common concern, and it’s important to address it. While tires do contain chemicals, the risk of significant leaching into the soil is generally considered low, especially with modern tires. However, to minimize any potential risk, you can take a few precautions. First, use a good quality soil liner inside the tire to create a barrier between the soil and the rubber. Second, avoid using tires that are visibly damaged or deteriorating. Third, focus on growing edible plants that are not root vegetables (like carrots or potatoes) in tire planters, as these are less likely to absorb any potential contaminants. Finally, ensure your soil is well-drained to prevent water from pooling inside the tire, which could increase the leaching process. Many gardeners have successfully used tire planters for years without any noticeable negative effects on their plants or the soil.
How do I prepare the tires for planting?
Preparing the tires is a simple process. First, thoroughly clean the tires with soap and water to remove any dirt or debris. Next, drill drainage holes in the bottom of the tire to prevent waterlogging. You can use a drill with a large drill bit or even a utility knife to create these holes. If you’re concerned about aesthetics, you can paint the tires with exterior-grade paint to match your garden’s color scheme. Allow the paint to dry completely before adding soil. Finally, line the inside of the tire with a layer of landscape fabric or a plastic liner to help retain moisture and prevent soil from escaping through the drainage holes.
What kind of soil should I use for growing pumpkins in tires?
Pumpkins are heavy feeders, so they need rich, well-draining soil. A good mix would be equal parts compost, topsoil, and potting mix. The compost provides essential nutrients, the topsoil provides structure, and the potting mix ensures good drainage. You can also amend the soil with slow-release fertilizer to provide a steady supply of nutrients throughout the growing season. Before planting, test the soil pH to ensure it’s within the optimal range for pumpkins (6.0 to 7.0). If the soil is too acidic, you can add lime to raise the pH.
How much sun do pumpkins need when grown in tires?
Pumpkins need at least six to eight hours of direct sunlight per day to thrive. Choose a location for your tire planters that receives plenty of sunlight throughout the day. If you live in a particularly hot climate, you may want to provide some afternoon shade to prevent the plants from overheating.
How often should I water my pumpkin plants in tire planters?
Watering frequency will depend on the climate, soil type, and the size of the tire planter. Generally, you should water deeply whenever the top inch of soil feels dry to the touch. Avoid overwatering, as this can lead to root rot. During hot, dry weather, you may need to water daily. Use a soaker hose or drip irrigation system to deliver water directly to the roots, minimizing water loss through evaporation.
Can I grow giant pumpkins in tire planters?
While you can certainly grow pumpkins in tire planters, growing giant pumpkins requires a significant amount of space and resources. Tire planters are better suited for growing smaller to medium-sized pumpkin varieties. If you’re determined to grow giant pumpkins, you’ll need to provide a much larger growing area and ensure the plants receive adequate nutrients and water.
What are some common pests and diseases that affect pumpkins, and how can I prevent them in tire gardens?
Common pumpkin pests include squash bugs, squash vine borers, and aphids. Diseases include powdery mildew and downy mildew. To prevent these problems, practice good garden hygiene by removing any dead or diseased leaves. You can also use insecticidal soap or neem oil to control pests. To prevent fungal diseases, ensure good air circulation around the plants and avoid overhead watering. Consider using disease-resistant pumpkin varieties. The tire itself can offer some protection from ground-dwelling pests.
How do I harvest my pumpkins from tire gardens?
Pumpkins are typically ready to harvest in the fall when the skin is hard and the stem is dry and brown. Use a sharp knife or pruning shears to cut the pumpkin from the vine, leaving a few inches of stem attached. Handle the pumpkins carefully to avoid bruising or damaging the skin. Store the pumpkins in a cool, dry place.
Leave a Comment