

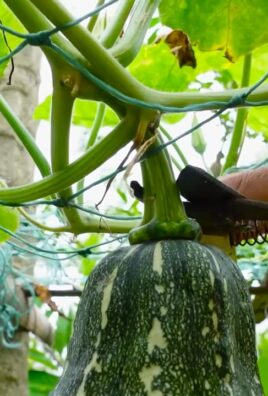
Sweet Potato Growing Method: Unlock the Secrets to a Bountiful Harvest Right in Your Backyard!
Have you ever dreamed of harvesting your own sweet potatoes, those vibrant orange jewels packed with nutrients and flavor? Imagine the satisfaction of digging into the earth and unearthing a treasure trove of homegrown goodness. Well, stop dreaming and start doing! This DIY guide is your key to mastering the sweet potato growing method, even if you’re a complete beginner.
Sweet potatoes have a rich history, dating back thousands of years in Central and South America. They were a staple food for indigenous populations and eventually spread across the globe, becoming a beloved ingredient in countless cuisines. Beyond their delicious taste, sweet potatoes are packed with vitamins, minerals, and antioxidants, making them a healthy and rewarding addition to your diet.
But why should you bother with growing your own? In today’s world, where we’re increasingly conscious of where our food comes from, knowing you’ve nurtured your own sweet potatoes from sprout to harvest is incredibly empowering. Plus, store-bought sweet potatoes often lack the freshness and flavor of homegrown varieties. And let’s be honest, who doesn’t love a good DIY project that results in something delicious and nutritious? I’m excited to share my favorite tips and tricks to help you succeed with the sweet potato growing method. Let’s get started!

DIY Oven Cleaner: Conquer Grease with Ease!
Okay, let’s face it: cleaning the oven is nobody’s favorite chore. But a sparkling clean oven makes cooking so much more enjoyable (and probably even cooks food better, right?). Store-bought oven cleaners can be harsh and full of chemicals I’d rather avoid. So, I’m going to share my go-to DIY oven cleaner recipe that’s effective, budget-friendly, and uses ingredients you probably already have in your pantry!
What You’ll Need: The Arsenal Against Grease
Before we dive in, let’s gather our supplies. This is a simple recipe, so the list is short and sweet:
* Baking Soda: Our main cleaning agent! It’s a mild alkali that helps dissolve grease and grime.
* White Vinegar: The acid that reacts with the baking soda to create a powerful cleaning fizz.
* Water: To create a paste and help with rinsing.
* Spray Bottle: For easy application of the vinegar.
* Rubber Gloves: Protect your hands from the baking soda paste.
* Sponge or Scrub Brush: For scrubbing away the loosened grime.
* Plastic Scraper (optional): For tackling stubborn baked-on messes.
* Old Rags or Paper Towels: For wiping down the oven.
* Small Bowl: For mixing the baking soda paste.
* Old Towel or Newspaper: To protect your kitchen floor.
Step-by-Step Guide: From Grimy to Gleaming
Here’s the breakdown of how we’re going to transform your oven from a greasy mess to a sparkling clean masterpiece.
1. Prep the Oven: Safety First!
* Unplug the Oven: This is absolutely crucial! We’re dealing with water and electricity, so safety is paramount.
* Remove Oven Racks: Take out all the racks and set them aside. We’ll clean them separately.
* Protect the Floor: Lay down an old towel or newspaper around the base of the oven to catch any drips or spills.
2. Mixing the Magic Paste: Baking Soda Power!
* Create the Paste: In your small bowl, mix together about ½ cup of baking soda with enough water to form a thick, spreadable paste. You want it to be similar to the consistency of frosting. Add water gradually, a tablespoon at a time, until you reach the right consistency.
* Adjust as Needed: If the paste is too runny, add a little more baking soda. If it’s too thick, add a little more water.
3. Applying the Paste: Coating the Oven
* Generously Apply: Using your hands (with gloves on, of course!), spread the baking soda paste all over the interior surfaces of your oven. This includes the walls, the floor, the door (inside), and the top.
* Avoid Heating Elements: Be careful not to get the paste on the heating elements. If you do, just wipe it off with a damp cloth.
* Thick Coating for Tough Spots: For areas with particularly stubborn grease or baked-on food, apply a thicker layer of the paste.
4. Let it Sit: The Waiting Game
* Patience is Key: This is the most important step! Let the baking soda paste sit in the oven for at least 12 hours, or even better, overnight. The longer it sits, the more time it has to break down the grease and grime.
* Don’t Rush It: I know it’s tempting to start scrubbing right away, but trust me, the wait is worth it.
5. Cleaning the Racks: A Separate Battle
* Soaking is Your Friend: While the paste is working its magic inside the oven, let’s tackle those racks. Fill your bathtub or a large utility sink with hot, soapy water.
* Add Baking Soda: Add about ½ cup of baking soda to the water. This will help loosen the grease and grime on the racks.
* Soak the Racks: Submerge the oven racks in the water and let them soak for at least a few hours, or even overnight.
* Scrubbing Time: After soaking, use a scrub brush or sponge to scrub the racks clean. For stubborn spots, you can use a steel wool pad, but be careful not to scratch the racks.
* Rinse and Dry: Rinse the racks thoroughly with clean water and let them air dry completely before putting them back in the oven.
6. The Vinegar Activation: Fizzing Power!
* Fill the Spray Bottle: Pour white vinegar into your spray bottle.
* Spray the Paste: Generously spray the baking soda paste inside the oven with the vinegar. You’ll see it start to fizz and bubble – that’s the chemical reaction breaking down the grease.
* Let it Fizz: Let the vinegar sit for a few minutes to work its magic.
7. Wiping Away the Grime: The Final Scrub
* Wipe it Down: Using a damp sponge or rag, start wiping away the baking soda paste and loosened grime. You may need to rinse your sponge or rag frequently as it gets dirty.
* Scrub Stubborn Spots: For any stubborn spots that remain, use a scrub brush or plastic scraper to gently scrub them away.
* Rinse Thoroughly: Once you’ve removed all the paste and grime, rinse the oven thoroughly with clean water to remove any residue.
8. Final Touches: Sparkle and Shine
* Dry the Oven: Use clean rags or paper towels to dry the interior of the oven completely.
* Reassemble: Put the clean oven racks back into the oven.
* Vinegar Wipe Down (Optional): For an extra shine, you can wipe down the interior of the oven with a clean rag dampened with white vinegar.
* Baking Soda Odor Neutralizer (Optional): Place a small bowl of baking soda inside the oven overnight to absorb any lingering odors.
9. Test Run: Burn Off Residue
* Turn on the Oven: Turn on your oven to a low temperature (around 300°F or 150°C) for about 15-20 minutes. This will help burn off any remaining residue and ensure that your oven is completely clean and ready to use.
* Ventilate: Open a window or turn on your kitchen exhaust fan to ventilate the area during this process.
10. Enjoy Your Clean Oven!
* Admire Your Work: Step back and admire your sparkling clean oven! You did it!
* Regular Maintenance: To keep your oven clean, try to wipe up spills as soon as they happen and do a quick cleaning every few months.
Troubleshooting: Tackling the Tough Stuff
Sometimes, even with the best efforts, you might encounter some particularly stubborn grease or baked-on food. Here are a few tips for dealing with those tough spots:
* Reapply the Paste: If a spot is particularly stubborn, reapply the baking soda paste and let it sit for a longer period of time.
* Vinegar Soak: Soak a rag in white vinegar and place it over the stubborn spot for a few hours to help loosen the grime.
* Baking Soda and Salt Scrub: For extra scrubbing power, mix baking soda with a little bit of salt to create a more abrasive scrub.
* Commercial Oven Cleaner (as a last resort): If all else fails, you can use a commercial oven cleaner, but be sure to follow the instructions carefully and wear appropriate safety gear.
Cleaning the Oven Door Glass: See-Through Sparkle
The oven door glass can often be the dirtiest part of the oven. Here’s how to get it sparkling clean:
* Baking Soda Paste: Apply the same baking soda paste we used for the inside of the oven to the oven door glass.
* Let it Sit: Let the paste sit for at least 30 minutes.
* Wipe and Scrub: Wipe away the paste with a damp sponge or rag, scrubbing any stubborn spots.
* Vinegar Spray: Spray the glass with white vinegar and wipe clean.
* Glass Cleaner: For an extra shine, you can finish by spraying the glass with a commercial glass cleaner.
Preventative Measures: Keeping it Clean Longer
* Oven Liners: Consider using oven liners to catch spills and prevent them from baking onto the bottom of the oven.
* Wipe Up Spills Immediately: The easiest way to keep your oven clean is to wipe up spills as soon as they happen.
* Regular Quick Cleans: Do a quick cleaning of

Conclusion
So, there you have it! Growing your own sweet potatoes from slips is not only surprisingly easy, but it’s also incredibly rewarding. Imagine the satisfaction of harvesting a bounty of vibrant, delicious sweet potatoes that you nurtured from just a single store-bought tuber. This DIY sweet potato growing method is a game-changer for gardeners of all levels, offering a sustainable and cost-effective way to enjoy this nutritious root vegetable.
Why is this a must-try? Because it bypasses the need to purchase expensive seedlings, puts you in complete control of the growing process, and connects you to the earth in a truly meaningful way. Plus, it’s a fantastic project for families, teaching children about plant life cycles and the origins of their food.
But the fun doesn’t stop there! Feel free to experiment with different varieties of sweet potatoes. Try growing Beauregard for its classic orange flesh and sweetness, or perhaps venture into the world of Japanese sweet potatoes with their purple skin and creamy white interior. You can also adjust the growing environment to suit your specific climate. If you live in a cooler region, consider starting your slips indoors earlier in the season to give them a head start. For those in warmer climates, you might even be able to extend your growing season and enjoy multiple harvests.
Another exciting variation is to explore different growing mediums. While water works perfectly well for sprouting slips, you can also try using a well-draining potting mix. This can encourage stronger root development from the very beginning. Just be sure to keep the soil consistently moist but not waterlogged.
Ultimately, the best way to discover the magic of growing your own sweet potatoes is to simply dive in and give it a try. Don’t be afraid to experiment, learn from your mistakes, and adapt the method to your own unique circumstances. We are confident that you’ll be amazed by the results.
We wholeheartedly encourage you to embark on this sweet potato growing adventure. Once you’ve harvested your first crop, we’d love to hear about your experience! Share your photos, tips, and stories with us in the comments below. Let’s create a community of sweet potato enthusiasts and inspire others to embrace the joy of homegrown goodness. Happy growing!
Frequently Asked Questions (FAQ)
What exactly are sweet potato slips?
Sweet potato slips are the sprouts that grow out of a sweet potato. These sprouts are essentially baby sweet potato plants that can be detached from the mother potato and planted to grow into full-sized sweet potato vines and, eventually, more sweet potatoes. They are the vegetative propagation method for sweet potatoes, allowing you to clone the parent plant.
How long does it take to grow sweet potato slips?
Generally, it takes about 4-8 weeks for sweet potato slips to develop to a size suitable for planting. The exact timeframe depends on factors such as temperature, humidity, and the variety of sweet potato. Warmer temperatures and higher humidity will encourage faster growth. You’ll know they’re ready when the slips are about 6-8 inches long and have a good set of roots.
Can I use any sweet potato from the grocery store?
Yes, you can typically use sweet potatoes from the grocery store to grow slips. However, it’s best to choose organic sweet potatoes if possible. Non-organic sweet potatoes may have been treated with sprout inhibitors, which can prevent them from producing slips. Look for sweet potatoes that are firm, free from blemishes, and haven’t started to sprout on their own.
How often should I change the water when growing slips?
It’s recommended to change the water every 2-3 days, or whenever it starts to look cloudy. Fresh water helps prevent the growth of bacteria and fungi that can harm the slips. When changing the water, be careful not to damage the roots.
How do I know when the slips are ready to be planted?
The slips are ready to be planted when they are about 6-8 inches long and have developed a good root system. The roots should be at least an inch or two long. Gently detach the slips from the sweet potato, being careful not to damage the roots.
What kind of soil is best for growing sweet potatoes?
Sweet potatoes prefer well-drained, sandy loam soil. They don’t thrive in heavy clay soil, as it can restrict root growth and lead to misshapen tubers. If you have clay soil, amend it with plenty of organic matter, such as compost or well-rotted manure, to improve drainage.
How much sun do sweet potatoes need?
Sweet potatoes need at least 6-8 hours of direct sunlight per day to thrive. Choose a planting location that receives plenty of sunlight throughout the growing season.
How often should I water sweet potatoes?
Water sweet potatoes regularly, especially during dry periods. Aim to keep the soil consistently moist but not waterlogged. Once the plants are established, they are relatively drought-tolerant, but regular watering will promote better tuber development.
When is the best time to harvest sweet potatoes?
Sweet potatoes are typically harvested in the fall, before the first frost. The foliage will start to turn yellow and die back, indicating that the tubers are mature. Use a garden fork to carefully dig up the sweet potatoes, being careful not to damage them.
How do I cure sweet potatoes after harvesting?
Curing sweet potatoes is essential for developing their sweetness and improving their storage life. After harvesting, gently brush off any excess soil and place the sweet potatoes in a warm, humid place (80-85°F and 85-90% humidity) for 7-10 days. This allows the skins to harden and any minor cuts or bruises to heal. After curing, store the sweet potatoes in a cool, dry, and well-ventilated place (55-60°F) for several months.
Can I grow sweet potatoes in containers?
Yes, you can grow sweet potatoes in containers, but you’ll need a large container (at least 20 gallons) to accommodate their extensive root system. Choose a container with good drainage and fill it with well-draining potting mix. Be sure to provide plenty of sunlight and water regularly.
Are there any common pests or diseases that affect sweet potatoes?
Some common pests that can affect sweet potatoes include sweet potato weevils, flea beetles, and wireworms. Diseases include stem rot, scurf, and black rot. Practicing crop rotation, using disease-free slips, and controlling weeds can help prevent these problems.
Can I eat the sweet potato leaves?
Yes, sweet potato leaves are edible and nutritious! They can be cooked and eaten like spinach or other leafy greens. Harvest young, tender leaves for the best flavor.
What are some good companion plants for sweet potatoes?
Good companion plants for sweet potatoes include beans, peas, and thyme. These plants can help deter pests and improve soil health. Avoid planting sweet potatoes near fennel, as it can inhibit their growth.
How do I store sweet potatoes long-term?
After curing, store sweet potatoes in a cool, dry, and well-ventilated place (55-60°F). Avoid storing them in the refrigerator, as this can cause them to develop a hard core and lose their flavor. Properly cured and stored sweet potatoes can last for several months.

Leave a Comment