

Sweet Melon Harvest dreams dancing in your head? I know the feeling! There’s nothing quite like biting into a juicy, sun-ripened melon you’ve grown yourself. But let’s be honest, getting from tiny seed to that perfect, sugary bite can feel like a real challenge. That’s where a few clever tricks come in handy.
For centuries, gardeners have been perfecting the art of melon cultivation. From ancient Egyptians who revered watermelons as symbols of abundance to the Renaissance gardeners of Europe who meticulously cultivated cantaloupes in orangeries, the quest for the perfect melon has a rich history. These fruits were once considered a luxury, a testament to skill and dedication.
Today, we might not be growing melons for royalty, but the satisfaction of a successful sweet melon harvest is still incredibly rewarding. This DIY guide is packed with simple, effective hacks to help you maximize your yield, protect your precious melons from pests and diseases, and ultimately, enjoy the sweetest, most flavorful harvest imaginable. I’m going to share my favorite tips and tricks that I’ve learned over the years, so you can avoid common pitfalls and enjoy a truly bountiful melon season. Let’s get growing!
DIY Sweet Melon Trellis: Maximize Your Harvest and Garden Space!
Hey fellow gardeners! Are you tired of your precious sweet melons sprawling all over your garden, taking up valuable space and potentially rotting on the ground? I know I was! That’s why I developed this super easy and effective DIY melon trellis. It’s a game-changer for maximizing your harvest, keeping your melons healthy, and adding a touch of vertical beauty to your garden. Let’s get started!
Why Trellis Your Melons?
Before we dive into the how-to, let’s quickly cover why trellising melons is such a fantastic idea:
* Space Saving: Melons can be space hogs! Trellising allows them to grow vertically, freeing up ground space for other plants.
* Improved Air Circulation: Lifting the melons off the ground promotes better air circulation, reducing the risk of fungal diseases like powdery mildew.
* Sunlight Exposure: Trellised melons receive more sunlight, leading to sweeter and more flavorful fruit.
* Pest Control: It’s easier to spot and manage pests when your melons are off the ground.
* Easier Harvesting: No more bending and searching through tangled vines! Harvesting becomes a breeze.
* Aesthetic Appeal: Let’s be honest, a melon-covered trellis looks amazing!
Materials You’ll Need
Okay, let’s gather our supplies. This project is relatively inexpensive and uses readily available materials. Here’s what you’ll need:
* Wooden Stakes (4): I recommend using sturdy wooden stakes that are at least 6 feet long. Cedar or redwood are great choices for their durability and resistance to rot.
* Heavy-Duty Trellis Netting: Choose a netting with a mesh size that’s large enough to allow the melon vines to easily grab onto it. I prefer a netting made of nylon or polypropylene for its strength and weather resistance. Make sure it’s wide and long enough to cover the area between your stakes.
* Heavy-Duty Garden Twine or Zip Ties: You’ll need this to secure the netting to the stakes. Garden twine is more eco-friendly, but zip ties are quicker and easier to use.
* Measuring Tape: For accurate measurements when placing your stakes.
* Hammer or Mallet: To drive the stakes into the ground.
* Scissors or Utility Knife: To cut the netting and twine or zip ties.
* Fabric Scraps or Old T-shirts: To create slings for supporting the melons (more on this later!).
* Optional: Wood Screws and Drill: For extra secure stake connections.
Building Your Melon Trellis: Step-by-Step
Alright, let’s get our hands dirty and build this trellis!
1. Planning Your Trellis Location
Before you start hammering, take a moment to plan the location of your trellis. Consider these factors:
* Sunlight: Melons need at least 6-8 hours of direct sunlight per day. Choose a spot in your garden that receives plenty of sunshine.
* Soil: Melons prefer well-drained soil that is rich in organic matter. Amend your soil with compost or aged manure if needed.
* Space: Make sure you have enough space for the trellis and the melon vines to grow. Allow at least 2-3 feet between the trellis and other plants.
* Water Source: Ensure easy access to water for irrigation.
2. Installing the Stakes
This is the foundation of your trellis, so make sure the stakes are securely in place.
1. Measure and Mark: Decide on the width of your trellis. I usually go for about 4-5 feet wide. Mark the locations for your stakes in a rectangular shape, ensuring they are evenly spaced.
2. Drive the Stakes: Using a hammer or mallet, drive the stakes into the ground at each marked location. Aim for a depth of at least 1-2 feet to provide stability. Make sure the stakes are straight and sturdy.
3. Check for Stability: Give each stake a good wiggle to ensure it’s firmly planted. If any stakes are loose, drive them in further or consider using longer stakes.
4. Optional: Reinforce the Stakes: For extra stability, especially if you live in a windy area, you can use wood screws to connect the stakes to each other at the top. This will create a more rigid frame.
3. Attaching the Trellis Netting
Now it’s time to create the climbing surface for your melons.
1. Unroll the Netting: Carefully unroll the trellis netting and lay it out on the ground.
2. Attach to the Stakes: Starting at one corner, attach the netting to the stake using garden twine or zip ties. Make sure the netting is taut and secure.
3. Continue Attaching: Work your way around the perimeter of the trellis, attaching the netting to each stake. Pull the netting tight as you go to create a smooth and even climbing surface.
4. Secure the Netting: Use plenty of twine or zip ties to ensure the netting is securely attached to the stakes. Pay special attention to the corners, as these are the areas that will experience the most stress.
5. Trim Excess Netting: Once the netting is securely attached, trim off any excess netting with scissors or a utility knife.
4. Planting Your Melon Seedlings or Seeds
Now for the fun part – planting your melons!
1. Prepare the Soil: Make sure the soil around the base of the trellis is loose and well-drained. Amend with compost or aged manure if needed.
2. Plant Seedlings or Seeds: Plant your melon seedlings or seeds according to the instructions on the seed packet or plant label. Space them appropriately, usually about 12-18 inches apart.
3. Water Thoroughly: Water the newly planted seedlings or seeds thoroughly to help them establish.
4. Mulch: Apply a layer of mulch around the base of the plants to help retain moisture and suppress weeds.
5. Training Your Melon Vines
As your melon vines grow, you’ll need to train them to climb the trellis.
1. Guide the Vines: Gently guide the melon vines towards the trellis netting.
2. Secure the Vines: Use garden twine or zip ties to loosely secure the vines to the netting. Be careful not to tie them too tightly, as this can damage the vines.
3. Repeat as Needed: Continue training the vines as they grow, guiding them up the trellis and securing them as needed.
4. Pruning: You can prune the melon vines to encourage branching and fruit production. Remove any dead or diseased leaves or stems.
Supporting Your Growing Melons
As your melons grow larger, they’ll need extra support to prevent them from breaking off the vine. This is where the fabric slings come in!
Creating Melon Slings
1. Cut Fabric Strips: Cut fabric scraps or old t-shirts into strips that are wide enough to support the melons.
2. Create Slings: Sew or tie the fabric strips into slings that are large enough to cradle the melons.
3. Attach to Trellis: Attach the slings to the trellis netting using garden twine or zip ties. Position the slings underneath the melons to provide support.
Supporting the Melons
1. Place Melons in Slings: Gently place the melons into the slings, ensuring they are securely supported.
2. Adjust as Needed: As the melons grow, you may need to adjust the slings to provide more support.
3. Monitor Regularly: Regularly monitor the melons and the slings to ensure they are in good condition.
Maintenance and Care
Once your trellis is built and your melons are growing, here are a few tips for maintaining your garden:
* Watering: Water your melons regularly, especially during dry periods. Aim for deep watering to encourage strong root growth.
* Fertilizing: Fertilize your melons every few weeks with a balanced fertilizer.
* Pest Control: Keep an eye out for pests like aphids, squash bugs, and vine borers. Take action to control them as needed.
* Disease Prevention: Practice good garden hygiene to prevent diseases. Remove any dead or diseased leaves or stems. Ensure good air circulation around the plants.
* Weeding: Keep the area around the trellis free of weeds.
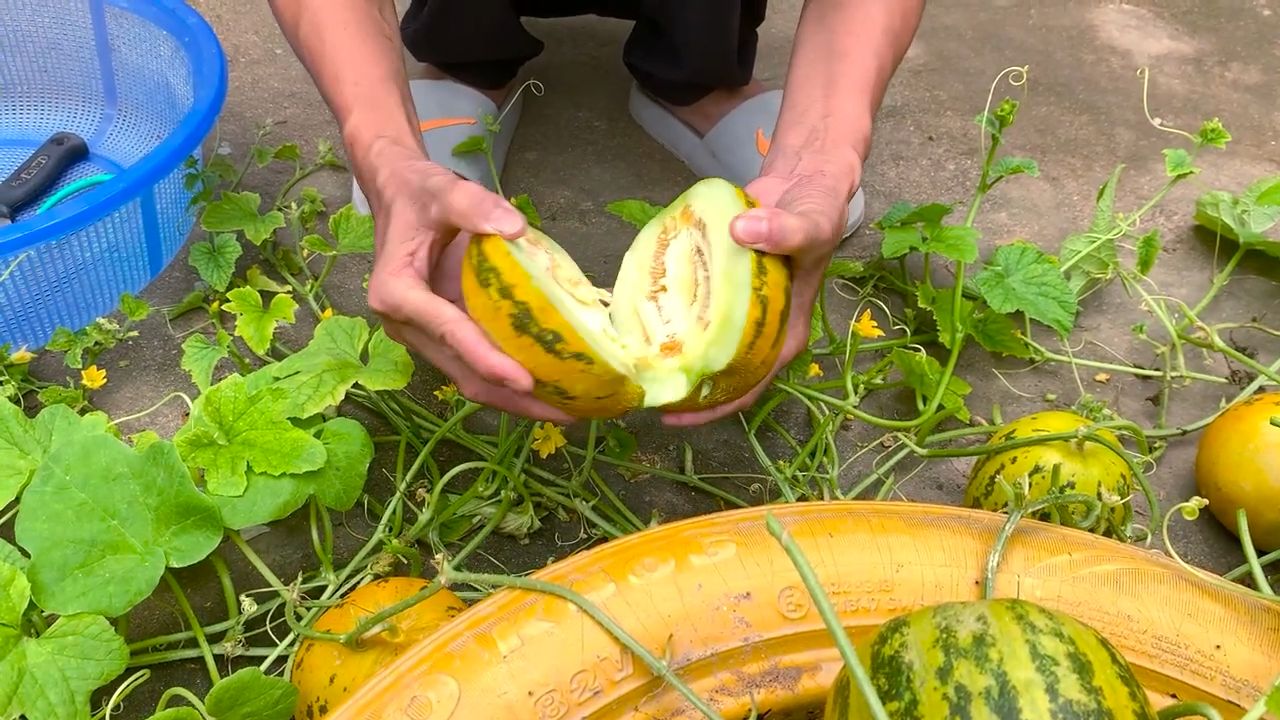
Harvesting Your Sweet Melons
The moment we’ve all been waiting for! Knowing when to harvest your melons is key to enjoying their sweet, juicy flavor.
* Check the Tendril: The tendril closest to the melon stem will turn brown and dry when the melon is ripe.
* Thump Test: Give the melon a gentle thump. A ripe melon will sound hollow.
* Smell Test: A ripe melon will have a sweet, fragrant aroma.
*
Conclusion
So, there you have it! Mastering the art of preserving your sweet melon harvest using our simple, yet effective DIY trick is not just about saving money; it’s about extending the joy of summer’s bounty well into the cooler months. Imagine the delight of enjoying a refreshing melon smoothie in the dead of winter, or adding a burst of summery sweetness to your holiday desserts. This method allows you to do just that, ensuring that none of your precious harvest goes to waste.
But why is this DIY trick a must-try? Beyond the obvious benefits of cost savings and reduced food waste, it offers unparalleled control over the final product. Store-bought preserved fruits often contain excessive amounts of sugar, artificial preservatives, and other unwanted additives. By preserving your own sweet melon, you can tailor the sweetness to your liking, using natural sweeteners like honey or maple syrup if desired, and avoid any artificial ingredients altogether. This is especially important for those with dietary restrictions or a preference for natural foods.
Furthermore, this DIY method is incredibly versatile. While we’ve focused on preserving sweet melon, the same principles can be applied to other fruits as well. Think about using this technique to preserve berries, peaches, plums, or even a combination of fruits for a delicious mixed fruit compote. The possibilities are truly endless!
Don’t be afraid to experiment with variations! Consider adding spices like cinnamon, ginger, or cardamom to your preserved melon for a warm and comforting flavor. A splash of lemon or lime juice can also enhance the natural sweetness and add a touch of acidity. For a more sophisticated flavor profile, try infusing your preserving liquid with herbs like mint or basil.
We understand that trying a new DIY project can sometimes feel daunting, but we assure you that this method is incredibly straightforward and requires minimal equipment. The satisfaction of preserving your own sweet melon harvest and enjoying its deliciousness throughout the year is well worth the effort.
So, what are you waiting for? Gather your ripe melons, follow our simple steps, and embark on a journey of culinary creativity. We are confident that you will be amazed by the results.
We wholeheartedly encourage you to try this DIY trick and share your experience with us! Let us know what variations you tried, what worked best for you, and any tips or tricks you discovered along the way. Your feedback is invaluable and helps us to improve our recipes and techniques. Share your photos and stories on our social media channels using #SweetMelonPreserve and let’s celebrate the joy of preserving together! We can’t wait to see your creations and hear about your sweet melon adventures!
Frequently Asked Questions (FAQ)
1. What types of sweet melon are best suited for this preservation method?
Almost any type of sweet melon can be preserved using this method, but some varieties tend to hold their texture better than others. Cantaloupe, honeydew, and watermelon are all excellent choices. Crenshaw melons and Galia melons also work well. Softer melons, like some varieties of muskmelon, may become slightly mushier during the preservation process, but they will still retain their flavor and can be used in smoothies or purees. The key is to choose melons that are ripe but still firm to the touch. Overripe melons will be too soft and may not hold their shape well during preservation.
2. How long will the preserved sweet melon last?
When properly stored in an airtight container in the refrigerator, preserved sweet melon can last for up to two weeks. For longer storage, freezing is recommended. Frozen preserved melon can last for up to six months without significant loss of quality. Be sure to label your containers with the date of preservation to keep track of their freshness. When thawing frozen melon, it’s best to do so gradually in the refrigerator to maintain its texture.
3. Can I use a different sweetener instead of sugar?
Absolutely! One of the great advantages of preserving your own sweet melon is the ability to customize the sweetness to your liking. You can substitute sugar with natural sweeteners like honey, maple syrup, agave nectar, or even stevia. Keep in mind that different sweeteners have different levels of sweetness, so you may need to adjust the amount accordingly. Honey and maple syrup will also impart a slightly different flavor to the preserved melon, which can be a delicious addition. If using stevia, be sure to use a product that is specifically designed for cooking and baking, as some stevia products can have a bitter aftertaste.
4. What if I don’t have airtight containers?
While airtight containers are ideal for preserving sweet melon, you can still use other types of containers if necessary. Glass jars with tight-fitting lids are a good alternative. Plastic containers with secure lids can also be used, but be sure to choose containers that are food-grade and BPA-free. If you don’t have any of these options, you can use resealable plastic bags, but be sure to remove as much air as possible before sealing them. Keep in mind that containers that are not completely airtight may reduce the shelf life of the preserved melon.
5. Can I add other fruits or vegetables to the preserved sweet melon?
Yes, you can definitely add other fruits or vegetables to the preserved sweet melon to create a more complex flavor profile. Berries, such as strawberries, blueberries, or raspberries, are a great addition. You can also add other fruits like peaches, plums, or nectarines. For a more savory twist, consider adding a small amount of ginger or mint. When adding other fruits or vegetables, be sure to choose ones that are ripe but still firm.
6. My preserved sweet melon seems a bit watery. Is this normal?
It is normal for preserved sweet melon to release some liquid during the preservation process. This is because the sugar draws out moisture from the melon. If your preserved melon seems excessively watery, you can drain off some of the excess liquid before serving. You can also add a small amount of cornstarch or tapioca starch to the preserving liquid to help thicken it.
7. Can I use this method to preserve other types of fruit?
Yes, this method can be adapted to preserve other types of fruit. The key is to adjust the amount of sugar and lemon juice depending on the sweetness and acidity of the fruit. For example, berries may require less sugar than melons, while tart fruits like rhubarb may require more. Be sure to research the specific preservation requirements for each type of fruit before you begin.
8. Is it necessary to use lemon juice in the preservation process?
Lemon juice plays an important role in preserving sweet melon. It helps to prevent browning, adds a touch of acidity to balance the sweetness, and acts as a natural preservative. If you don’t have lemon juice, you can substitute it with lime juice or a small amount of vinegar. However, lemon juice is the preferred option for its flavor and preservative properties.
9. What are some creative ways to use preserved sweet melon?
Preserved sweet melon can be used in a variety of creative ways. It can be enjoyed as a simple snack or dessert, added to smoothies or yogurt, used as a topping for ice cream or pancakes, or incorporated into baked goods like muffins or cakes. You can also use it to make a delicious melon salsa or chutney. Get creative and experiment with different ways to incorporate preserved sweet melon into your favorite recipes!
10. What if my sweet melon isn’t very sweet to begin with?
If your sweet melon isn’t very sweet to begin with, you may need to add a bit more sugar to the preserving liquid. Taste the melon before you begin the preservation process and adjust the amount of sugar accordingly. You can also add a small amount of honey or maple syrup to enhance the sweetness. Another option is to choose a different variety of sweet melon that is known for its sweetness.
Leave a Comment