

Small space carrot farming might sound like an impossible dream, especially if you’re living in an apartment or have a tiny backyard. But guess what? It’s totally achievable, and I’m here to show you how! For centuries, carrots have been a staple in diets worldwide, from ancient Rome where they were initially purple and white, to the vibrant orange varieties we know and love today, cultivated by the Dutch in the 17th century.
Imagine plucking fresh, sweet carrots straight from your own little garden patch, even if that patch is just a balcony container. No more bland, store-bought carrots! This DIY guide is packed with simple, effective tricks and hacks to help you maximize your yield and enjoy the satisfaction of growing your own food, regardless of your space constraints.
Why is small space carrot farming so important now? Well, more and more people are embracing urban gardening for its sustainability, health benefits, and the sheer joy of connecting with nature. Plus, knowing exactly where your food comes from is incredibly empowering. So, let’s dive in and transform even the tiniest corner into a thriving carrot haven!
DIY Carrot Farming in Small Spaces: A Bumper Crop Awaits!
Hey there, fellow gardening enthusiasts! Dreaming of fresh, homegrown carrots but short on space? Don’t worry, I’ve got you covered. You absolutely *can* grow delicious carrots even if you only have a balcony, patio, or a tiny corner of your yard. This guide will walk you through everything you need to know to cultivate a thriving carrot patch in a small space. Let’s get digging!
Choosing the Right Carrot Variety
Not all carrots are created equal, especially when it comes to container gardening. Longer varieties need deeper containers, which might not be ideal for your limited space. Here’s what I recommend:
* Short and Sweet: Look for varieties like ‘Thumbelina,’ ‘Parisian,’ or ‘Little Finger.’ These are round or short and stubby, perfect for shallow containers.
* Half-Long Options: ‘Nantes’ or ‘Danvers Half Long’ are good choices if you have slightly deeper containers. They offer a good balance between size and flavor.
* Consider Heirloom Varieties: Explore heirloom options for unique colors and flavors. ‘Rainbow’ blends are fun and add visual appeal to your garden.
Gathering Your Supplies
Before we get our hands dirty, let’s make sure we have everything we need. This will save you time and frustration later on.
* Container: Choose a container that’s at least 12 inches deep for shorter varieties and 18 inches deep for half-long varieties. Make sure it has drainage holes! A wide container is better than a narrow one, allowing more carrots to grow.
* Potting Mix: This is crucial! Don’t use garden soil; it’s too heavy and compacts easily. Opt for a high-quality, well-draining potting mix. I like to use a mix specifically formulated for vegetables.
* Carrot Seeds: Select your chosen carrot variety. Buy fresh seeds from a reputable source for the best germination rates.
* Watering Can or Hose: Gentle watering is key, especially when the seeds are germinating.
* Fertilizer: A balanced, slow-release fertilizer or liquid fertilizer will provide essential nutrients.
* Optional: Horticultural sand or vermiculite to improve drainage.
* Optional: Seed starting tray if you prefer to start your seeds indoors.
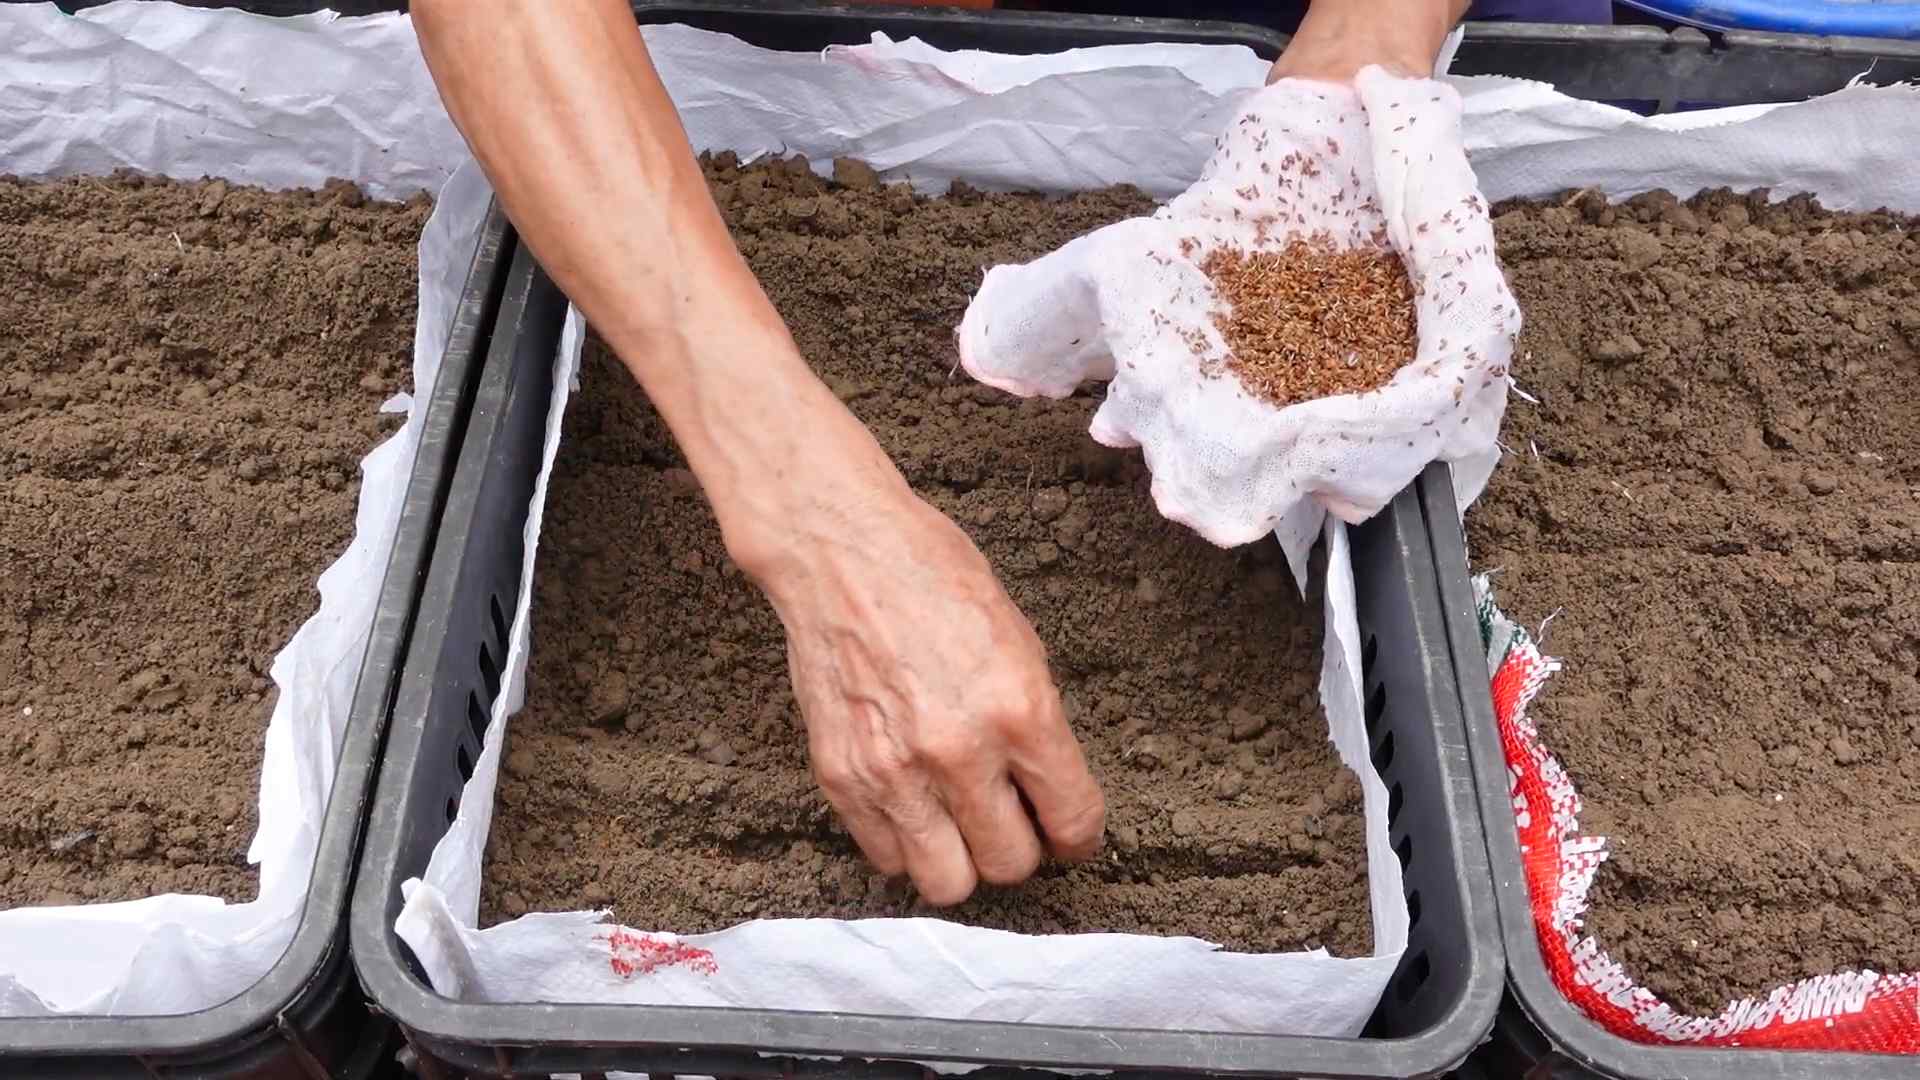
Planting Your Carrot Seeds
Now for the fun part! Getting those tiny seeds into the soil is the first step towards a bountiful harvest.
1. Prepare the Container: Fill your container with potting mix, leaving about an inch or two of space at the top. Gently pat down the soil to remove any large air pockets.
2. Sow the Seeds: Carrot seeds are tiny, so it’s easy to over-sow. Sprinkle the seeds thinly across the surface of the soil. Aim for about 1/2 inch spacing between seeds. If you are using a seed starting tray, plant 2-3 seeds per cell.
3. Cover the Seeds: Lightly cover the seeds with a thin layer (about 1/4 inch) of potting mix or horticultural sand. This helps retain moisture and prevents the seeds from drying out.
4. Water Gently: Use a watering can with a gentle rose or a hose with a spray nozzle to thoroughly moisten the soil. Avoid blasting the seeds with water, as this can dislodge them.
5. Label and Place: Label your container with the carrot variety and planting date. Place the container in a sunny location. Carrots need at least 6-8 hours of sunlight per day.
6. Maintain Moisture: Keep the soil consistently moist but not waterlogged. Check the soil moisture daily and water when the top inch feels dry.
Thinning Your Carrot Seedlings
This is a crucial step that many beginners overlook. Thinning ensures that your carrots have enough space to develop properly.
1. Wait for True Leaves: Once your seedlings have emerged and developed their first set of “true leaves” (the leaves that look like miniature carrot tops), it’s time to thin. This usually happens about 2-3 weeks after germination.
2. Identify the Strongest Seedlings: Look for the healthiest and most vigorous seedlings in each area.
3. Thin Carefully: Using small scissors or your fingers, gently snip or pull out the weaker seedlings, leaving about 1-2 inches between the remaining plants. Be careful not to disturb the roots of the plants you want to keep.
4. Water After Thinning: Water the container gently after thinning to help settle the soil and reduce transplant shock.
Caring for Your Growing Carrots
Consistent care is essential for healthy carrot growth. Here’s what you need to do:
1. Watering: Water regularly, keeping the soil consistently moist but not soggy. Avoid letting the soil dry out completely, especially during hot weather. Water deeply and less frequently, rather than shallowly and often.
2. Fertilizing: Feed your carrots with a balanced, slow-release fertilizer or a liquid fertilizer every 2-3 weeks. Follow the instructions on the fertilizer package. Avoid over-fertilizing, as this can lead to excessive foliage growth at the expense of root development.
3. Weeding: Keep the container free of weeds, as they can compete with your carrots for nutrients and water. Gently pull out any weeds that appear.
4. Sunlight: Ensure your carrots receive at least 6-8 hours of sunlight per day. If you live in a very hot climate, provide some afternoon shade to prevent the soil from overheating.
5. Pest Control: Keep an eye out for common carrot pests like carrot rust flies or aphids. If you notice any pests, treat them with an appropriate organic insecticide or insecticidal soap.
6. Crop Rotation (If Possible): If you’re planting carrots in the same container year after year, consider rotating your crops to prevent soilborne diseases. Plant a different type of vegetable in the container for a season or two before planting carrots again.
Troubleshooting Common Problems
Even with the best care, you might encounter some challenges. Here’s how to address them:
* Poor Germination: This could be due to old seeds, dry soil, or soil that’s too cold. Make sure you’re using fresh seeds, keeping the soil consistently moist, and planting when the soil temperature is above 50°F (10°C).
* Forked or Twisted Carrots: This is often caused by rocky or compacted soil. Ensure your potting mix is loose and well-draining. Remove any rocks or debris from the soil before planting.
* Small Carrots: This could be due to overcrowding, lack of sunlight, or insufficient nutrients. Thin your seedlings properly, provide adequate sunlight, and fertilize regularly.
* Pests: Regularly inspect your plants for pests and take action promptly. Use organic pest control methods whenever possible.
* Bolting (Premature Flowering): This can happen if carrots are exposed to extreme temperature fluctuations or stress. Try to maintain consistent growing conditions and avoid letting the soil dry out.
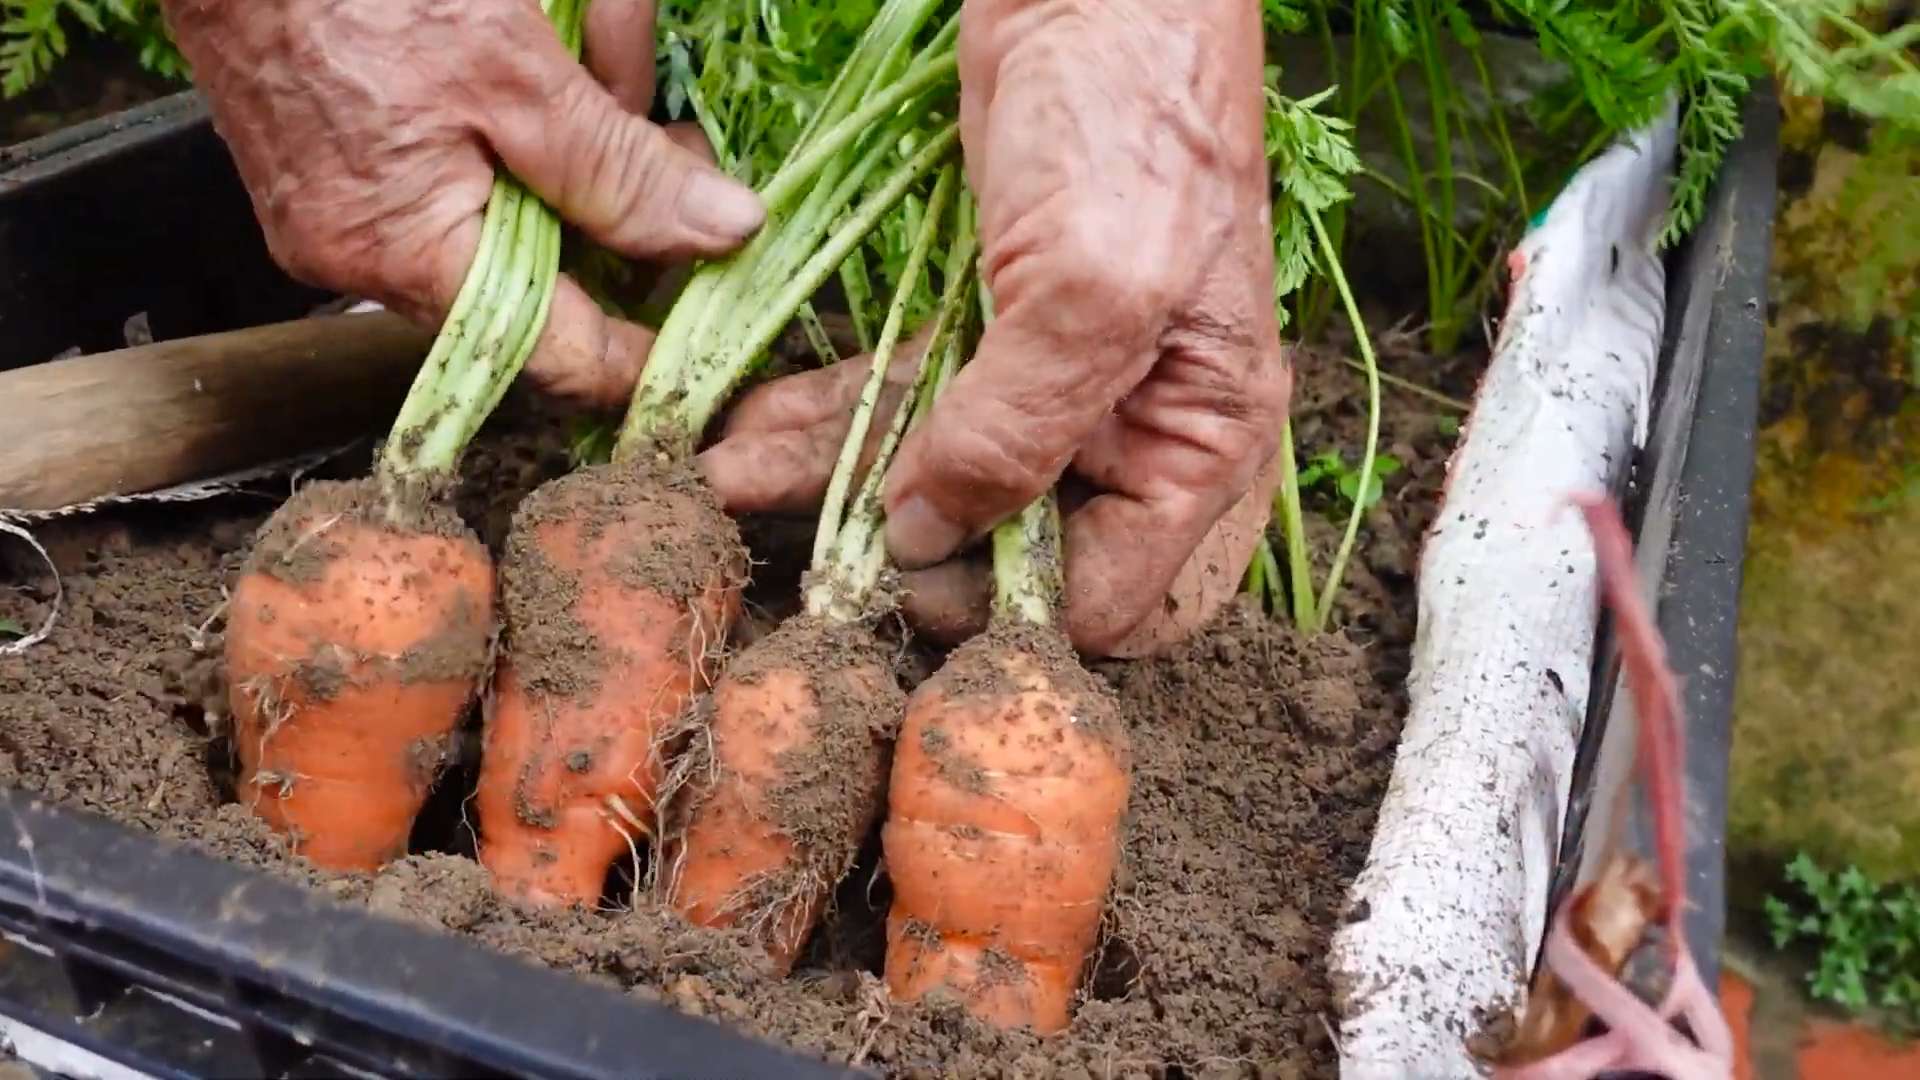
Harvesting Your Carrots
The moment you’ve been waiting for! Harvesting your homegrown carrots is incredibly rewarding.
1. Check Maturity: Carrots are typically ready to harvest 60-80 days after planting, depending on the variety. Check the seed packet for specific maturity dates.
2. Look for Size: Gently brush away some soil around the base of the carrot to check its size. If it’s the size you desire, it’s ready to harvest.
3. Loosen the Soil: Before pulling the carrots, water the soil thoroughly to loosen it. This will make it easier to pull the carrots without breaking them.
4. Pull Gently: Grasp the carrot tops firmly near the base and gently pull straight up. If the carrot is difficult to pull, use a garden fork to carefully loosen the soil around it.
5. Wash and Enjoy: Wash the harvested carrots thoroughly to remove any soil. Enjoy them fresh from the garden or store them in the refrigerator for later use.
Extending Your Carrot Harvest
Want to enjoy fresh carrots for longer? Here are a few tips:
* Succession Planting: Plant a new batch of carrot seeds every 2-3 weeks to ensure a continuous harvest throughout the growing season.
* Cold Frames or Greenhouses: If you live in a colder climate, use a cold frame or greenhouse to extend the growing season.
* Overwintering: In mild climates, you can overwinter carrots by covering them with a thick layer of mulch. This will protect them from frost and allow you to harvest them throughout the winter.
Final Thoughts
Growing carrots in small spaces is a fun and rewarding experience. With a little planning and care, you can enjoy a delicious harvest of homegrown carrots, even if you only have a limited amount of space. So, grab your seeds, get your hands dirty, and start growing! Happy gardening
Conclusion
So, there you have it! Transforming your limited space into a thriving mini-carrot farm is not only achievable but surprisingly rewarding. We’ve walked you through the simple steps to cultivate delicious, homegrown carrots, even if you only have a balcony, patio, or a tiny corner of your yard. This DIY trick for small space carrot farming is a game-changer for urban gardeners and anyone who dreams of fresh, flavorful produce right at their fingertips.
Why is this a must-try? Beyond the sheer satisfaction of harvesting your own food, consider the benefits: fresher, tastier carrots than you’ll find in most supermarkets, control over the growing process (no mystery pesticides!), and a significant reduction in your grocery bill. Plus, it’s a fantastic way to connect with nature and learn about the miracle of growth, even in the most confined environments.
But don’t stop there! Experiment with different carrot varieties. Nantes carrots are a classic choice, but consider trying round Parisian carrots for containers or colorful rainbow carrots for a visual treat. You can also companion plant your carrots with herbs like rosemary or sage, which can help deter pests and enhance the flavor of your carrots. Another variation is to use different types of containers. While we focused on pots, consider using grow bags or even repurposed containers like old buckets or tubs. Just ensure they have adequate drainage.
We’ve armed you with the knowledge and the inspiration; now it’s time to get your hands dirty! We wholeheartedly encourage you to try this DIY trick for small space carrot farming. It’s easier than you think, and the rewards are immeasurable. Imagine the pride of serving a salad made with carrots you grew yourself, or the joy of sharing your harvest with friends and neighbors.
Don’t be afraid to experiment, adapt the techniques to your specific environment, and most importantly, have fun! Gardening should be a joyful experience, and even small successes can bring immense satisfaction.
Once you’ve embarked on your small space carrot farming adventure, we’d love to hear about your experience. Share your photos, tips, and challenges in the comments section below. Let’s build a community of urban gardeners, sharing our knowledge and inspiring each other to grow our own food, one carrot at a time. Your insights could be invaluable to someone just starting out, and together, we can make the world a greener, more sustainable place, one small garden at a time. So, grab your seeds, your soil, and your enthusiasm, and let’s get growing!
Frequently Asked Questions (FAQ)
What is the best type of container to use for small space carrot farming?
The ideal container should be at least 12 inches deep to accommodate the length of most carrot varieties. A wider container is also beneficial, allowing you to plant multiple carrots. Terracotta pots, plastic containers, grow bags, and even repurposed buckets or tubs can work well, as long as they have adequate drainage holes. Consider the material of the container as well. Terracotta pots dry out faster than plastic, so you may need to water more frequently. Grow bags offer excellent drainage and aeration, promoting healthy root growth.
How often should I water my carrots in containers?
The frequency of watering depends on several factors, including the type of container, the weather, and the type of soil you’re using. Generally, you should water your carrots when the top inch of soil feels dry to the touch. Avoid overwatering, as this can lead to root rot. A good rule of thumb is to water deeply but infrequently, allowing the soil to dry out slightly between waterings. During hot, dry weather, you may need to water daily. Check the soil moisture regularly to ensure your carrots are getting the right amount of water.
What type of soil is best for growing carrots in containers?
Carrots prefer loose, well-draining soil that is rich in organic matter. A sandy loam soil is ideal, as it allows the carrots to grow easily without encountering resistance. Avoid heavy clay soils, as they can become compacted and prevent the carrots from developing properly. You can improve the drainage of your soil by adding perlite or vermiculite. Incorporating compost or well-rotted manure will provide essential nutrients for healthy growth. A slightly acidic soil pH of 6.0 to 6.8 is optimal for carrot growth.
How much sunlight do carrots need?
Carrots need at least 6 hours of direct sunlight per day to thrive. If you live in a hot climate, providing some afternoon shade can help prevent the soil from drying out too quickly. If you don’t have a sunny spot, you can supplement with grow lights. Place the grow lights a few inches above the plants and adjust the height as the carrots grow. Rotate the containers regularly to ensure that all sides of the plants receive adequate sunlight.
What are some common pests and diseases that affect carrots, and how can I prevent them?
Common pests that affect carrots include carrot rust flies, aphids, and nematodes. Carrot rust flies lay their eggs near the base of the plants, and the larvae tunnel into the roots, causing damage. Aphids suck the sap from the leaves, weakening the plants. Nematodes are microscopic worms that live in the soil and feed on the roots. To prevent these pests, practice crop rotation, use row covers to protect the plants, and introduce beneficial insects like ladybugs and lacewings. Diseases that can affect carrots include leaf blight and root rot. To prevent these diseases, ensure good air circulation, avoid overwatering, and use disease-resistant varieties.
When should I harvest my carrots?
Carrots are typically ready to harvest 60-80 days after planting, depending on the variety. You can check the size of the carrots by gently pulling back the soil around the top of the root. Harvest when the carrots have reached the desired size and color. To harvest, gently loosen the soil around the carrot and pull it straight up. If the soil is dry, water it beforehand to make it easier to pull the carrots.
Can I grow carrots indoors year-round?
Yes, you can grow carrots indoors year-round if you provide them with adequate light, water, and nutrients. Use grow lights to supplement natural sunlight, and ensure the containers have good drainage. Monitor the soil moisture regularly and water when the top inch of soil feels dry. Fertilize the carrots with a balanced fertilizer every few weeks. Choose a compact carrot variety that is well-suited for container gardening.
What are some good companion plants for carrots?
Companion planting can help improve the growth and flavor of your carrots, as well as deter pests. Good companion plants for carrots include:
* **Onions and Garlic:** These plants repel carrot rust flies.
* **Rosemary and Sage:** These herbs also deter carrot rust flies and other pests.
* **Lettuce:** Lettuce provides shade for the carrot roots, helping to keep the soil cool and moist.
* **Radishes:** Radishes break up the soil, making it easier for the carrots to grow.
* **Marigolds:** Marigolds repel nematodes and other soil pests.
How can I improve the flavor of my homegrown carrots?
The flavor of your homegrown carrots can be influenced by several factors, including the variety, the soil, and the growing conditions. To improve the flavor of your carrots:
* **Choose a flavorful variety:** Some carrot varieties are known for their sweetness and flavor.
* **Ensure well-drained soil:** Carrots grown in heavy, compacted soil may not develop their full flavor.
* **Provide adequate sunlight:** Sunlight is essential for the development of sugars in the carrots.
* **Water regularly:** Consistent watering is important for maintaining the moisture content of the carrots.
* **Harvest at the right time:** Carrots that are harvested too early may not be as sweet or flavorful.
What if my carrots are forked or stunted?
Forked or stunted carrots are often caused by compacted soil or obstacles in the soil that prevent the roots from growing straight. To prevent this, ensure that your soil is loose, well-draining, and free of rocks or debris. You can also try growing shorter, rounder carrot varieties that are less susceptible to forking. Amending the soil with compost or well-rotted manure can also help improve its structure and fertility.

Leave a Comment