

Salt and vinegar cleaning: it’s not just for chips anymore! Are you tired of harsh chemicals and expensive cleaning products cluttering your cupboards? Do you yearn for a simpler, more natural way to keep your home sparkling? Well, you’re in luck! For generations, resourceful homemakers have turned to the humble pantry staples of salt and vinegar to tackle tough cleaning jobs. Think of it as a return to our roots, a time when ingenuity and resourcefulness reigned supreme.
From ancient civilizations using vinegar to preserve food to modern-day eco-conscious consumers seeking sustainable solutions, the power of salt and vinegar has stood the test of time. But why is salt and vinegar cleaning so effective? The acidity of vinegar cuts through grease and grime, while salt acts as a gentle abrasive, scrubbing away stubborn stains without damaging surfaces.
In this article, I’m going to share some amazing DIY cleaning tricks using these two powerhouse ingredients. You’ll discover how to banish hard water stains, revive dull copper, and even freshen up your laundry – all with ingredients you probably already have on hand. Get ready to ditch the chemicals and embrace a cleaner, greener, and more budget-friendly way to keep your home looking its best!

DIY Power Cleaner: Unleash the Cleaning Magic of Salt and Vinegar!
Hey there, fellow DIY enthusiasts! Are you tired of harsh chemicals and expensive cleaning products? I’ve got a fantastic solution for you: a powerful, all-natural cleaner using just two ingredients you probably already have in your pantry – salt and vinegar! Trust me, this dynamic duo can tackle everything from stubborn stains to grimy surfaces. Let’s dive in and learn how to create this cleaning powerhouse!
What Makes Salt and Vinegar So Effective?
Before we get started, let’s understand why this combination works so well. Vinegar, specifically white distilled vinegar, is a mild acid. This acidity helps to dissolve mineral deposits, grease, and grime. Salt, on the other hand, acts as a gentle abrasive, helping to scrub away stubborn dirt and stains without scratching most surfaces. Together, they create a synergistic effect, boosting each other’s cleaning power.
Gathering Your Supplies
Okay, let’s get organized! Here’s what you’ll need to create your salt and vinegar cleaning solutions:
* White Distilled Vinegar: This is your primary cleaning agent. Make sure it’s white distilled vinegar, as other types may contain dyes or additives that could stain surfaces.
* Table Salt or Coarse Salt: Both work, but coarse salt provides a bit more scrubbing power.
* Spray Bottles: You’ll need these to apply your cleaning solutions. I recommend having a few on hand for different purposes.
* Cleaning Cloths or Sponges: Microfiber cloths are my go-to for most cleaning tasks.
* Scrub Brush: For tougher stains and grime.
* Gloves (Optional): If you have sensitive skin, gloves are a good idea.
* Measuring Cups and Spoons: For accurate mixing.
* Small Bowl: For mixing pastes.
* Kettle or Microwave (Optional): For heating vinegar (more on this later).
Creating Your Salt and Vinegar Cleaning Solutions
Now for the fun part! We’ll create a few different solutions to tackle various cleaning tasks.
1. All-Purpose Salt and Vinegar Spray
This is your everyday cleaner for countertops, sinks, and other surfaces.
Step 1: Combine Vinegar and Water. In a spray bottle, mix equal parts white distilled vinegar and water. For example, 1 cup of vinegar and 1 cup of water.
Step 2: Add Salt (Optional). For extra cleaning power, add 1 tablespoon of salt per cup of vinegar solution. Shake well to dissolve the salt.
Step 3: Shake Well. Make sure everything is thoroughly mixed before using.
Step 4: Test on an Inconspicuous Area. Before spraying on a large surface, test the solution on a small, hidden area to ensure it doesn’t damage or discolor the material.
Step 5: Spray and Wipe. Spray the solution onto the surface you want to clean and let it sit for a few minutes. Then, wipe clean with a damp cloth or sponge.
2. Salt and Vinegar Paste for Stubborn Stains
This paste is perfect for tackling tough stains on sinks, tubs, and tile grout.
Step 1: Combine Salt and Vinegar. In a small bowl, mix salt and vinegar to form a thick paste. The ratio should be approximately 2 parts salt to 1 part vinegar. Add more salt or vinegar as needed to achieve the desired consistency.
Step 2: Apply to Stain. Apply the paste directly to the stain and let it sit for at least 30 minutes, or even longer for really stubborn stains.
Step 3: Scrub. Use a scrub brush or sponge to scrub the stain. You may need to apply some elbow grease!
Step 4: Rinse. Rinse the area thoroughly with water.
Step 5: Repeat if Necessary. If the stain is still visible, repeat the process.
3. Salt and Vinegar Solution for Cleaning Drains
This solution can help to unclog and deodorize drains.
Step 1: Pour Salt Down the Drain. Pour about 1/2 cup of salt down the drain.
Step 2: Pour Vinegar Down the Drain. Follow with 1 cup of white distilled vinegar.
Step 3: Let it Fizz. Let the mixture fizz and bubble for about 30 minutes.
Step 4: Flush with Hot Water. Flush the drain with hot water for several minutes to clear away any debris.
4. Heated Vinegar for Extra Cleaning Power
Heating vinegar can increase its cleaning power, but be careful! Never boil vinegar in a microwave or on the stovetop, as the fumes can be irritating.
Step 1: Heat the Vinegar. Heat the vinegar in the microwave for about 1-2 minutes, or until it’s warm but not boiling. Alternatively, you can heat it in a kettle.
Step 2: Use with Caution. Use the heated vinegar with caution, as it will be more potent. Make sure to ventilate the area well.
Step 3: Apply and Wipe. Apply the heated vinegar to the surface you want to clean and let it sit for a few minutes. Then, wipe clean with a damp cloth or sponge.
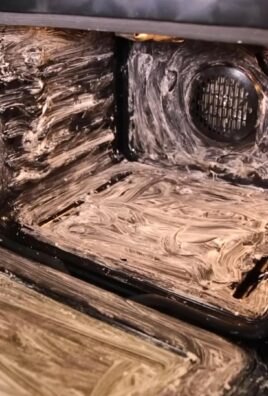
Cleaning Specific Areas with Salt and Vinegar
Now that you have your cleaning solutions ready, let’s talk about how to use them in different areas of your home.
Cleaning the Kitchen
* Countertops: Use the all-purpose spray to clean countertops. Be sure to test on an inconspicuous area first, especially if you have granite or marble countertops.
* Sinks: Use the salt and vinegar paste to scrub away stains and grime in your sink.
* Drains: Use the drain cleaning solution to unclog and deodorize your kitchen sink drain.
* Microwave: Heat a cup of vinegar in the microwave for a few minutes to loosen food splatters. Then, wipe clean.
* Cutting Boards: Sprinkle salt on your cutting board and rub with half a lemon. The salt will help to scrub away food particles, and the lemon will disinfect and deodorize.
* Coffee Maker: Run a cycle with equal parts vinegar and water to remove mineral buildup. Then, run a cycle with plain water to rinse.
Cleaning the Bathroom
* Shower and Tub: Use the all-purpose spray to clean shower walls and tubs. For stubborn soap scum, use the salt and vinegar paste.
* Toilet: Pour a cup of vinegar into the toilet bowl and let it sit for 30 minutes. Then, scrub and flush.
* Tile Grout: Apply the salt and vinegar paste to tile grout and let it sit for a few minutes. Then, scrub with a grout brush and rinse.
* Showerhead: Remove the showerhead and soak it in a solution of equal parts vinegar and water overnight to remove mineral deposits.
Cleaning Other Areas
* Windows and Mirrors: Mix equal parts vinegar and water in a spray bottle and use it to clean windows and mirrors. Wipe with a clean, lint-free cloth.
* Floors: Add 1/2 cup of vinegar to a bucket of warm water and use it to mop floors. Be sure to test on an inconspicuous area first, especially if you have hardwood floors.
* Laundry: Add 1/2 cup of vinegar to your washing machine as a natural fabric softener and odor remover.
* Rust Removal: Soak rusty items in vinegar for several hours or overnight. Then, scrub with a brush to remove the rust.
Important Considerations and Safety Tips
While salt and vinegar are generally safe, there are a few things to keep in mind:
* Test on Inconspicuous Areas: Always test your cleaning solutions on a small, hidden area before applying them to a large surface.
* Avoid Certain Surfaces: Avoid using vinegar on natural stone surfaces like granite and marble, as it can etch the stone. Also, avoid using it on waxed wood, as it can strip the wax.
* Ventilation: When using vinegar, especially heated vinegar, make sure to ventilate the area well.
* Mixing with Bleach: Never mix vinegar with bleach, as this can create toxic fumes.
* Skin Sensitivity: If you have sensitive skin, wear gloves when using salt and vinegar cleaning solutions.
* Storage: Store your cleaning solutions in labeled spray bottles or containers. Keep them out of reach of children and pets.
Troubleshooting Common Issues
* Vinegar Smell: The vinegar smell will dissipate quickly. If you’re concerned about the smell, you can add a few drops of essential oil to your cleaning solution. Lavender, lemon, and tea tree oil are all good options.
* Stains Not Coming Out: For really stubborn stains, you may need to repeat the cleaning process or try a stronger cleaning solution.
* Residue: If you notice a residue after cleaning, wipe the surface with a clean, damp cloth.
Final Thoughts
So there you have it

Conclusion
So, there you have it! This simple yet incredibly effective salt and vinegar cleaning solution is more than just a DIY trick; it’s a game-changer for your home cleaning routine. We’ve explored how the humble combination of salt and vinegar can tackle a surprising range of cleaning challenges, from stubborn stains to grimy surfaces. The beauty of this method lies in its simplicity, affordability, and eco-friendliness. You’re not just cleaning; you’re making a conscious choice to reduce your reliance on harsh chemicals and embrace a more sustainable approach to home care.
Why is this a must-try? Because it works! It’s a powerful, natural alternative to expensive and often toxic commercial cleaners. Think about the money you’ll save, the peace of mind knowing you’re not exposing your family to harmful fumes, and the satisfaction of creating a sparkling clean home with ingredients you likely already have in your pantry.
But the possibilities don’t stop there. Feel free to experiment with variations to suit your specific needs. For instance, for extra stubborn stains, try creating a paste of salt, vinegar, and baking soda. The baking soda adds a gentle abrasive action that can help lift even the most challenging grime. You can also infuse your cleaning solution with essential oils like lemon, lavender, or tea tree for a pleasant scent and added antibacterial properties. Remember to always test your solution on an inconspicuous area first, especially when cleaning delicate surfaces.
We’re confident that once you experience the cleaning power of salt and vinegar, you’ll be hooked. It’s a versatile, reliable, and cost-effective solution that deserves a permanent place in your cleaning arsenal.
Now, it’s your turn! We encourage you to give this DIY salt and vinegar cleaning method a try. Don’t be afraid to experiment and find what works best for you and your home. And most importantly, share your experiences with us! Let us know what surfaces you’ve cleaned, what variations you’ve tried, and what amazing results you’ve achieved. Your feedback will not only help other readers but also inspire us to continue exploring the endless possibilities of natural cleaning solutions. So, grab your salt, your vinegar, and get ready to transform your cleaning routine! We can’t wait to hear your success stories.
Frequently Asked Questions (FAQs)
What exactly makes salt and vinegar such a powerful cleaning combination?
The magic lies in the individual properties of each ingredient. Vinegar, typically white distilled vinegar, is a mild acid (acetic acid) that helps to dissolve mineral deposits, grease, and grime. It’s also a natural disinfectant, killing many common household bacteria and mold. Salt, on the other hand, acts as a gentle abrasive, helping to scrub away stubborn stains and dirt without scratching most surfaces. When combined, the salt enhances the cleaning power of the vinegar, creating a potent and effective cleaning solution. The salt helps to lift the dirt and grime, allowing the vinegar to penetrate and dissolve it more effectively.
What surfaces can I safely clean with a salt and vinegar solution?
This is a versatile cleaner, but it’s essential to exercise caution and test in an inconspicuous area first. Generally, you can safely use salt and vinegar on:
* **Glass and Mirrors:** It leaves a streak-free shine.
* **Stainless Steel:** Removes water spots and fingerprints.
* **Ceramic Tile:** Cleans grout and removes soap scum.
* **Sinks and Bathtubs (excluding natural stone):** Dissolves mineral deposits and soap scum.
* **Cutting Boards (wood and plastic):** Disinfects and removes food stains.
* **Coffee Makers:** Descales and removes mineral buildup.
* **Showerheads:** Removes mineral deposits that can clog the spray.
However, avoid using it on:
* **Natural Stone (granite, marble, etc.):** The acidity can etch and damage the surface.
* **Waxed or Oiled Wood:** It can strip the finish.
* **Aluminum:** It can cause discoloration.
* **Cast Iron:** It can remove the seasoning.
* **Electronics Screens:** The liquid can damage the internal components.
What’s the best ratio of salt to vinegar for cleaning?
A good starting point is a 1:1 ratio of salt to vinegar. For example, you can mix 1/2 cup of salt with 1/2 cup of white distilled vinegar. However, you can adjust the ratio depending on the severity of the cleaning task. For tougher stains, you might want to use a slightly higher concentration of vinegar. For more delicate surfaces, you can dilute the solution with water. Remember to always test the solution on a small, hidden area first to ensure it doesn’t damage the surface.
How do I deal with the strong vinegar smell?
The vinegar smell can be a deterrent for some. Fortunately, there are several ways to minimize it:
* **Ventilation:** Open windows and doors to allow for proper ventilation while cleaning.
* **Essential Oils:** Add a few drops of your favorite essential oil to the cleaning solution. Lemon, lavender, and tea tree oil are popular choices that not only mask the vinegar smell but also offer additional cleaning and antibacterial benefits.
* **Rinse Thoroughly:** After cleaning, rinse the surface thoroughly with clean water to remove any residual vinegar.
* **Vinegar Scent Dissipates:** The vinegar smell typically dissipates within a few hours after cleaning.
Can I store the salt and vinegar cleaning solution for later use?
Yes, you can store the solution in a sealed container for later use. A spray bottle is a convenient option for easy application. However, it’s best to use the solution within a few weeks, as the salt may settle at the bottom over time. Simply shake the bottle well before each use to redistribute the salt.
Is salt and vinegar cleaning safe for pets and children?
While salt and vinegar are natural ingredients, it’s still important to exercise caution when cleaning around pets and children. Keep them away from the area while you’re cleaning and ensure that the surface is completely dry before allowing them to come into contact with it. Although the solution is generally considered safe, ingestion can cause stomach upset. If your pet or child ingests the solution, contact your veterinarian or doctor immediately.
Can I use other types of vinegar besides white distilled vinegar?
While white distilled vinegar is the most commonly recommended type for cleaning due to its high acidity and lack of color, you can experiment with other types of vinegar, such as apple cider vinegar. However, be aware that apple cider vinegar has a lower acidity than white vinegar, so it may not be as effective for certain cleaning tasks. Additionally, the color of apple cider vinegar could potentially stain some surfaces, so it’s essential to test it in an inconspicuous area first.
What if the salt and vinegar solution doesn’t remove a stain completely?
For particularly stubborn stains, you may need to repeat the cleaning process or try a different approach. You can also try creating a paste of salt, vinegar, and baking soda and applying it to the stain for a longer period before scrubbing. If the stain persists, you may need to consult a professional cleaning service.
How does this method compare to commercial cleaning products?
Commercial cleaning products often contain harsh chemicals that can be harmful to your health and the environment. Salt and vinegar cleaning offers a natural, non-toxic alternative that is just as effective for many cleaning tasks. While some commercial cleaners may be specifically formulated for certain types of stains or surfaces, salt and vinegar provides a versatile and cost-effective solution for everyday cleaning needs. By choosing salt and vinegar, you’re making a conscious decision to reduce your exposure to harmful chemicals and embrace a more sustainable cleaning routine.

Leave a Comment