

Rooftop okra gardening easy? Absolutely! Imagine stepping onto your rooftop and harvesting fresh, vibrant okra right in the heart of the city. Sounds like a dream, right? Well, it doesn’t have to be! This DIY guide is your ticket to transforming your underutilized rooftop into a thriving edible oasis, even if you think you have a black thumb.
Okra, also known as “lady’s fingers,” has a rich history, tracing back to ancient Ethiopia and Egypt. It’s been a staple in cuisines across the globe for centuries, from Southern gumbo to Indian curries. But you don’t need a sprawling farm to enjoy this versatile vegetable. With a few simple tricks and a little bit of elbow grease, you can cultivate your own okra patch right above your head.
Why should you try rooftop okra gardening? Well, for starters, it’s incredibly rewarding to grow your own food. Plus, it’s a fantastic way to utilize unused space, reduce your carbon footprint, and enjoy fresh, organic produce without ever leaving home. In this article, I’ll share my favorite easy-to-follow tips and tricks for successful rooftop okra gardening easy, even if you’re a complete beginner. Get ready to unleash your inner urban farmer!
Rooftop Okra Gardening: A Beginner’s Guide to Bountiful Harvests
Hey there, fellow gardening enthusiasts! Ever dreamt of having fresh, homegrown okra right at your fingertips, even if you live in an apartment or have limited yard space? Well, dream no more! Rooftop okra gardening is totally achievable, and I’m here to guide you through the entire process. It’s easier than you think, and the rewards are incredibly delicious. Let’s get started!
Choosing the Right Okra Variety
First things first, let’s talk okra varieties. Not all okra plants are created equal, especially when it comes to container gardening. You’ll want to choose a variety that’s relatively compact and well-suited for growing in pots. Here are a few of my favorites:
* Dwarf Green Long Pod: As the name suggests, this variety stays relatively small, making it perfect for containers. It produces long, slender pods that are incredibly tender.
* Clemson Spineless: This is a classic okra variety that’s known for its high yields and relatively spineless pods (making harvesting a breeze!). While it can grow a bit taller, it still does well in large containers.
* Burgundy Okra: If you’re looking for something a little different, Burgundy okra is a great choice. It has beautiful red stems and pods, adding a pop of color to your rooftop garden. It’s also quite productive.
Gathering Your Supplies
Okay, now that we’ve picked our okra variety, let’s gather the necessary supplies. Here’s what you’ll need:
* Large Containers: Okra plants need plenty of room for their roots to grow, so choose containers that are at least 18-24 inches in diameter and depth. Make sure they have drainage holes!
* High-Quality Potting Mix: Don’t skimp on the potting mix! Use a well-draining mix that’s rich in organic matter. I like to use a mix of compost, peat moss, and perlite.
* Okra Seeds: Of course, you’ll need okra seeds! You can find them at most garden centers or online.
* Watering Can or Hose: You’ll need a way to water your okra plants regularly.
* Fertilizer: Okra plants are heavy feeders, so you’ll need to fertilize them regularly. I recommend using a balanced fertilizer (like 10-10-10) or an organic fertilizer like compost tea.
* Trowel or Shovel: For planting and transplanting.
* Gloves: To protect your hands.
* Optional: Stakes or cages to support the plants as they grow.
Planting Your Okra Seeds
Alright, let’s get our hands dirty! Here’s how to plant your okra seeds:
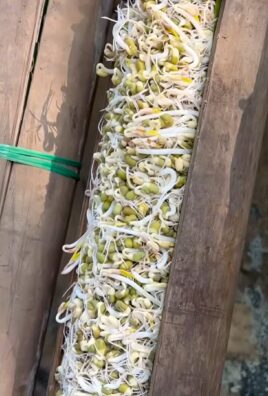
1. Soak the Seeds: To improve germination, soak the okra seeds in warm water for 12-24 hours before planting. This will help soften the seed coat and speed up the sprouting process.
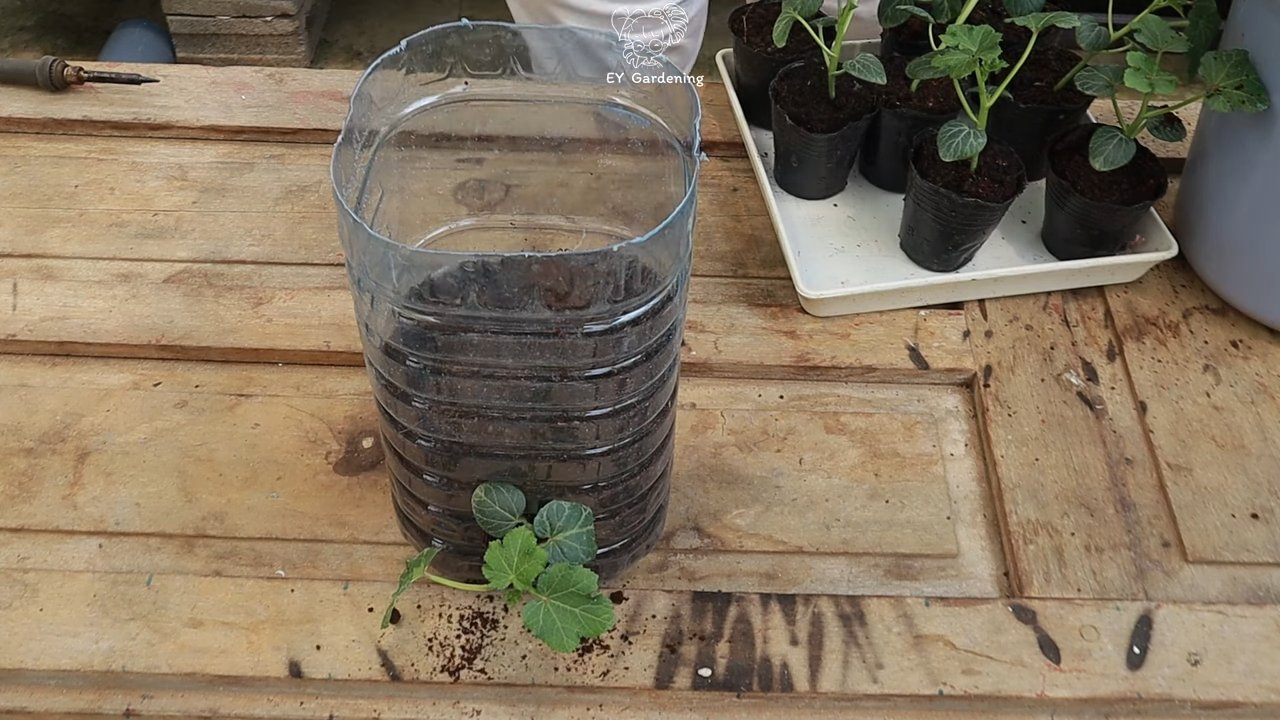
2. Fill the Containers: Fill your containers with the high-quality potting mix, leaving about an inch or two of space at the top.
3. Plant the Seeds: Make small holes about 1/2 inch deep and 2-3 inches apart. Place 2-3 seeds in each hole. This ensures at least one seed will germinate.
4. Cover the Seeds: Gently cover the seeds with potting mix and water thoroughly.
5. Keep the Soil Moist: Keep the soil consistently moist, but not waterlogged. You can cover the containers with plastic wrap to help retain moisture until the seeds germinate.
6. Provide Warmth: Okra seeds need warm temperatures to germinate (ideally between 70-85掳F). If you’re starting your seeds indoors, you can use a heat mat to provide extra warmth.
7. Thin the Seedlings: Once the seedlings emerge (usually within 7-14 days), thin them to one plant per hole. Choose the strongest, healthiest seedling and snip off the others at the soil line.
Caring for Your Okra Plants
Now that your okra plants are growing, it’s important to provide them with the care they need to thrive. Here’s what you need to do:
1. Water Regularly: Okra plants need consistent moisture, especially during hot weather. Water deeply whenever the top inch of soil feels dry to the touch. Avoid overwatering, as this can lead to root rot.
2. Fertilize Regularly: As I mentioned earlier, okra plants are heavy feeders. Fertilize them every 2-3 weeks with a balanced fertilizer or an organic fertilizer like compost tea. Follow the instructions on the fertilizer package.
3. Provide Sunlight: Okra plants need at least 6-8 hours of direct sunlight per day. Make sure your rooftop garden gets plenty of sun.
4. Support the Plants: As your okra plants grow, they may need support to prevent them from falling over. You can use stakes or cages to provide support.
5. Prune the Plants: Pruning isn’t strictly necessary, but it can help improve air circulation and encourage bushier growth. You can remove any yellowing or damaged leaves.
6. Watch for Pests and Diseases: Keep an eye out for common okra pests like aphids, spider mites, and okra worms. You can control these pests with insecticidal soap or neem oil. Okra plants can also be susceptible to diseases like powdery mildew and root rot. Prevent these diseases by providing good air circulation and avoiding overwatering.
Harvesting Your Okra
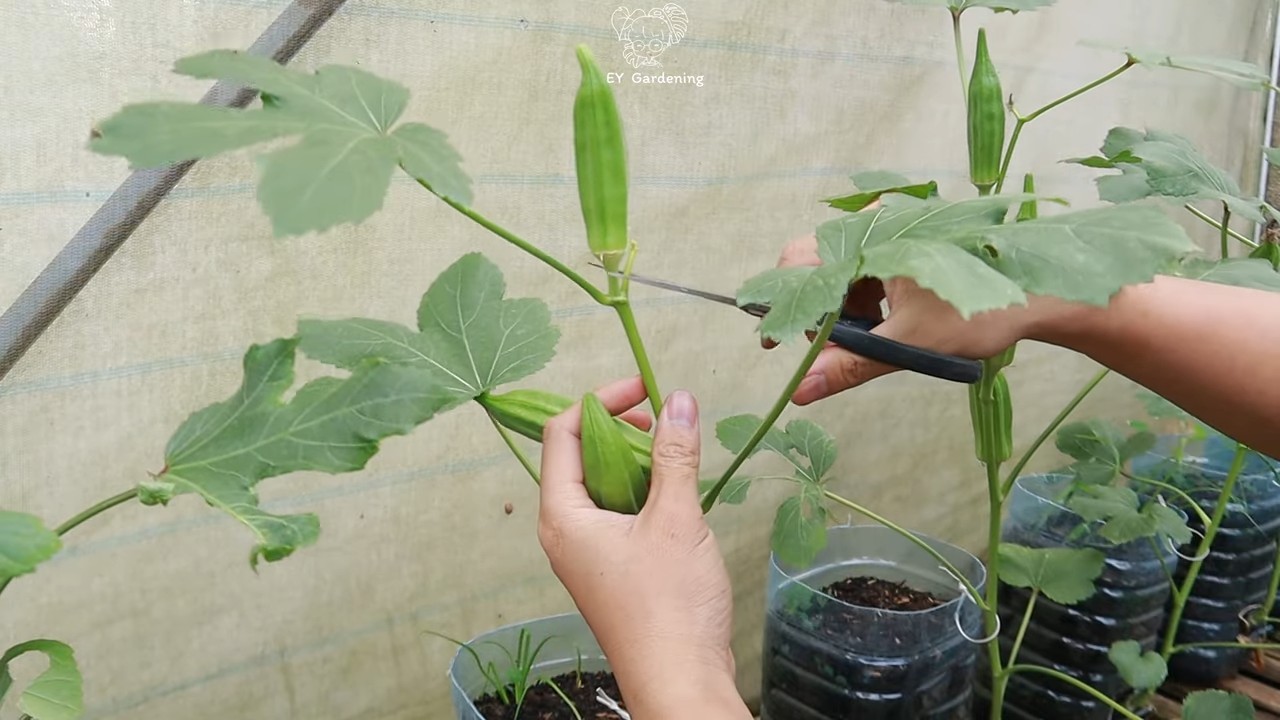
The moment you’ve been waiting for! Harvesting your okra is the most rewarding part of the process. Here’s how to do it:
1. Harvest Regularly: Okra pods are best when they’re young and tender. Harvest them every 1-2 days, when they’re about 2-4 inches long.
2. Use a Sharp Knife or Pruning Shears: Cut the pods off the plant with a sharp knife or pruning shears. Be careful not to damage the plant.
3. Wear Gloves: Okra pods can be prickly, so it’s a good idea to wear gloves when harvesting.
4. Don’t Let the Pods Get Too Big: If you let the pods get too big, they’ll become tough and fibrous.
5. Enjoy Your Harvest: Okra can be used in a variety of dishes, from soups and stews to stir-fries and fried okra.
Troubleshooting Common Problems
Even with the best care, you might encounter some problems while growing okra on your rooftop. Here are a few common issues and how to fix them:
* Yellowing Leaves: This could be a sign of nutrient deficiency, overwatering, or underwatering. Check the soil moisture and fertilize if necessary.
* Lack of Flowers: This could be due to insufficient sunlight, poor soil, or lack of pollination. Make sure your plants are getting enough sun and fertilize them with a bloom-boosting fertilizer.
* Pest Infestations: As mentioned earlier, aphids, spider mites, and okra worms can be a problem. Use insecticidal soap or neem oil to control these pests.
* Root Rot: This is caused by overwatering. Make sure your containers have good drainage and avoid overwatering.
Extending the Growing Season
Depending on your climate, you may be able to extend the okra growing season by starting your seeds indoors or using row covers to protect the plants from frost.
* Starting Seeds Indoors: Start your seeds indoors 6-8 weeks before the last expected frost. This will give your plants a head start on the growing season.
* Using Row Covers: Row covers can protect your plants from frost and extend the growing season by several weeks.
Enjoying Your Rooftop Okra Garden
Growing okra on your rooftop is a fun and rewarding experience. With a little bit of care and attention, you can enjoy a bountiful harvest of fresh, homegrown okra. So, get out there and start planting! Happy gardening! I hope this guide helps you achieve okra-growing success. Remember to adapt these tips to your specific climate and growing conditions. Good luck, and happy harvesting!
Conclusion
So, there you have it! Transforming your rooftop into a thriving okra patch is not just a whimsical dream; it’s an achievable reality with this simple, effective DIY trick. We’ve walked you through the essential steps, from selecting the right containers and soil to providing optimal sunlight and water. But why should you dedicate your time and effort to rooftop okra gardening? The answer is multifaceted.
Firstly, imagine the unparalleled satisfaction of harvesting fresh, crisp okra right from your own home. No more trips to the grocery store, no more questioning the freshness or origin of your produce. You’ll have complete control over the growing process, ensuring that your okra is free from harmful pesticides and chemicals. This is a significant advantage, especially for those who prioritize healthy eating and sustainable living.
Secondly, rooftop okra gardening is an excellent way to maximize space, particularly for urban dwellers with limited or no yard space. It allows you to transform otherwise unused areas into productive gardens, bringing a touch of nature to your concrete jungle. This can have a profound impact on your well-being, providing a calming and therapeutic escape from the stresses of city life.
Thirdly, growing your own okra is a cost-effective way to supplement your grocery budget. Okra can be quite expensive, especially when purchased out of season. By growing your own, you can significantly reduce your food expenses and enjoy fresh okra whenever you desire.
But the benefits don’t stop there. Rooftop okra gardening is also a fantastic learning experience, especially for children. It teaches them about the life cycle of plants, the importance of environmental stewardship, and the rewards of hard work. It’s a fun and engaging way to connect them with nature and foster a lifelong appreciation for gardening.
Now, let’s talk about variations. While we’ve focused on the basic method, there are plenty of ways to customize your rooftop okra garden to suit your specific needs and preferences. For example, you could experiment with different varieties of okra, such as Clemson Spineless or Burgundy. You could also try companion planting, growing okra alongside other vegetables and herbs that benefit from each other. Consider adding marigolds to deter pests or basil to attract pollinators.
Another variation is to explore different container options. While we’ve recommended large pots or grow bags, you could also repurpose old containers, such as buckets or barrels. Just make sure that the containers have adequate drainage holes to prevent waterlogging.
Finally, don’t be afraid to get creative with your rooftop garden design. You could create a tiered garden, using different levels to maximize space and add visual interest. You could also incorporate decorative elements, such as trellises or sculptures, to enhance the aesthetic appeal of your garden.
Rooftop okra gardening is more than just a hobby; it’s a lifestyle. It’s a way to connect with nature, improve your health, and beautify your surroundings. So, what are you waiting for? Grab your gardening gloves, gather your supplies, and embark on this exciting adventure today!
We are confident that you’ll be amazed by the results. But don’t just take our word for it. Try it out for yourself and see the magic unfold. And when you do, we encourage you to share your experience with us. Post photos of your rooftop okra garden on social media, using the hashtag #RooftopOkra. Tell us about your successes, your challenges, and your tips for fellow gardeners. Together, we can create a vibrant community of rooftop okra enthusiasts.
Ready to Grow?
We can’t wait to see your rooftop okra gardens flourish! Happy gardening!
FAQ
What is the best time of year to start rooftop okra gardening?
Okra thrives in warm weather, so the best time to start your rooftop okra garden is in the late spring or early summer, after the last frost has passed. The soil temperature should be at least 65 degrees Fahrenheit for optimal germination. If you live in a region with a short growing season, you can start your okra seeds indoors a few weeks before the last frost and then transplant them outdoors once the weather warms up.
What kind of soil is best for growing okra in containers?
Okra prefers well-draining soil that is rich in organic matter. A good potting mix for container gardening is ideal. You can also amend your soil with compost or aged manure to improve its fertility and drainage. Avoid using heavy clay soil, as it can become waterlogged and inhibit root growth. A slightly acidic to neutral pH (around 6.0 to 7.0) is ideal.
How much sunlight does okra need?
Okra requires at least six to eight hours of direct sunlight per day to thrive. Choose a location on your rooftop that receives ample sunlight throughout the day. If your rooftop is partially shaded, try to position your okra plants in the sunniest spot. If you don’t have enough natural sunlight, you can supplement with grow lights.
How often should I water my okra plants?
Water your okra plants regularly, especially during hot, dry weather. The soil should be kept consistently moist, but not waterlogged. Water deeply whenever the top inch of soil feels dry to the touch. Avoid overhead watering, as it can promote fungal diseases. Instead, water at the base of the plants. Consider using a soaker hose or drip irrigation system to deliver water directly to the roots.
How do I fertilize my okra plants?
Okra is a heavy feeder, so it’s important to fertilize your plants regularly. Use a balanced fertilizer, such as 10-10-10, every two to three weeks. You can also use organic fertilizers, such as compost tea or fish emulsion. Avoid over-fertilizing, as it can lead to excessive foliage growth and reduced fruit production.
What are some common pests and diseases that affect okra?
Some common pests that affect okra include aphids, flea beetles, and okra stink bugs. You can control these pests with insecticidal soap or neem oil. Common diseases that affect okra include powdery mildew and root rot. Prevent these diseases by providing good air circulation and avoiding overwatering. If you notice any signs of disease, remove the affected leaves or plants immediately.
How do I harvest okra?
Okra pods are typically ready to harvest about 50 to 60 days after planting. Harvest the pods when they are about 2 to 4 inches long and still tender. Use a sharp knife or pruners to cut the pods from the plant. Harvest okra regularly, as this will encourage the plant to produce more pods. Overripe okra pods can become tough and fibrous.
Can I grow okra in a small container?
While okra plants can grow quite large, reaching heights of 4 to 6 feet, you can still grow them in containers. Choose a container that is at least 12 inches in diameter and 12 inches deep. Make sure the container has adequate drainage holes. You may need to stake or support your okra plants as they grow taller.
What are some companion plants for okra?
Okra benefits from companion planting. Some good companion plants for okra include basil, marigolds, peppers, and tomatoes. Basil helps to repel pests, while marigolds attract beneficial insects. Peppers and tomatoes provide shade and support for okra plants. Avoid planting okra near beans or cabbage, as they can compete for nutrients.
How do I save okra seeds for next year?
To save okra seeds, allow some of the pods to mature fully on the plant. The pods will turn brown and dry out. Once the pods are completely dry, harvest them and remove the seeds. Store the seeds in a cool, dry place until next spring.

Leave a Comment