

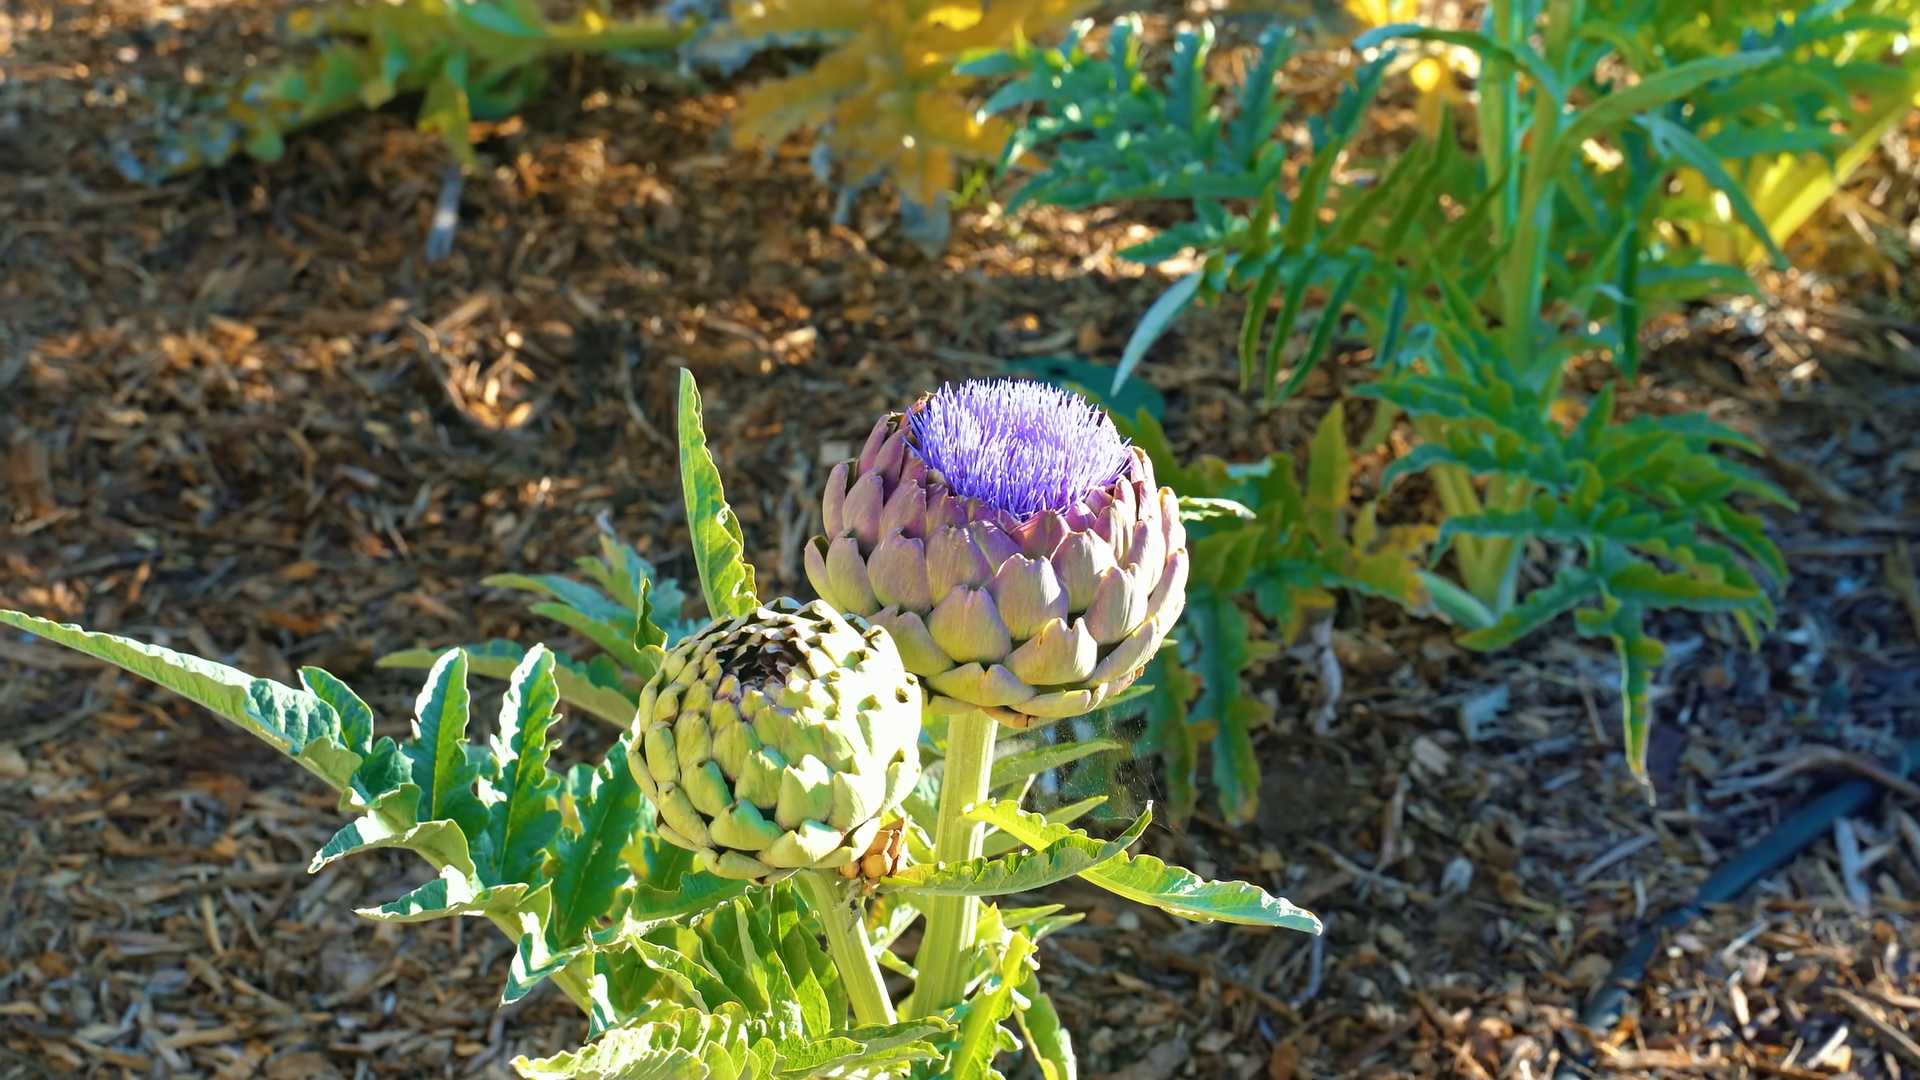
Growing artichokes at home might seem like a culinary adventure reserved for seasoned gardeners, but I’m here to tell you it’s totally achievable, even if you’re just starting out! Forget those pricey, often-bruised artichokes at the grocery store. Imagine plucking your own fresh, plump globes straight from your backyard – the taste is simply unparalleled.
Artichokes, with their architectural beauty and delicious hearts, have a rich history. Originating in the Mediterranean, they were prized by the ancient Romans and Greeks for their culinary and medicinal properties. For centuries, they’ve been a symbol of abundance and sophisticated taste. Now, you can bring that touch of Mediterranean elegance to your own garden!
Why should you try growing artichokes at home? Well, beyond the bragging rights (and trust me, you’ll want to brag!), it’s about having access to the freshest possible produce. Store-bought artichokes can be days or even weeks old, losing flavor and nutrients along the way. Plus, knowing exactly where your food comes from and how it’s grown is incredibly rewarding. This DIY guide will walk you through every step, from choosing the right variety to harvesting your own delectable artichokes. Get ready to impress your friends and family with your newfound gardening skills!
DIY Deep Cleaning: Transform Your Home Like a Pro!
Hey everyone! I’m so excited to share my ultimate guide to deep cleaning your home like a professional. Forget those expensive cleaning services – with a little elbow grease and these insider tips, you can achieve sparkling results yourself! I’ve broken down the process into manageable steps and sections, so let’s get started!
Gather Your Arsenal: Essential Cleaning Supplies
Before you dive in, it’s crucial to have the right tools and products. Trust me, being prepared will save you time and frustration. Here’s my go-to list:
* Microfiber cloths: These are my absolute favorite! They’re super absorbent, lint-free, and perfect for dusting, wiping, and polishing. Stock up on a bunch!
* All-purpose cleaner: Choose a cleaner that’s effective on various surfaces. I personally love using a diluted vinegar solution for many tasks (more on that later!).
* Glass cleaner: For streak-free windows and mirrors.
* Bathroom cleaner: Specifically designed to tackle soap scum, mildew, and hard water stains.
* Toilet bowl cleaner: A must-have for a sparkling clean toilet.
* Oven cleaner: For tackling baked-on grease and grime.
* Floor cleaner: Choose a cleaner appropriate for your floor type (hardwood, tile, laminate, etc.).
* Sponges: I prefer non-scratch sponges to avoid damaging surfaces.
* Scrub brush: For tackling stubborn stains and grime.
* Toothbrush: An old toothbrush is perfect for cleaning grout and tight spaces.
* Rubber gloves: Protect your hands from harsh chemicals and keep them clean.
* Vacuum cleaner: With various attachments for different surfaces.
* Mop and bucket: For cleaning floors.
* Spray bottles: For diluting cleaners and creating your own solutions.
* Baking soda: A natural and effective cleaning agent for deodorizing and scrubbing.
* White vinegar: My secret weapon! It’s a fantastic cleaner, disinfectant, and deodorizer.
* Lemon juice: Another natural cleaner and deodorizer with a fresh scent.
* Magic Eraser: For removing scuff marks and stubborn stains. Use with caution on delicate surfaces.
* Duster (extendable): For reaching high places like ceiling fans and light fixtures.
The Deep Cleaning Game Plan: Room by Room
Now that you’re armed with your cleaning supplies, let’s create a game plan. I like to tackle one room at a time to avoid feeling overwhelmed. Here’s my suggested order:
1. Bathrooms: These tend to be the most challenging, so getting them out of the way first is a good idea.
2. Kitchen: Another high-traffic area that requires a thorough cleaning.
3. Bedrooms: Focus on decluttering and creating a relaxing space.
4. Living areas: Pay attention to furniture, floors, and windows.
5. Hallways and entryways: These areas often get overlooked but are important for making a good first impression.
Bathroom Blitz: Sparkling Clean in No Time
Okay, let’s start with the bathrooms! Here’s my step-by-step guide to achieving a sparkling clean bathroom:
1. Clear the clutter: Remove everything from the countertops, shower, and tub. This will give you a clear surface to work with.
2. Dust and wipe down surfaces: Use a microfiber cloth to dust shelves, light fixtures, and other surfaces. Then, wipe down countertops, cabinets, and the exterior of the toilet with an all-purpose cleaner.
3. Tackle the toilet: Apply toilet bowl cleaner under the rim and let it sit for the recommended time. Then, scrub the bowl with a toilet brush and flush. Wipe down the exterior of the toilet with an all-purpose cleaner. Don’t forget the base!
4. Shower and tub scrub: Spray the shower and tub with bathroom cleaner and let it sit for a few minutes. Then, scrub with a sponge or scrub brush to remove soap scum and mildew. Rinse thoroughly. For stubborn stains, try a paste of baking soda and water.
5. Clean the showerhead: Mineral buildup can clog your showerhead. To clean it, fill a plastic bag with white vinegar and secure it around the showerhead with a rubber band. Let it soak for a few hours or overnight. Then, remove the bag and run the shower to flush out any remaining vinegar.
6. Clean the mirror and glass surfaces: Spray glass cleaner onto a microfiber cloth and wipe down the mirror and shower door. For streak-free results, use a clean, dry microfiber cloth to buff the surfaces.
7. Clean the grout: Grout can be a breeding ground for mold and mildew. To clean it, mix baking soda with a little water to form a paste. Apply the paste to the grout and let it sit for a few minutes. Then, scrub with an old toothbrush and rinse thoroughly.
8. Mop the floor: Sweep or vacuum the floor to remove any loose debris. Then, mop with a floor cleaner appropriate for your floor type.
9. Replace items and organize: Once everything is clean and dry, replace the items you removed earlier. Organize your toiletries and cleaning supplies to keep your bathroom tidy.
Kitchen Conquest: From Grimy to Gleaming
Next up is the kitchen! This is where I spend a lot of time, so keeping it clean is essential.
1. Clear the countertops: Remove everything from the countertops, including appliances, utensils, and food items.
2. Clean the countertops: Wipe down the countertops with an all-purpose cleaner. Pay special attention to areas where food is prepared. For stubborn stains, try a paste of baking soda and water.
3. Clean the sink: Scrub the sink with a sponge and dish soap. Rinse thoroughly. To deodorize the sink, pour baking soda down the drain followed by white vinegar. Let it fizz for a few minutes, then flush with hot water.
4. Clean the stovetop: Remove the grates and burner caps. Soak them in hot, soapy water. Wipe down the stovetop with an all-purpose cleaner. For stubborn grease, use a degreaser or a paste of baking soda and water.
5. Clean the oven: This is often the most dreaded task, but it’s essential for a clean kitchen. Follow the instructions on your oven cleaner. I usually spray the oven with cleaner, let it sit overnight, and then wipe it clean the next day. Remember to wear gloves and ventilate the area well.
6. Clean the microwave: Heat a cup of water with a few tablespoons of vinegar in the microwave for a few minutes. The steam will loosen any food splatters. Then, wipe down the interior with a sponge.
7. Clean the refrigerator: Remove all the food from the refrigerator. Discard any expired or spoiled items. Wipe down the shelves, drawers, and walls with an all-purpose cleaner. To deodorize the refrigerator, place an open box of baking soda inside.
8. Clean the dishwasher: Run an empty dishwasher cycle with a dishwasher cleaner. This will help remove buildup and keep your dishwasher running smoothly.
9. Clean the cabinets: Wipe down the cabinet doors and drawers with an all-purpose cleaner. Pay special attention to areas around the handles, which tend to get greasy.
10. Sweep and mop the floor: Sweep or vacuum the floor to remove any loose debris. Then, mop with a floor cleaner appropriate for your floor type.
Bedroom Bliss: Creating a Sanctuary
Now, let’s move on to the bedrooms. The goal here is to create a clean and relaxing space.
1. Declutter: Remove any unnecessary items from the room. Donate or discard anything you no longer need or use.
2. Make the bed: A made bed instantly makes a room look cleaner and more inviting.
3. Dust: Dust all surfaces, including furniture, shelves, and light fixtures. Don’t forget to dust the ceiling fan!
4. Vacuum or mop the floor: Vacuum carpets and rugs thoroughly. Mop hard floors with a floor cleaner appropriate for your floor type.
5. Clean windows and mirrors: Clean windows and mirrors with glass cleaner for a streak-free shine.
6. Organize closets and drawers: Take some time to organize your closets and drawers. This will help you keep your bedroom tidy in the long run.
7. Freshen the air: Open the windows to air out the room. You can also use an air freshener or essential oil diffuser to create a pleasant scent.
Living Area Love: Making it Shine
The living area is where we spend a lot of time relaxing and entertaining, so it’s important to keep it clean and inviting.
1. Declutter: Remove any unnecessary items from the room.
2
Conclusion
So, there you have it! Growing artichokes at home, while it might seem daunting at first, is a deeply rewarding experience that brings the taste of the Mediterranean right to your backyard. We’ve walked you through the essential steps, from selecting the right variety for your climate to nurturing your plants through the seasons. But why is this DIY trick a must-try?
Firstly, the flavor of homegrown artichokes is simply unparalleled. Forget the bland, pre-packaged artichokes you find at the grocery store. When you harvest your own, you’re getting peak freshness and a depth of flavor that will elevate your culinary creations. Imagine dipping those tender leaves into a homemade aioli, or grilling the hearts to perfection – the possibilities are endless!
Secondly, growing your own artichokes is a sustainable and eco-friendly choice. You’re reducing your carbon footprint by eliminating the need for long-distance transportation and minimizing plastic packaging. Plus, you’ll have the satisfaction of knowing exactly where your food comes from and how it was grown.
Thirdly, artichoke plants are beautiful additions to any garden. Their striking silvery-green foliage and architectural flower buds add a touch of elegance and visual interest. They can even serve as a focal point in your landscape.
But the real magic lies in the process itself. Nurturing these plants from tiny seedlings to mature, productive specimens is a truly fulfilling experience. You’ll learn about the rhythms of nature, develop a deeper appreciation for the food you eat, and gain a sense of accomplishment that comes from growing your own.
Variations and Suggestions:
Don’t be afraid to experiment with different artichoke varieties to find the ones that thrive best in your region. ‘Green Globe’ is a classic choice, but ‘Violetta’ and ‘Chianti’ are also popular options with unique flavors and colors.
Consider companion planting to enhance the health and productivity of your artichokes. Planting herbs like rosemary and thyme nearby can help deter pests, while legumes like beans and peas can fix nitrogen in the soil.
If you live in a colder climate, you can overwinter your artichoke plants by cutting them back and covering them with a thick layer of mulch. This will protect them from frost and ensure that they come back strong in the spring.
For those with limited space, artichokes can even be grown in large containers. Just make sure to choose a pot that is at least 24 inches in diameter and provide plenty of sunlight and water.
And finally, don’t forget to share your harvest with friends and family! Homegrown artichokes make a thoughtful and delicious gift.
We wholeheartedly encourage you to embark on this gardening adventure and try growing artichokes at home. It’s a rewarding experience that will bring joy to your garden and your table. We’re confident that you’ll be amazed by the results.
Now, we want to hear from you! Have you tried growing artichokes before? What are your favorite tips and tricks? Share your experiences in the comments below and let’s learn from each other. We can’t wait to see your homegrown artichoke creations! Let us know if you have any questions, and happy gardening!
FAQ
What is the best time of year to plant artichokes?
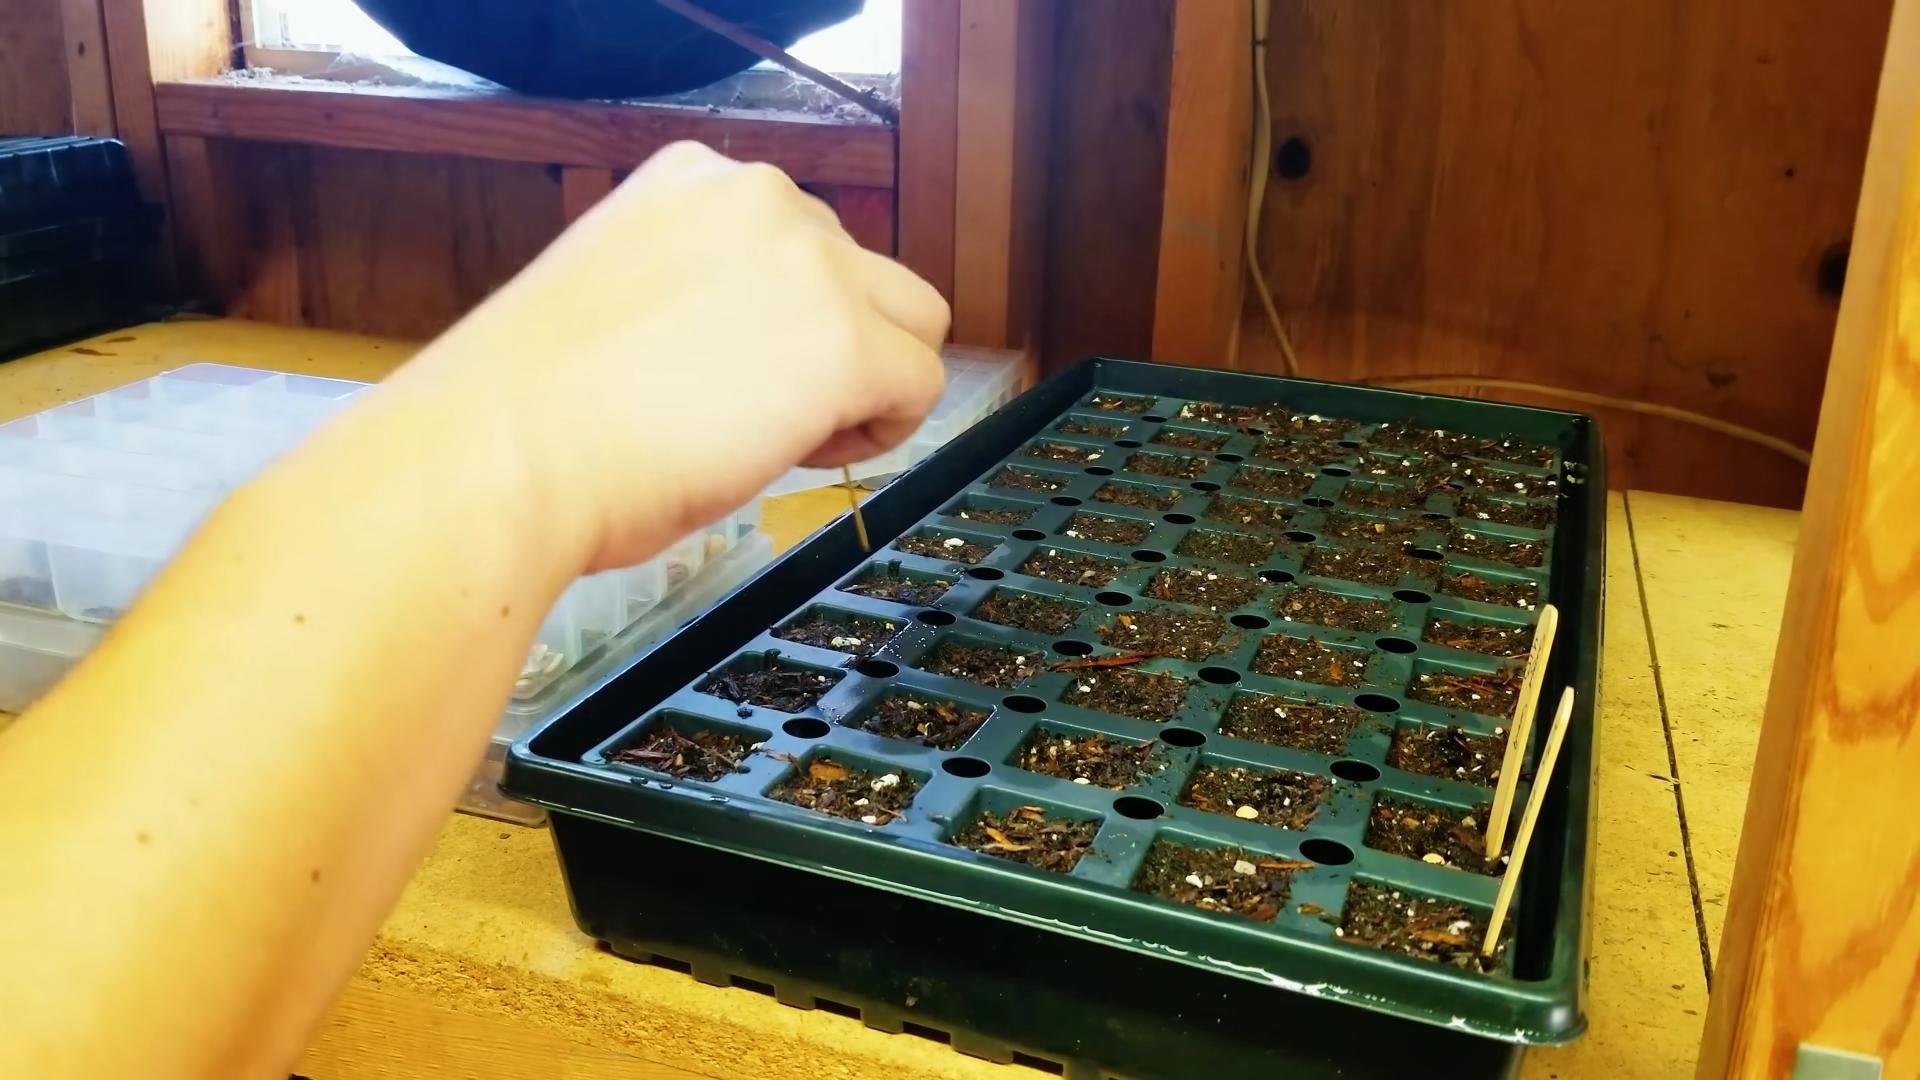
The ideal time to plant artichokes depends on your climate. In regions with mild winters, you can plant them in the fall for a spring harvest. In colder climates, it’s best to start them indoors in late winter or early spring and transplant them outdoors after the last frost. Starting indoors gives them a head start and allows them to establish themselves before the heat of summer. Remember to harden off your seedlings before transplanting them to acclimate them to outdoor conditions.
How much sun do artichokes need?
Artichokes thrive in full sun, requiring at least six to eight hours of direct sunlight per day. Adequate sunlight is crucial for their growth and development, ensuring robust plants and abundant bud production. If you live in a particularly hot climate, some afternoon shade can be beneficial to prevent the plants from getting scorched.
What kind of soil is best for growing artichokes?
Artichokes prefer well-draining soil that is rich in organic matter. Amend your soil with compost or well-rotted manure before planting to improve its fertility and drainage. A slightly acidic to neutral pH (around 6.0 to 7.0) is ideal. Good drainage is essential to prevent root rot, which can be a common problem with artichokes.
How often should I water my artichoke plants?
Artichokes need consistent moisture, especially during hot and dry periods. Water deeply and regularly, aiming to keep the soil consistently moist but not waterlogged. Check the soil moisture regularly and adjust your watering schedule accordingly. Mulching around the plants can help retain moisture and suppress weeds.
How do I fertilize my artichoke plants?
Artichokes are heavy feeders and benefit from regular fertilization
So, there you have it! Growing artichokes at home, while it might seem daunting at first, is a deeply rewarding experience that brings the taste of the Mediterranean right to your backyard. We’ve walked you through the essential steps, from selecting the right variety for your climate to nurturing your plants through the seasons. But why is this DIY trick a must-try?
Firstly, the flavor of homegrown artichokes is simply unparalleled. Forget the bland, pre-packaged artichokes you find at the grocery store. When you harvest your own, you’re getting peak freshness and a depth of flavor that will elevate your culinary creations. Imagine dipping those tender leaves into a homemade aioli, or grilling the hearts to perfection – the possibilities are endless!
Secondly, growing your own artichokes is a sustainable and eco-friendly choice. You’re reducing your carbon footprint by eliminating the need for long-distance transportation and minimizing plastic packaging. Plus, you’ll have the satisfaction of knowing exactly where your food comes from and how it was grown.
Thirdly, artichoke plants are beautiful additions to any garden. Their striking silvery-green foliage and architectural flower buds add a touch of elegance and visual interest. They can even serve as a focal point in your landscape.
But the real magic lies in the process itself. Nurturing these plants from tiny seedlings to mature, productive specimens is a truly fulfilling experience. You’ll learn about the rhythms of nature, develop a deeper appreciation for the food you eat, and gain a sense of accomplishment that comes from growing your own.
Variations and Suggestions:
Don’t be afraid to experiment with different artichoke varieties to find the ones that thrive best in your region. ‘Green Globe’ is a classic choice, but ‘Violetta’ and ‘Chianti’ are also popular options with unique flavors and colors.
Consider companion planting to enhance the health and productivity of your artichokes. Planting herbs like rosemary and thyme nearby can help deter pests, while legumes like beans and peas can fix nitrogen in the soil.
If you live in a colder climate, you can overwinter your artichoke plants by cutting them back and covering them with a thick layer of mulch. This will protect them from frost and ensure that they come back strong in the spring.
For those with limited space, artichokes can even be grown in large containers. Just make sure to choose a pot that is at least 24 inches in diameter and provide plenty of sunlight and water.
And finally, don’t forget to share your harvest with friends and family! Homegrown artichokes make a thoughtful and delicious gift.
We wholeheartedly encourage you to embark on this gardening adventure and try growing artichokes at home. It’s a rewarding experience that will bring joy to your garden and your table. We’re confident that you’ll be amazed by the results.
Now, we want to hear from you! Have you tried growing artichokes before? What are your favorite tips and tricks? Share your experiences in the comments below and let’s learn from each other. We can’t wait to see your homegrown artichoke creations! Let us know if you have any questions, and happy gardening!
FAQ
What is the best time of year to plant artichokes?
The ideal time to plant artichokes depends on your climate. In regions with mild winters, you can plant them in the fall for a spring harvest. In colder climates, it’s best to start them indoors in late winter or early spring and transplant them outdoors after the last frost. Starting indoors gives them a head start and allows them to establish themselves before the heat of summer. Remember to harden off your seedlings before transplanting them to acclimate them to outdoor conditions.
How much sun do artichokes need?
Artichokes thrive in full sun, requiring at least six to eight hours of direct sunlight per day. Adequate sunlight is crucial for their growth and development, ensuring robust plants and abundant bud production. If you live in a particularly hot climate, some afternoon shade can be beneficial to prevent the plants from getting scorched.
What kind of soil is best for growing artichokes?
Artichokes prefer well-draining soil that is rich in organic matter. Amend your soil with compost or well-rotted manure before planting to improve its fertility and drainage. A slightly acidic to neutral pH (around 6.0 to 7.0) is ideal. Good drainage is essential to prevent root rot, which can be a common problem with artichokes.
How often should I water my artichoke plants?
Artichokes need consistent moisture, especially during hot and dry periods. Water deeply and regularly, aiming to keep the soil consistently moist but not waterlogged. Check the soil moisture regularly and adjust your watering schedule accordingly. Mulching around the plants can help retain moisture and suppress weeds.
How do I fertilize my artichoke plants?
Artichokes are heavy feeders and benefit from regular fertilization. Apply a balanced fertilizer (e.g., 10-10-10) every few weeks during the growing season. You can also side-dress with compost or manure to provide a slow-release source of nutrients. Avoid over-fertilizing, as this can lead to excessive foliage growth at the expense of bud production.
When are artichokes ready to harvest?
Artichokes are typically ready to harvest in the spring or early summer, depending on your climate and the variety you’re growing. The buds should be firm and plump, with tightly closed scales. Harvest them when they are about two-thirds of their full size. Use a sharp knife to cut the stem about two inches below the base of the bud.
How do I protect my artichoke plants from pests and diseases?
Artichokes can be susceptible to pests like aphids, snails, and slugs. Regularly inspect your plants for signs of infestation and take appropriate action. You can use organic pest control methods like insecticidal soap or diatomaceous earth. Diseases like powdery mildew and root rot can also be a problem. Ensure good air circulation around the plants and avoid overwatering to prevent these issues.
Can I grow artichokes in containers?
Yes, artichokes can be grown successfully in containers, but you’ll need to choose a large pot (at least 24 inches in diameter) to accommodate their root system. Use a well-draining potting mix and provide plenty of sunlight and water. Container-grown artichokes may need more frequent fertilization than those grown in the ground.
How do I overwinter artichoke plants in cold climates?
In regions with cold winters, artichokes need protection to survive. After the first frost, cut back the foliage to a few inches above the ground. Cover the plants with a thick layer of mulch, such as straw or leaves, to insulate the roots. You can also wrap the plants in burlap or horticultural fleece for added protection. In very cold climates, you may need to dig up the plants and store them in a cool, dark place until spring.
Are artichokes perennial plants?
In mild climates, artichokes are perennial plants and can live for several years. However, in colder climates, they are often grown as annuals or treated as tender perennials that need winter protection. With proper care, you can enjoy a continuous harvest of artichokes for many years to come.


Leave a Comment