

Plant peanuts at home? Absolutely! Imagine the satisfaction of harvesting your own homegrown peanuts, roasted to perfection and enjoyed with friends and family. It’s easier than you think, and this DIY guide will walk you through every step of the process, from selecting the right seeds to enjoying your bountiful harvest.
Growing peanuts has a rich history, dating back thousands of years in South America. Evidence suggests that peanuts were cultivated as early as 7,600 years ago in Peru! From ancient civilizations to modern-day snacks, peanuts have held a significant place in cultures worldwide. Now, you can be a part of that history by cultivating your own peanut patch right in your backyard.
Why should you plant peanuts at home? Well, store-bought peanuts can sometimes be treated with chemicals or lack the freshness of homegrown varieties. Plus, gardening is a fantastic way to connect with nature, relieve stress, and enjoy the fruits (or, in this case, the legumes!) of your labor. This DIY project is perfect for beginners and experienced gardeners alike. I’m excited to share these simple yet effective tricks and hacks that will help you grow a thriving peanut crop. Let’s get started and transform your garden into a peanut paradise!
Growing Peanuts at Home: From Seed to Snack!
Okay, so you want to grow peanuts at home? Awesome! It’s a surprisingly rewarding experience, and trust me, there’s nothing quite like snacking on peanuts you’ve grown yourself. It’s easier than you might think, but there are a few key things to keep in mind to ensure a successful harvest. Let’s dive in!
Choosing Your Peanuts and Preparing for Planting
Before we get our hands dirty, we need to talk about the peanuts themselves. Not all peanuts are created equal when it comes to planting.
* Raw vs. Roasted: This is crucial! You absolutely *must* use raw, unsalted peanuts. Roasted peanuts won’t sprout. Think of it like trying to plant a cooked seed – it just won’t work.
* Variety Matters: There are different varieties of peanuts, each with slightly different growing requirements and harvest times. Virginia peanuts are large and often used for roasting. Spanish peanuts are smaller and have a reddish skin. Valencia peanuts are sweet and have multiple kernels per shell. Runner peanuts are commonly used for peanut butter. Choose a variety that suits your climate and preferences. I personally like Virginia peanuts because they’re so satisfying to roast.
* Sourcing Your Peanuts: You can find raw, unsalted peanuts at most health food stores, some grocery stores (check the bulk bins!), or online. Make sure they look healthy and plump, not shriveled or discolored.
* Soil Preparation is Key: Peanuts need well-drained, sandy loam soil. They don’t do well in heavy clay soil. If your soil is clay-heavy, amend it with plenty of compost, sand, and peat moss to improve drainage and aeration.
* Sunlight is Essential: Peanuts need at least 6-8 hours of direct sunlight per day. Choose a sunny spot in your garden or on your patio.
* Warmth is Your Friend: Peanuts are warm-weather crops. Wait until the soil temperature is consistently above 65°F (18°C) before planting. This is usually a few weeks after the last frost.
Planting Your Peanut Seeds
Alright, now for the fun part! Let’s get those peanuts in the ground.
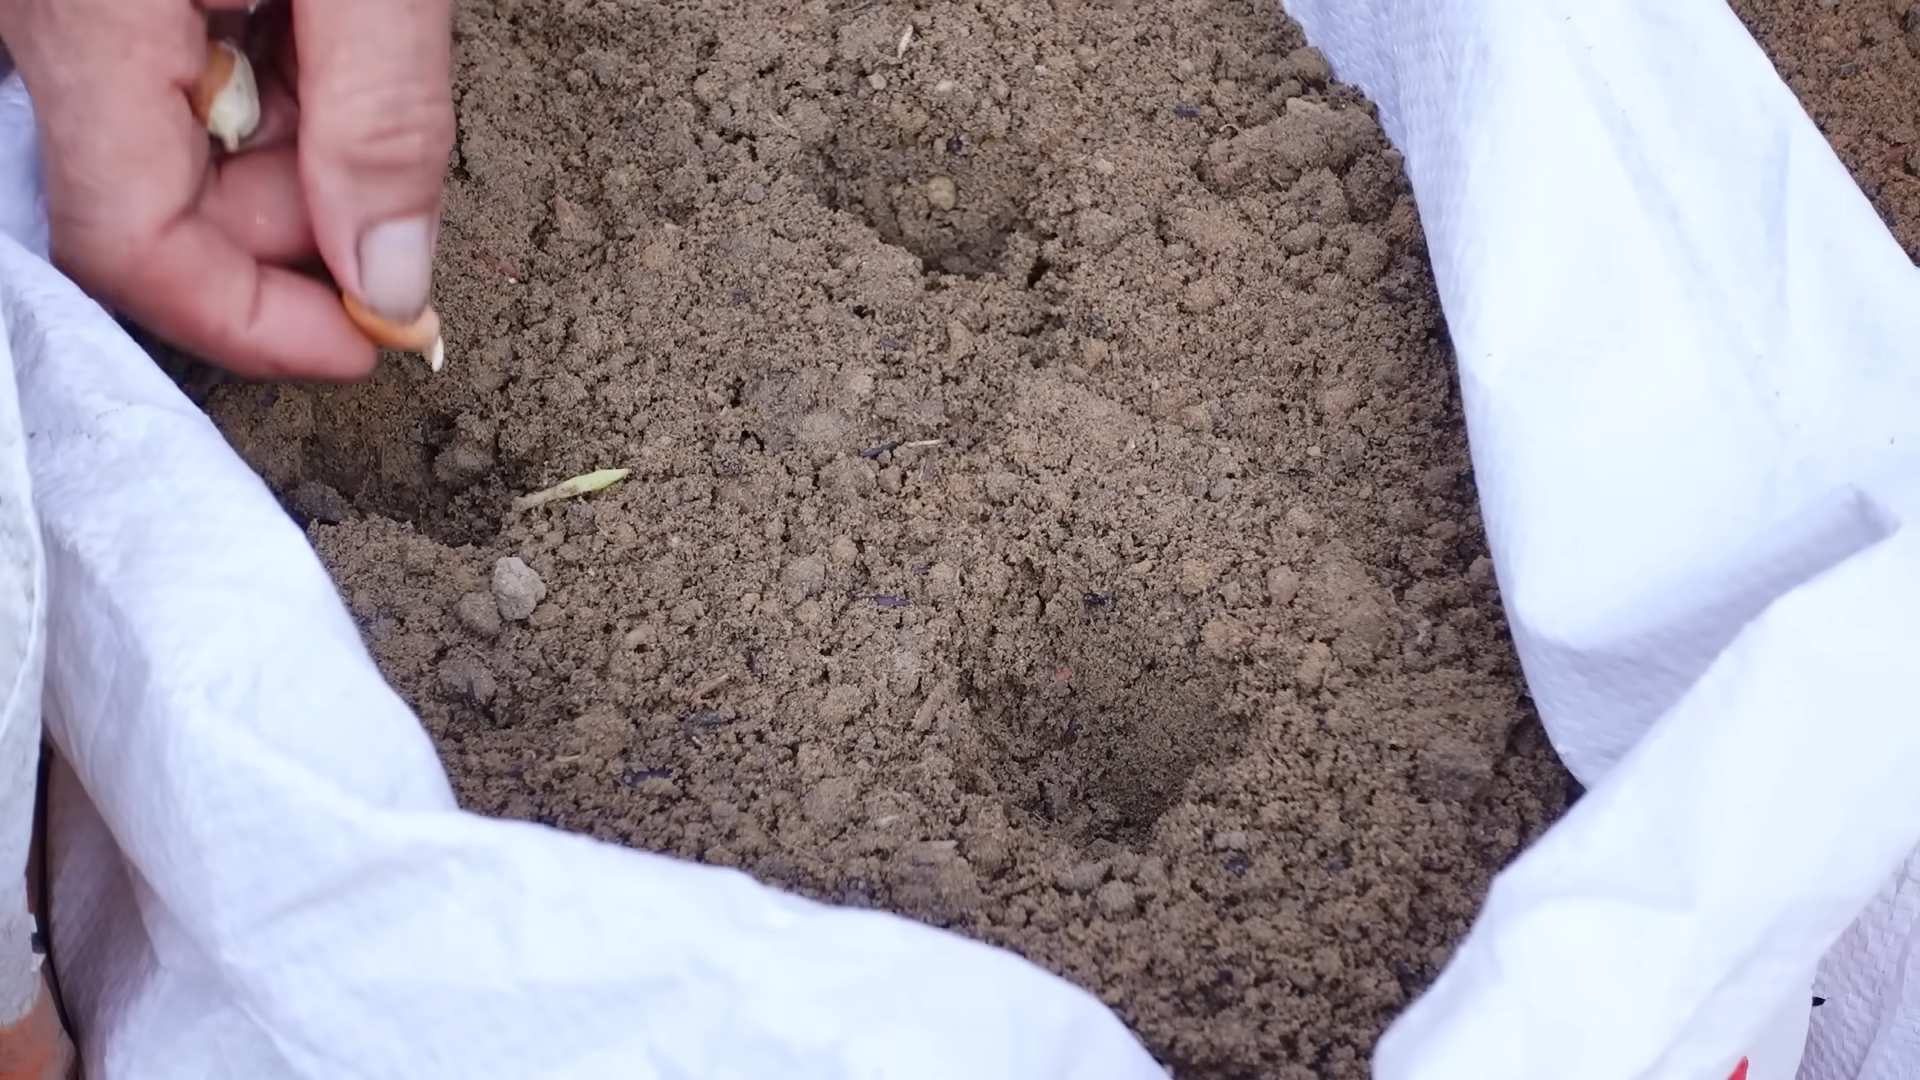
1. Soaking the Peanuts (Optional but Recommended): Soaking the peanuts in water for a few hours (or overnight) can help speed up germination. Don’t soak them for too long, though, or they might rot. I usually soak mine for about 4-6 hours.
2. Preparing the Planting Area: Loosen the soil in your chosen area to a depth of about 12 inches. Remove any rocks, weeds, or debris.
3. Planting Depth and Spacing: Plant the peanuts about 1-2 inches deep and 6-8 inches apart. If you’re planting in rows, space the rows about 2-3 feet apart. This gives the plants enough room to spread out.
4. Covering the Seeds: Gently cover the peanuts with soil and lightly pat it down.
5. Watering: Water the planting area thoroughly after planting. Keep the soil consistently moist, but not waterlogged, until the seedlings emerge.
Caring for Your Peanut Plants
Once your peanut plants have sprouted, it’s important to provide them with the right care to ensure a good harvest.
1. Watering: Water regularly, especially during dry periods. Peanuts need about 1 inch of water per week. Avoid overhead watering, as this can promote fungal diseases. Drip irrigation is ideal.
2. Weeding: Keep the planting area free of weeds. Weeds compete with peanut plants for nutrients and water. Hand-pull weeds carefully to avoid disturbing the peanut plants’ roots.
3. Fertilizing: Peanuts are legumes, which means they can fix nitrogen from the air. However, they still benefit from a balanced fertilizer. Apply a fertilizer that is low in nitrogen and high in phosphorus and potassium. Follow the instructions on the fertilizer package. I usually use a fertilizer specifically formulated for legumes.
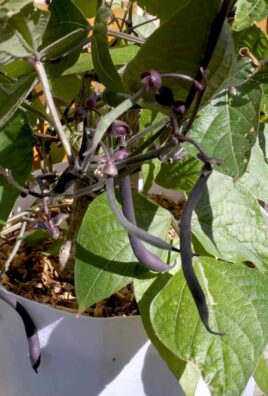
4. Hilling: This is a crucial step! As the peanut plants grow, they will produce “pegs” that grow downwards from the base of the plant into the soil. These pegs are where the peanuts develop. To encourage peanut production, hill the soil around the base of the plants every few weeks. This means gently mounding soil around the stems to provide support and encourage the pegs to enter the soil.
5. Pest and Disease Control: Peanuts can be susceptible to pests and diseases. Monitor your plants regularly for signs of problems. Common pests include aphids, spider mites, and leafhoppers. Common diseases include leaf spot and root rot. Treat any problems promptly with appropriate insecticides or fungicides. Organic options are always a good choice!
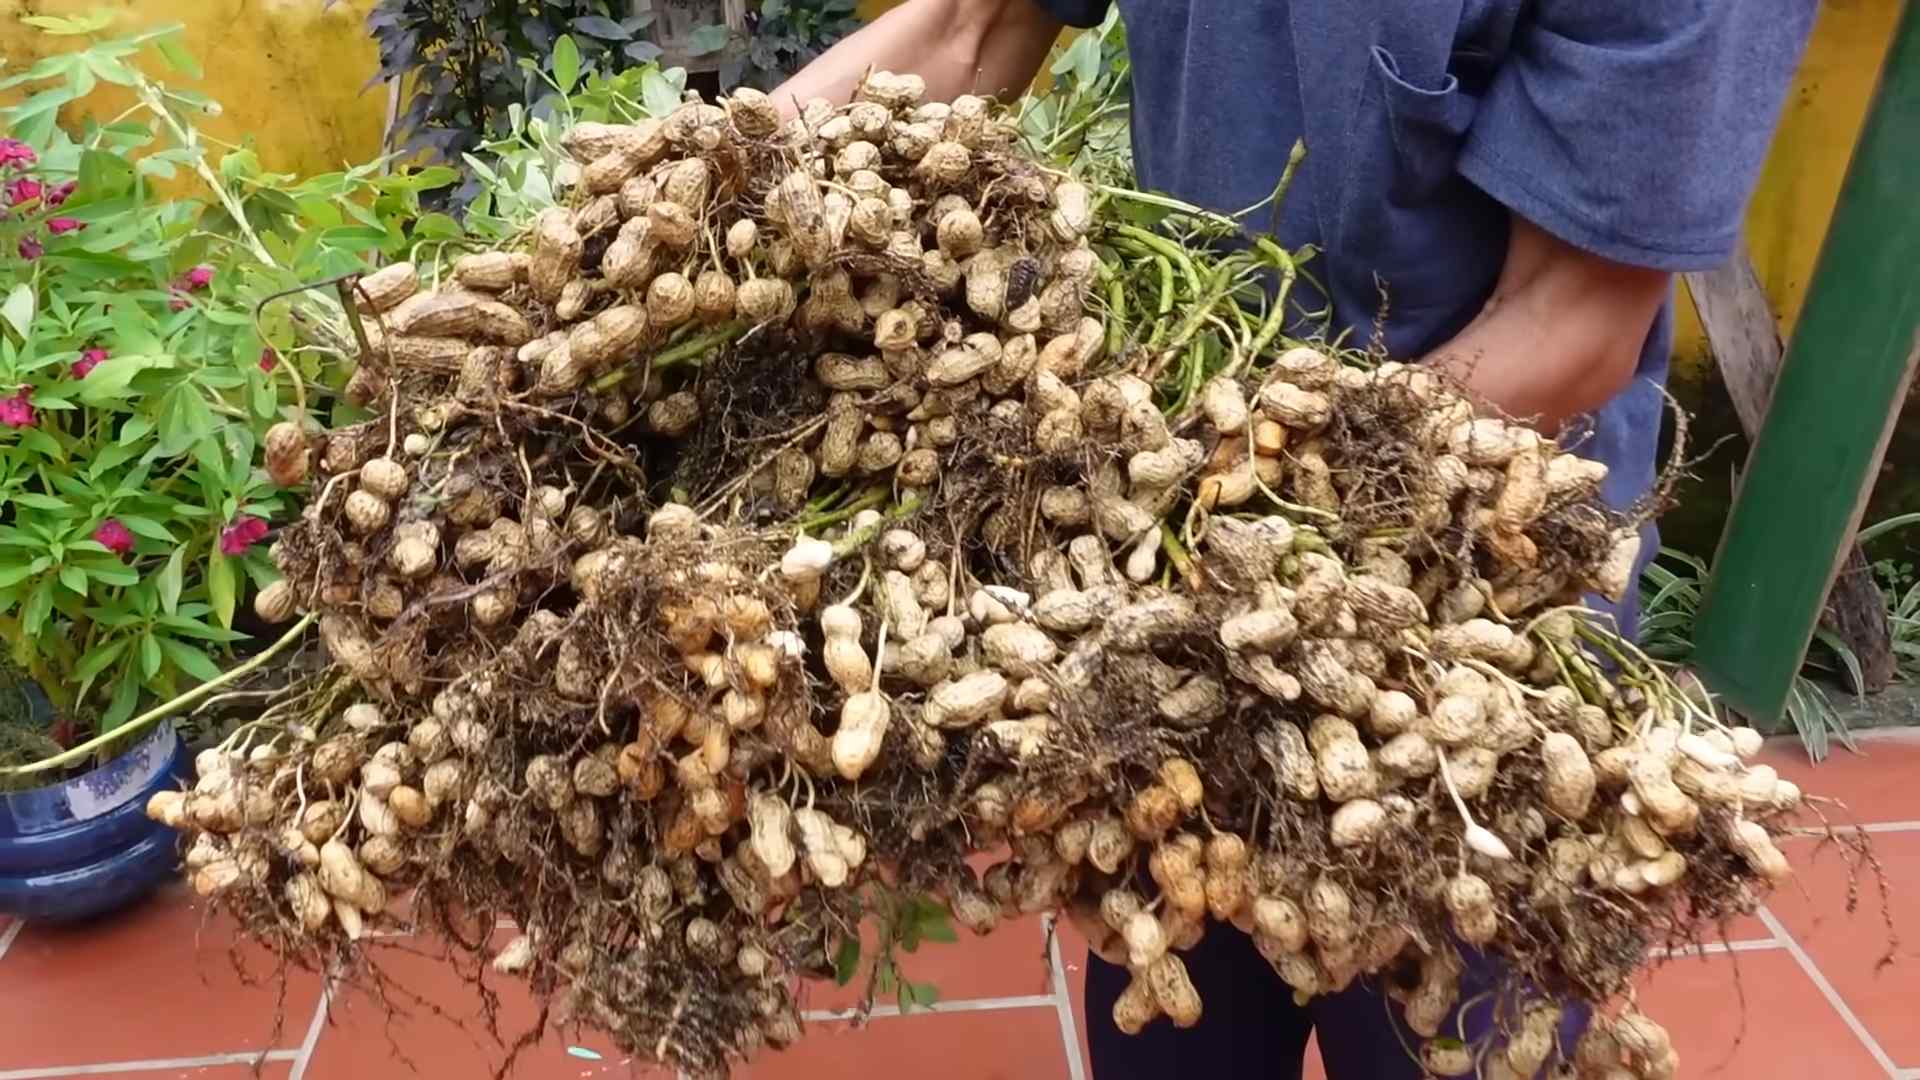
Harvesting Your Peanuts
The moment you’ve been waiting for! Harvesting peanuts is a bit of an art, but it’s also incredibly satisfying.
1. Timing is Everything: Peanuts are typically ready to harvest about 120-150 days after planting, depending on the variety. A good indicator is when the leaves start to turn yellow and the plants begin to look a little tired. You can also dig up a few plants to check the peanuts. The shells should be well-formed and the kernels should be plump and mature.
2. Digging Up the Plants: Use a garden fork or shovel to carefully dig up the entire plant, being careful not to damage the peanuts. Gently shake off any excess soil.
3. Curing the Peanuts: This is a critical step for flavor and storage. Hang the peanut plants upside down in a well-ventilated area for 2-4 weeks to allow the peanuts to dry and cure. You can hang them in a garage, shed, or even on a clothesline. Make sure they are protected from rain and direct sunlight.
4. Separating the Peanuts: Once the plants are cured, you can separate the peanuts from the vines. Simply pull them off by hand.
5. Final Drying (Optional): For longer storage, you can dry the peanuts further in a dehydrator or oven at a low temperature (around 130°F or 55°C) for several hours. This will help to reduce the moisture content and prevent mold growth.
Roasting Your Homegrown Peanuts
Now for the best part – enjoying the fruits (or rather, nuts!) of your labor! Roasting your homegrown peanuts is easy and delicious.
1. Preheat Your Oven: Preheat your oven to 350°F (175°C).
2. Prepare the Peanuts: Spread the peanuts in a single layer on a baking sheet.
3. Roasting Time: Roast the peanuts for 15-20 minutes, or until they are golden brown and fragrant. Stir them occasionally to ensure even roasting.
4. Cooling and Salting: Remove the peanuts from the oven and let them cool completely. You can sprinkle them with salt while they are still warm.
5. Enjoy! Store your roasted peanuts in an airtight container at room temperature. They should last for several weeks.
Troubleshooting Common Peanut Growing Problems
Even with the best care, you might encounter some challenges along the way. Here are a few common problems and how to address them:
* Poor Germination: This could be due to several factors, including using roasted peanuts, planting too deep, planting in cold soil, or overwatering. Make sure you are using raw, unsalted peanuts, planting at the correct depth, waiting until the soil is warm enough, and avoiding overwatering.
* Yellowing Leaves: This could be a sign of nutrient deficiency, disease, or pest infestation. Check the soil pH and nutrient levels. Treat any diseases or pests promptly.
* Small Peanuts: This could be due to insufficient water, poor soil, or overcrowding. Make sure you are watering regularly, providing adequate nutrients, and spacing the plants properly.
* Moldy Peanuts: This is usually caused by improper curing or storage. Make sure you are curing the peanuts properly in a well-ventilated area and storing them in an airtight container.
Extra Tips for Peanut Growing Success
* Rotate Your Crops: Avoid planting peanuts in the same spot year after year. Crop rotation helps to prevent soilborne diseases and pests.
* Consider Container Gardening: If you don’t have a garden, you can grow peanuts in containers. Choose a large container (at least 18 inches in diameter) and fill it with well-draining potting mix.
* Experiment with Different Varieties: Try growing different varieties of peanuts to see which ones perform best in your area.
* Have Fun! Growing peanuts is a rewarding experience. Don’t be afraid to experiment and learn along the way.
Growing peanuts at home is a journey, but it’s one that’s well worth taking. With a little patience and care, you can enjoy a delicious harvest of homegrown peanuts. Happy planting!
Conclusion
So, there you have it! Planting peanuts at home is not only surprisingly simple, but it’s also an incredibly rewarding experience. Forget the store-bought peanuts – imagine the satisfaction of harvesting your own homegrown crop, bursting with fresh, nutty flavor. This DIY trick transforms your garden (or even a large container!) into a mini peanut farm, offering a unique connection to your food and a fun project for the whole family.
Why is this a must-try? Because it’s more than just growing peanuts; it’s about understanding the process, appreciating the effort that goes into producing our food, and enjoying the unparalleled taste of freshly harvested, homegrown goodness. Plus, it’s a fantastic conversation starter! Imagine serving your guests a bowl of roasted peanuts that you grew yourself.
But the fun doesn’t stop there! Feel free to experiment with different peanut varieties. There are Virginia peanuts, known for their large size and often roasted in the shell; Spanish peanuts, smaller and sweeter, perfect for candies; and Runner peanuts, commonly used for peanut butter. Each variety offers a unique flavor profile, allowing you to tailor your peanut harvest to your specific preferences.
Consider also experimenting with different growing conditions. While peanuts thrive in warm weather and well-drained soil, you can adjust your planting schedule and soil amendments to optimize your yield. Try adding compost or other organic matter to enrich the soil and provide your peanut plants with the nutrients they need to flourish. You can even try growing them in raised beds or containers if you have limited space or poor soil quality.
Don’t be afraid to get creative with your harvest, too! Beyond roasting, you can use your homegrown peanuts to make homemade peanut butter, peanut brittle, or even add them to savory dishes like stir-fries and salads. The possibilities are endless!
We wholeheartedly encourage you to give this DIY trick a try. It’s a simple, affordable, and incredibly satisfying way to connect with nature and enjoy the delicious taste of homegrown peanuts. And most importantly, remember to document your journey! Take pictures of your peanut plants as they grow, share your successes (and even your failures!), and let us know what you learned along the way.
Share your experiences, tips, and tricks in the comments below. We’re eager to hear about your peanut-growing adventures and learn from your insights. Let’s build a community of home peanut growers and spread the joy of this rewarding DIY project! So, grab some raw peanuts, prepare your soil, and get ready to experience the magic of planting peanuts at home. You won’t regret it!
FAQ
What kind of peanuts should I use for planting?
You need to use raw, unsalted peanuts. Roasted peanuts will not germinate. Look for peanuts specifically labeled as “raw” or “seed peanuts” at your local garden center or online. Avoid peanuts that have been treated with fungicides or other chemicals, as these can inhibit germination. Virginia peanuts, Spanish peanuts, and Runner peanuts are all suitable varieties for planting, depending on your preference for size and flavor.
When is the best time to plant peanuts?
Peanuts thrive in warm weather, so the best time to plant them is after the last frost, when the soil temperature has reached at least 65 degrees Fahrenheit (around 18 degrees Celsius). This is typically in late spring or early summer. In warmer climates, you may be able to plant peanuts earlier in the season. Check your local weather conditions and soil temperatures to determine the optimal planting time for your region.
How do I prepare the soil for planting peanuts?
Peanuts prefer well-drained, sandy loam soil with a slightly acidic pH (around 6.0 to 6.5). Before planting, amend the soil with compost or other organic matter to improve drainage and fertility. Avoid using soils that are heavy in clay, as these can become waterlogged and inhibit peanut growth. If your soil is compacted, till it to a depth of at least 8 inches to loosen it up.
How far apart should I plant peanut seeds?
Plant peanut seeds about 1-2 inches deep and 6-8 inches apart in rows that are 2-3 feet apart. This spacing allows the plants enough room to spread out and develop their pods. If you are planting in containers, use a large pot (at least 12 inches in diameter) and plant 2-3 seeds per pot.
How much water do peanut plants need?
Peanut plants need consistent moisture, especially during germination and pod development. Water deeply and regularly, especially during dry periods. Avoid overwatering, as this can lead to root rot. A good rule of thumb is to water when the top inch of soil feels dry to the touch.
How long does it take for peanuts to grow?
Peanuts typically take 120-150 days to mature, depending on the variety and growing conditions. You’ll know they’re ready to harvest when the leaves start to turn yellow and the pods feel plump and full.
How do I harvest peanuts?
To harvest peanuts, carefully dig up the entire plant, being careful not to damage the pods. Shake off any excess soil and hang the plants upside down in a warm, dry place for several weeks to cure. Curing allows the peanuts to dry out and develop their flavor.
How do I cure peanuts after harvesting?
After digging up the peanut plants, gently shake off the excess soil. Hang the entire plant upside down in a well-ventilated, warm, and dry place for about 2-4 weeks. This curing process is crucial for developing the peanut’s flavor and preventing mold growth. Make sure the peanuts are not exposed to direct sunlight or rain during curing.
How do I store peanuts after curing?
Once the peanuts are cured, you can remove them from the plants and store them in airtight containers in a cool, dry place. Properly stored peanuts can last for several months. You can also freeze peanuts for longer storage.
Can I grow peanuts in containers?
Yes, peanuts can be successfully grown in containers. Choose a large container (at least 12 inches in diameter) with drainage holes. Use a well-draining potting mix and plant 2-3 seeds per container. Provide the plants with plenty of sunlight and water regularly.
What are some common problems when growing peanuts?
Some common problems when growing peanuts include pests like aphids and spider mites, diseases like leaf spot, and nutrient deficiencies. Monitor your plants regularly and take appropriate action if you notice any problems. Organic pest control methods and proper soil management can help prevent many of these issues.
Do I need to fertilize peanut plants?
Peanut plants are legumes, which means they can fix nitrogen from the air and convert it into a form that plants can use. However, they may still benefit from a light application of fertilizer, especially if your soil is poor in nutrients. Use a fertilizer that is low in nitrogen and high in phosphorus and potassium. Avoid over-fertilizing, as this can lead to excessive vegetative growth and reduced pod production.
Can I grow peanuts indoors?
While it’s possible to grow peanuts indoors, it can be challenging. Peanut plants need a lot of sunlight, so you’ll need to provide them with supplemental lighting if you don’t have a sunny window. You’ll also need to ensure that the plants are properly pollinated. Growing peanuts outdoors is generally easier and more successful.
What if my peanuts don’t produce pods?
There are several reasons why your peanut plants might not be producing pods. These include poor soil quality, lack of sunlight, insufficient watering, and pest or disease problems. Make sure your plants are getting enough sunlight, water, and nutrients, and that they are protected from pests and diseases. If you’re still having problems, consider amending your soil with compost or other organic matter.
Is planting peanuts at home worth the effort?
Absolutely! While it requires some effort and patience, planting peanuts at home is a rewarding experience that allows you to connect with nature, enjoy the delicious taste of homegrown peanuts, and learn about the process of growing your own food. The satisfaction of harvesting your own crop is well worth the effort.
Leave a Comment