

Olive Oil Cleaning Granite Stainless: Sounds like an odd combination, right? But trust me, this simple pantry staple might just be the secret weapon you’ve been missing in your cleaning arsenal! For generations, people have relied on natural ingredients for cleaning, long before the days of harsh chemicals and complicated formulas. Think about it – our grandmothers probably used olive oil for everything from polishing furniture to moisturizing skin.
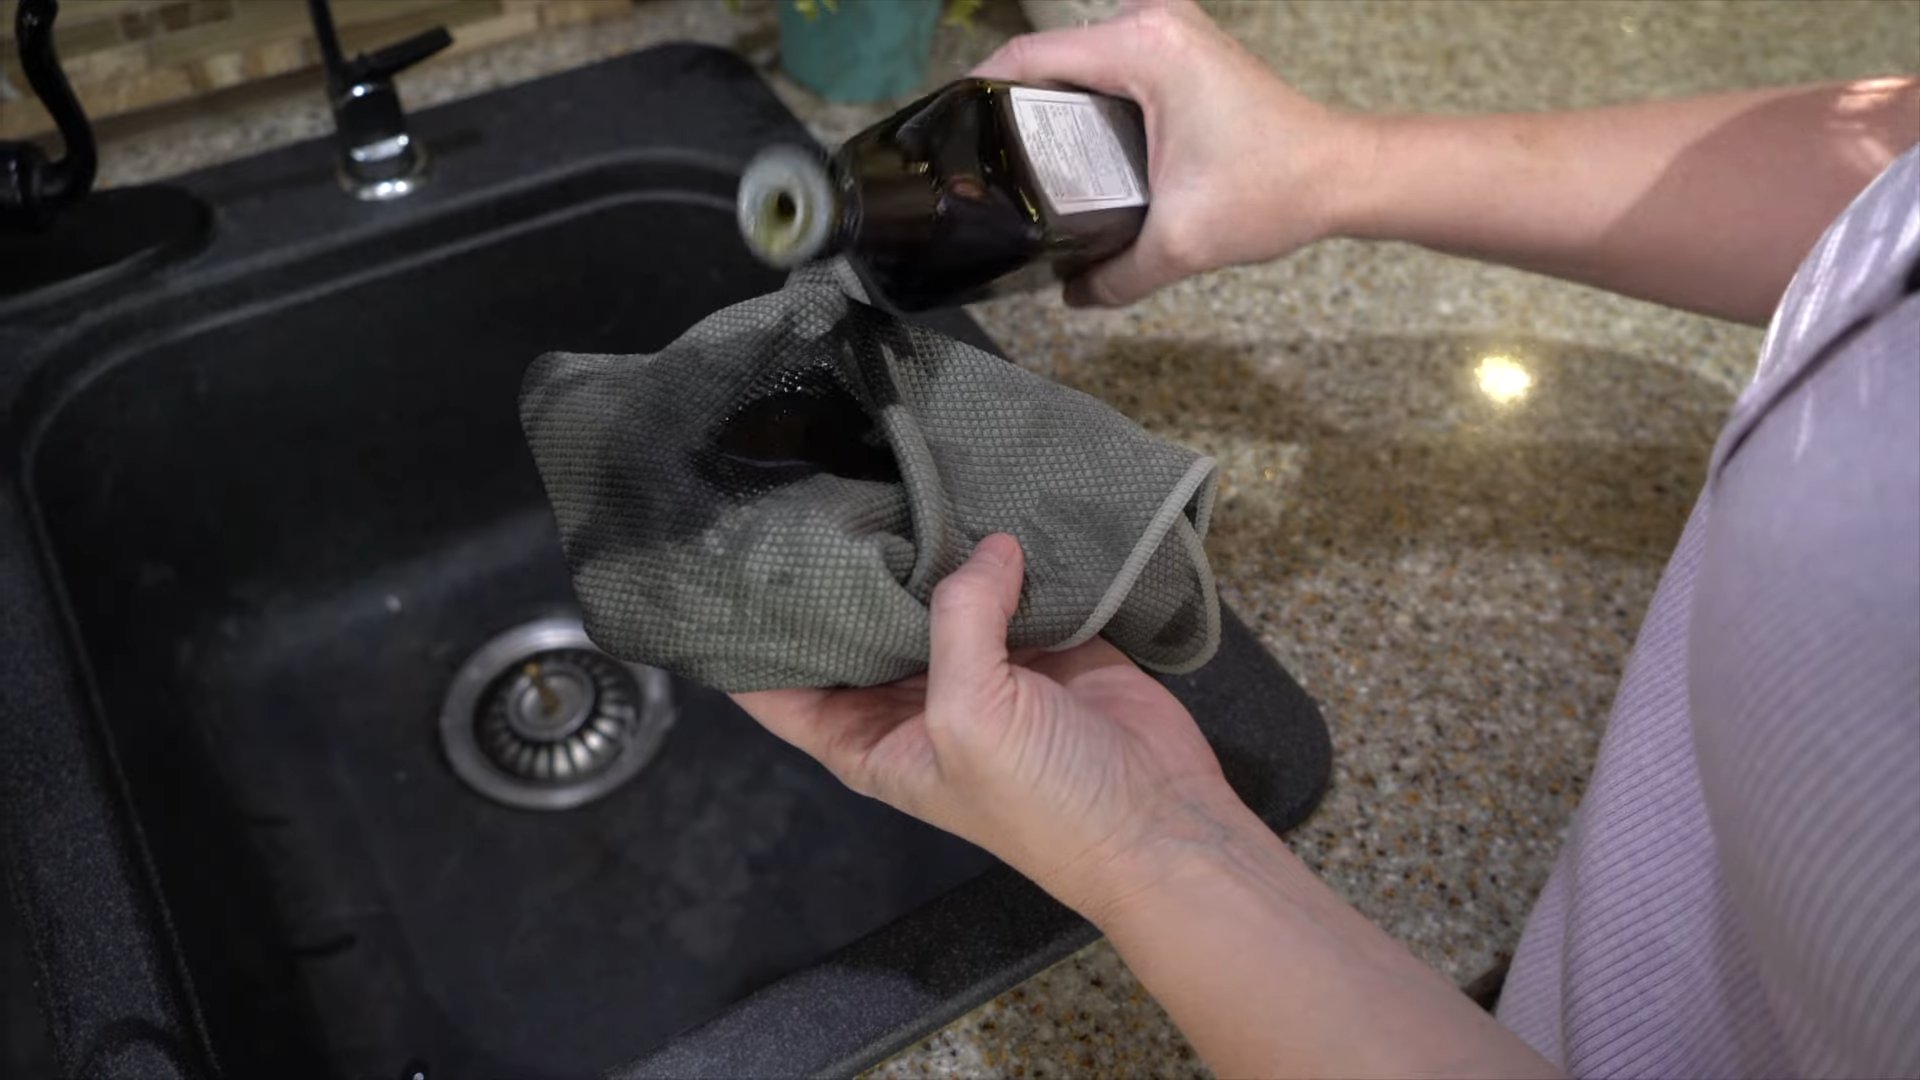
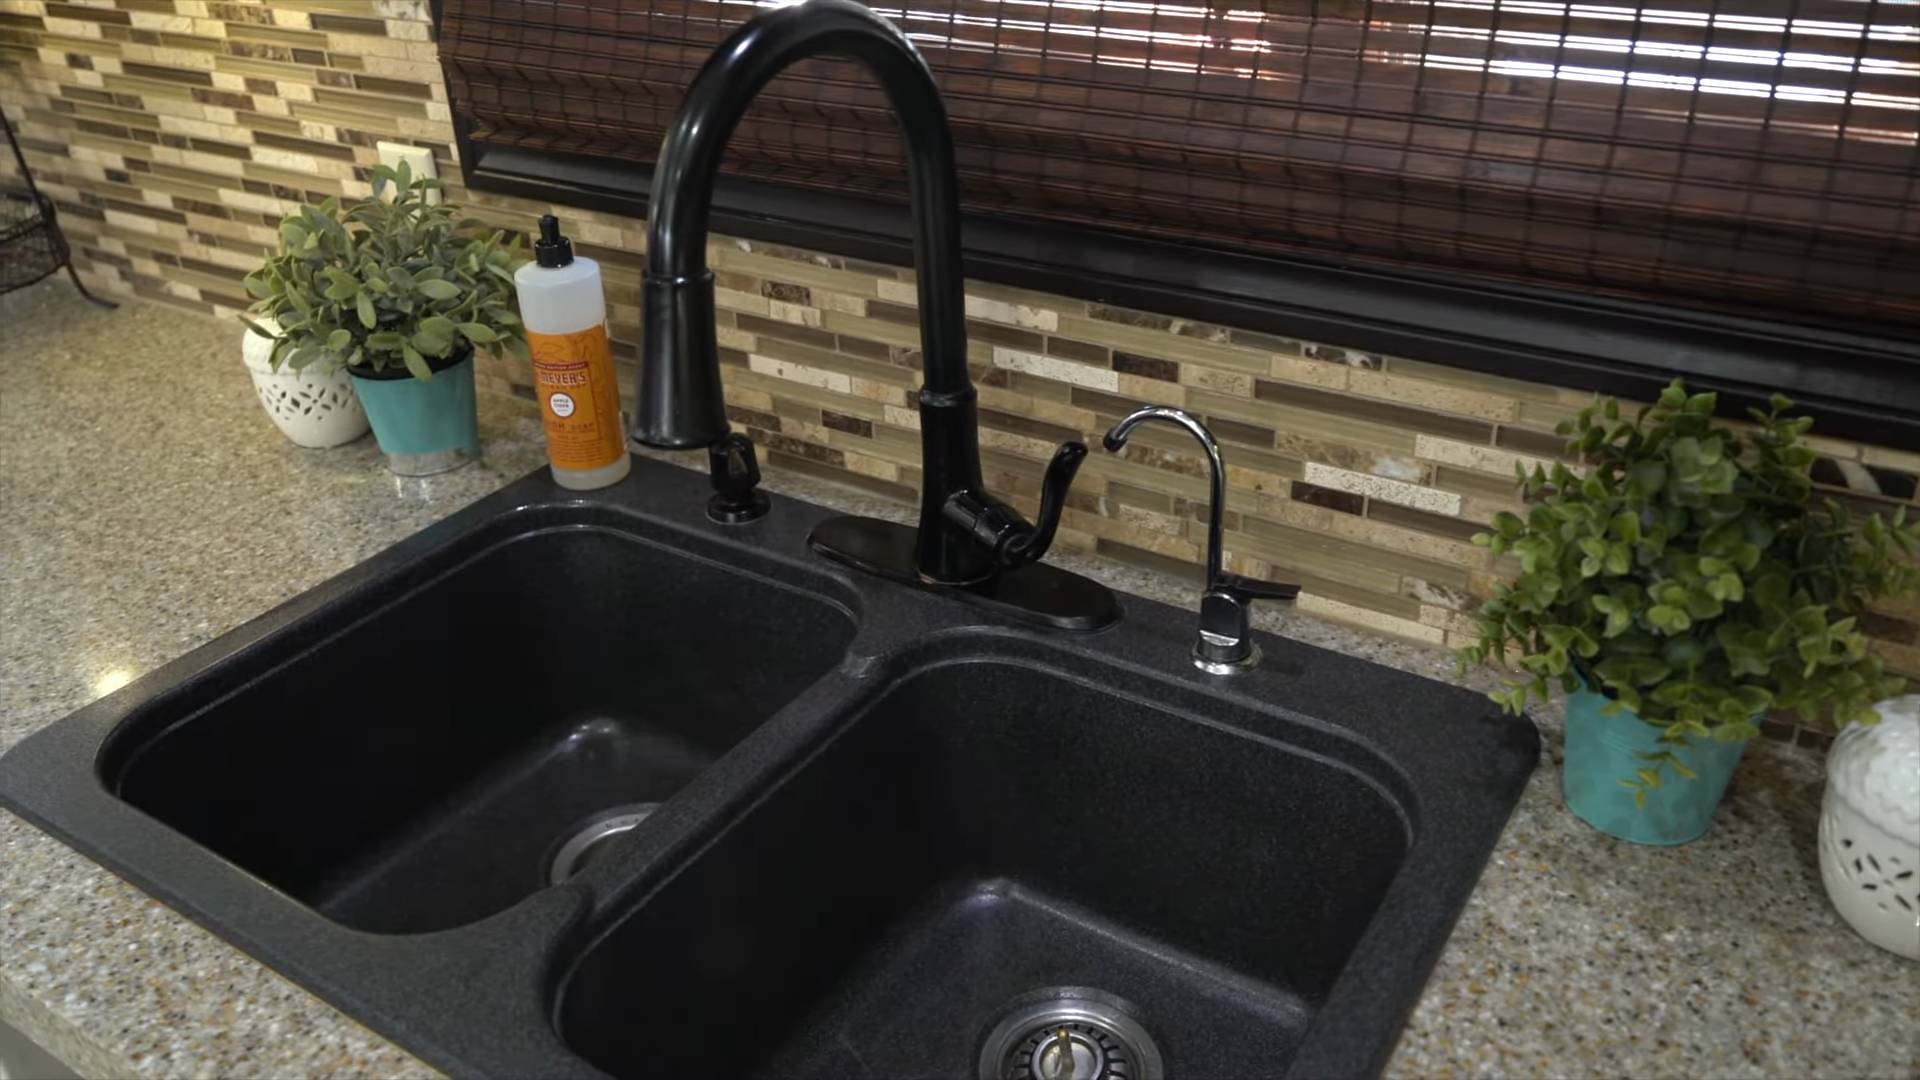
Now, you might be wondering, “Why would I use olive oil cleaning granite stainless steel appliances?” Well, the answer is simple: it’s effective, affordable, and eco-friendly! Granite countertops can lose their luster over time, and stainless steel appliances are notorious for attracting fingerprints and smudges. Instead of reaching for expensive, potentially harmful cleaners, a little olive oil can restore shine and protect surfaces. I’m going to show you how to use this simple trick to keep your kitchen looking its best, without breaking the bank or exposing your family to harsh chemicals. Get ready to be amazed by the power of this everyday ingredient!
Growing Watermelons in Your Backyard: A Comprehensive DIY Guide
Hey there, fellow gardening enthusiasts! I’m so excited to share my experience and guide you through the process of growing juicy, delicious watermelons right in your own backyard. It might seem daunting, but trust me, with a little planning and effort, you’ll be enjoying homegrown watermelon all summer long. Let’s dive in!
Choosing the Right Watermelon Variety
Before we get our hands dirty, it’s crucial to pick the right watermelon variety for your climate and space. Some varieties are better suited for smaller gardens, while others thrive in warmer climates.
* Consider your climate: Some watermelons need a longer growing season than others. If you live in a cooler climate, opt for shorter-season varieties like ‘Sugar Baby’ or ‘Bush Sugar Baby’. For warmer climates, you have more options, including ‘Charleston Gray’ and ‘Jubilee’.
* Think about space: Watermelons are sprawling plants. If you have limited space, consider bush varieties like ‘Bush Sugar Baby’ or ‘Golden Midget’. These varieties produce smaller vines and are perfect for container gardening.
* Flavor preferences: Do you prefer a super sweet watermelon or one with a slightly tangy flavor? Research different varieties and choose one that suits your taste. ‘Crimson Sweet’ is a popular choice for its sweetness, while ‘Black Diamond’ is known for its deep red flesh and slightly less sweet flavor.
Preparing the Soil
Watermelons are heavy feeders, meaning they need nutrient-rich soil to thrive. Proper soil preparation is key to a successful harvest.
* Sunlight is Key: Watermelons need at least 6-8 hours of direct sunlight per day. Choose a location in your backyard that receives plenty of sun.
* Soil Testing: Ideally, you should test your soil’s pH level. Watermelons prefer a slightly acidic soil with a pH between 6.0 and 6.8. You can purchase a soil testing kit at most garden centers.
* Amending the Soil: Regardless of your soil type, you’ll need to amend it with organic matter. This will improve drainage, aeration, and nutrient content.
* Compost: Add a generous amount of compost to your soil. Compost is a fantastic source of nutrients and helps improve soil structure.
* Well-rotted manure: Manure is another excellent soil amendment. Make sure it’s well-rotted to avoid burning the plants.
* Other organic matter: You can also add other organic matter like shredded leaves, grass clippings, or peat moss.
* Creating Mounds or Rows: Watermelons prefer well-drained soil. Creating mounds or rows can help improve drainage, especially in heavy clay soils.
* Mounds: Create mounds about 12 inches high and 3-4 feet wide. Space the mounds about 4-6 feet apart.
* Rows: Create rows about 4-6 feet apart.
Planting Watermelon Seeds or Seedlings
You can start watermelon seeds indoors or directly sow them in the garden. Starting seeds indoors gives you a head start, especially in cooler climates.
* Starting Seeds Indoors (Optional):
1. Timing: Start seeds indoors about 4-6 weeks before the last expected frost.
2. Containers: Use peat pots or biodegradable containers to avoid disturbing the roots when transplanting.
3. Soil: Use a seed-starting mix.
4. Planting: Plant 2-3 seeds per pot, about 1 inch deep.
5. Watering: Keep the soil consistently moist but not waterlogged.
6. Warmth: Provide bottom heat using a heat mat to speed up germination.
7. Light: Once the seedlings emerge, provide them with plenty of light. Use grow lights if necessary.
8. Hardening Off: Before transplanting the seedlings outdoors, you’ll need to harden them off. This involves gradually exposing them to outdoor conditions over a period of 7-10 days. Start by placing them in a sheltered location for a few hours each day, gradually increasing the amount of time they spend outdoors.
* Direct Sowing:
1. Timing: Sow seeds directly in the garden after the last expected frost when the soil temperature is at least 70°F (21°C).
2. Planting: Plant seeds about 1 inch deep and 2-3 feet apart.
3. Watering: Keep the soil consistently moist until the seedlings emerge.
* Transplanting Seedlings:
1. Timing: Transplant seedlings after the last expected frost when the soil temperature is at least 70°F (21°C).
2. Spacing: Space the seedlings 2-3 feet apart.
3. Planting: Dig a hole slightly larger than the root ball. Gently remove the seedling from the container and place it in the hole. Backfill with soil and water thoroughly.
4. Mulching: Apply a layer of mulch around the plants to help retain moisture, suppress weeds, and regulate soil temperature.
Watering and Fertilizing
Watermelons need consistent watering, especially during fruit development. They also benefit from regular fertilization.
* Watering:
* Deep Watering: Water deeply and infrequently, allowing the soil to dry out slightly between waterings. This encourages deep root growth.
* Avoid Overhead Watering: Avoid overhead watering, as this can promote fungal diseases. Use a soaker hose or drip irrigation system to water at the base of the plants.
* Watering Frequency: Water more frequently during hot, dry weather.
* Fertilizing:
* Initial Fertilization: When planting, mix a slow-release fertilizer into the soil.
* Side-dressing: Side-dress the plants with a nitrogen-rich fertilizer when the vines start to run.
* Fruiting Stage: Switch to a fertilizer that is higher in phosphorus and potassium when the fruits start to develop. This will promote fruit development and sweetness.
* Organic Options: Consider using organic fertilizers like compost tea or fish emulsion.
Pollination
Watermelons require pollination to produce fruit. Bees are the primary pollinators.
* Attracting Pollinators:
* Plant Flowers: Plant flowers that attract bees and other pollinators near your watermelon patch. Some good choices include sunflowers, zinnias, and lavender.
* Avoid Pesticides: Avoid using pesticides, as they can harm pollinators.
* Hand-Pollination (If Necessary):
* Identifying Male and Female Flowers: Watermelons have separate male and female flowers. Male flowers appear first and have a long, thin stem. Female flowers have a small, immature fruit at the base of the flower.
* Pollinating: In the early morning, use a small paintbrush to collect pollen from the male flower and transfer it to the female flower.
Pest and Disease Control
Watermelons are susceptible to various pests and diseases.
* Common Pests:
* Aphids: Aphids are small, sap-sucking insects that can weaken plants. Control aphids with insecticidal soap or neem oil.
* Squash Bugs: Squash bugs can cause significant damage to watermelon plants. Handpick squash bugs and their eggs.
* Cucumber Beetles: Cucumber beetles can transmit diseases and damage foliage. Use row covers to protect young plants.
* Common Diseases:
* Powdery Mildew: Powdery mildew is a fungal disease that causes a white, powdery coating on the leaves. Improve air circulation and use a fungicide if necessary.
* Anthracnose: Anthracnose is a fungal disease that causes dark, sunken lesions on the leaves and fruits. Use disease-resistant varieties and avoid overhead watering.
* Fusarium Wilt: Fusarium wilt is a soilborne fungal disease that can cause wilting and death of plants. Use disease-resistant varieties and practice crop rotation.
* Preventative Measures:
* Crop Rotation: Rotate your crops each year to prevent the buildup of soilborne diseases.
* Good Air Circulation: Provide good air circulation to reduce the risk of fungal diseases.
* Weed Control: Keep your garden free of weeds, as they can harbor pests and diseases.
* Healthy Plants: Healthy plants are more resistant to pests and diseases. Provide your watermelons with proper care, including adequate watering, fertilization, and sunlight.
Supporting the Fruit
As the watermelons grow, they may need support to prevent them from rotting on the ground.
* Using Mulch: Place a thick layer of mulch under the fruits to keep
Conclusion
So, there you have it! This simple yet incredibly effective DIY trick using olive oil to clean and shine your granite and stainless steel surfaces is a game-changer. Forget expensive, chemical-laden cleaners that promise the world but often leave streaks and residue. This method is not only cost-effective and environmentally friendly, but it also delivers stunning results, leaving your surfaces gleaming and protected.
Why is this a must-try? Because it’s simple, safe, and effective. The natural oils in olive oil gently lift dirt and grime without scratching or damaging delicate surfaces like granite and stainless steel. Plus, the oil creates a protective barrier, helping to repel water and prevent future stains. You’ll be amazed at how easily fingerprints and smudges disappear, leaving behind a brilliant shine that lasts.
But the beauty of this DIY trick lies in its versatility. While olive oil is the star of the show, you can easily customize the recipe to suit your specific needs and preferences. For example, if you prefer a slightly stronger cleaning solution, add a few drops of lemon essential oil to the mixture. Lemon oil not only boosts the cleaning power but also leaves a refreshing citrus scent. Alternatively, a few drops of tea tree oil can add antibacterial properties, making it ideal for cleaning kitchen surfaces.
For stainless steel appliances, consider using a microfiber cloth to buff the surface after applying the olive oil mixture. This will help to remove any excess oil and create a streak-free shine. When cleaning granite countertops, be sure to use a soft cloth to avoid scratching the surface.
We understand that trying new cleaning methods can be daunting, but we urge you to give this olive oil cleaning method a try. The results speak for themselves. You’ll be amazed at how easy it is to achieve a professional-level clean with just a few simple ingredients.
Don’t just take our word for it! We encourage you to experiment with this DIY trick and share your experiences with us. Let us know what variations you tried, what worked best for you, and any tips you have to share. Your feedback will help us refine this method and make it even better for everyone.
Ready to ditch the harsh chemicals and embrace a natural, effective cleaning solution? Grab your olive oil, a soft cloth, and get ready to transform your granite and stainless steel surfaces. You won’t be disappointed! This **olive oil cleaning** method is a true testament to the power of simple, natural ingredients.
Frequently Asked Questions (FAQ)
1. Can I use any type of olive oil for cleaning?
While extra virgin olive oil is often recommended for its purity and quality, you can technically use any type of olive oil for cleaning granite and stainless steel. However, keep in mind that extra virgin olive oil may leave a slightly stronger scent than lighter olive oils. If you’re concerned about the scent, you can opt for a refined olive oil or a light olive oil. Ultimately, the choice is yours, and the results will be similar regardless of the type of olive oil you use. Just ensure the olive oil is fresh and hasn’t gone rancid. Rancid olive oil will have an unpleasant odor and may not clean as effectively.
2. How often should I use olive oil to clean my granite countertops?
The frequency of cleaning depends on how often you use your granite countertops and how prone they are to getting dirty. In general, you can use olive oil to clean your granite countertops once or twice a week to maintain their shine and protect them from stains. For daily cleaning, you can simply wipe down the countertops with a damp cloth to remove any spills or crumbs. Avoid using harsh chemicals or abrasive cleaners on your granite countertops, as these can damage the sealant and dull the surface.
3. Will olive oil make my stainless steel appliances greasy?
No, olive oil should not make your stainless steel appliances greasy if used properly. The key is to use a small amount of olive oil and to buff the surface thoroughly with a clean microfiber cloth after applying the oil. This will remove any excess oil and leave behind a streak-free shine. If you find that your stainless steel appliances are still greasy after cleaning, you may be using too much olive oil. Try using a smaller amount next time and buffing the surface more vigorously.
4. Can I use this method on other types of stone countertops, such as marble or quartz?
While olive oil is generally safe for use on granite and stainless steel, it’s important to exercise caution when using it on other types of stone countertops, such as marble or quartz. Marble is a porous stone and can be easily stained by oils. Quartz countertops are more resistant to staining, but it’s still best to test the olive oil mixture in an inconspicuous area before applying it to the entire surface. If you’re unsure whether olive oil is safe for your countertops, consult with a professional stone cleaner or countertop manufacturer.
5. What if I don’t have olive oil? Can I use another type of oil?
While olive oil is the preferred choice for this DIY cleaning trick, you can experiment with other types of natural oils, such as coconut oil or almond oil. However, keep in mind that these oils may have different properties and may not produce the same results as olive oil. Coconut oil, for example, is solid at room temperature and may be more difficult to apply and buff. Almond oil is a lighter oil and may not provide as much protection as olive oil. If you decide to use another type of oil, be sure to test it in an inconspicuous area first to ensure that it doesn’t stain or damage the surface.
6. How do I remove stubborn stains from my granite or stainless steel before using olive oil?
For stubborn stains on granite, try making a paste of baking soda and water. Apply the paste to the stain, let it sit for 15-20 minutes, and then gently scrub with a soft cloth. Rinse with water and dry thoroughly before applying the olive oil mixture. For stubborn stains on stainless steel, try using a mixture of vinegar and water. Spray the mixture onto the stain, let it sit for a few minutes, and then wipe with a clean cloth. Rinse with water and dry thoroughly before applying the olive oil mixture. Always test any cleaning solution in an inconspicuous area first to ensure that it doesn’t damage the surface.
7. Can I add essential oils other than lemon or tea tree oil?
Yes, you can experiment with other essential oils to customize the scent and cleaning properties of your olive oil mixture. Lavender essential oil can add a calming and relaxing scent, while peppermint essential oil can provide a refreshing and invigorating aroma. Eucalyptus essential oil has antibacterial and antiviral properties, making it a good choice for cleaning kitchen surfaces. When adding essential oils, be sure to use pure, therapeutic-grade oils and to add only a few drops to the mixture. Too much essential oil can be overpowering and may irritate the skin.
8. My granite looks dull after cleaning with olive oil. What am I doing wrong?
If your granite looks dull after cleaning with olive oil, it’s likely that you’re using too much oil or not buffing the surface thoroughly enough. Try using a smaller amount of olive oil and buffing the surface more vigorously with a clean microfiber cloth. You can also try using a dry cloth to remove any excess oil after buffing. If the dullness persists, it’s possible that your granite needs to be resealed. Contact a professional stone cleaner to have your granite resealed.
9. Is this olive oil cleaning method safe for food preparation surfaces?
Yes, this olive oil cleaning method is safe for food preparation surfaces, as olive oil is a natural and non-toxic ingredient. However, it’s important to wipe down the surface thoroughly with a clean, damp cloth after cleaning with olive oil to remove any residue. You can also use a food-safe cleaner to sanitize the surface after cleaning with olive oil.
10. How do I store the olive oil cleaning mixture?
You can store the olive oil cleaning mixture in a clean, airtight container at room temperature. Be sure to label the container clearly so that you don’t accidentally use it for cooking. The mixture should last for several months, but it’s best to use it within a few weeks for optimal results. If the mixture starts to smell rancid or develops a strange color, discard it and make a fresh batch.

Leave a Comment