

Planting Bok Choy: Your Guide to a Bountiful Harvest
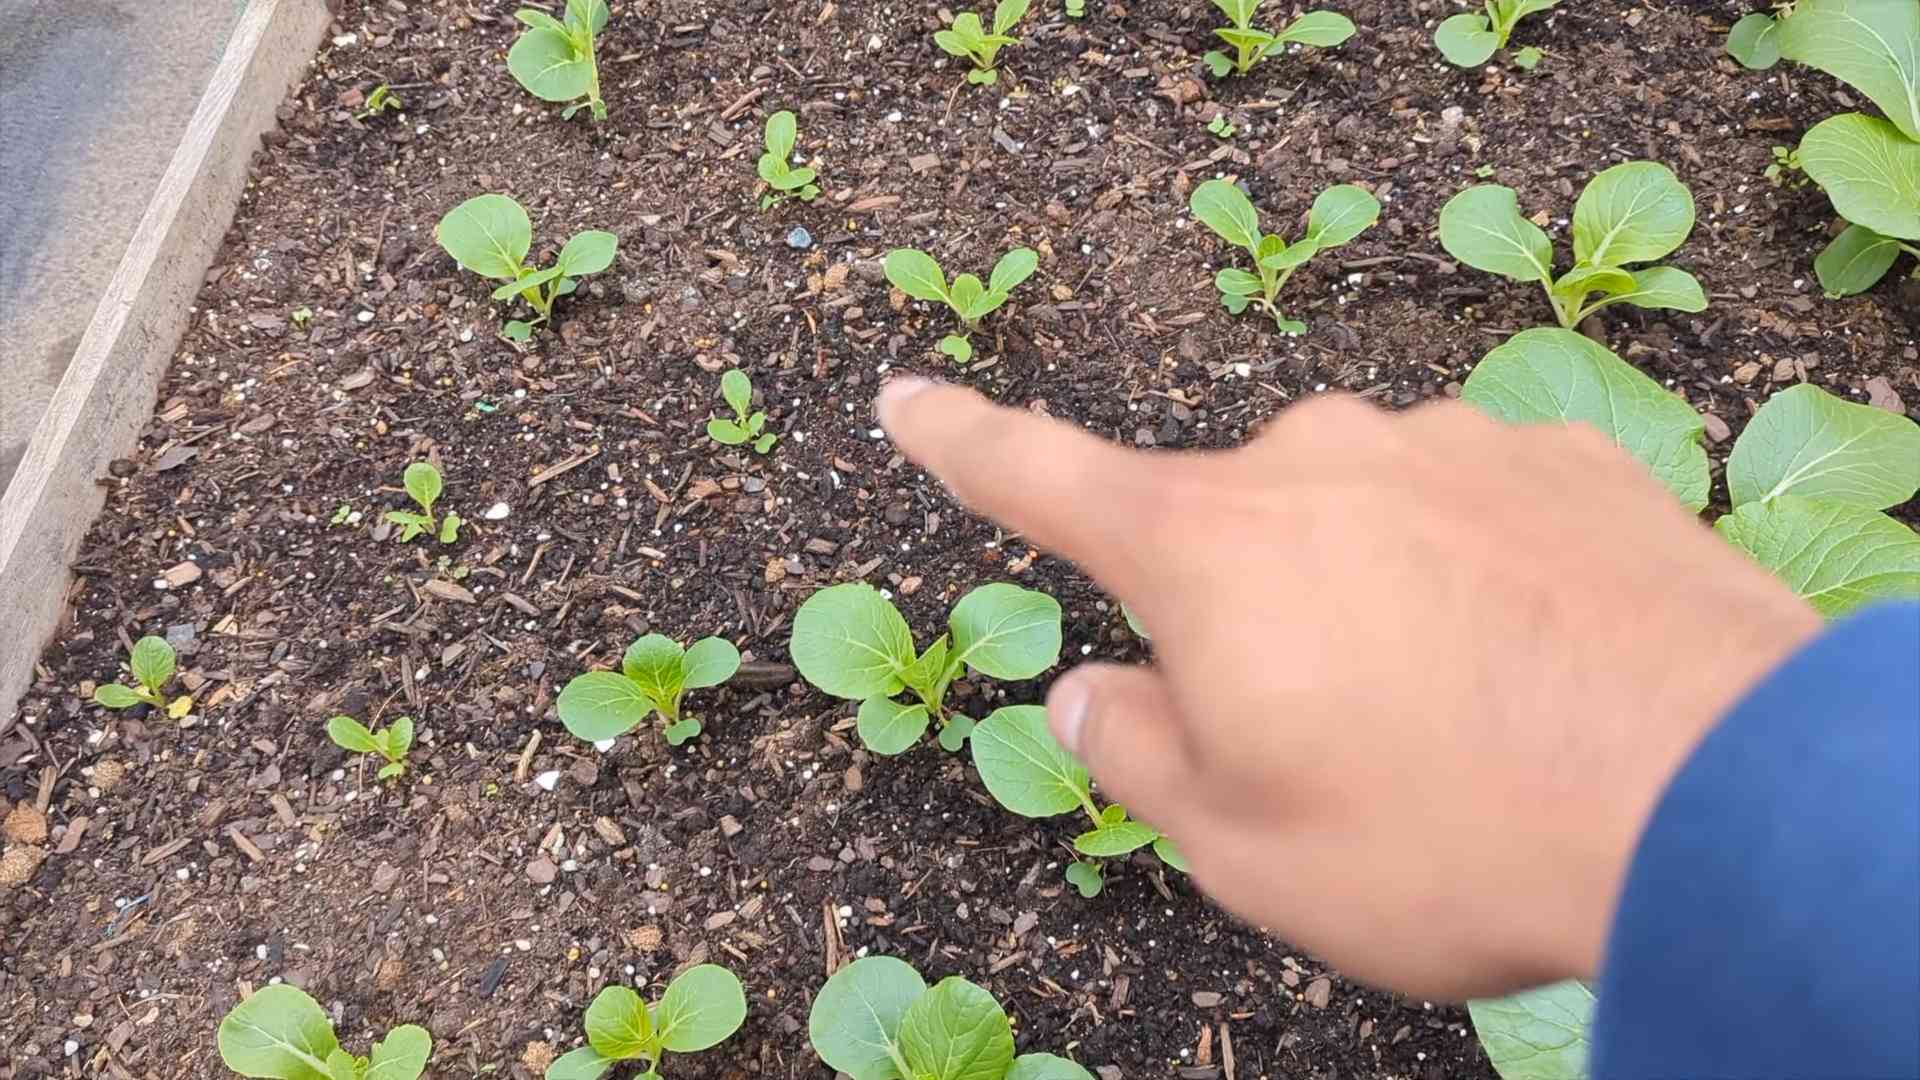
Planting Bok Choy might seem daunting at first, but I promise you, it’s easier than you think! This article is your passport to a thriving home garden bursting with delicious, nutritious bok choy. Forget expensive grocery store produce – I’m going to share my favorite Planting Bok Choy tricks and DIY solutions that will have you harvesting your own crisp, flavorful leaves in no time.
Bok choy, a member of the brassica family alongside kale and cabbage, boasts a rich history, cultivated for centuries in East Asia. Its versatility in the kitchen, from stir-fries to salads, makes it a beloved vegetable across cultures. But the real magic lies in growing your own. There’s something incredibly satisfying about nurturing a plant from seed to harvest, and the taste of homegrown bok choy is simply unparalleled.
Why Grow Your Own Bok Choy?
Beyond the delicious taste, planting bok choy offers numerous benefits. You control the quality of your produce, avoiding pesticides and ensuring freshness. It’s a rewarding experience for the whole family, especially kids who can get involved in the planting and harvesting process. Plus, it’s a surprisingly space-saving crop, perfect for even the smallest balcony gardens. This article will equip you with the knowledge and techniques to successfully plant and grow your own bok choy, no matter your gardening experience level. Let’s get started on your journey to a bountiful bok choy harvest!

Unlocking the Power of Baking Soda: My Favorite Cleaning Hacks
Baking soda, that humble box of white powder sitting in your pantry, is a cleaning superhero in disguise! It’s cheap, readily available, and surprisingly effective at tackling a wide range of cleaning tasks. Let me share some of my favorite baking soda cleaning hacks – you’ll be amazed at what this versatile ingredient can do.
Cleaning Your Kitchen with Baking Soda
The kitchen is often the heart of the home, and it can also be the dirtiest! Baking soda is my go-to for keeping it sparkling.
- Deodorizing your refrigerator: An open box of baking soda absorbs odors wonderfully. Replace it every few months for optimal freshness.
- Cleaning your microwave: Make a paste of baking soda and water. Apply it to the inside of your microwave, let it sit for a few minutes, then wipe clean. Stubborn stains might need a bit more elbow grease!
- Cleaning your oven: For light cleaning, sprinkle baking soda on the bottom of your oven and let it sit overnight. In the morning, wipe it up with a damp cloth. For heavier grime, make a paste of baking soda and water and apply it to the affected areas. Let it sit for a few hours or overnight, then scrub with a damp sponge or brush.
- Cleaning your stovetop: Baking soda is great for cleaning both gas and electric stovetops. Sprinkle it on the surface, let it sit for a while, then scrub with a damp sponge or cloth. For stubborn grease, make a paste of baking soda and water.
- Cleaning your dishwasher: Sprinkle a cup of baking soda into the bottom of your empty dishwasher and run a hot cycle. This helps to remove odors and clean the interior.
- Cleaning your sink: Sprinkle baking soda into your sink, scrub with a damp sponge, and rinse. This helps remove stains and deodorize.
Step-by-Step: Cleaning a Greasy Stovetop
1. Prepare your workspace: Clear the stovetop of any pots, pans, or other items. Turn off the stove and allow it to cool completely.
2. Sprinkle baking soda: Generously sprinkle baking soda over the entire stovetop surface, paying extra attention to greasy areas.
3. Let it sit: Allow the baking soda to sit for at least 30 minutes, or even overnight for stubborn grease. The baking soda will absorb the grease.
4. Add water (optional): For extra cleaning power, lightly dampen a sponge or cloth and gently scrub the baking soda into the grease.
5. Scrub and wipe: Use a damp sponge or cloth to scrub the stovetop, wiping away the baking soda and grease. You may need to rinse your sponge or cloth frequently.
6. Rinse and dry: Rinse the stovetop thoroughly with clean water and dry it with a clean cloth or paper towel.
Cleaning Your Bathroom with Baking Soda
The bathroom is another area where baking soda shines. Its abrasive nature helps to scrub away grime, while its deodorizing properties leave your bathroom smelling fresh.
- Cleaning your toilet: Sprinkle baking soda into the toilet bowl, let it sit for a few hours, then scrub with a toilet brush and flush. For extra cleaning power, add a cup of white vinegar after the baking soda.
- Cleaning your shower or bathtub: Make a paste of baking soda and water. Apply it to the shower walls and bathtub, let it sit for a few minutes, then scrub with a brush or sponge. Rinse thoroughly.
- Cleaning your sink: Similar to the kitchen sink, sprinkle baking soda into your bathroom sink, scrub with a damp sponge, and rinse. This helps remove stains and deodorize.
- Cleaning grout: Make a paste of baking soda and water. Apply it to the grout, let it sit for a few minutes, then scrub with an old toothbrush. Rinse thoroughly.
- Deodorizing your bathroom: Place an open container of baking soda in your bathroom to absorb odors.
Step-by-Step: Cleaning Grout with Baking Soda
1. Prepare your workspace: Clear the area around the grout you’ll be cleaning. Protect surrounding surfaces with old towels or newspaper.
2. Make a paste: Mix baking soda with just enough water to create a thick paste. The consistency should be similar to toothpaste.
3. Apply the paste: Apply the paste to the grout using an old toothbrush or a grout brush. Make sure to cover all the grout lines evenly.
4. Let it sit: Allow the paste to sit for at least 15-20 minutes, or longer for stubborn stains.
5. Scrub the grout: Use the toothbrush or grout brush to scrub the grout lines vigorously. The baking soda will help to lift the dirt and grime.
6. Rinse and dry: Rinse the grout thoroughly with clean water and wipe it dry with a clean cloth or sponge.
Other Baking Soda Cleaning Hacks
Beyond the kitchen and bathroom, baking soda has many other cleaning applications.
- Cleaning your laundry: Add ½ cup of baking soda to your washing machine along with your detergent to boost cleaning power and soften clothes. It also helps to remove odors.
- Cleaning carpets and upholstery: Sprinkle baking soda on carpets and upholstery to absorb odors and remove stains. Let it sit for at least 30 minutes, then vacuum thoroughly.
- Cleaning silver: Line a bowl with aluminum foil, add hot water, baking soda, and salt. Submerge your silver items, and watch the tarnish disappear!
- Cleaning your coffee maker: Run a cycle with water and baking soda to remove coffee residue and clean the carafe.
- Cleaning your cutting boards: Sprinkle baking soda on your cutting board, scrub with a damp sponge, and rinse. This helps to remove odors and sanitize.
Step-by-Step: Cleaning Silver with Baking Soda
1. Gather your supplies: You’ll need a bowl, aluminum foil, hot water, baking soda, and salt.
2. Line the bowl: Line the bowl with aluminum foil, shiny side up.
3. Add water and ingredients: Add hot water to the bowl, along with about 1/4 cup of baking soda and 1 tablespoon of salt.
4. Submerge the silver: Carefully place your silver items into the bowl, making sure they are in contact with the aluminum foil.
5. Let it sit: Let the silver sit in the solution for about 5-10 minutes, or until the tarnish is gone.
6. Rinse and dry: Remove the silver items from the bowl and rinse them thoroughly with clean water. Dry them immediately with a soft cloth to prevent water spots.
Remember to always test a small, inconspicuous area first before applying baking soda to a larger surface, especially on delicate materials. With a little patience and elbow grease, baking soda can help you achieve a sparkling clean home!
Conclusion
So there you have it – a comprehensive guide to successfully planting bok choy in your own garden, balcony, or even window box! This DIY approach to growing your own bok choy offers a multitude of benefits, far surpassing the convenience of store-bought options. Not only will you enjoy the unparalleled freshness and flavor of homegrown bok choy, but you’ll also experience the immense satisfaction of nurturing a plant from seed to harvest. The process is surprisingly straightforward, even for beginner gardeners, and the rewards are incredibly satisfying. You’ll be amazed by the vibrant green leaves and the crisp, delicious taste that only homegrown bok choy can provide. This simple DIY trick allows you to control the quality of your ingredients, ensuring that your bok choy is free from pesticides and other harmful chemicals. Plus, you’ll be reducing your carbon footprint by sourcing your food locally and minimizing transportation emissions. It’s a win-win for your taste buds, your health, and the environment.
Beyond the basic method outlined, there are numerous exciting variations you can explore. Experiment with different bok choy varieties – from the classic smooth-leafed types to the more textured and ruffled varieties. Consider companion planting, pairing your bok choy with herbs like basil or dill, which can deter pests and enhance the overall flavor profile. You can also try different planting methods, such as starting seeds indoors for an earlier harvest or using a hydroponic system for a more controlled growing environment. The possibilities are truly endless!
We strongly encourage you to embark on this rewarding journey of planting your own bok choy. It’s a fantastic way to connect with nature, learn about the growing process, and enjoy the delicious fruits (or rather, leaves!) of your labor. Share your experience with us! We’d love to hear about your successes, challenges, and any innovative techniques you discover along the way. Post your photos on social media using #DIYBokChoy and tag us – we can’t wait to see your thriving bok choy plants and hear about your culinary creations featuring this incredibly versatile vegetable.
Don’t hesitate to get started today. The journey from seed to succulent bok choy is more rewarding than you might imagine. You’ll be surprised at how easy it is to grow your own delicious and healthy bok choy. So grab some seeds, prepare your soil, and get ready to experience the joy of homegrown goodness!
Frequently Asked Questions
What type of soil is best for planting bok choy?
Bok choy thrives in loose, well-drained soil that is rich in organic matter. A slightly acidic to neutral pH (6.0-7.0) is ideal. Amend heavy clay soils with compost or other organic materials to improve drainage and aeration. Sandy soils may benefit from the addition of peat moss or other organic matter to retain moisture.
How much sunlight does bok choy need?
Bok choy prefers partial shade, especially during the hottest part of the day. Aim for at least 4-6 hours of sunlight per day, but protect it from intense afternoon sun, which can scorch the leaves. In hotter climates, providing some shade during the peak sun hours is crucial for optimal growth.
How often should I water my bok choy?
Consistent moisture is key to successful bok choy cultivation. Water regularly, keeping the soil consistently moist but not waterlogged. The frequency of watering will depend on your climate and soil type. During hot and dry periods, you may need to water daily, while in cooler, more humid conditions, watering every other day might suffice. Always check the soil moisture before watering; water deeply when the top inch of soil feels dry.
How long does it take for bok choy to mature?
The time it takes for bok choy to mature varies depending on the variety and growing conditions. Generally, most bok choy varieties are ready for harvest in 45-60 days from planting. However, some varieties may take slightly longer or shorter, so always refer to the seed packet for specific information on the expected maturity time.
What are some common pests and diseases that affect bok choy?
Bok choy can be susceptible to various pests and diseases, including aphids, slugs, snails, and fungal diseases like downy mildew. Regularly inspect your plants for signs of pests or diseases. Implementing preventative measures, such as companion planting, crop rotation, and maintaining good sanitation practices, can help minimize pest and disease problems. If pests or diseases become a significant issue, consider using organic pest control methods or consulting a local gardening expert for advice.
Can I grow bok choy in containers?
Absolutely! Bok choy grows well in containers, making it a perfect choice for balcony gardens or small spaces. Choose containers that are at least 12 inches deep and wide to allow for adequate root development. Ensure the containers have drainage holes to prevent waterlogging.
What should I do with my harvested bok choy?
Harvest bok choy when the leaves are fully developed and firm. Cut the entire plant at the base or harvest individual leaves as needed. Store harvested bok choy in a plastic bag in the refrigerator for up to a week to maintain its freshness. You can also blanch and freeze bok choy for longer storage.
Can I save seeds from my bok choy plants to plant next year?
While it’s possible to save seeds from your bok choy plants, it’s generally not recommended for hybrid varieties, as the resulting plants may not exhibit the same characteristics as the parent plant. If you’re interested in saving seeds, it’s best to choose open-pollinated varieties, which are more likely to produce true-to-type offspring. Allow the seed pods to fully mature on the plant before collecting the seeds.

Leave a Comment