

Homemade Cleaning Solutions: Unlock the secrets to a sparkling home without breaking the bank or harming the environment! Are you tired of harsh chemicals and sky-high prices for cleaning products? I know I was! That’s why I dove headfirst into the world of DIY cleaning, and let me tell you, it’s been a game-changer.
For generations, resourceful homemakers have relied on simple, natural ingredients to keep their homes clean and fresh. Think back to your grandmother’s pantry – vinegar, baking soda, lemon juice – these weren’t just for cooking! They were the cornerstones of a clean and healthy home. This tradition, born out of necessity and a deep understanding of natural ingredients, is making a huge comeback, and for good reason.
In today’s world, we’re more aware than ever of the impact our choices have on our health and the planet. Many commercial cleaning products are packed with chemicals that can irritate our skin, pollute our air, and harm aquatic life. By switching to homemade cleaning solutions, you can drastically reduce your exposure to these toxins while saving money and reducing plastic waste. Plus, it’s incredibly satisfying to create something effective and eco-friendly with your own two hands. So, are you ready to ditch the chemicals and embrace the power of natural cleaning? Let’s get started!

DIY Cleaning Solutions: Ditch the Chemicals and Save Money!
Hey everyone! I’m so excited to share some of my favorite homemade cleaning solutions with you. I’ve been making my own cleaners for years now, and honestly, I’ll never go back to store-bought stuff. Not only are these recipes super effective, but they’re also much cheaper, better for the environment, and safer for my family (and my furry friends!). Plus, it’s kind of fun to play mad scientist in the kitchen, right?
Let’s dive into some of my go-to recipes. I promise, you’ll be amazed at how well these work!
All-Purpose Cleaner: Your New Best Friend
This is my absolute favorite and most-used cleaner. It’s perfect for countertops, sinks, appliances, and pretty much any surface that needs a good wipe-down.
What you’ll need:
* Spray bottle (I reuse old cleaning bottles to be extra eco-friendly!)
* 1/2 cup white vinegar
* 1/4 cup baking soda
* 1 liter of water
* 10-15 drops of your favorite essential oil (optional, but I love lemon, lavender, or tea tree)
Step-by-step instructions:
1. Mix the baking soda and vinegar: In a large bowl or measuring cup, slowly combine the baking soda and vinegar. Be careful, it will fizz! This is the magic happening, so don’t worry.
2. Add the water: Once the fizzing subsides, gradually add the water. Stir gently to combine everything.
3. Add essential oils (optional): If you’re using essential oils, now’s the time to add them. I find they really boost the cleaning power and leave a lovely scent.
4. Pour into the spray bottle: Carefully pour the mixture into your spray bottle. A funnel can be helpful here to avoid spills.
5. Clean away! Spray the solution onto the surface you want to clean and wipe with a clean cloth or sponge. For tougher messes, let the solution sit for a few minutes before wiping.
Glass Cleaner: Streak-Free Shine Guaranteed
Say goodbye to streaks and hello to sparkling clean windows and mirrors! This glass cleaner is incredibly simple and works like a charm.
What you’ll need:
* Spray bottle
* 2 cups water
* 1/4 cup white vinegar
* 1/4 cup rubbing alcohol (isopropyl alcohol)
Step-by-step instructions:
1. Combine the ingredients: In your spray bottle, combine the water, vinegar, and rubbing alcohol.
2. Shake it up: Give the bottle a good shake to mix everything together.
3. Spray and wipe: Spray the solution onto your windows or mirrors and wipe with a clean microfiber cloth. Microfiber cloths are key to avoiding streaks!
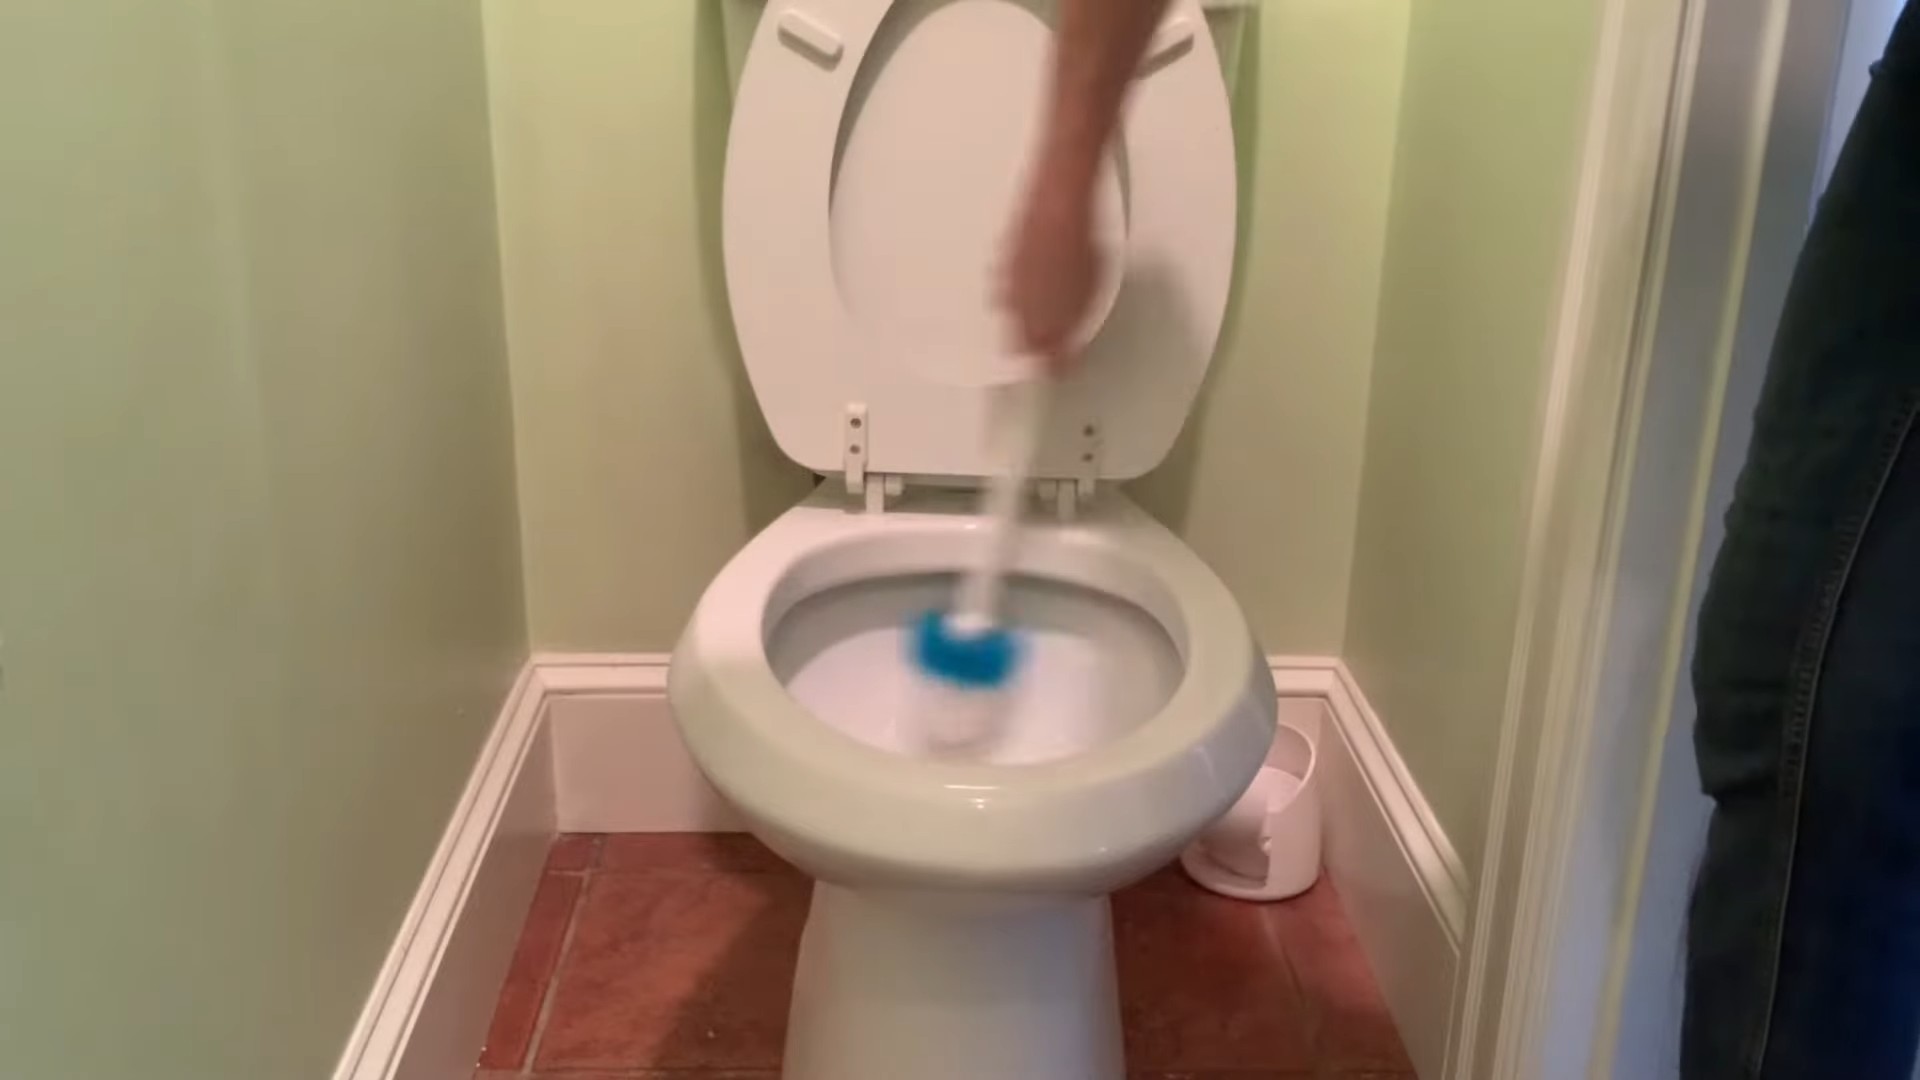
Toilet Bowl Cleaner: Keep it Fresh and Clean
This toilet bowl cleaner is a great alternative to harsh chemical cleaners. It’s effective at removing stains and keeping your toilet fresh.
What you’ll need:
* 1/2 cup baking soda
* 1 cup white vinegar
* 10-15 drops of tea tree essential oil (optional, for extra disinfecting power)
Step-by-step instructions:
1. Pour in the baking soda: Sprinkle the baking soda into the toilet bowl, making sure to coat the sides as much as possible.
2. Add the vinegar: Slowly pour the vinegar over the baking soda. It will fizz, just like with the all-purpose cleaner.
3. Let it sit: Let the mixture sit for at least 15-20 minutes, or even longer for tougher stains.
4. Scrub and flush: After the soaking time, scrub the toilet bowl with a toilet brush and flush.
5. Add essential oils (optional): If you’re using tea tree oil, add it to the bowl after flushing for a fresh, clean scent.
Drain Cleaner: Unclog Those Pesky Drains
Clogged drains are the worst! But before you reach for those harsh chemical drain cleaners, try this natural solution. It’s surprisingly effective and much safer for your pipes and the environment.
What you’ll need:
* 1/2 cup baking soda
* 1 cup white vinegar
* Boiling water
Step-by-step instructions:
1. Pour in the baking soda: Pour the baking soda down the drain.
2. Add the vinegar: Follow with the vinegar. Again, it will fizz!
3. Let it sit: Let the mixture sit for 30 minutes. This allows the baking soda and vinegar to break down the clog.
4. Flush with boiling water: After 30 minutes, carefully pour a pot of boiling water down the drain. The hot water will help to flush away the loosened debris.
5. Repeat if necessary: If the drain is still clogged, repeat the process. For really stubborn clogs, you might need to use a plunger after the boiling water.
Furniture Polish: Restore Shine and Protect Wood
This homemade furniture polish will bring back the shine to your wooden furniture and help protect it from damage.
What you’ll need:
* Spray bottle or small container
* 1/4 cup olive oil
* 1/4 cup white vinegar or lemon juice
* Soft cloth
Step-by-step instructions:
1. Combine the ingredients: In a spray bottle or small container, combine the olive oil and vinegar (or lemon juice).
2. Shake or stir well: Shake the spray bottle or stir the mixture well to combine the ingredients.
3. Apply to furniture: Lightly spray or apply a small amount of the polish to your wooden furniture.
4. Wipe with a soft cloth: Use a soft cloth to rub the polish into the wood, following the grain. Buff the surface to a shine.
Laundry Detergent: Clean Clothes, Happy Planet
Making your own laundry detergent might seem intimidating, but it’s actually quite easy and can save you a lot of money. Plus, you can customize the scent to your liking!
What you’ll need:
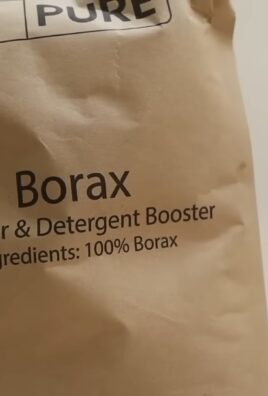
* 1 cup washing soda (sodium carbonate)
* 1 cup borax (sodium borate)
* 1 bar of castile soap (like Dr. Bronner’s), grated
* Optional: 10-15 drops of essential oil (lavender, lemon, or tea tree are great choices)
Step-by-step instructions:
1. Grate the castile soap: Use a cheese grater to finely grate the castile soap. This will help it dissolve more easily.
2. Combine the ingredients: In a large bowl, combine the washing soda, borax, and grated castile soap.
3. Add essential oils (optional): If you’re using essential oils, add them to the mixture.
4. Mix well: Stir everything together thoroughly until well combined.
5. Store in an airtight container: Store the laundry detergent in an airtight container, such as a glass jar or plastic container.
6. Use sparingly: Use 1-2 tablespoons of detergent per load of laundry, depending on the size and soil level of the load.
Oven Cleaner: Tackle Baked-On Messes
Oven cleaning is nobody’s favorite chore, but this homemade oven cleaner makes it a little less daunting. It’s effective at removing baked-on grease and grime without the harsh chemicals.
What you’ll need:
* 1/2 cup baking soda
* Water
* Spray bottle
* Spatula or scraper
* Vinegar (optional)
Step-by-step instructions:
1. Make a baking soda paste: In a bowl, mix the baking soda with enough water to form a thick paste.
2. Coat the oven: Spread the baking soda paste all over the inside of your oven, avoiding the heating elements. Be generous with the paste, especially on areas with baked-on messes.
3. Let it sit: Let the paste sit for at least 12 hours, or even overnight. This gives the baking soda time to break down the grease and grime.
4. Scrub and scrape: After the soaking time, use a spatula or scraper to remove as much of the baking soda paste as possible.
5. Wipe clean: Wipe the oven clean with a damp cloth. You may need to rinse the cloth several times to remove all the baking soda residue.
6. Spray with vinegar (optional): For any stubborn residue, spray the area with vinegar and let it sit for a few minutes before wiping clean. The vinegar will react with any remaining baking soda and help to loosen the grime.
Dish Soap: Gentle on Hands, Tough on Grease
Conclusion
So, there you have it! Ditching the harsh chemicals and embracing these simple, effective, and budget-friendly homemade cleaning solutions is more than just a trend; it’s a conscious choice for a healthier home and a happier planet. We’ve explored how easy it is to create powerful cleaners using ingredients you likely already have in your pantry. From tackling stubborn grease to banishing bathroom grime, these recipes offer a natural alternative without compromising on cleaning power.
But why is this DIY approach a must-try? Firstly, you’re in complete control of what goes into your cleaning products. No more deciphering confusing ingredient lists filled with unpronounceable chemicals. You know exactly what you’re using, reducing the risk of allergic reactions and sensitivities, especially important for households with children and pets. Secondly, it’s incredibly cost-effective. Think about how much you spend annually on commercial cleaning products. These homemade alternatives significantly cut those costs, freeing up your budget for other things. Finally, and perhaps most importantly, you’re making a positive impact on the environment. By reducing your reliance on plastic bottles and harsh chemicals, you’re contributing to a more sustainable future.
Ready to take your cleaning game to the next level? Consider these variations to personalize your homemade cleaning solutions:
* **Infuse your vinegar:** Add citrus peels (lemon, orange, grapefruit) to your vinegar for a refreshing scent and extra cleaning power. Let it steep for a few weeks before using.
* **Essential oil blends:** Experiment with different essential oil combinations to create custom scents and boost cleaning properties. Lavender, tea tree, eucalyptus, and lemon are all excellent choices.
* **Adjust the ratios:** Feel free to adjust the ratios of ingredients to suit your specific needs and preferences. If you find a solution isn’t strong enough, add a bit more of the active ingredient (e.g., vinegar, baking soda).
* Consider adding borax: For tougher cleaning jobs, a small amount of borax can be added to some of these solutions. However, always use caution and research proper safety guidelines when handling borax.
We’re confident that once you experience the effectiveness and simplicity of these homemade cleaning solutions, you’ll never go back to store-bought cleaners. The peace of mind knowing you’re using safe, natural ingredients is truly priceless.
Now, it’s your turn! We encourage you to try these recipes and discover the magic of DIY cleaning. Don’t be afraid to experiment and find what works best for you. And most importantly, share your experiences with us! Let us know which recipes you tried, what variations you created, and how they worked for you. Your feedback will help others discover the benefits of homemade cleaning solutions and build a community of eco-conscious cleaners. Share your tips and tricks in the comments below – we can’t wait to hear from you! Let’s make our homes cleaner, healthier, and more sustainable, one homemade solution at a time.
Frequently Asked Questions (FAQs)
What are the benefits of using homemade cleaning solutions compared to store-bought ones?
Homemade cleaning solutions offer a multitude of benefits. Firstly, they are generally much safer for your health and the environment. Store-bought cleaners often contain harsh chemicals that can cause skin irritation, respiratory problems, and even long-term health issues. Homemade solutions, on the other hand, use natural ingredients like vinegar, baking soda, and lemon juice, which are less likely to cause adverse reactions. Secondly, they are significantly more cost-effective. The ingredients used in homemade cleaners are typically inexpensive and readily available, saving you money in the long run. Thirdly, they are environmentally friendly. By using homemade solutions, you reduce your reliance on plastic bottles and harmful chemicals that can pollute our waterways and ecosystems. Finally, you have complete control over the ingredients, allowing you to customize the solutions to your specific needs and preferences.
Are homemade cleaning solutions as effective as store-bought cleaners?
Yes, in many cases, homemade cleaning solutions can be just as effective, if not more so, than store-bought cleaners. The key is to use the right ingredients and recipes for the specific cleaning task. For example, vinegar is an excellent disinfectant and degreaser, while baking soda is a natural abrasive that can remove stubborn stains. Lemon juice is a powerful cleaner and deodorizer. By combining these ingredients in the right proportions, you can create powerful cleaning solutions that rival the effectiveness of commercial products. However, it’s important to note that some tasks may require more specialized cleaning agents, and it’s always a good idea to test any new cleaning solution on a small, inconspicuous area first.
What are some essential ingredients to have on hand for making homemade cleaning solutions?
A few essential ingredients will allow you to create a wide range of homemade cleaning solutions. These include:
* **White vinegar:** A versatile cleaner, disinfectant, and deodorizer.
* **Baking soda:** A natural abrasive, deodorizer, and pH regulator.
* **Lemon juice:** A natural cleaner, disinfectant, and deodorizer.
* **Castile soap:** A gentle and effective cleanser made from vegetable oils.
* **Essential oils:** Add fragrance and boost cleaning properties (e.g., lavender, tea tree, eucalyptus, lemon).
* **Borax (optional):** A natural mineral that can be used as a cleaning booster (use with caution and research safety guidelines).
* **Water:** Used as a base for many cleaning solutions.
Having these ingredients on hand will allow you to tackle most cleaning tasks around your home.
Can I use essential oils in my homemade cleaning solutions? If so, which ones are best?
Yes, essential oils are a great addition to homemade cleaning solutions. They not only add a pleasant fragrance but also offer additional cleaning and disinfecting properties. Some of the best essential oils for cleaning include:
* **Lavender:** Known for its calming scent and antibacterial properties.
* **Tea tree:** A powerful antiseptic and antifungal agent.
* **Eucalyptus:** A natural disinfectant and decongestant.
* **Lemon:** A refreshing scent and degreasing properties.
* **Peppermint:** A refreshing scent and antibacterial properties.
* **Orange:** A cheerful scent and degreasing properties.
When using essential oils, be sure to use pure, therapeutic-grade oils and follow recommended dilution ratios. A few drops are usually sufficient for most cleaning solutions.
Are there any surfaces or materials that I should avoid using homemade cleaning solutions on?
While homemade cleaning solutions are generally safe for most surfaces, there are a few exceptions to be aware of:
* **Granite and marble:** Acidic cleaners like vinegar and lemon juice can etch and damage these surfaces. Use a pH-neutral cleaner specifically designed for stone.
* **Waxed wood:** Vinegar can strip the wax finish from wood furniture. Use a gentle soap and water solution instead.
* **Electronics:** Avoid spraying any liquid directly onto electronic devices. Use a slightly damp microfiber cloth to wipe them down.
* **Unsealed grout:** Baking soda can be abrasive and damage unsealed grout. Use a gentle cleaner specifically designed for grout.
Always test any new cleaning solution on a small, inconspicuous area first to ensure it doesn’t damage the surface.
How should I store my homemade cleaning solutions?
Store your homemade cleaning solutions in clean, airtight containers. Glass bottles are ideal, but plastic spray bottles can also be used. Be sure to label each container clearly with the name of the solution and the date it was made. Store the solutions in a cool, dark place away from direct sunlight and heat. Some solutions, like those containing essential oils, may degrade over time, so it’s best to use them within a few months.
Are homemade cleaning solutions safe for pets and children?
Homemade cleaning solutions are generally safer for pets and children than store-bought cleaners, but it’s still important to take precautions. Keep all cleaning solutions out of reach of children and pets. Avoid using essential oils that are known to be toxic to pets, such as tea tree oil. When cleaning, ventilate the area well and allow surfaces to dry completely before allowing pets or children to come into contact with them. If you have any concerns, consult with your veterinarian or pediatrician.
How can I make my homemade cleaning solutions smell better?
There are several ways to enhance the scent of your homemade cleaning solutions. The easiest way is to add a few drops of your favorite essential oils. You can also infuse your vinegar with citrus peels or herbs for a more subtle fragrance. Another option is to use scented castile soap as a base for your cleaning solutions. Experiment with different combinations to find scents that you enjoy.
What if a homemade cleaning solution doesn’t seem to be working?
If a homemade cleaning solution isn’t working as expected, try these tips:
* **Increase the concentration:** Add more of the active ingredient (e.g., vinegar, baking soda) to the solution.
* **Allow it to sit:** Let the solution sit on the surface for a few minutes before wiping it away.
* **Use a scrub brush:** For stubborn stains, use a scrub brush or sponge to agitate the surface.
* **Try a different solution:** Some cleaning tasks may require a different approach. Experiment with different recipes until you find one that works.
* **Consider borax (with caution):** For very tough cleaning jobs, a small amount of borax can be

Leave a Comment