

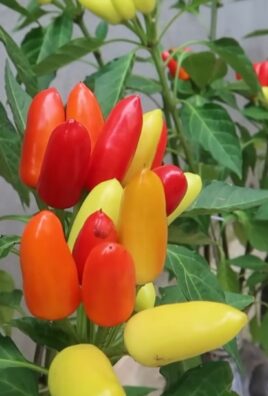
Homegrown Spicy Chili Peppers – imagine the fiery kick of a perfectly ripe chili, grown right in your own backyard! Forget bland, store-bought peppers; we’re diving headfirst into the world of DIY chili cultivation, and I’m so excited to share my secrets with you.
For centuries, chili peppers have been more than just a spice; they’ve been woven into the fabric of cultures around the globe. From the ancient Aztecs using them in rituals to the vibrant street food of Thailand, these fiery fruits have a rich and fascinating history. But you don’t need to be a culinary historian to appreciate the joy of growing your own.
Why should you embark on this spicy adventure? Well, for starters, you’ll have access to varieties you simply can’t find in supermarkets. Plus, you’ll know exactly what went into growing them – no mystery pesticides or questionable practices. But the real reason? It’s incredibly rewarding! There’s nothing quite like the satisfaction of harvesting your own homegrown spicy chili peppers and adding that personal touch to your favorite dishes.
This article is packed with easy-to-follow DIY tricks and hacks that will transform even the most novice gardener into a chili-growing pro. We’ll cover everything from seed starting to pest control, ensuring you have a bountiful harvest of fiery goodness. So, grab your gardening gloves, and let’s get started!

Turning Your Homegrown Spicy Chili Peppers into Fiery Chili Oil
Okay, so you’ve nurtured those little chili pepper plants, babied them through the summer, and now you’re overflowing with a bounty of fiery goodness. What to do with all those spicy chili peppers? I’m here to tell you: chili oil! Forget the store-bought stuff; homemade chili oil is a game-changer. It’s fresher, more flavorful, and you can customize the heat level to your exact liking. Plus, it makes a fantastic gift for your spice-loving friends. Let’s get started!
What You’ll Need: The Essentials
Before we dive in, let’s gather our ingredients and equipment. This is crucial for a smooth and enjoyable chili oil-making experience.
* **Your Homegrown Chili Peppers:** Obviously! The type of chili pepper you use will determine the heat level and flavor profile of your oil. I personally love a mix of cayenne, Thai chilies, and maybe a few habaneros for an extra kick. Remember to wear gloves when handling hot peppers!
* **Neutral Oil:** You’ll need a good quality neutral oil with a high smoke point. Canola oil, peanut oil, soybean oil, or grapeseed oil are all excellent choices. Avoid olive oil, as its flavor is too strong and its smoke point is too low for this process.
* **Aromatics:** This is where you can really get creative! Common aromatics include:
* Garlic cloves (fresh, peeled)
* Shallots (peeled and sliced)
* Ginger (fresh, peeled and sliced)
* Star anise
* Cinnamon stick
* Sichuan peppercorns (for that numbing, tingling sensation)
* Bay leaves
* Dried orange peel
* **Spices (Optional):** Feel free to add other spices to enhance the flavor. Some ideas include:
* Cumin seeds
* Coriander seeds
* Fennel seeds
* Black peppercorns
* **Salt:** To taste.
* **Sugar (Optional):** A pinch of sugar can balance the flavors.
* **Vinegar (Optional):** A splash of rice vinegar or black vinegar can add a nice tang.
* **Equipment:**
* Large, heavy-bottomed pot or Dutch oven
* Heat-resistant bowl or jar for the finished chili oil
* Fine-mesh sieve or cheesecloth-lined strainer
* Tongs or slotted spoon
* Cutting board
* Knife
* Gloves (essential for handling chili peppers!)
Step-by-Step: Making Your Fiery Chili Oil
Alright, let’s get down to business! Follow these steps carefully, and you’ll be enjoying your homemade chili oil in no time.
1. **Prepare the Chili Peppers:** This is the most important step, as it directly affects the flavor and heat of your oil.
* **Wear gloves!** Seriously, don’t skip this. Chili oil can burn your skin and eyes.
* **Wash and dry the chili peppers thoroughly.**
* **Decide how you want to process them:** You have a few options here:
* **Roughly chop:** This will result in a chunkier chili oil with a more intense flavor.
* **Grind into flakes:** Use a food processor or spice grinder to create chili flakes. This will create a smoother oil with a more even heat distribution.
* **Leave whole:** If you want a milder oil, you can leave some of the chili peppers whole. Just be sure to pierce them with a knife or fork so the oil can penetrate.
* I personally prefer to grind about half of my chili peppers into flakes and roughly chop the other half for a bit of texture.
2. **Infuse the Oil with Aromatics:** This step is crucial for building a complex and flavorful base for your chili oil.
* Pour the neutral oil into your large pot or Dutch oven. You’ll need enough oil to completely submerge the chili peppers and aromatics. A good starting point is about 2-3 cups.
* Add your aromatics to the cold oil. This includes the garlic, shallots, ginger, star anise, cinnamon stick, bay leaves, and dried orange peel (if using).
* Heat the oil over medium-low heat. The goal is to gently infuse the oil with the flavors of the aromatics without burning them.
* Cook the aromatics for about 30-45 minutes, or until they are golden brown and fragrant. The garlic and shallots should be crispy but not burnt.
* Keep a close eye on the oil and adjust the heat as needed. If the aromatics start to brown too quickly, reduce the heat.
* Once the aromatics are nicely browned, remove them from the oil using a slotted spoon or tongs. Discard the aromatics; they’ve done their job!
3. **Bloom the Chili Peppers:** This is where the magic happens! Blooming the chili peppers in the hot oil releases their flavor and heat.
* Let the oil cool slightly for a few minutes. You don’t want it to be scorching hot, as this can burn the chili peppers and create a bitter flavor.
* Carefully add the prepared chili peppers (flakes, chopped, or whole) to the oil.
* The oil will sizzle and bubble as the chili peppers bloom.
* Stir the chili peppers constantly to ensure they are evenly coated in the oil and don’t burn.
* Cook the chili peppers for about 5-10 minutes, or until they are fragrant and have deepened in color.
* Be careful not to overcook the chili peppers, as this can make the oil bitter.
4. **Add Optional Spices and Seasonings:** Now’s the time to customize your chili oil with additional spices and seasonings.
* Add any optional spices, such as cumin seeds, coriander seeds, fennel seeds, and black peppercorns.
* Stir well to combine.
* Season with salt to taste.
* If you want to add a touch of sweetness, add a pinch of sugar.
* For a tangy kick, add a splash of rice vinegar or black vinegar.
5. **Strain and Store:** The final step is to strain the chili oil and store it properly.
* Let the chili oil cool slightly.
* Place a fine-mesh sieve or cheesecloth-lined strainer over a heat-resistant bowl or jar.
* Carefully pour the chili oil through the sieve or strainer to remove the chili peppers and spices.
* Allow the chili oil to cool completely before storing it in an airtight container.
* Store the chili oil in a cool, dark place for up to several months. The flavor will continue to develop over time.
Tips and Tricks for the Perfect Chili Oil
Here are a few extra tips to help you create the best chili oil possible:
* Experiment with different chili peppers. Don’t be afraid to try different varieties to find your perfect heat level and flavor profile.
* Use high-quality ingredients. The better the ingredients, the better the chili oil.
* Don’t overcrowd the pot. If you’re making a large batch of chili oil, work in batches to ensure the chili peppers and aromatics cook evenly.
* Be patient. Infusing the oil with aromatics takes time, but it’s worth it.
* Taste as you go. Adjust the seasonings to your liking.
* Store the chili oil properly. This will help it last longer and maintain its flavor.
* Don’t throw away the chili flakes! The strained chili flakes are delicious sprinkled on noodles, eggs, or anything else that needs a little extra spice. You can also use them to make chili crisp.
Using Your Homemade Chili Oil
Now that you’ve made your own fiery chili oil, it’s time to put it to good use! Here are just a few ideas:
* **Drizzle it over noodles or rice.**
* **Add it to soups and stews.**
* **Use it as a marinade for meat or vegetables.**
* **Mix it with soy sauce and vinegar for a dipping sauce.**
* **Spread it on sandwiches or toast.**
* **Add it to scrambled eggs or omelets.**
* **Use it to make chili crisp.**
The possibilities are endless! So go ahead, experiment, and enjoy the deliciousness of your homemade chili oil. I hope you enjoy this recipe and have fun creating your own unique chili oil blend! Happy cooking!

Conclusion
So, there you have it! Transforming your homegrown spicy chili peppers into a vibrant, flavorful chili oil is not just a recipe; it’s an experience. It’s about taking the fruits (or rather, the peppers!) of your labor and elevating them into something truly special. This DIY chili oil is more than just a condiment; it’s a testament to the power of fresh ingredients and a little bit of kitchen creativity.
Why is this DIY trick a must-try? Because store-bought chili oils simply can’t compare to the depth of flavor you achieve when using your own homegrown spicy chili peppers. You control the heat level, the aroma, and the overall character of the oil. Plus, there’s an undeniable satisfaction in knowing exactly what goes into your food. No artificial flavors, no preservatives, just pure, unadulterated chili goodness.
But the beauty of this recipe lies in its versatility. Feel free to experiment with different types of chili peppers to create your own signature blend. Want a smoky flavor? Add a few smoked paprika peppers to the mix. Prefer a sweeter note? Incorporate some dried ancho peppers. The possibilities are endless!
Beyond the peppers themselves, consider infusing your oil with other aromatic ingredients. A star anise or two will impart a subtle licorice flavor, while a cinnamon stick adds warmth and complexity. For a citrusy twist, add a few strips of orange or lemon zest. Don’t be afraid to get creative and tailor the recipe to your own personal preferences.
This homemade chili oil is incredibly versatile. Drizzle it over noodles, stir it into soups, use it as a marinade for meats, or simply dip your bread into it. It’s the perfect way to add a kick of flavor to any dish. Imagine the possibilities: a spicy drizzle on your morning eggs, a fiery addition to your pizza, or a flavorful marinade for grilled chicken.
We’ve found that using a combination of dried and fresh chili peppers yields the best results. The dried peppers provide a deep, concentrated flavor, while the fresh peppers add a vibrant, fruity note. Experiment with different ratios to find your perfect balance.
We highly encourage you to try this DIY chili oil recipe. It’s a fun, rewarding, and delicious way to use your homegrown spicy chili peppers. And once you’ve tasted the difference between homemade and store-bought, you’ll never go back.
But don’t just take our word for it. We want to hear about your experiences! Share your photos, your variations, and your tips in the comments below. What types of chili peppers did you use? What other ingredients did you add? What dishes did you use your chili oil on? We can’t wait to see what you create!
So, grab your homegrown spicy chili peppers, gather your ingredients, and get ready to embark on a culinary adventure. This DIY chili oil is a game-changer, and we’re confident that you’ll love it as much as we do. Happy cooking!
Frequently Asked Questions (FAQ)
What types of chili peppers are best for making chili oil?
The best chili peppers for chili oil depend on your desired heat level and flavor profile. For a milder heat, consider using Anaheim or Poblano peppers. For a medium heat, try Jalapeño or Serrano peppers. For a fiery kick, opt for Thai chili peppers, Scotch Bonnets, or Habaneros. You can also experiment with different combinations of peppers to create a unique flavor blend. Remember that drying the peppers concentrates their heat, so dried peppers will generally be spicier than fresh ones. Using your homegrown spicy chili peppers will give you the freshest and most flavorful results.
How long does homemade chili oil last?
When stored properly in an airtight container in a cool, dark place, homemade chili oil can last for several months, typically up to 6 months. However, it’s important to monitor the oil for any signs of spoilage, such as a rancid smell or changes in color or texture. To extend the shelf life, ensure that all ingredients are completely dry before adding them to the oil. Moisture can promote the growth of bacteria and shorten the oil’s lifespan.
Can I use a different type of oil besides vegetable oil?
Yes, you can definitely experiment with different types of oil to create a unique flavor profile. Neutral-flavored oils like canola oil, grapeseed oil, or sunflower oil are good choices if you want the chili pepper flavor to shine through. For a richer, more complex flavor, consider using olive oil or sesame oil. However, keep in mind that olive oil has a lower smoke point than vegetable oil, so it’s best to use it for finishing rather than cooking at high temperatures. Sesame oil adds a nutty, aromatic flavor that pairs well with Asian-inspired dishes.
What if I don’t have homegrown spicy chili peppers?
While using homegrown spicy chili peppers will undoubtedly result in the freshest and most flavorful chili oil, you can still make a delicious version using store-bought dried chili peppers. Look for high-quality dried chili peppers at your local grocery store or Asian market. You can also order them online. If using store-bought peppers, be sure to check the expiration date and choose peppers that are vibrant in color and have a strong aroma.
How do I adjust the heat level of the chili oil?
The heat level of your chili oil is primarily determined by the type and quantity of chili peppers you use. To make a milder chili oil, use fewer chili peppers or choose milder varieties. You can also remove the seeds and membranes from the chili peppers, as these contain the majority of the capsaicin, the compound that gives chili peppers their heat. To make a spicier chili oil, use more chili peppers or choose hotter varieties. You can also add a pinch of cayenne pepper or chili flakes to boost the heat.
Can I add other ingredients to the chili oil?
Absolutely! One of the best things about making your own chili oil is that you can customize it to your liking. Consider adding other aromatic ingredients like garlic, ginger, star anise, cinnamon sticks, Sichuan peppercorns, or bay leaves. These ingredients will infuse the oil with their unique flavors and aromas. You can also add dried spices like cumin, coriander, or smoked paprika for added depth and complexity.
How do I prevent the chili peppers from burning when making the oil?
To prevent the chili peppers from burning, it’s important to heat the oil slowly and gently. Use a low to medium heat and monitor the oil closely. If the chili peppers start to brown too quickly, reduce the heat or remove the pot from the heat temporarily. You can also add the chili peppers in stages, starting with the less delicate ingredients like garlic and ginger, and then adding the chili peppers towards the end.
What are some creative ways to use chili oil?
Chili oil is incredibly versatile and can be used in a wide variety of dishes. Drizzle it over noodles, rice, eggs, pizza, or vegetables. Use it as a marinade for meats, poultry, or seafood. Add it to soups, stews, or sauces for a spicy kick. Mix it with soy sauce and vinegar to create a flavorful dipping sauce. Use it as a condiment for tacos, burritos, or sandwiches. The possibilities are endless!
Is it safe to store chili oil with the chili peppers inside?
Yes, it is generally safe to store chili oil with the chili peppers inside, as the oil acts as a preservative. However, it’s important to ensure that all ingredients are completely dry before adding them to the oil to prevent the growth of bacteria. Over time, the chili peppers may lose some of their color and flavor, but they will still impart their heat to the oil. If you prefer, you can strain the chili peppers out of the oil after a few weeks, but this is not necessary.
How do I know if my chili oil has gone bad?
The most obvious sign that chili oil has gone bad is a rancid smell. The oil may also develop a cloudy or murky appearance, or the chili peppers may become moldy. If you notice any of these signs, discard the oil immediately. It’s always best to err on the side of caution when it comes to food safety.
Leave a Comment