

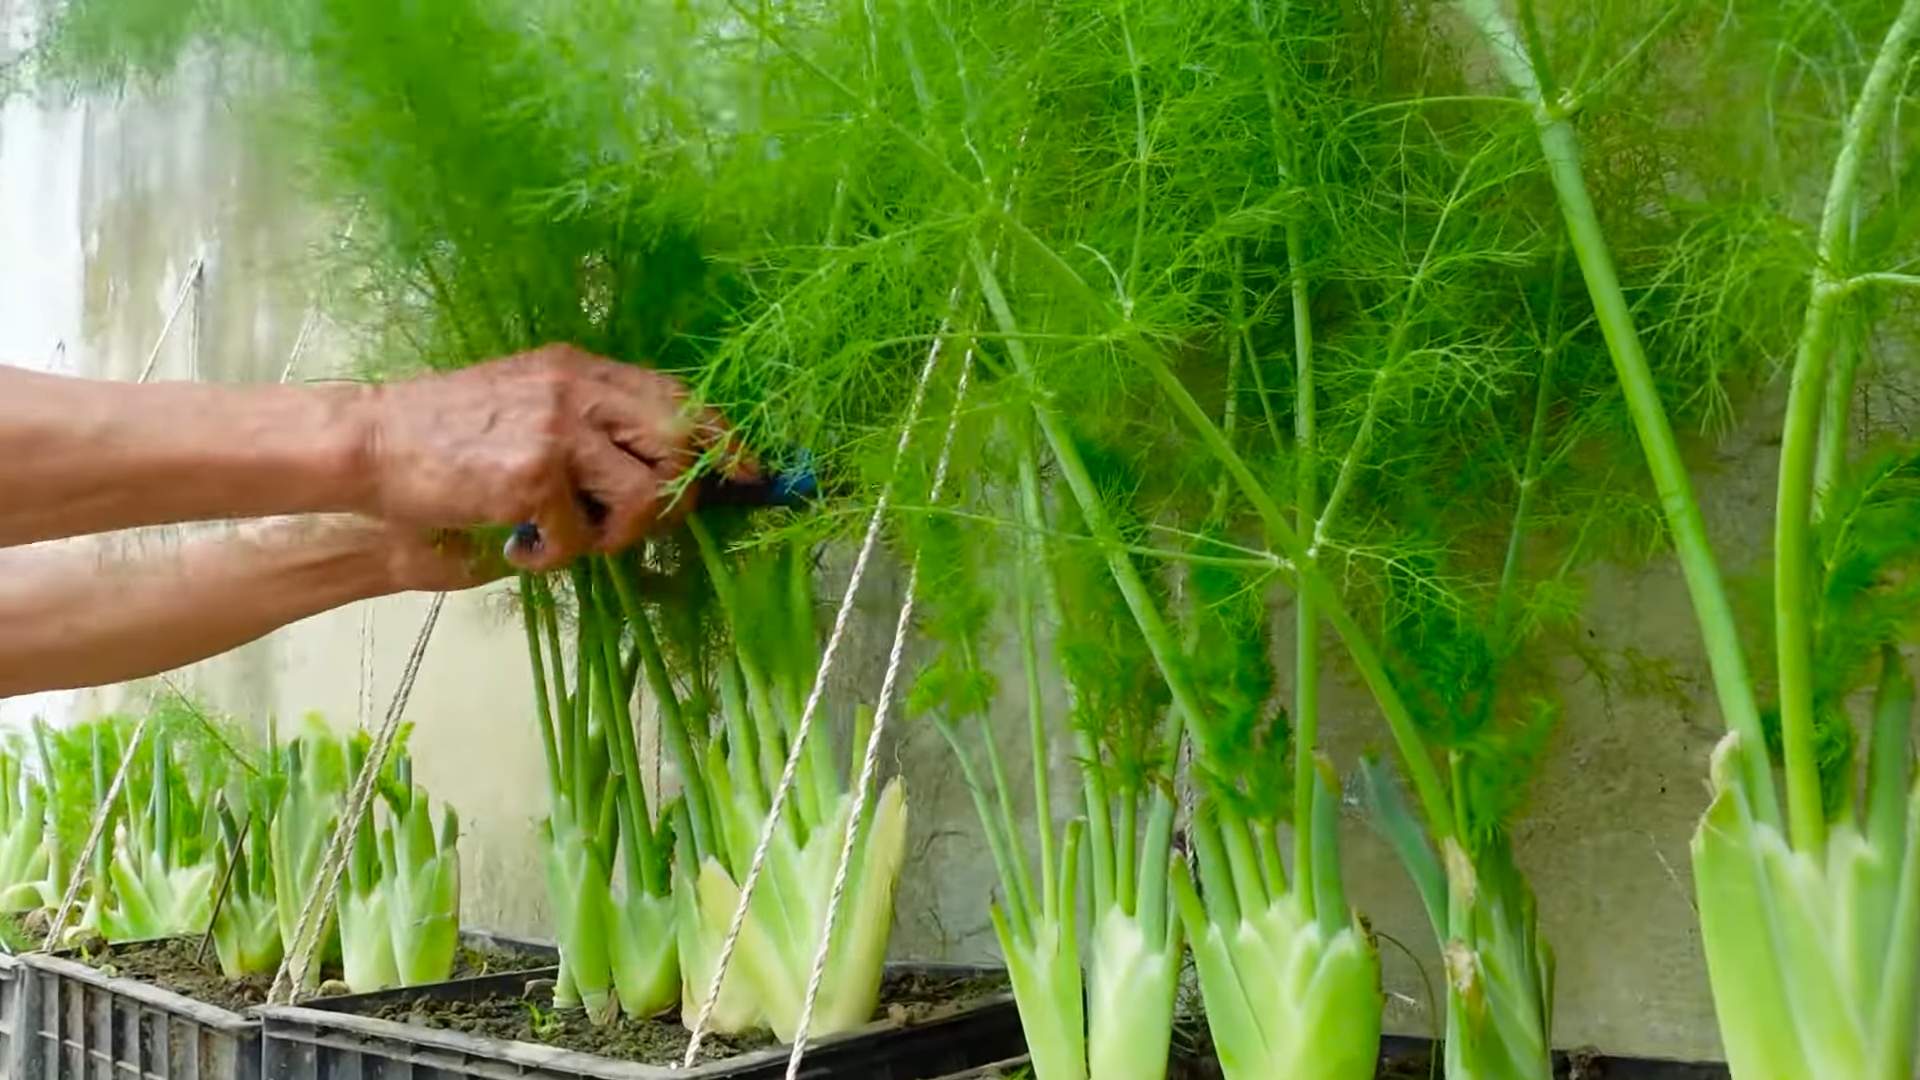
Harvest Dill Quickly and effortlessly? Absolutely! Imagine having a constant supply of fresh, fragrant dill right at your fingertips, ready to elevate your culinary creations. No more wilted supermarket herbs or last-minute dashes to the store. This DIY guide is your passport to a thriving dill patch, even if you’re a complete beginner.
Dill, with its feathery fronds and distinctive anise-like flavor, has been cherished for centuries. Its use dates back to ancient Egypt and Rome, where it was valued for both its culinary and medicinal properties. From flavoring pickles to adding a vibrant touch to salads and sauces, dill has earned its place as a kitchen staple. But why settle for store-bought when you can easily grow your own?
Let’s face it, life gets busy. We all crave fresh, healthy ingredients, but finding the time for extensive gardening can feel overwhelming. That’s where these simple, effective tricks come in. I’m going to show you how to harvest dill quickly and efficiently, maximizing your yield and minimizing your effort. Whether you have a sprawling garden or a small balcony, these tips will help you enjoy a continuous harvest of this delightful herb. Get ready to unlock the secrets to a bountiful dill harvest and elevate your home cooking game!
Harvest Dill Like a Pro: My Foolproof Guide
Okay, dill lovers, gather ’round! I’m going to share my tried-and-true method for harvesting dill, ensuring you get the most flavor and prolong the life of your plant. Forget those sad, scraggly dill sprigs – we’re aiming for a bountiful harvest! This guide is designed to help you, whether you’re a seasoned gardener or just starting out.
Understanding Dill Growth and Harvesting Timing
Before we dive into the nitty-gritty, let’s talk about dill itself. Dill is an annual herb, meaning it completes its life cycle in one growing season. It’s known for its feathery leaves and its distinctive flavor, perfect for pickles, dips, and so much more.
The key to a successful dill harvest is timing. You want to harvest the leaves when they’re young and tender, before the plant starts to flower. Once the dill plant flowers (bolts), the leaves tend to become bitter and less flavorful.
Here’s what to look for:
* Leaf Size: Aim for leaves that are at least 4-6 inches long.
* Plant Height: The plant should be at least 8-10 inches tall.
* Flowering: Avoid harvesting leaves from plants that have already started to flower extensively. A few small flower buds are okay, but if the plant is covered in flowers, the leaves will likely be bitter.
* Frequency: You can harvest dill multiple times throughout the growing season, encouraging new growth.
Tools You’ll Need
To make the harvesting process smooth and efficient, gather these tools:
* Sharp Scissors or Pruning Shears: Sharp tools are essential for clean cuts, which help prevent disease and promote healthy regrowth.
* Basket or Container: To collect your harvested dill.
* Water (Optional): For rinsing the dill after harvesting.
* Gloves (Optional): If you have sensitive skin.
The Harvesting Process: Step-by-Step
Now for the fun part! Here’s how I harvest dill to maximize flavor and yield:
1. Choose Your Harvesting Day: The best time to harvest dill is in the morning, after the dew has dried but before the sun gets too hot. This is when the essential oils are most concentrated, resulting in the best flavor.
2. Identify the Stems to Harvest: Look for healthy, vibrant green stems with plenty of leaves. Avoid stems that are yellowing, browning, or showing signs of disease.
3. Make the Cut: Using your sharp scissors or pruning shears, cut the stems about 1-2 inches above a leaf node (the point where leaves grow out of the stem). This encourages the plant to branch out and produce more leaves. Make sure your cuts are clean and angled slightly to prevent water from pooling on the cut surface.
4. Harvest Strategically: Don’t harvest more than one-third of the plant at a time. This allows the plant to recover and continue growing. Focus on harvesting the outer stems first, leaving the inner stems to mature.
5. Collect Your Harvest: Place the harvested dill sprigs in your basket or container. Be gentle to avoid bruising the leaves.
6. Rinse (Optional): If your dill is dusty or dirty, you can rinse it gently with cool water. Be sure to dry it thoroughly before storing it. I usually skip this step unless my plants are particularly dirty.
Extending Your Harvest: Pinching and Pruning
To keep your dill plant producing throughout the season, it’s important to pinch and prune it regularly.
* Pinching: When the plant is young, pinch off the top growth to encourage it to branch out and become bushier. This will result in more leaves to harvest.
* Pruning: As the plant grows, prune away any yellowing or damaged leaves. This will help to keep the plant healthy and prevent disease.
* Deadheading: If you want to prevent the plant from going to seed (flowering), deadhead the flowers as soon as they appear. This will redirect the plant’s energy into producing more leaves. However, if you want to collect dill seeds for future planting or culinary use, allow some of the flowers to mature and dry on the plant.
Storing Your Harvested Dill
Once you’ve harvested your dill, you’ll want to store it properly to preserve its flavor and freshness. Here are a few options:
* Refrigerating: This is the best option for short-term storage. Wrap the dill sprigs in a damp paper towel and place them in a plastic bag or container in the refrigerator. They should stay fresh for up to a week.
* Freezing: This is a great option for long-term storage. There are a few ways to freeze dill:
* Whole Sprigs: Wash and dry the dill sprigs thoroughly. Place them in a freezer bag or container and freeze.
* Chopped Dill: Chop the dill and place it in ice cube trays. Fill the trays with water or olive oil and freeze. Once frozen, transfer the cubes to a freezer bag or container. This is a convenient way to add dill to soups, sauces, and other dishes.
* Dill Paste: Blend fresh dill with a little bit of olive oil to create a paste. Freeze the paste in small portions.
* Drying: You can also dry dill, but keep in mind that dried dill has a less intense flavor than fresh or frozen dill. To dry dill, hang the sprigs upside down in a cool, dry place until they are completely dry. You can also use a dehydrator. Once dry, store the dill in an airtight container.
Troubleshooting Common Dill Harvesting Problems
Even with the best intentions, you might encounter a few challenges when harvesting dill. Here are some common problems and how to address them:
* Bitter Leaves: As I mentioned earlier, bitter leaves are usually a sign that the plant has started to flower. To prevent this, harvest the leaves before the plant flowers or deadhead the flowers as soon as they appear.
* Yellowing Leaves: Yellowing leaves can be caused by a number of factors, including overwatering, underwatering, nutrient deficiencies, or disease. Make sure you’re watering the plant properly and providing it with adequate nutrients. If you suspect disease, remove the affected leaves and treat the plant with an appropriate fungicide.
* Pest Infestations: Dill can be susceptible to pests such as aphids and spider mites. Inspect your plants regularly and treat any infestations promptly. Insecticidal soap or neem oil can be effective treatments.
Using Your Harvested Dill
Now that you have a bountiful harvest of fresh dill, it’s time to put it to good use! Here are a few of my favorite ways to use dill:
* Pickles: Dill is a classic ingredient in pickles. Add fresh dill sprigs to your pickle brine for a delicious and flavorful twist.
* Dips: Dill is a wonderful addition to dips. Try adding it to sour cream, yogurt, or cream cheese for a refreshing and flavorful dip.
* Salads: Sprinkle fresh dill over salads for a burst of flavor. It pairs particularly well with cucumber, tomatoes, and potatoes.
* Soups and Sauces: Add fresh or frozen dill to soups and sauces for a bright and herbaceous flavor.
* Fish and Seafood: Dill is a classic pairing with fish and seafood. Use it to season grilled salmon, baked cod, or shrimp scampi.
* Egg Dishes: Add chopped dill to omelets, frittatas, or scrambled eggs for a flavorful breakfast or brunch.
* Dill Butter: Mix softened butter with chopped dill, garlic, and lemon juice for a delicious and versatile spread.
Encouraging Continuous Growth
To ensure a continuous supply of fresh dill throughout the growing season, consider succession planting. Sow new seeds every few weeks to have a steady stream of plants at different stages of growth. This will allow you to harvest dill regularly without depleting your entire supply.
Also, remember to provide your dill plants with adequate sunlight, water, and nutrients. Dill prefers full sun (at least 6 hours of sunlight per day) and well-drained soil. Fertilize the plants regularly with a balanced fertilizer.
By following these tips, you can enjoy a bountiful harvest of fresh, flavorful dill all season long! Happy gardening!

Conclusion
So, there you have it! Mastering the art of how to harvest dill quickly doesn’t have to be a daunting task. By implementing these simple yet effective techniques, you can ensure a continuous supply of fresh, flavorful dill throughout the growing season. Forget tedious, time-consuming methods – this approach is all about efficiency and maximizing your yield.
Think about the possibilities! Imagine adding freshly harvested dill to your creamy potato salad, sprinkling it generously over grilled salmon, or infusing it into homemade pickles. The vibrant aroma and delicate taste of homegrown dill will elevate your culinary creations to a whole new level. Plus, knowing that you harvested it yourself, quickly and efficiently, adds an extra layer of satisfaction.
But the benefits extend beyond just delicious meals. Harvesting dill regularly encourages the plant to produce even more foliage, resulting in a bushier, healthier herb. This means more dill for you to enjoy and share with friends and family. It’s a win-win situation!
Don’t be afraid to experiment with variations. If you prefer a more intense dill flavor, try harvesting the leaves just before the plant flowers. For a milder taste, harvest the younger, more tender leaves. You can also dry or freeze your harvested dill to preserve its flavor for use during the off-season. Consider making dill-infused oil or vinegar for a unique and flavorful addition to your pantry.
We understand that every garden is different, and what works for one person may not work for another. That’s why we encourage you to adapt these techniques to suit your specific needs and preferences. The key is to find a method that is both efficient and enjoyable for you.
Now it’s your turn! We urge you to give these DIY tricks a try and experience the joy of harvesting dill quickly and effortlessly. We’re confident that you’ll be amazed at how much time and effort you can save.
More importantly, we want to hear about your experiences! Share your tips, tricks, and variations in the comments below. Let us know what worked best for you, what challenges you encountered, and any creative ways you’ve found to harvest dill quickly. Your feedback will not only help us improve this guide but also inspire other gardeners to embrace the art of efficient dill harvesting. Let’s build a community of dill enthusiasts who are passionate about growing and enjoying this versatile herb. So go ahead, get your gardening gloves on, and start harvesting! We can’t wait to hear your success stories.
Frequently Asked Questions (FAQ)
What is the best time of day to harvest dill?
The best time to harvest dill is in the morning, after the dew has dried but before the sun gets too hot. This is when the dill’s essential oils are most concentrated, resulting in the most flavorful leaves. Harvesting in the heat of the day can cause the leaves to wilt and lose some of their flavor.
How often should I harvest dill?
You can harvest dill as needed throughout the growing season. Regular harvesting encourages the plant to produce more foliage. Aim to harvest at least once a week, or more frequently if you’re using dill regularly in your cooking. Don’t be afraid to harvest quite a bit; dill is a prolific grower.
Can I harvest dill after it has flowered?
Yes, you can still harvest dill after it has flowered, but the flavor of the leaves may be slightly less intense. Some people actually prefer the flavor of dill flowers, which can be used in salads, pickles, and other dishes. You can also harvest the dill seeds, which have a stronger, more pungent flavor than the leaves.
How do I store harvested dill?
There are several ways to store harvested dill. For short-term storage, you can wrap the dill in a damp paper towel and store it in a plastic bag in the refrigerator. This will keep it fresh for a few days. For longer-term storage, you can dry or freeze the dill. To dry dill, hang it upside down in a cool, dry place or use a dehydrator. To freeze dill, chop it up and place it in ice cube trays with water or olive oil. Once frozen, transfer the cubes to a freezer bag.
Will harvesting dill kill the plant?
No, harvesting dill will not kill the plant, as long as you don’t remove more than one-third of the foliage at a time. Regular harvesting actually encourages the plant to grow bushier and produce more leaves. However, if you harvest too much at once, you can stress the plant and reduce its yield.
How do I encourage my dill plant to produce more leaves?
To encourage your dill plant to produce more leaves, make sure it is planted in a sunny location with well-drained soil. Water it regularly, especially during dry periods. Fertilize it with a balanced fertilizer every few weeks. And, most importantly, harvest it regularly! Regular harvesting encourages the plant to produce more foliage.
What are some common problems that affect dill plants?
Some common problems that affect dill plants include aphids, spider mites, and fungal diseases. Aphids and spider mites can be controlled with insecticidal soap or neem oil. Fungal diseases can be prevented by ensuring good air circulation and avoiding overwatering.
Can I grow dill indoors?
Yes, you can grow dill indoors, but it can be challenging. Dill needs at least 6 hours of sunlight per day, so you’ll need to provide supplemental lighting if you don’t have a sunny window. It also needs well-drained soil and regular watering.
What are some good companion plants for dill?
Dill is a good companion plant for many vegetables, including cucumbers, cabbage, and lettuce. It attracts beneficial insects, such as ladybugs and lacewings, which prey on aphids and other pests. It also repels some harmful insects, such as cabbage moths.
Is it better to harvest dill before or after flowering for pickling?
For pickling, many prefer to harvest dill just before or as it begins to flower. At this stage, the dill heads and stems contain a high concentration of flavor compounds that contribute to the characteristic taste of dill pickles. The seeds, which develop after flowering, also add a distinct flavor. Experiment to find your preferred stage for harvesting for pickling.
How can I tell if my dill is ready to harvest?
Dill is ready to harvest when the leaves are well-developed and the plant is about 6-8 inches tall. The leaves should be a vibrant green color and have a strong dill aroma. You can start harvesting the leaves as soon as the plant is large enough, even if it hasn’t reached its full size.
What if my dill plant bolts (goes to seed) too quickly?
Bolting in dill is often triggered by hot weather. To prevent premature bolting, try planting dill in a location that receives some afternoon shade. You can also try planting bolt-resistant varieties of dill. Regular watering and fertilization can also help to prevent bolting. If your dill plant does bolt, you can still harvest the leaves and seeds, but the flavor may be slightly less intense.
Leave a Comment