

Growing Winged Beans at Home can seem daunting, but trust me, it’s an incredibly rewarding experience! Have you ever dreamt of strolling through your garden, plucking fresh, vibrant beans straight from the vine for your dinner? Well, dream no more! This DIY guide will unlock the secrets to successfully cultivating these unique and nutritious legumes right in your own backyard.
Winged beans, also known as asparagus peas or goa beans, boast a rich history, particularly in Southeast Asia and Papua New Guinea, where they’ve been a staple food source for centuries. They’re not just delicious; every part of the plant – from the pods and leaves to the roots and seeds – is edible and packed with nutrients. Imagine the possibilities!
But why should you bother with this particular DIY project? In today’s world, where access to fresh, locally-sourced produce can be limited, growing winged beans at home offers a fantastic solution. You’ll not only enjoy a sustainable source of healthy food, but you’ll also gain a deeper connection to nature and the satisfaction of nurturing something from seed to harvest. Plus, these climbing vines add a beautiful, vertical element to any garden, making them both practical and aesthetically pleasing. So, let’s dive in and discover the simple steps to bringing this amazing plant into your life!
Growing Winged Beans: A DIY Guide to Vertical Gardening and Delicious Harvests
Hey there, fellow gardening enthusiasts! I’m so excited to share my experience with growing winged beans, also known as Goa beans, right in my backyard. These fascinating legumes are not only beautiful climbers but also incredibly nutritious, offering edible pods, leaves, flowers, and even tubers! If you’re looking for a unique and rewarding gardening project, look no further. This guide will walk you through every step, from seed to harvest, ensuring you have a thriving winged bean patch.
Choosing the Right Variety and Location
Before we dive into the nitty-gritty, let’s talk about selecting the right winged bean variety and finding the perfect spot for them to flourish.
* Variety Selection: Winged beans come in various cultivars, differing in pod color, size, and maturity time. Some popular choices include ‘Chimbu,’ ‘Daylight,’ and ‘UPS 122.’ Research which varieties are best suited for your local climate and growing season. I personally prefer ‘Chimbu’ for its early maturity and prolific pod production.
* Sunlight: Winged beans are sun-worshippers! They need at least 6-8 hours of direct sunlight daily to thrive. Choose a location in your garden that receives ample sunlight throughout the day.
* Soil: Well-drained soil is crucial. Winged beans don’t like soggy feet. Amend your soil with compost or other organic matter to improve drainage and fertility. A slightly acidic to neutral pH (6.0-7.0) is ideal.
* Support System: These are climbing plants, remember! They need a sturdy trellis, fence, or other support structure to climb on. I’ve found that a trellis made of bamboo poles works wonderfully.
Preparing the Soil and Planting Seeds
Now that we’ve got the basics covered, let’s get our hands dirty and prepare the soil for planting.
1. Soil Preparation: Start by clearing the planting area of any weeds, rocks, or debris. Loosen the soil to a depth of at least 12 inches using a garden fork or tiller. Incorporate plenty of compost or well-rotted manure to enrich the soil and improve drainage. I usually add a generous amount of bone meal as well to promote strong root development.
2. Seed Scarification (Optional but Recommended): Winged bean seeds have a hard outer coating that can sometimes hinder germination. To improve germination rates, you can scarify the seeds by gently rubbing them with sandpaper or nicking them with a knife. Be careful not to damage the inner seed.
3. Seed Soaking (Optional): Soaking the seeds in warm water for 12-24 hours before planting can also help soften the seed coat and speed up germination. I usually skip the scarification if I soak them, but doing both definitely gives them a head start.
4. Planting Seeds: Sow the seeds directly into the prepared soil, about 1 inch deep and 4-6 inches apart. If you’re planting in rows, space the rows 2-3 feet apart. I like to plant a few extra seeds in each spot just in case some don’t germinate.
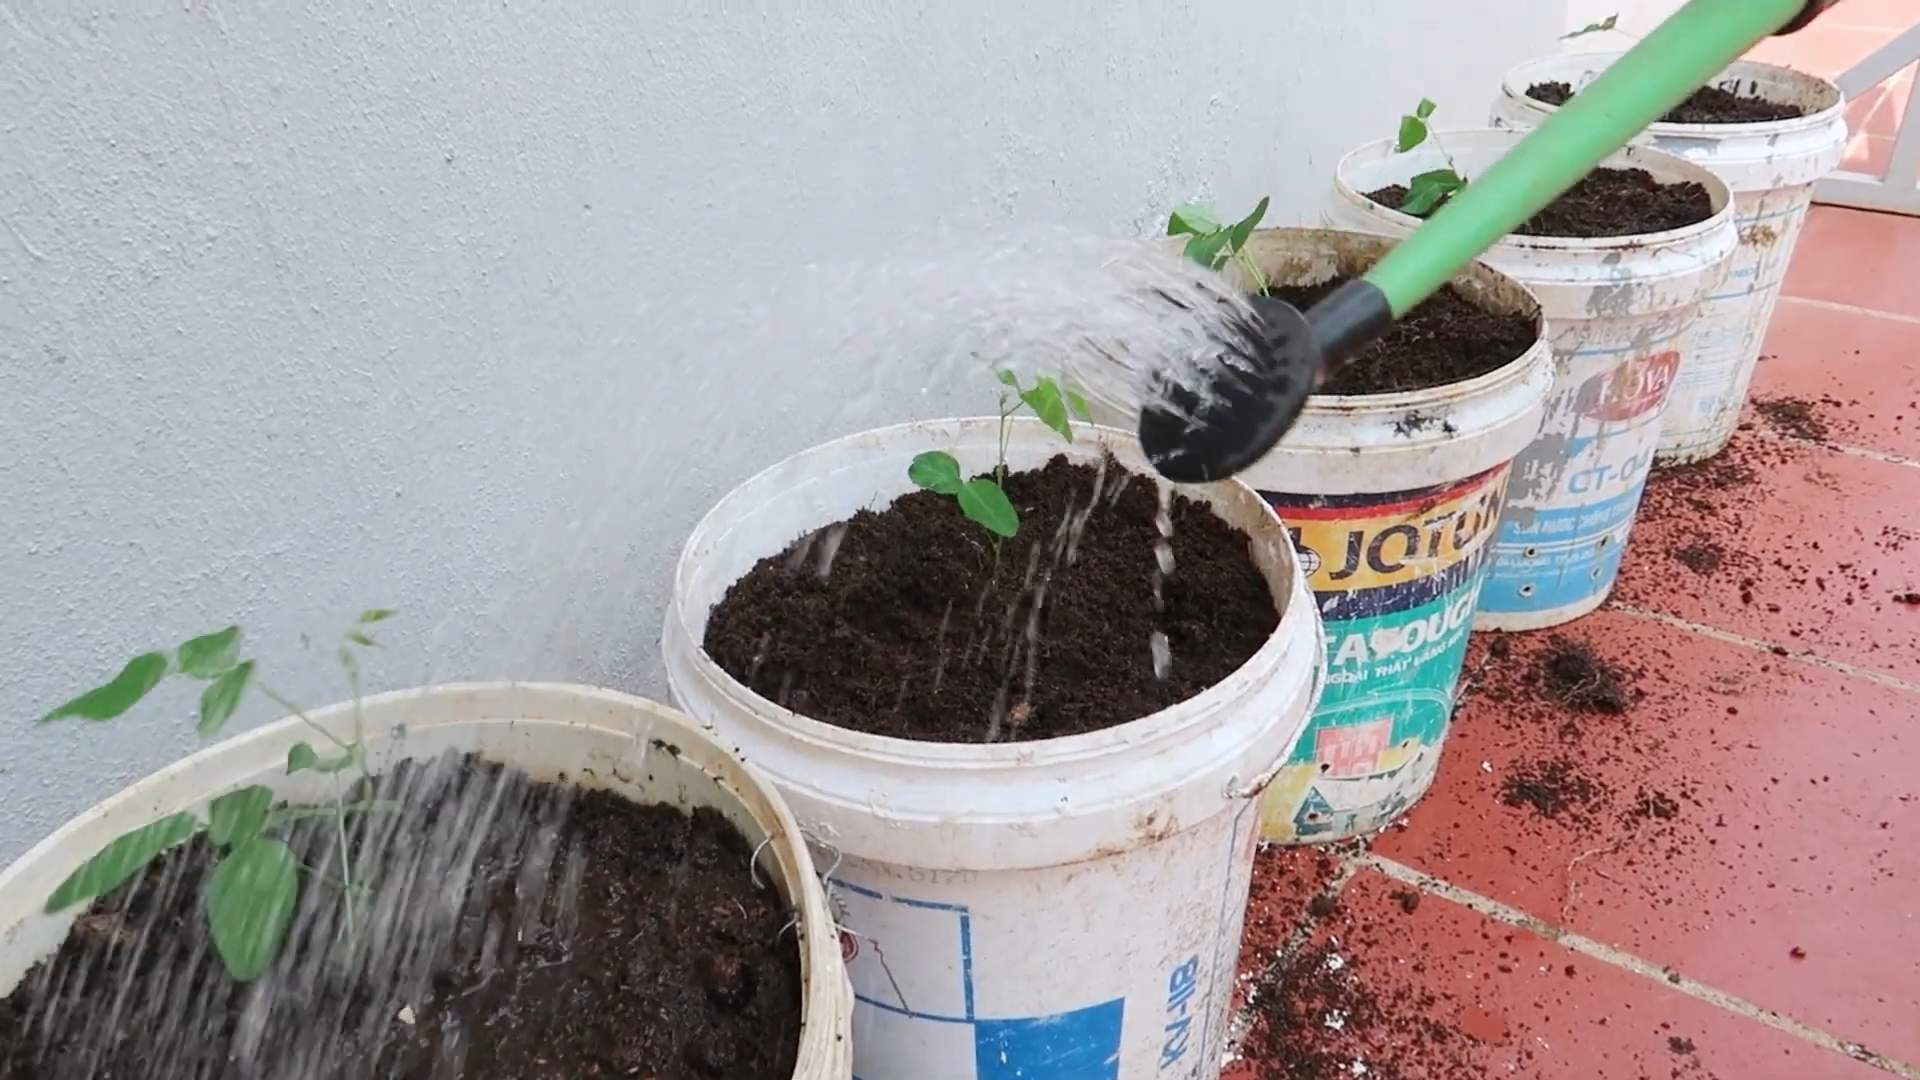
5. Watering: Water the newly planted seeds thoroughly, ensuring the soil is evenly moist but not waterlogged. Keep the soil consistently moist until the seedlings emerge.
Building a Sturdy Trellis
Winged beans are vigorous climbers, so a strong and reliable trellis is essential. Here’s how I build mine:
1. Gather Materials: You’ll need bamboo poles (or other sturdy poles), twine or wire, and a pair of pruning shears. I prefer bamboo because it’s readily available and adds a natural aesthetic to the garden.
2. Construct the Frame: Drive the bamboo poles into the ground, spacing them about 4-6 feet apart. The height of the trellis should be at least 6-8 feet to accommodate the vertical growth of the winged beans.
3. Create the Climbing Structure: Use twine or wire to connect the poles horizontally and vertically, creating a grid-like structure for the winged beans to climb on. Make sure the twine or wire is taut and securely fastened to the poles. I like to create a diamond pattern with the twine for extra support.
4. Reinforce the Trellis: For added stability, you can reinforce the trellis by adding diagonal supports or anchoring it to the ground with stakes. This is especially important if you live in an area with strong winds.
Caring for Your Winged Bean Plants
Once your winged bean plants are established, it’s time to provide them with the care they need to thrive.
1. Watering: Water regularly, especially during dry spells. Winged beans need consistent moisture to produce abundant pods. Aim for about 1 inch of water per week. I use a soaker hose to deliver water directly to the roots, minimizing water loss through evaporation.
2. Fertilizing: Winged beans are legumes, which means they can fix nitrogen from the atmosphere. However, they still benefit from occasional fertilization. Use a balanced fertilizer or a fertilizer specifically formulated for beans and peas. I like to use a liquid seaweed fertilizer every few weeks to provide essential micronutrients.
3. Weeding: Keep the planting area free of weeds, which can compete with the winged beans for nutrients and water. Hand-pull weeds regularly or use a hoe to cultivate the soil. Mulching around the plants can also help suppress weed growth.
4. Pest and Disease Control: Winged beans are generally resistant to pests and diseases, but they can occasionally be affected by aphids, spider mites, or fungal diseases. Inspect your plants regularly for any signs of infestation or disease. Treat any problems promptly with organic pest control methods or fungicides. I’ve found that a strong blast of water from the hose can often dislodge aphids and spider mites.
5. Training the Vines: As the winged bean vines grow, gently guide them onto the trellis, ensuring they have adequate support. You may need to tie the vines to the trellis with twine or plant clips. I like to check on them every few days and redirect any stray vines.
Harvesting Your Bountiful Crop
The moment you’ve been waiting for – harvesting your delicious winged beans!
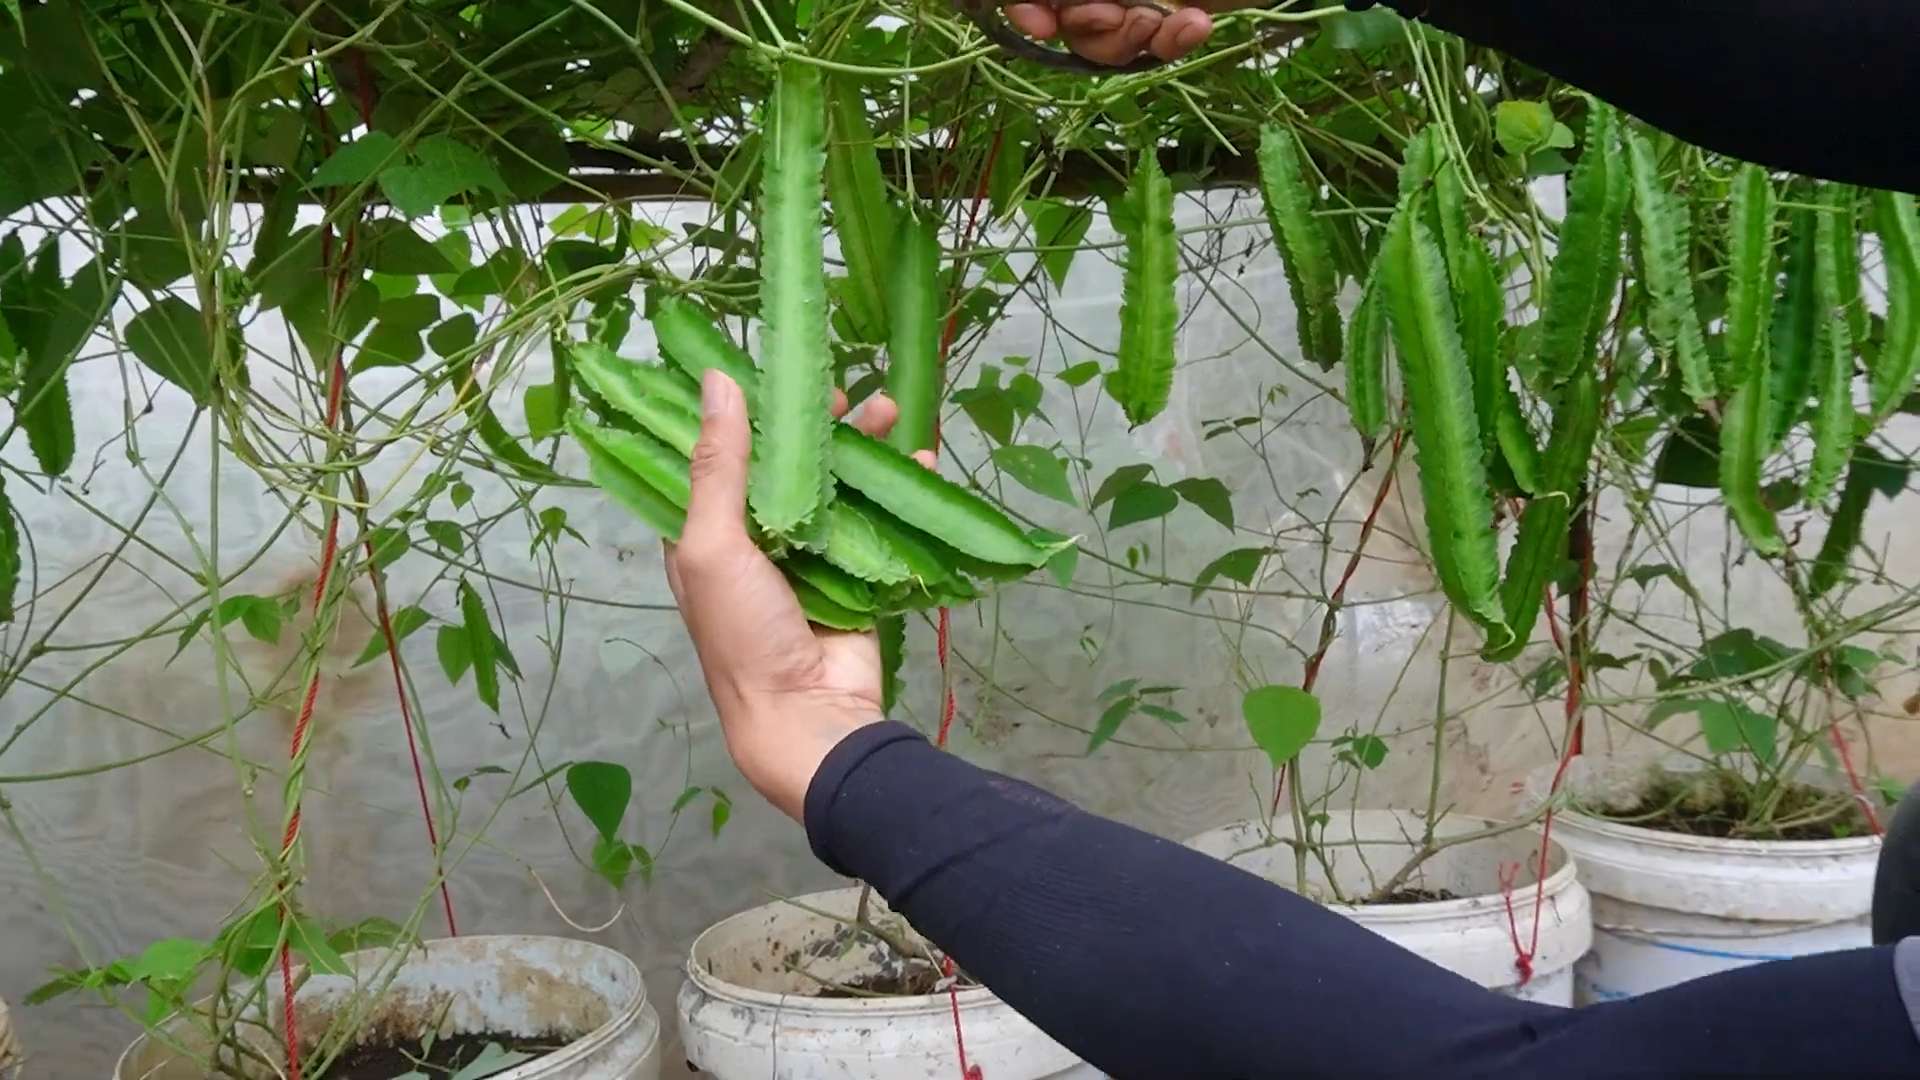
1. Pod Harvesting: Winged bean pods are typically ready for harvest about 2-3 months after planting. Harvest the pods when they are young and tender, about 6-8 inches long. The pods should be firm and snap easily when bent. Regular harvesting encourages continued pod production. I usually harvest every few days to ensure I’m getting the most tender pods.
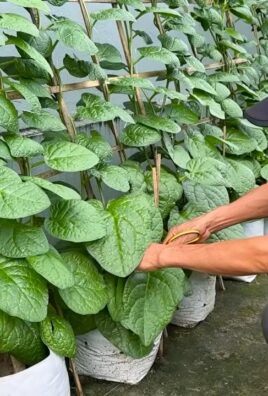
2. Leaf Harvesting: The leaves of winged beans are also edible and can be harvested throughout the growing season. Harvest young, tender leaves for the best flavor. They can be used in salads, stir-fries, or soups.
3. Flower Harvesting: The flowers are also edible and can be used as a garnish or added to salads. They have a slightly sweet flavor.
4. Tuber Harvesting: If you want to harvest the tubers, wait until the end of the growing season, after the plants have died back. Dig up the tubers and wash them thoroughly. They can be cooked and eaten like potatoes. I haven’t tried harvesting the tubers yet, but I’m planning to this year!
5. Seed Saving: If you want to save seeds for next year, allow some of the pods to mature and dry on the vine. Once the pods are completely dry, shell the seeds and store them in a cool, dry place.
Enjoying Your Winged Bean Harvest
Now that you’ve harvested your winged beans, it’s time to enjoy the fruits (or rather, pods) of your labor! Winged beans are incredibly versatile and can be used in a variety of dishes.
* Steamed or Stir-Fried: Young, tender pods can be steamed or stir-fried and served as a side dish.
* Salads: The leaves and flowers can be added to salads for a unique flavor and texture.
* Soups and Stews: The pods can be added to soups and stews for a hearty and nutritious meal.
* Curries: Winged beans are a popular ingredient in Southeast Asian curries.
* Roasted: The tubers can be roasted like potatoes.
I hope this guide has inspired you to try growing winged beans in your own garden. It’s a rewarding experience that will provide you with a unique and delicious harvest. Happy gardening!
Conclusion
So, there you have it! Growing winged beans at home is not just a gardening project; it’s an adventure in flavor, sustainability, and sheer botanical wonder. We’ve explored the ins and outs of cultivating this remarkable legume, from selecting the right seeds to harvesting its bounty. But why should you take the plunge and dedicate space in your garden to this climbing marvel?
The answer lies in the unparalleled versatility and nutritional powerhouse that is the winged bean. Forget bland, run-of-the-mill vegetables. Winged beans offer a symphony of textures and tastes, from the crisp, asparagus-like pods to the protein-rich seeds and the earthy, potato-like tubers. Every part of the plant is edible, making it a true zero-waste champion in your garden.
Beyond its culinary appeal, growing winged beans at home is a sustainable choice. These nitrogen-fixing plants enrich your soil, reducing your reliance on synthetic fertilizers. They’re also relatively pest-resistant, minimizing the need for harmful pesticides. By cultivating your own winged beans, you’re contributing to a healthier environment and a more resilient food system.
But the real magic of growing winged beans lies in the personal connection you forge with your food. There’s something deeply satisfying about nurturing a plant from seed to harvest, watching it climb and flourish under your care. And when you finally taste the fruits (or rather, the pods) of your labor, you’ll experience a flavor that’s simply unmatched by anything you can buy in a store.
Ready to take your winged bean journey to the next level? Consider these variations and suggestions:
* Vertical Gardening Superstar: Winged beans are natural climbers, so get creative with your trellises and supports. Use bamboo poles, repurposed fencing, or even a sturdy pergola to create a stunning vertical garden feature.
* Companion Planting Powerhouse: Winged beans thrive alongside other plants. Try planting them with corn, sunflowers, or squash to create a mutually beneficial ecosystem in your garden.
* Seed Saving Savvy: Once your winged beans mature, save some of the seeds for future plantings. This is a great way to preserve your favorite varieties and ensure a continuous supply of this amazing legume.
* Culinary Creativity Unleashed: Don’t limit yourself to traditional recipes. Experiment with different ways to prepare winged beans. Try stir-frying them with garlic and ginger, adding them to soups and stews, or even grilling them for a smoky flavor. The possibilities are endless!
We’re confident that once you experience the joy of growing winged beans at home, you’ll be hooked. It’s a rewarding and sustainable way to add a unique and delicious vegetable to your diet.
So, grab your seeds, prepare your garden, and get ready to embark on a winged bean adventure! We encourage you to share your experiences with us and the wider gardening community. Post photos of your plants, share your favorite recipes, and let us know what you’ve learned along the way. Together, we can spread the word about this amazing legume and inspire others to discover the joys of growing their own food. Happy gardening!
Frequently Asked Questions (FAQ)
What are the ideal growing conditions for winged beans?
Winged beans thrive in warm, humid climates with plenty of sunshine. They need at least 6-8 hours of direct sunlight per day. The ideal temperature range for growth is between 70°F and 85°F (21°C and 29°C). They also prefer well-drained soil that is rich in organic matter. Before planting, amend your soil with compost or well-rotted manure to improve its fertility and drainage. Winged beans are sensitive to frost, so it’s important to plant them after the last frost date in your area. If you live in a cooler climate, you can start the seeds indoors 4-6 weeks before the last frost and transplant them outdoors once the weather warms up.
How often should I water my winged bean plants?
Winged beans need consistent moisture, especially during hot and dry weather. Water them deeply whenever the top inch of soil feels dry to the touch. Avoid overwatering, as this can lead to root rot. A good rule of thumb is to water them thoroughly 2-3 times per week, depending on the weather conditions. Mulching around the plants can help to retain moisture in the soil and suppress weed growth.
What kind of support system do winged beans need?
Winged beans are vigorous climbers and require a sturdy support system to grow properly. A trellis, fence, or pergola are all excellent options. The support should be at least 6-8 feet tall to accommodate the plant’s growth. You can also use bamboo poles or even a sturdy tree branch as a natural support. Train the vines to climb the support by gently guiding them and tying them loosely with twine or plant ties.
When can I harvest winged beans?
The timing of the harvest depends on which part of the plant you want to eat. The young pods can be harvested when they are about 6-8 inches long and still tender. The seeds can be harvested when the pods are fully mature and dry. The tubers can be harvested in the fall, after the plant has finished flowering and the leaves have started to die back. To harvest the pods, simply snip them off the vine with a pair of scissors or pruning shears. To harvest the seeds, allow the pods to dry completely on the vine, then shell them and store them in an airtight container. To harvest the tubers, dig them up carefully with a garden fork, being careful not to damage them.
Are there any common pests or diseases that affect winged beans?
Winged beans are relatively pest-resistant, but they can be susceptible to certain pests and diseases, such as aphids, spider mites, and fungal diseases. To prevent pest and disease problems, practice good garden hygiene. Remove any dead or diseased leaves and debris from around the plants. Water the plants at the base to avoid wetting the foliage, which can encourage fungal growth. If you notice any pests or diseases, treat them promptly with an appropriate organic pesticide or fungicide. Neem oil is a good option for controlling aphids and spider mites. Copper fungicide can be used to treat fungal diseases.
Can I grow winged beans in containers?
Yes, you can grow winged beans in containers, but you’ll need to choose a large container that is at least 12 inches in diameter and 12 inches deep. Fill the container with a well-draining potting mix that is rich in organic matter. Provide a sturdy trellis or support for the vines to climb. Water the plants regularly and fertilize them every 2-3 weeks with a balanced fertilizer. Container-grown winged beans may require more frequent watering and fertilization than those grown in the ground.
How do I save winged bean seeds for future plantings?
Saving winged bean seeds is a simple process. Allow the pods to dry completely on the vine. Once the pods are dry and brittle, shell them and remove the seeds. Spread the seeds out on a tray or screen to dry completely for a few days. Store the dried seeds in an airtight container in a cool, dark, and dry place. Properly stored winged bean seeds can remain viable for several years.
Are winged beans safe to eat raw?
While the young pods of winged beans are often eaten raw in salads, it’s generally recommended to cook the mature pods and seeds before eating. Cooking helps to break down certain compounds that can be difficult to digest. The tubers should always be cooked before eating.
What are some creative ways to use winged beans in cooking?
Winged beans are incredibly versatile in the kitchen. The young pods can be used in salads, stir-fries, and soups. The mature pods and seeds can be cooked and used in stews, curries, and casseroles. The tubers can be roasted, mashed, or fried like potatoes. You can also use winged bean flour to make bread, cakes, and other baked goods. Experiment with different recipes and flavor combinations to discover your favorite ways to enjoy this amazing legume.
Where can I find winged bean seeds?
Winged bean seeds can be found at some local nurseries and garden centers, especially in warmer climates. You can also purchase them online from various seed suppliers. Look for reputable seed companies that specialize in heirloom and unusual vegetables. When buying seeds, make sure to choose a variety that is well-suited to your climate and growing conditions.

Leave a Comment