

Growing Sweet Potatoes in Pots might sound like a challenge reserved for seasoned gardeners, but trust me, it’s a surprisingly simple and rewarding DIY project that anyone can tackle! Imagine harvesting your own sweet, earthy potatoes right from your patio or balcony – the taste of homegrown goodness is simply unbeatable.
Sweet potatoes have a rich history, originating in Central and South America thousands of years ago. They were a staple food for many indigenous cultures and eventually spread across the globe, becoming a beloved ingredient in cuisines worldwide. From sweet potato pie in the American South to roasted sweet potatoes in Europe, their versatility is undeniable.
But why bother growing them in pots? Well, not everyone has access to a sprawling garden! This DIY trick is perfect for apartment dwellers, urban gardeners, or anyone with limited space. Plus, growing sweet potatoes in pots allows for better control over soil conditions and watering, leading to a potentially bigger and healthier harvest. I’m excited to share my tips and tricks to help you cultivate your own sweet potato bounty, no matter where you live. Let’s get started!
Growing Sweet Potatoes in Pots: A Beginner’s Guide
Hey there, fellow gardening enthusiasts! Ever thought about growing your own sweet potatoes? It’s easier than you might think, and you don’t even need a sprawling garden. You can absolutely grow these delicious tubers in pots! I’ve been doing it for a few years now, and I’m excited to share my secrets with you. Get ready to enjoy homegrown sweet potato fries!
What You’ll Need
Before we dive in, let’s gather our supplies. Here’s a list of everything you’ll need to successfully grow sweet potatoes in pots:
* Large Pots: This is crucial! Sweet potatoes need plenty of room to develop. Aim for pots that are at least 15-20 gallons in size. The bigger, the better, really. Think large storage containers or half whiskey barrels.
* Well-Draining Potting Mix: Don’t use garden soil! It’s too heavy and compacts easily, which sweet potatoes hate. A good quality potting mix is essential. I like to amend mine with compost for extra nutrients.
* Sweet Potato Slips: These are the sprouts that grow from a sweet potato. You can buy them online or at your local garden center. Or, you can even grow your own (more on that later!).
* Watering Can or Hose: For, well, watering!
* Fertilizer (Optional): A balanced, slow-release fertilizer can give your sweet potatoes a boost. Look for one specifically formulated for vegetables.
* Trowel or Small Shovel: For planting.
* Mulch (Optional): Helps retain moisture and suppress weeds. Straw or wood chips work great.
* Sunny Location: Sweet potatoes need at least 6-8 hours of direct sunlight per day.
Growing Your Own Sweet Potato Slips (Optional but Fun!)
If you’re feeling adventurous, you can grow your own sweet potato slips. It’s a fun project, and it’s really rewarding to start from scratch. Here’s how:
1. Choose a Healthy Sweet Potato: Select a sweet potato that’s firm, free from blemishes, and preferably organic.
2. Prepare the Sweet Potato: There are two main methods:
* Water Method: Suspend the sweet potato in a jar or glass of water, with the bottom half submerged. You can use toothpicks to hold it in place.
* Soil Method: Bury the sweet potato horizontally in a container filled with moist potting mix, leaving the top exposed.
3. Provide Warmth and Light: Place the jar or container in a warm, sunny location.
4. Wait Patiently: It can take several weeks for slips to emerge. Keep the water fresh (for the water method) and the soil moist (for the soil method).
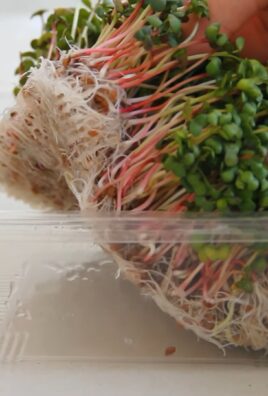
5. Harvest the Slips: Once the slips are 6-8 inches long, gently twist or cut them off the sweet potato.
6. Root the Slips (Optional but Recommended): Place the slips in a glass of water for a few days until roots develop. This will give them a head start when you plant them in the pots.
Planting Your Sweet Potato Slips
Okay, now for the main event: planting those sweet potato slips!
1. Prepare the Pots: Fill your large pots with well-draining potting mix, leaving a few inches of space at the top.
2. Water the Soil: Moisten the soil thoroughly before planting.
3. Plant the Slips: Dig a small hole in the soil for each slip. Gently place the slip in the hole, burying the roots (if you rooted them) and the bottom portion of the stem. Space the slips about 12 inches apart.
4. Water Again: Water the newly planted slips gently.
5. Mulch (Optional): Add a layer of mulch around the base of the plants to help retain moisture and suppress weeds.
Caring for Your Sweet Potato Plants
Now that your sweet potato slips are planted, it’s time to nurture them and watch them grow!
1. Watering: Sweet potatoes need consistent moisture, especially during hot weather. Water deeply whenever the top inch of soil feels dry. Avoid overwatering, as this can lead to root rot.
2. Sunlight: Make sure your pots are in a location that receives at least 6-8 hours of direct sunlight per day.
3. Fertilizing (Optional): If you choose to fertilize, apply a balanced, slow-release fertilizer according to the package directions. Avoid over-fertilizing, as this can lead to excessive foliage growth at the expense of tuber development.
4. Weeding: Keep the pots free of weeds, as they can compete with the sweet potatoes for nutrients and water.
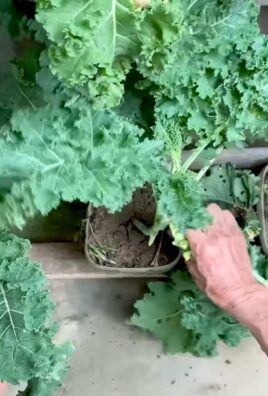
5. Vine Management: Sweet potato vines can get quite long and sprawling. You can let them trail over the sides of the pots, or you can prune them back to keep them more manageable. Pruning won’t hurt the tuber development.
6. Pest Control: Sweet potatoes are generally pest-resistant, but keep an eye out for common garden pests like aphids and spider mites. If you spot any pests, treat them with an appropriate organic insecticide.
Harvesting Your Sweet Potatoes
The moment you’ve been waiting for! Harvesting your homegrown sweet potatoes is incredibly satisfying.
1. Timing: Sweet potatoes typically take 90-120 days to mature. You’ll know they’re ready to harvest when the vines start to turn yellow and die back. This usually happens in the fall, before the first frost.
2. Prepare to Harvest: Stop watering your sweet potatoes a week or two before harvest. This will help the tubers cure properly.
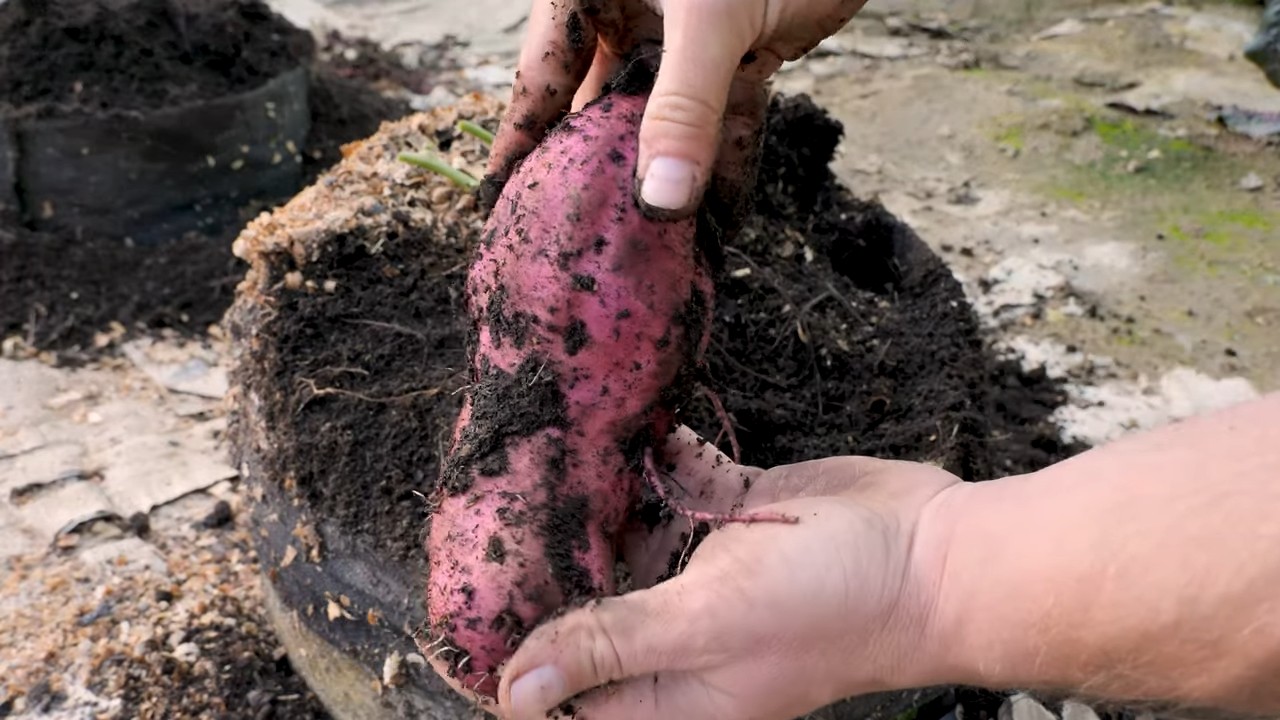
3. Harvesting: Gently tip the pot over and carefully remove the soil. You can also use a garden fork to loosen the soil around the edges of the pot. Be careful not to damage the sweet potatoes.
4. Curing: Curing is essential for developing the sweet flavor of sweet potatoes and for extending their storage life. To cure your sweet potatoes, place them in a warm, humid location (80-85°F and 85-90% humidity) for 7-10 days. A greenhouse or a warm, sunny room with a humidifier works well.
5. Storing: After curing, store your sweet potatoes in a cool, dry, and dark place (55-60°F). They should last for several months.
Troubleshooting
Even with the best care, you might encounter a few challenges along the way. Here are some common problems and how to address them:
* Yellowing Leaves: This could be a sign of overwatering, underwatering, or nutrient deficiency. Check the soil moisture and adjust your watering accordingly. If you suspect a nutrient deficiency, fertilize with a balanced fertilizer.
* Slow Growth: This could be due to insufficient sunlight, poor soil, or cool temperatures. Make sure your pots are in a sunny location and that the soil is well-draining. If the weather is cool, consider moving the pots to a warmer location.
* Pests: As mentioned earlier, keep an eye out for common garden pests. Treat them with an appropriate organic insecticide.
* Root Rot: This is caused by overwatering. Make sure your pots have good drainage and avoid overwatering.
Tips for Success
Here are a few extra tips to help you succeed in growing sweet potatoes in pots:
* Choose the Right Variety: Some sweet potato varieties are better suited for container growing than others. Look for bush-type varieties that don’t produce long, sprawling vines. ‘Bush Porto Rico’ and ‘Georgia Jet’ are good choices.
* Use a Trellis: If you’re growing a vining variety, consider using a trellis to support the vines. This will help keep them off the ground and prevent them from taking over your garden.
* Rotate Your Crops: Don’t plant sweet potatoes in the same pots year after year. Rotate your crops to prevent soilborne diseases.
* Have Fun! Gardening should be enjoyable. Don’t be afraid to experiment and learn from your mistakes.
Growing sweet potatoes in pots is a rewarding experience. With a little bit of care and attention, you can enjoy a bountiful harvest of delicious, homegrown sweet potatoes. Happy gardening!

Conclusion
So, there you have it! Growing sweet potatoes in pots is not only achievable, but it’s also a surprisingly rewarding experience. We’ve walked you through the entire process, from selecting the right pot and soil to nurturing your slips and harvesting your bounty. But why should you bother with this DIY project?
Firstly, it’s incredibly space-saving. If you’re limited to a balcony, patio, or small garden, container gardening is your best friend. You don’t need acres of land to enjoy the delicious, homegrown flavor of sweet potatoes. Secondly, it gives you complete control over the growing environment. You can tailor the soil composition, watering schedule, and sun exposure to perfectly suit the needs of your sweet potato plants. This often leads to healthier, more productive plants compared to growing them directly in the ground, especially if your native soil isn’t ideal.
Thirdly, it’s a fantastic learning experience. Gardening is a journey, and growing sweet potatoes in pots offers a unique opportunity to understand the life cycle of a plant, the importance of proper care, and the satisfaction of harvesting your own food. It’s a hands-on lesson in sustainability and self-sufficiency.
But the benefits don’t stop there. Imagine the pride you’ll feel when you serve a dish made with sweet potatoes you grew yourself. Think of the conversations you’ll spark with friends and family who are amazed by your gardening prowess. And consider the delicious, nutritious meals you’ll create with your homegrown harvest.
Ready to take your sweet potato game to the next level? Consider these variations:
* Experiment with different varieties: Beauregard is a classic choice, but there are many other sweet potato varieties to explore, each with its own unique flavor and texture. Try Japanese sweet potatoes with their purple skin and white flesh, or Jewel sweet potatoes with their vibrant orange hue.
* Vertical gardening: If you’re truly short on space, explore vertical gardening techniques. You can use stacked planters or hanging baskets to maximize your growing area. Just be sure to choose sturdy containers that can support the weight of the plants and the developing tubers.
* Companion planting: Enhance your sweet potato growth by planting companion plants like beans, peas, or herbs. These plants can help deter pests, improve soil health, and even enhance the flavor of your sweet potatoes.
* Sweet potato vines as ornamentals: Even if your harvest isn’t huge, the vines themselves are beautiful. Consider using them as ornamental plants in hanging baskets or containers, adding a touch of greenery to your outdoor space.
We’re confident that you’ll find growing sweet potatoes in pots to be a rewarding and enjoyable experience. Don’t be afraid to get your hands dirty, experiment with different techniques, and learn from your mistakes. The key is to be patient, observant, and persistent.
So, what are you waiting for? Grab a pot, some soil, and a sweet potato, and get started on your own container gardening adventure. We encourage you to try this DIY sweet potato growing method and share your experiences with us! Post pictures of your plants, share your tips and tricks, and let us know how your harvest turns out. We can’t wait to see what you create! Happy gardening!
Frequently Asked Questions (FAQ)
What is the best size pot for growing sweet potatoes?
The ideal pot size for growing sweet potatoes is at least 10 gallons, but larger is generally better. A 15-20 gallon pot will provide ample space for the tubers to develop. The pot should also be at least 12 inches deep to accommodate the root system. Remember that sweet potatoes grow underground, so they need plenty of room to expand. Using a smaller pot may result in smaller tubers or a reduced harvest. Consider using grow bags as they allow for good drainage and aeration, which are crucial for healthy sweet potato growth.
What type of soil is best for growing sweet potatoes in pots?
Sweet potatoes thrive in well-draining, sandy loam soil that is rich in organic matter. Avoid heavy clay soils, as they can become waterlogged and hinder tuber development. You can create your own potting mix by combining equal parts of compost, peat moss (or coconut coir), and perlite or coarse sand. The compost provides essential nutrients, the peat moss or coconut coir helps retain moisture, and the perlite or sand improves drainage. A slightly acidic soil pH of around 6.0 to 6.5 is ideal. You can test your soil pH using a soil testing kit and amend it accordingly with lime (to raise the pH) or sulfur (to lower the pH).
How often should I water sweet potatoes in pots?
Water sweet potatoes regularly, especially during hot and dry weather. The soil should be kept consistently moist, but not waterlogged. Check the soil moisture level by sticking your finger about an inch into the soil. If it feels dry, it’s time to water. Water deeply, until water drains out of the bottom of the pot. Avoid overhead watering, as this can promote fungal diseases. Instead, water at the base of the plant. Reduce watering frequency as the plants mature and the tubers begin to develop. Overwatering can lead to root rot and affect the quality of the sweet potatoes.
How much sunlight do sweet potatoes need?
Sweet potatoes need at least 6-8 hours of direct sunlight per day to thrive. Choose a sunny location for your pots where the plants will receive ample sunlight throughout the day. If you live in a particularly hot climate, provide some afternoon shade to prevent the plants from scorching. Insufficient sunlight can result in leggy growth, reduced tuber production, and smaller sweet potatoes. If you don’t have a sunny spot, consider using grow lights to supplement the natural sunlight.
When is the best time to harvest sweet potatoes grown in pots?
Sweet potatoes are typically ready to harvest about 90-120 days after planting the slips. The leaves will start to turn yellow and the vines will begin to die back, indicating that the tubers are mature. To harvest, gently tip the pot over and carefully remove the sweet potatoes from the soil. Avoid damaging the tubers during harvest. Cure the sweet potatoes by placing them in a warm, humid place (around 80-85°F and 85-90% humidity) for 7-10 days. This process helps to heal any wounds and improves the flavor and storage life of the sweet potatoes.
Can I grow sweet potatoes from store-bought sweet potatoes?
Yes, you can grow sweet potatoes from store-bought sweet potatoes, but it’s important to choose organic sweet potatoes that haven’t been treated with growth inhibitors. Suspend the sweet potato in a jar of water, with the bottom half submerged. Place the jar in a warm, sunny location. After a few weeks, sprouts (slips) will emerge from the sweet potato. Once the slips are about 6-8 inches long, gently twist them off and place them in a glass of water to root. Once the roots are about an inch long, they are ready to be planted in pots.
What are some common pests and diseases that affect sweet potatoes?
Common pests that affect sweet potatoes include sweet potato weevils, aphids, and spider mites. Diseases include fungal diseases like fusarium wilt and black rot. To prevent pests and diseases, use healthy slips, practice crop rotation, and maintain good soil drainage. Inspect your plants regularly for signs of pests or diseases and take action promptly. You can use organic pest control methods like insecticidal soap or neem oil to control pests. For fungal diseases, use a copper-based fungicide.
How do I store sweet potatoes after harvesting?
After curing, store sweet potatoes in a cool, dry, and dark place with good ventilation. The ideal storage temperature is around 55-60°F. Avoid storing sweet potatoes in the refrigerator, as this can cause them to develop a hard core and lose their flavor. Properly cured and stored sweet potatoes can last for several months. Check the sweet potatoes periodically for signs of spoilage and discard any that are soft or have blemishes.
Can I reuse the soil from my sweet potato pots?
Yes, you can reuse the soil from your sweet potato pots, but it’s important to amend it with fresh compost and other organic matter to replenish the nutrients. You should also sterilize the soil to kill any potential pests or diseases. You can sterilize the soil by baking it in the oven at 200°F for 30 minutes or by solarizing it in a black plastic bag for several weeks. Reusing soil can save you money and reduce waste, but it’s important to ensure that the soil is healthy and free from contaminants.

Leave a Comment