

Growing peas indoors might sound like a whimsical dream reserved for seasoned gardeners, but trust me, it’s totally achievable, even for those of us with limited outdoor space or a penchant for forgetting to water things (guilty!). Have you ever imagined plucking fresh, sweet peas right from your windowsill in the middle of winter? That’s the magic we’re unlocking today!
For centuries, peas have been a staple crop, nourishing communities across the globe. From ancient civilizations to medieval gardens, these little green gems have held a special place in our culinary and agricultural history. But traditionally, they’ve been relegated to sprawling fields and sunny summer days. What if I told you we could bring that bounty indoors, regardless of the season?
In this article, I’m going to share some simple, yet effective, DIY tricks and hacks that will empower you to successfully cultivate your own indoor pea patch. Growing peas indoors offers a fantastic solution for urban dwellers, apartment residents, or anyone seeking a fresh, homegrown treat without the hassle of a traditional garden. Plus, it’s incredibly rewarding to watch those tiny seeds sprout and transform into a vibrant, edible harvest. So, grab your gardening gloves (or not, it’s indoors!), and let’s get started on this exciting journey of bringing the garden inside!
Growing Peas Indoors: A Comprehensive DIY Guide
Hey there, fellow gardening enthusiasts! Ever dreamt of enjoying fresh, sweet peas even when the weather outside is frightful? Well, dream no more! I’m going to walk you through the process of growing peas indoors, step-by-step. It’s easier than you might think, and the reward of homegrown peas in the middle of winter is absolutely worth it.
Choosing the Right Pea Variety
Not all pea varieties are created equal when it comes to indoor growing. You’ll want to select bush or dwarf varieties that don’t require extensive trellising. These are more compact and better suited for container gardening.
Here are a few of my favorite indoor pea varieties:
* ‘Little Marvel’: A classic dwarf variety that produces sweet, plump peas.
* ‘Tom Thumb’: An ultra-compact variety perfect for small spaces.
* ‘Sugar Ann’: A bush snap pea variety that produces edible pods early.
* ‘Oregon Sugar Pod II’: Another great snap pea option with good disease resistance.
Gathering Your Supplies
Before we dive into planting, let’s make sure you have everything you need. This will save you time and frustration later on.
Here’s your checklist:
* Pea Seeds: Choose your desired variety from the list above.
* Containers: Select containers that are at least 6-8 inches deep and wide. Good drainage is crucial. I prefer using plastic pots with drainage holes, but terracotta pots work too (just be mindful that they dry out faster).
* Potting Mix: Use a high-quality, well-draining potting mix. Avoid using garden soil, as it can compact and hinder drainage.
* Grow Lights (Optional but Recommended): Peas need plenty of light to thrive. If you don’t have a sunny south-facing window, grow lights are essential.
* Trellis or Support (Optional): While bush varieties don’t need extensive trellising, providing some support can help keep the plants upright and prevent them from sprawling. Small tomato cages or bamboo stakes work well.
* Watering Can or Spray Bottle: For gentle watering.
* Seed Starting Tray (Optional): For pre-sprouting seeds.
Planting Your Pea Seeds
Now for the fun part! Let’s get those pea seeds in the soil.
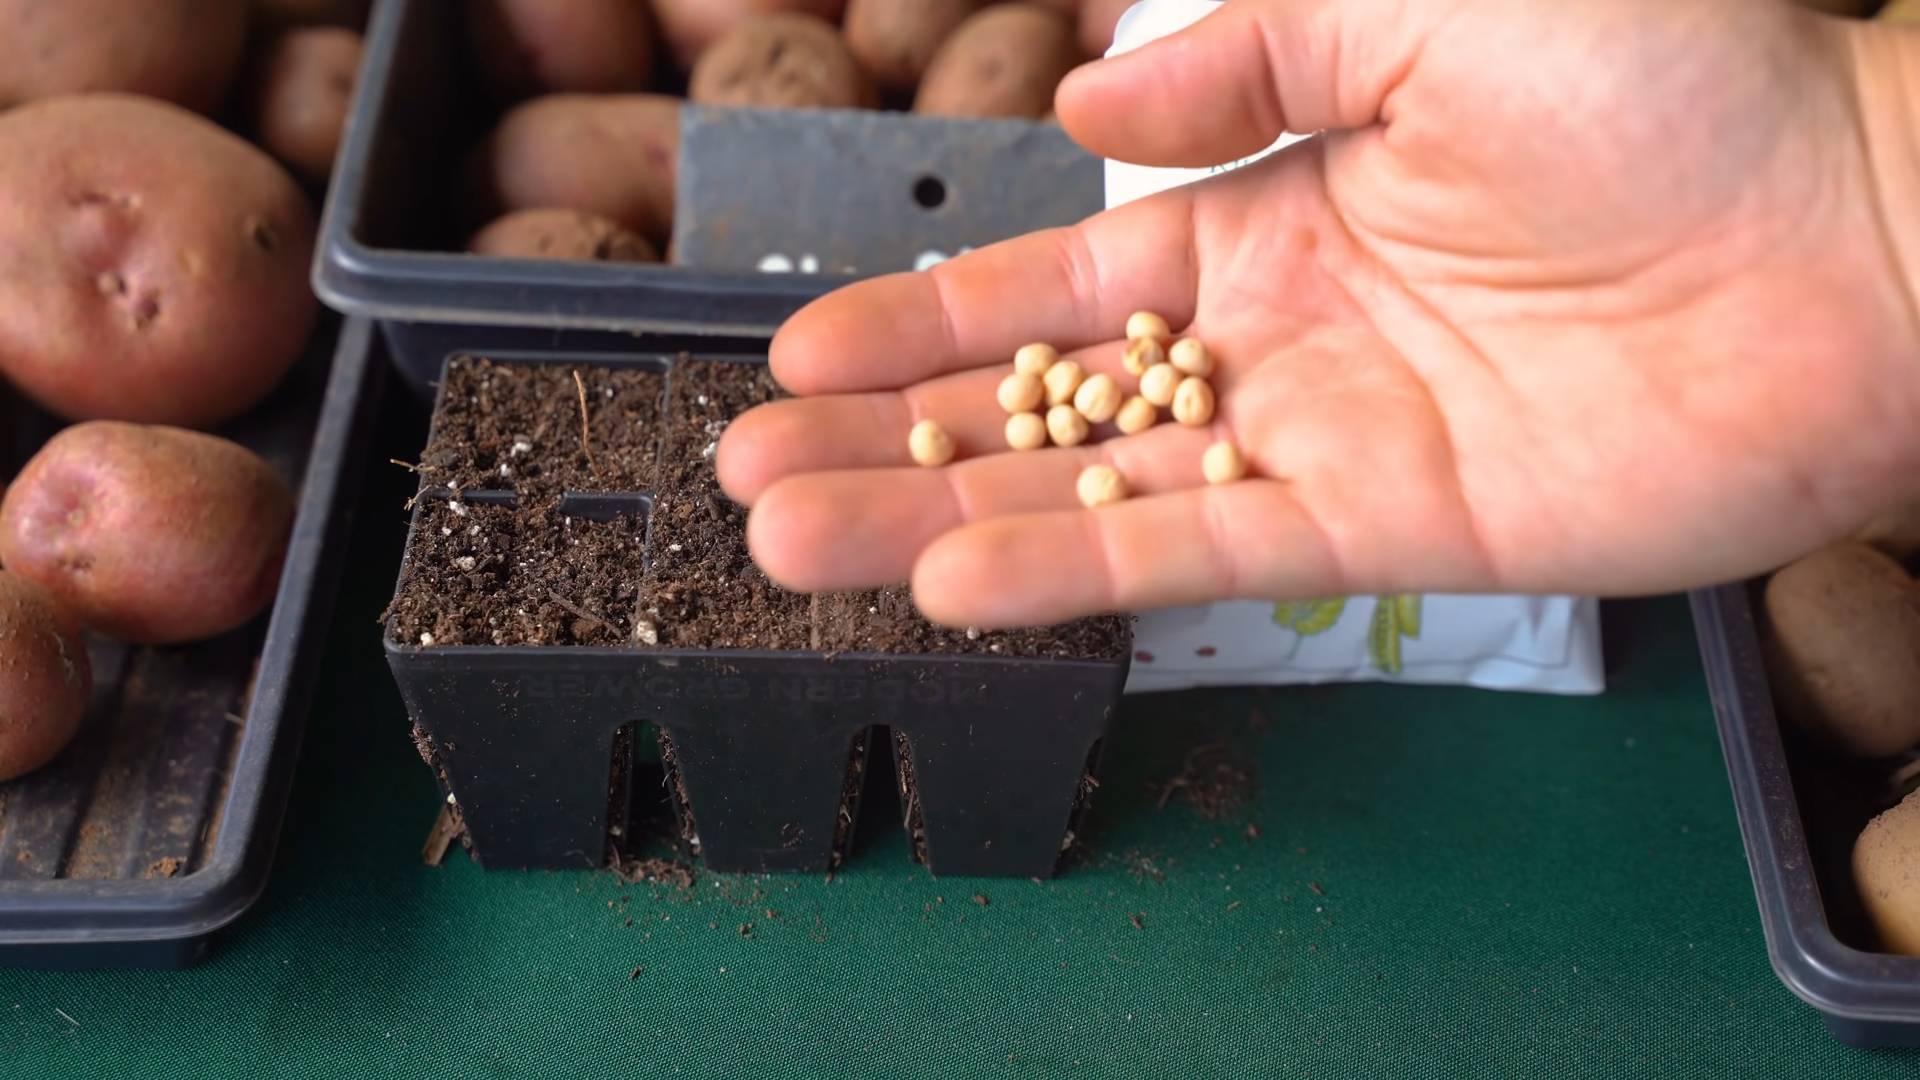
1. Soak the Seeds (Optional): Soaking pea seeds in water for 12-24 hours before planting can help speed up germination. I usually do this, but it’s not strictly necessary. Just place the seeds in a bowl of water and let them sit.
2. Prepare the Containers: Fill your containers with potting mix, leaving about an inch of space at the top. Gently tap the containers to settle the soil.
3. Sow the Seeds: Make small indentations in the soil, about 1 inch deep and 2 inches apart. Place one or two pea seeds in each indentation. I usually plant two seeds per hole just in case one doesn’t germinate.
4. Cover the Seeds: Gently cover the seeds with potting mix and lightly pat down the soil.
5. Water Thoroughly: Water the containers thoroughly until water drains out of the drainage holes. This will help settle the soil and ensure the seeds have enough moisture to germinate.
Providing the Right Environment
Peas need specific conditions to thrive indoors. Here’s how to create the ideal environment for your pea plants:
1. Light: Peas need at least 6-8 hours of direct sunlight per day. If you don’t have a sunny window, use grow lights. Position the lights about 6-12 inches above the plants. I use LED grow lights, which are energy-efficient and provide the right spectrum of light for plant growth.
2. Temperature: Peas prefer cool temperatures, ideally between 60-70°F (15-21°C). Avoid placing them near heat sources, such as radiators or vents.
3. Watering: Keep the soil consistently moist, but not soggy. Water when the top inch of soil feels dry to the touch. Avoid overwatering, as this can lead to root rot. I usually water every 2-3 days, but this will depend on the temperature and humidity in your home.
4. Humidity: Peas prefer moderate humidity. If the air in your home is dry, you can increase humidity by placing a tray of water near the plants or using a humidifier.
5. Air Circulation: Good air circulation is important to prevent fungal diseases. Make sure your plants have enough space between them and that there’s good airflow in the room.
Caring for Your Pea Plants
Once your pea plants have sprouted, it’s time to provide ongoing care to ensure they thrive.
1. Thinning (If Necessary): If you planted two seeds per hole and both germinate, thin out the weaker seedling. This will give the stronger seedling more room to grow.
2. Fertilizing: Peas are relatively light feeders, but they will benefit from occasional fertilization. Use a balanced liquid fertilizer diluted to half strength every 2-3 weeks. I like to use a fertilizer specifically formulated for vegetables.
3. Providing Support: As your pea plants grow, they may need some support to stay upright. Insert small tomato cages or bamboo stakes into the containers and gently tie the plants to the supports with twine.
4. Pest Control: Keep an eye out for common pests, such as aphids and spider mites. If you spot any pests, treat them with insecticidal soap or neem oil. I prefer to use organic pest control methods whenever possible.
5. Pollination: Peas are self-pollinating, so you don’t need to worry about hand-pollinating them. However, you can gently shake the plants occasionally to help distribute pollen.
Harvesting Your Peas
The moment you’ve been waiting for! Harvesting your homegrown peas.
1. Timing: The time it takes for peas to mature will depend on the variety you’re growing. Generally, you can expect to harvest peas about 60-70 days after planting.
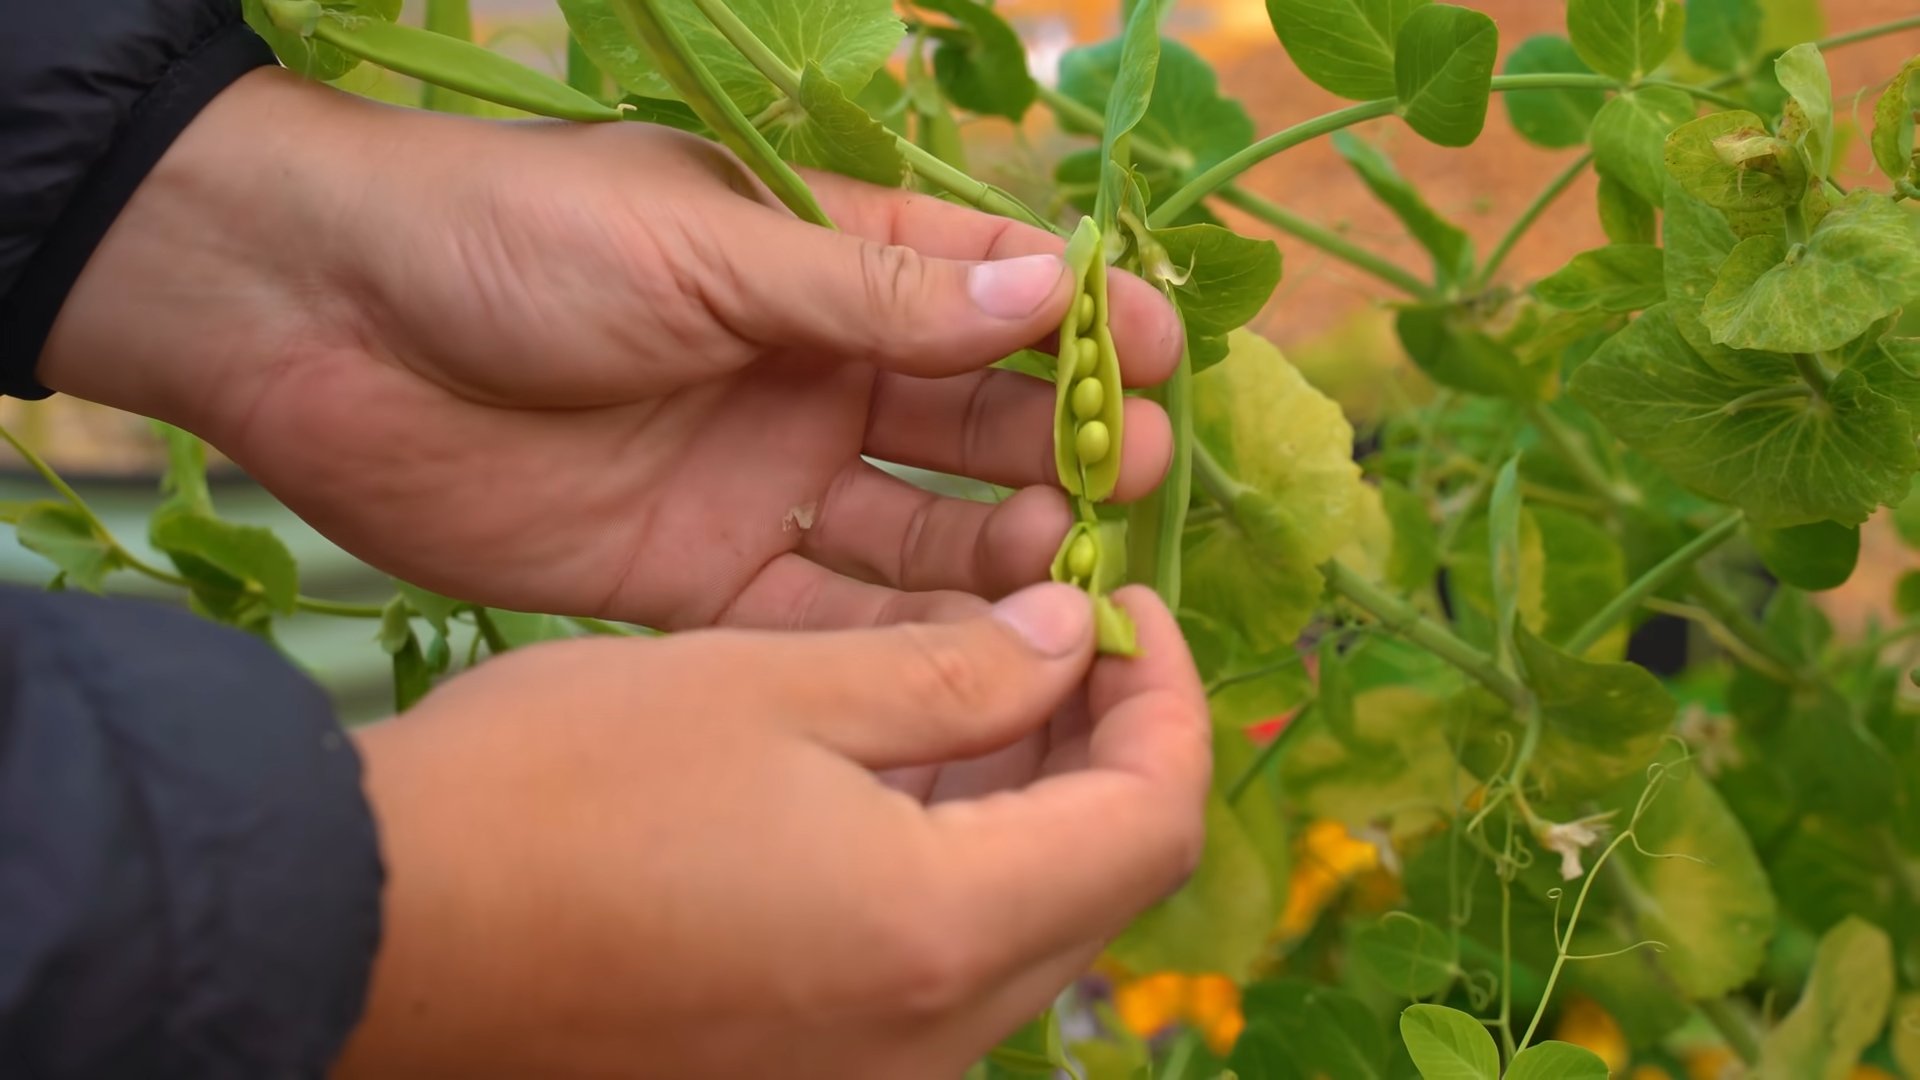
2. Harvesting Snap Peas: Harvest snap peas when the pods are plump and the peas inside are still small and tender. The pods should be bright green and crisp.
3. Harvesting Shelling Peas: Harvest shelling peas when the pods are full and the peas inside are large and well-developed. The pods should be slightly rounded and firm.
4. Harvesting Snow Peas: Harvest snow peas when the pods are flat and tender, before the peas inside have fully developed. The pods should be bright green and translucent.
5. How to Harvest: Gently pluck the pea pods from the plants. Avoid pulling or tugging, as this can damage the plants.
6. Enjoy! Enjoy your freshly harvested peas raw, cooked, or added to your favorite dishes. They’re delicious in salads, stir-fries, soups, and more.
Troubleshooting Common Problems
Even with the best care, you may encounter some problems when growing peas indoors. Here are a few common issues and how to address them:
* Poor Germination: If your pea seeds aren’t germinating, make sure the soil is consistently moist and the temperature is warm enough. You can also try scarifying the seeds by gently nicking the outer coating with a knife before planting.
* Yellowing Leaves: Yellowing leaves can be a sign of overwatering, underwatering, or nutrient deficiency. Check the soil moisture and adjust your watering accordingly. If the problem persists, fertilize the plants with a balanced liquid fertilizer.
* Leggy Growth: Leggy growth (tall, spindly plants) is usually caused by insufficient light. Make sure your plants are getting enough sunlight or grow light.
* Powdery Mildew: Powdery mildew is a fungal disease that can affect pea plants. It appears as a white, powdery coating on the leaves. To prevent powdery mildew, ensure good air circulation and avoid overhead watering. If you spot powdery mildew, treat the plants with a fungicide.
* Aphids: Aphids are small, sap-sucking insects that can infest pea plants. They can cause stunted growth and yellowing leaves. To control aphids, spray the plants with insecticidal soap or neem oil.
Extending Your Harvest
To enjoy a continuous harvest of peas, you can succession plant. This means planting new seeds every 2-3 weeks. This will ensure that you always have a supply of fresh peas.
I hope this guide has inspired you to try growing peas indoors. It’s a rewarding experience that will bring a touch of spring to your home, even in the dead of winter. Happy gardening!
Conclusion
So, there you have it! Growing peas indoors is not only achievable, but it’s also a remarkably rewarding experience. Forget relying solely on grocery store produce, especially when you crave that fresh, sweet taste of homegrown peas in the dead of winter. This DIY trick empowers you to enjoy the vibrant flavor and nutritional benefits of peas year-round, regardless of your outdoor climate or garden space.
Why is this a must-try? Because it’s simple, cost-effective, and incredibly satisfying. Imagine the joy of watching those tiny sprouts emerge, knowing that you nurtured them from seed to harvest. Think of the delicious meals you can create with your own homegrown peas – from adding them to salads and stir-fries to enjoying them as a healthy snack straight from the vine. This isn’t just about growing food; it’s about connecting with nature, learning a new skill, and enjoying the fruits (or rather, the vegetables) of your labor.
But the beauty of this DIY project lies in its adaptability. Feel free to experiment with different pea varieties. Snow peas, snap peas, and shelling peas all thrive indoors, offering a diverse range of flavors and textures. Consider using different types of containers, from traditional pots to repurposed containers like yogurt tubs or plastic bottles. Just ensure they have adequate drainage. You can also explore different support structures for your pea vines. While bamboo stakes work well, you could also use trellises, netting, or even repurposed branches.
Don’t be afraid to get creative and personalize your indoor pea garden to suit your preferences and available resources.
Furthermore, consider the lighting conditions in your home. While a sunny windowsill is ideal, you may need to supplement with grow lights, especially during the darker months. Experiment with different light intensities and durations to find what works best for your peas. Remember, consistent watering and proper ventilation are also crucial for success.
We strongly encourage you to give this DIY trick a try. It’s a fantastic way to bring a touch of spring into your home, even in the depths of winter. Plus, it’s a great project for kids, teaching them about plant life cycles and the importance of healthy eating.
Once you’ve harvested your first batch of homegrown peas, we’d love to hear about your experience! Share your photos, tips, and recipes with us in the comments below. Let’s create a community of indoor pea growers and inspire others to embrace the joy of homegrown food. Remember, even a small indoor garden can make a big difference in your health, happiness, and connection to the natural world. So, grab some seeds, get your hands dirty, and start growing your own delicious, fresh peas indoors today! This method of growing peas indoors is sure to become a favorite.
Frequently Asked Questions (FAQ)
What kind of peas are best for growing indoors?
While most pea varieties can be grown indoors, some are better suited than others. Bush varieties, which are more compact and don’t require extensive support, are generally easier to manage in limited indoor spaces. Popular choices include ‘Little Marvel,’ ‘Sugar Ann’ (a bush snap pea), and ‘Tom Thumb.’ However, vining varieties like ‘Sugar Snap’ or ‘Oregon Sugar Pod’ can also be grown indoors, provided you provide adequate support like a trellis or stakes. Experiment with different varieties to see which ones thrive best in your specific indoor environment. Consider the size of your container and the amount of vertical space you have available when selecting your pea variety.
How much light do indoor peas need?
Peas need plenty of light to thrive. Ideally, they should receive at least 6-8 hours of direct sunlight per day. A south-facing window is usually the best option. However, if you don’t have access to a sunny window, you can supplement with grow lights. Fluorescent or LED grow lights are both effective. Position the lights a few inches above the plants and keep them on for 12-16 hours per day. Monitor your plants closely and adjust the light intensity and duration as needed. Signs of insufficient light include leggy growth, pale leaves, and a lack of flowering.
What kind of soil should I use for growing peas indoors?
Use a well-draining potting mix that is rich in organic matter. Avoid using garden soil, as it can be too heavy and may contain pests or diseases. A good potting mix will provide adequate drainage and aeration, which are essential for healthy root growth. You can also amend your potting mix with compost or other organic materials to improve its fertility. Make sure the pH of the soil is slightly acidic to neutral, around 6.0 to 7.0.
How often should I water my indoor pea plants?
Water your pea plants regularly, keeping the soil consistently moist but not waterlogged. Check the soil moisture level daily by sticking your finger into the soil. If the top inch feels dry, it’s time to water. Water deeply, allowing the excess water to drain out of the bottom of the container. Avoid overwatering, as this can lead to root rot. The frequency of watering will depend on factors such as the size of your container, the temperature, and the humidity level.
How do I support my pea plants as they grow?
Vining pea varieties need support to climb. You can use a variety of structures, such as trellises, stakes, or netting. Insert the support structure into the container when you plant the seeds to avoid disturbing the roots later. As the pea plants grow, gently guide the vines onto the support structure. You can use twine or plant clips to secure the vines if needed. Bush varieties may not require support, but they may benefit from a small stake to prevent them from flopping over.
When can I harvest my indoor peas?
The time to harvest your peas will depend on the variety you are growing. Snow peas and snap peas are typically harvested when the pods are plump and tender, but before the peas inside are fully developed. Shelling peas are harvested when the pods are full and the peas inside are large and round. Regularly check your plants for ripe pods and harvest them as needed. Harvesting regularly will encourage the plants to produce more peas.
Are there any common pests or diseases that affect indoor pea plants?
Indoor pea plants are generally less susceptible to pests and diseases than outdoor plants. However, they can still be affected by common pests such as aphids, spider mites, and whiteflies. Regularly inspect your plants for signs of infestation and take action promptly if you notice any pests. You can control pests by handpicking them off the plants, spraying them with insecticidal soap, or using other organic pest control methods. Overwatering can lead to fungal diseases, so ensure proper drainage and ventilation.
Can I grow peas indoors year-round?
Yes, you can grow peas indoors year-round, provided you provide them with adequate light, water, and nutrients. You may need to adjust your growing practices depending on the season. For example, you may need to supplement with grow lights during the winter months when natural light is limited. You may also need to adjust your watering schedule depending on the temperature and humidity level.
How do I encourage my pea plants to produce more peas?
To encourage your pea plants to produce more peas, make sure they are getting enough light, water, and nutrients. Fertilize your plants regularly with a balanced fertilizer. Deadhead spent flowers to encourage the plants to produce more pods. Harvest your peas regularly to prevent the plants from going to seed. Providing adequate support for the vines will also help the plants to produce more peas.
What are some creative ways to use my homegrown peas?
The possibilities are endless! Freshly harvested peas are delicious eaten raw as a snack. You can also add them to salads, stir-fries, soups, and stews. They can be steamed, boiled, or sautéed. You can even use them to make pea puree or pea soup. Get creative and experiment with different recipes to find your favorite ways to enjoy your homegrown peas. Consider blanching and freezing excess peas for later use.
Leave a Comment