

Growing Luffa at Home might sound like a tropical dream, but trust me, it’s totally achievable, even if you’re just starting your gardening journey! Imagine the satisfaction of exfoliating with a sponge you grew yourself – talk about farm-to-shower freshness! For centuries, luffa sponges have been a natural and sustainable alternative to synthetic scrubbers, with roots tracing back to Asia and Africa, where they were used for everything from bathing to cleaning.
But why should you bother with growing luffa at home? Well, think about it: you’re reducing plastic waste, saving money on store-bought sponges, and enjoying a rewarding gardening experience all in one go. Plus, it’s a conversation starter! I know, I know, gardening can seem intimidating, but I’m here to break down the process into simple, easy-to-follow steps. This DIY guide will equip you with all the knowledge you need to cultivate your very own luffa crop, from seed to sponge. Get ready to ditch those plastic loofahs and embrace the natural goodness of homegrown luffa!
Growing Your Own Luffa Sponges: A Beginner’s Guide
Hey there, fellow gardeners! Ever thought about growing your own sponges? I know, it sounds a little crazy, but it’s totally doable and incredibly rewarding. I’m talking about luffa sponges, those amazing natural exfoliators you find at the store. Forget buying them – let’s grow our own! This guide will walk you through everything you need to know, from seed to scrub.
Choosing the Right Luffa Variety
Before we dive in, let’s talk luffa types. There are two main varieties: *Luffa aegyptiaca* (also known as smooth luffa) and *Luffa acutangula* (angled luffa). I personally prefer *Luffa aegyptiaca* because it tends to have a finer texture, making it a gentler sponge. *Luffa acutangula* has ridges and can be a bit rougher. Both are great, though, so choose whichever sounds best to you!
Getting Started: Seed Germination
Luffas have a long growing season, so starting them indoors is usually the best bet, especially if you live in a cooler climate. I usually start mine about 6-8 weeks before the last expected frost.
Here’s how I germinate my luffa seeds:
* Soaking the Seeds: Luffa seeds have a tough outer shell. To help them germinate faster, I soak them in warm water for 24-48 hours. This softens the shell and allows moisture to penetrate. I use a small bowl and make sure the seeds are fully submerged.
* Preparing the Seed Starting Mix: Use a well-draining seed starting mix. I like to use a mix of peat moss, vermiculite, and perlite. You can also buy pre-made seed starting mixes at most garden centers.
* Planting the Seeds: Fill small pots (about 3-4 inches in diameter) with the seed starting mix. Make a small hole about 1 inch deep in the center of each pot. Place one or two seeds in each hole and cover them gently with soil.
* Watering and Warmth: Water the pots gently until the soil is moist but not soggy. I use a spray bottle to avoid disturbing the seeds. Luffa seeds need warmth to germinate, so place the pots in a warm location, like on top of a refrigerator or on a heat mat. The ideal temperature is around 70-80°F (21-27°C).
* Patience is Key: Germination can take anywhere from 7 to 21 days, so be patient! Keep the soil consistently moist and the temperature warm. Once the seedlings emerge, move them to a sunny location.
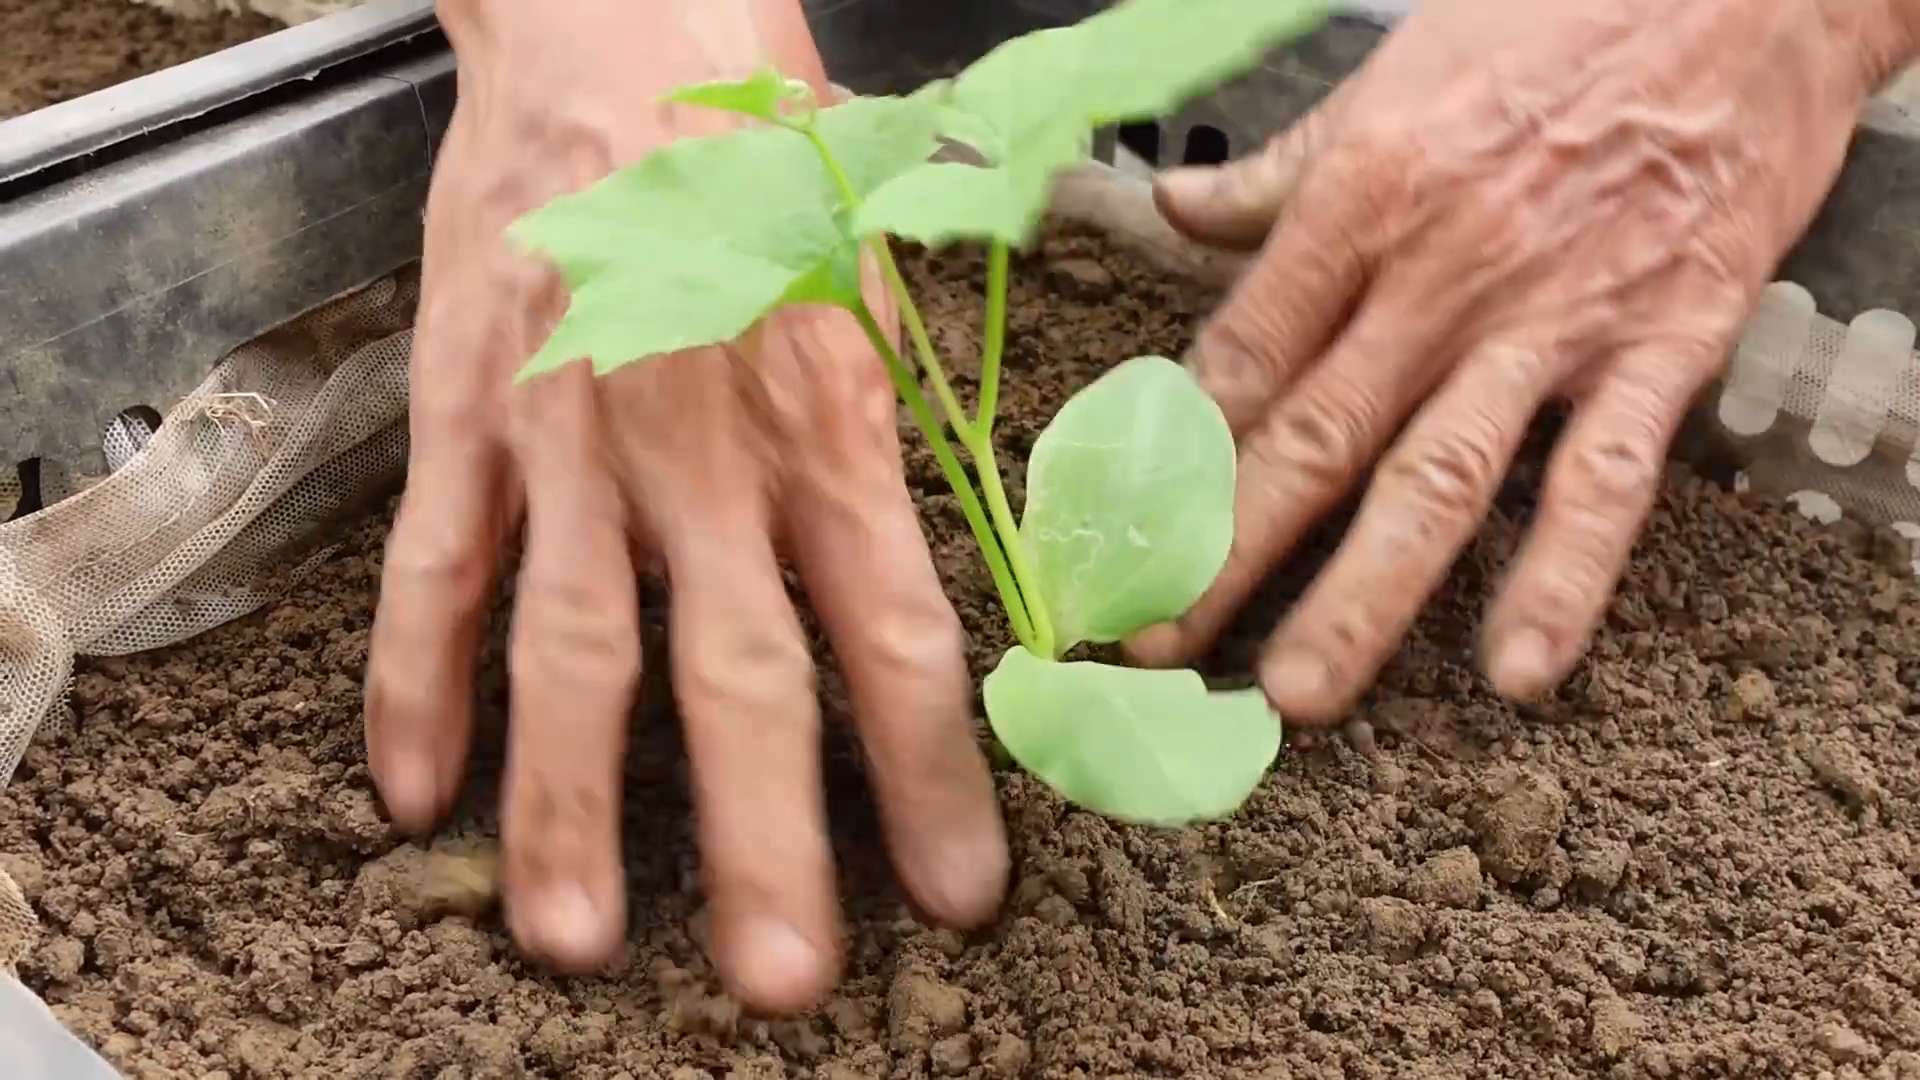
Transplanting Your Luffa Seedlings
Once the danger of frost has passed and your luffa seedlings have developed a few sets of true leaves (those are the leaves that look like miniature versions of the adult leaves), it’s time to transplant them outdoors.
1. Hardening Off: Before transplanting, you need to “harden off” the seedlings. This means gradually acclimating them to outdoor conditions. Start by placing the pots outdoors in a sheltered location for a few hours each day, gradually increasing the amount of time they spend outside over the course of a week. This helps them adjust to the sun, wind, and temperature changes.
2. Choosing the Right Location: Luffas need a sunny location with well-draining soil. They also need plenty of space to grow, as the vines can get quite long (up to 30 feet!). I recommend planting them near a sturdy trellis, fence, or arbor.
3. Preparing the Soil: Amend the soil with compost or well-rotted manure to improve drainage and fertility. Luffas are heavy feeders, so rich soil is essential.
4. Transplanting: Dig a hole that is slightly larger than the root ball of the seedling. Gently remove the seedling from the pot and place it in the hole. Backfill with soil and water thoroughly. Space the plants about 2-3 feet apart.
5. Providing Support: Immediately after transplanting, provide support for the vines to climb. Train the vines to grow up the trellis or fence by gently tying them to the support structure.
Caring for Your Luffa Plants
Luffas are relatively easy to care for, but they do require some attention.
1. Watering: Water regularly, especially during dry periods. Luffas need consistent moisture to thrive. I usually water deeply once or twice a week, depending on the weather.
2. Fertilizing: Fertilize every few weeks with a balanced fertilizer. I like to use a liquid fertilizer diluted to half strength. You can also side-dress with compost or manure.
3. Pruning: Prune the vines as needed to control their growth and encourage fruit production. I usually prune off any side shoots that are not producing flowers or fruit.
4. Pest and Disease Control: Luffas are generally pest and disease resistant, but they can be susceptible to squash bugs, vine borers, and powdery mildew. Inspect your plants regularly for signs of pests or diseases and take action promptly. I use insecticidal soap for squash bugs and vine borers, and a fungicide for powdery mildew.
5. Pollination: Luffas have separate male and female flowers. The female flowers have a small fruit behind them, while the male flowers do not. Bees and other pollinators are essential for pollination. If you’re not seeing many bees in your garden, you can hand-pollinate the flowers by transferring pollen from the male flowers to the female flowers with a small brush.
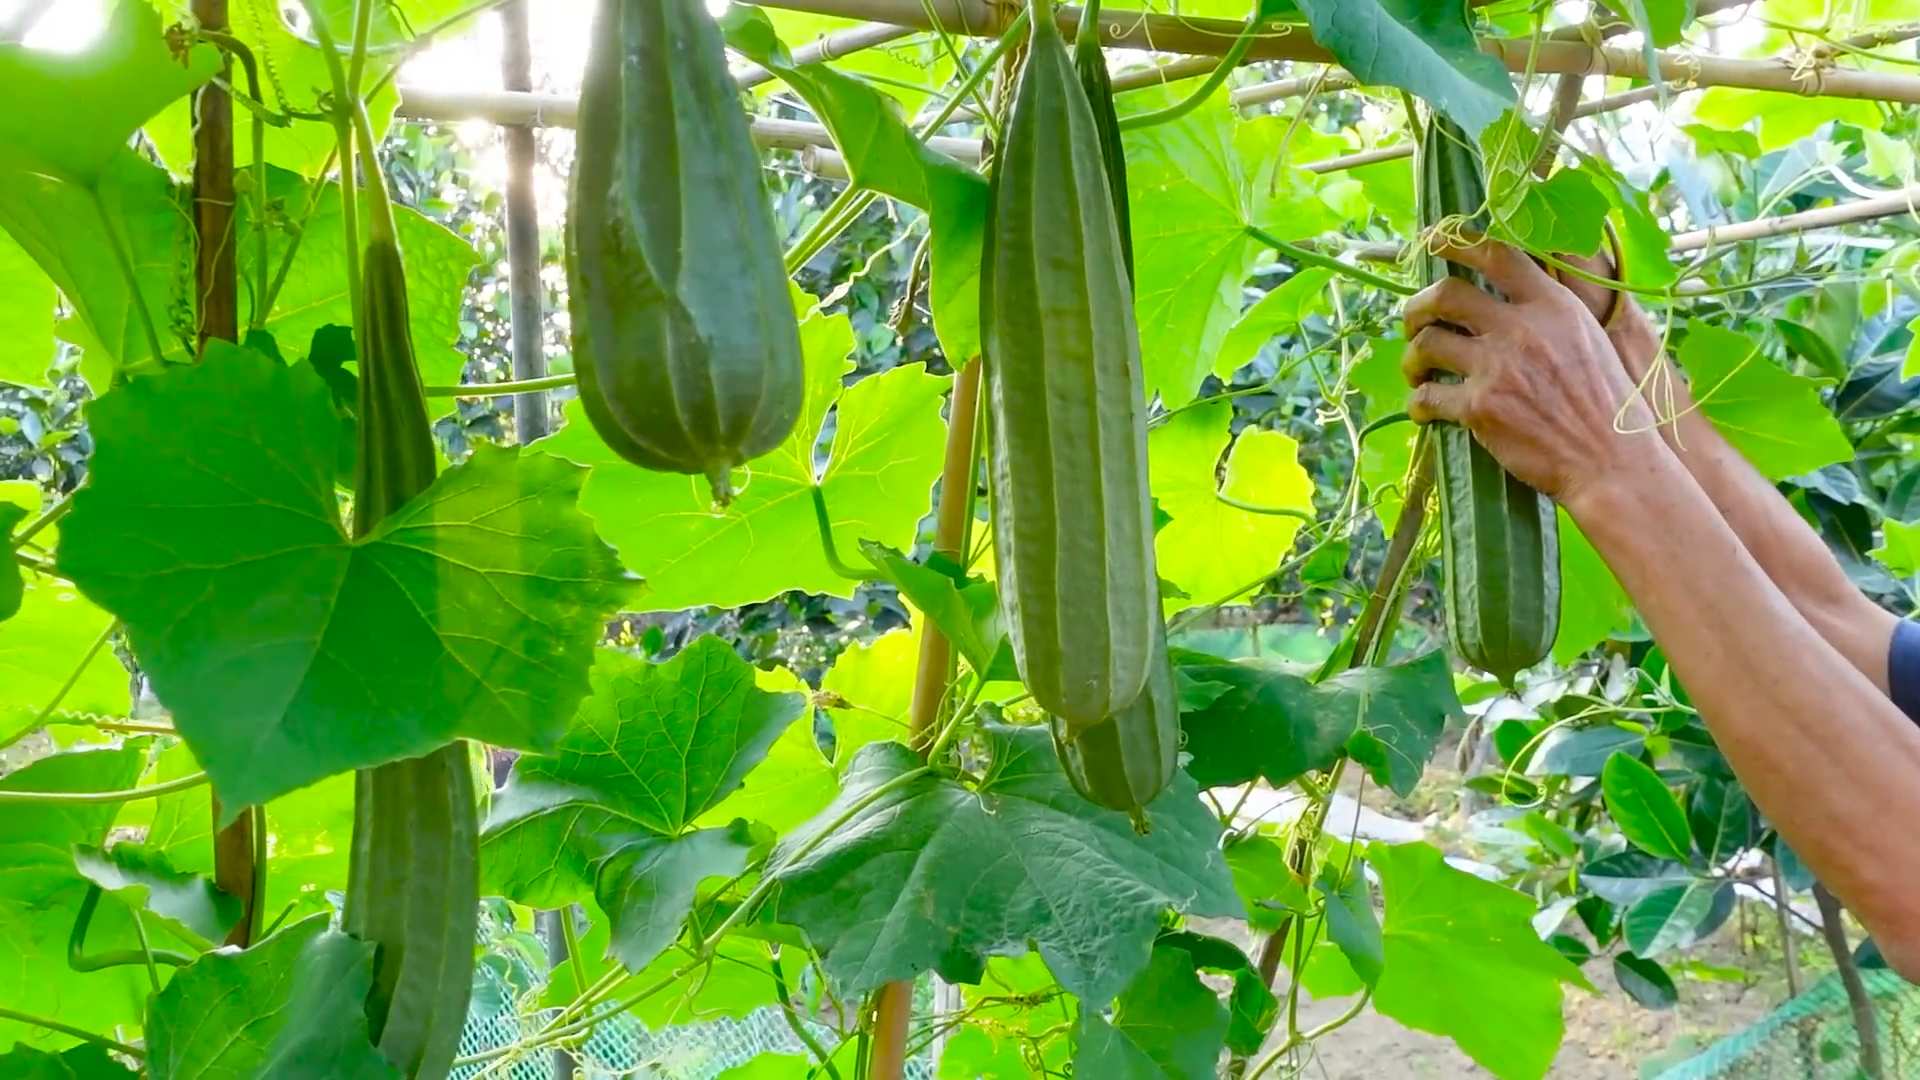
Harvesting Your Luffa Sponges
This is the most exciting part! Knowing when to harvest is key to getting good quality sponges.
1. Timing is Everything: The best time to harvest luffas is when the skin turns yellow or brown and feels dry and lightweight. The vine itself will also start to dry out. If you wait too long, the luffa will become too fibrous and the seeds will start to sprout inside. If you harvest too early, the sponge will be too soft and mushy.
2. Cutting the Luffa: Use a sharp knife or pruning shears to cut the luffa from the vine. Leave a few inches of stem attached.
3. Peeling the Luffa: This can be a bit messy, but it’s essential for removing the outer skin and revealing the sponge inside. There are a few ways to do this:
* Soaking Method: Soak the luffa in water for a few days to soften the skin. This makes it easier to peel. I usually soak mine in a bucket of water outside.
* Crushing Method: Gently crush the luffa with your hands or feet to crack the skin. This makes it easier to peel. Be careful not to damage the sponge inside.
* Peeling by Hand: If the skin is already dry and brittle, you may be able to peel it off by hand. Start at the stem end and work your way down.
4. Removing the Seeds: Once the skin is removed, shake out the seeds. You can save these seeds for planting next year. I usually spread them out on a paper towel to dry completely before storing them in an airtight container.
5. Washing and Drying: Wash the luffa thoroughly with soap and water to remove any remaining pulp or debris. Rinse well and allow it to dry completely in the sun. This helps to prevent mold and mildew. I usually hang mine on a clothesline to dry.
6. Bleaching (Optional): If you want a whiter sponge, you can soak it in a diluted bleach solution for a few minutes. Be sure to rinse it thoroughly afterwards. I personally prefer to leave mine natural.
Using Your Homegrown Luffa Sponges
Congratulations! You’ve successfully grown and harvested your own luffa sponges. Now it’s time to enjoy them!
* Exfoliating: Luffa sponges are great for exfoliating your skin. Use them in the shower or bath to gently scrub away dead skin cells and leave your skin feeling smooth and refreshed.
* Washing Dishes: Luffa sponges can also be used to wash dishes. They’re a natural and sustainable alternative to synthetic sponges.
* Gardening: Use smaller pieces of luffa as seedling starter pots. The roots will grow right through the luffa and you can plant the whole thing in the ground.
* Crafting: Get creative! Luffa sponges can be used in a variety of craft projects.
Troubleshooting
Even with the best planning, things can sometimes go wrong. Here are a few common problems I’ve encountered and how I’ve dealt with them:
* Seeds Not Germinating: Make sure the soil is warm enough and consistently moist. Try scarifying the seeds (gently scratching the outer shell) before soaking them.
*
Conclusion
So, there you have it! Growing your own luffa sponges at home is not just a fun gardening project; it’s a sustainable way to source a versatile and eco-friendly cleaning tool. From seed to scrub, the entire process is incredibly rewarding, connecting you to nature and providing you with a tangible product of your labor. Forget those mass-produced, plastic-laden sponges from the store. Embrace the natural goodness of a homegrown luffa!
Why is this DIY trick a must-try? Because it’s more than just growing a vegetable; it’s about embracing a lifestyle that values sustainability and self-sufficiency. You’re reducing your reliance on plastic, minimizing your carbon footprint, and gaining a unique and effective cleaning tool in the process. Plus, imagine the satisfaction of gifting a homegrown luffa to friends and family – a truly thoughtful and eco-conscious present!
But the benefits don’t stop there. Growing luffa allows you to control the entire process, ensuring that your sponges are free from harmful chemicals and pesticides. You can tailor the size and shape of your luffa by adjusting your growing practices. Want a smaller, more delicate sponge for facial cleansing? Harvest the luffa earlier. Prefer a larger, more robust sponge for scrubbing pots and pans? Let it mature fully on the vine.
Variations and Suggestions:
* Luffa Soap Holders: Cut a thick slice of luffa and let it dry completely. This makes an excellent, naturally draining soap holder.
* Luffa Bath Mats: Sew several luffa slices together to create a textured and exfoliating bath mat.
* Luffa Seed Saving: Save seeds from your best-performing luffa plants to ensure a consistent supply for future harvests.
* Companion Planting: Plant luffa alongside beneficial companion plants like basil or marigolds to deter pests and attract pollinators.
* Luffa for Crafts: Dried luffa can be used in a variety of craft projects, from decorative wreaths to unique wall art.
We encourage you to embark on this exciting gardening adventure and experience the joy of growing your own luffa sponges. It’s a project that’s both environmentally friendly and personally fulfilling. Don’t be intimidated if you’re a beginner gardener; luffa is surprisingly resilient and relatively easy to grow with a little patience and care.
Once you’ve harvested your first crop of homegrown luffa, we’d love to hear about your experience! Share your photos, tips, and tricks on social media using #HomegrownLuffa and #SustainableLiving. Let’s inspire others to join the luffa-growing movement and create a more sustainable future, one sponge at a time. Remember, every small step towards sustainability makes a big difference, and growing your own luffa is a fantastic way to contribute. So, get your seeds ready, prepare your garden, and get ready to enjoy the many benefits of this amazing plant!
Frequently Asked Questions (FAQ)
What is the best time to plant luffa seeds?
Luffa is a warm-weather crop, so it’s best to plant seeds after the last frost when the soil has warmed up to at least 70°F (21°C). In most regions, this is typically in late spring or early summer. You can also start seeds indoors 6-8 weeks before the last frost to get a head start on the growing season. This is especially helpful in areas with shorter growing seasons.
How much space does a luffa plant need?
Luffa vines are vigorous growers and require plenty of space to spread. Each plant needs at least 8-10 feet of space in each direction. They also need a strong trellis or support structure to climb on, as the gourds can become quite heavy. Consider using a sturdy fence, pergola, or custom-built trellis.
How long does it take for a luffa to mature?
Luffa gourds typically take 90-120 days to mature, depending on the variety and growing conditions. You’ll know they’re ready to harvest when the skin turns brown and dry, and the gourd feels lightweight. If you’re unsure, you can gently squeeze the gourd; if it feels hollow and the seeds rattle inside, it’s ready.
How do I harvest and process luffa sponges?
To harvest, cut the luffa gourd from the vine, leaving a few inches of stem attached. Soak the gourd in water for a few days to soften the skin. Once the skin is soft, peel it off to reveal the fibrous sponge inside. Rinse the sponge thoroughly to remove any remaining pulp and seeds. Shake out excess water and allow the sponge to dry completely in a well-ventilated area. This may take several weeks.
How do I clean and maintain my luffa sponge?
To keep your luffa sponge clean and hygienic, rinse it thoroughly after each use and allow it to dry completely. You can also sanitize it periodically by soaking it in a solution of diluted vinegar or hydrogen peroxide. Replace your luffa sponge every few weeks or months, depending on how frequently you use it.
Can I eat luffa?
Yes, young luffa gourds can be eaten like zucchini or squash. They have a mild, slightly sweet flavor and can be used in stir-fries, soups, and other dishes. However, once the gourd matures and becomes fibrous, it is no longer edible.
What are some common problems when growing luffa?
Some common problems when growing luffa include pests like squash bugs and vine borers, as well as fungal diseases like powdery mildew. To prevent these problems, practice good garden hygiene, such as removing dead leaves and debris, and consider using organic pest control methods. Ensure proper air circulation around the plants to minimize the risk of fungal diseases.
Can I grow luffa in a container?
Yes, you can grow luffa in a container, but you’ll need a large pot (at least 20 gallons) and a sturdy trellis for the vine to climb on. Make sure the container has good drainage and use a high-quality potting mix. Container-grown luffa plants may require more frequent watering and fertilization than those grown in the ground.
How do I save luffa seeds for next year?
To save luffa seeds, allow a few gourds to fully mature and dry on the vine. Once the gourds are completely dry, crack them open and remove the seeds. Spread the seeds out on a paper towel to dry completely. Store the dried seeds in an airtight container in a cool, dark, and dry place.
Is growing luffa sponges sustainable?
Absolutely! Growing your own luffa sponges is a highly sustainable practice. It reduces your reliance on plastic sponges, minimizes waste, and allows you to control the entire production process. Plus, luffa plants are relatively low-maintenance and require minimal resources to grow. By composting the spent luffa vines and using organic gardening practices, you can further enhance the sustainability of your luffa-growing project.
Leave a Comment