

Growing Celery Indoors might seem like a challenge reserved for seasoned gardeners, but trust me, it’s a surprisingly achievable and rewarding project for anyone, even if you’re just starting your green-thumb journey! Have you ever bought a bunch of celery, used a few stalks, and watched the rest wilt away in your fridge? I know I have, countless times! That’s where this simple, yet ingenious DIY trick comes in – we’re going to learn how to regrow celery from those leftover bases, right in the comfort of our homes.
Celery, with its crisp texture and refreshing flavor, has been cultivated for centuries, dating back to ancient Greece and Rome, where it was initially valued more for its medicinal properties than its culinary uses. Today, it’s a staple in kitchens worldwide. But beyond its culinary appeal, growing celery indoors offers a fantastic opportunity to connect with nature, reduce food waste, and enjoy fresh, homegrown produce year-round.
In this article, I’ll guide you through a step-by-step process that’s so easy, even kids can participate. We’ll cover everything from preparing your celery base to providing the right environment for healthy growth. Imagine the satisfaction of harvesting your own celery, knowing you’ve not only saved money but also contributed to a more sustainable lifestyle. So, let’s ditch the wilting celery woes and embark on this exciting indoor gardening adventure together!

Growing Celery Indoors: A Beginner’s Guide
Hey there, fellow plant enthusiasts! Ever thought about growing your own celery indoors? It’s totally doable, and honestly, there’s nothing quite like the satisfaction of snipping off a fresh stalk for your soup or salad. I’ve been doing it for a while now, and I’m excited to share my secrets with you. It’s easier than you might think!
Choosing the Right Celery and Setting Up Your Space
Before we dive into the nitty-gritty, let’s talk about picking the right celery and prepping your indoor garden.
* Choosing Your Celery: You can start with celery from the grocery store! Look for a head of celery that’s firm, with healthy-looking stalks and a good, solid base. Avoid anything that’s wilted or showing signs of decay. Organic celery is a great choice if you can find it, as it minimizes the risk of any unwanted chemicals.
* Light is Key: Celery needs a good amount of light, ideally 6-8 hours a day. A sunny windowsill facing south or west is perfect. If you don’t have enough natural light, don’t worry! You can easily supplement with a grow light. I use a simple LED grow light that I got online, and it works wonders.
* Container Considerations: You’ll need a container that’s at least 6-8 inches deep and wide. This gives the celery roots enough room to grow. A plastic pot with drainage holes is ideal. You can also use a repurposed container, just make sure it’s clean and has drainage.
* Potting Mix Matters: Use a good-quality potting mix that drains well. Celery likes moisture, but it doesn’t like to sit in soggy soil. I usually mix some perlite into my potting mix to improve drainage.
Regrowing Celery from a Base: The Water Propagation Method
This is the easiest way to get started, and it’s so cool to watch the celery regrow!
1. Prepare the Celery Base: Once you’ve used the stalks of your celery, don’t throw away the base! Cut off the celery stalks about 2 inches from the bottom of the base. This is the part we’ll be using to regrow the celery.
2. Place in Water: Find a shallow dish or glass. Place the celery base in the dish, cut-side up. Add enough water to cover the bottom inch or so of the base. Be careful not to submerge the entire base, as this can cause it to rot.
3. Find a Sunny Spot: Place the dish with the celery base on a sunny windowsill or under a grow light.
4. Change the Water Regularly: Change the water every 1-2 days to keep it fresh and prevent bacteria from growing.
5. Watch for Growth: After a few days, you should start to see small roots emerging from the bottom of the base and new leaves sprouting from the top. This is so exciting!
6. Wait for Roots to Develop: Let the roots grow for about a week or two, until they are a few inches long. This will give the celery a good start when you transplant it to soil.
Transplanting to Soil: Giving Your Celery a Home
Now that your celery has roots, it’s time to give it a permanent home in a pot.
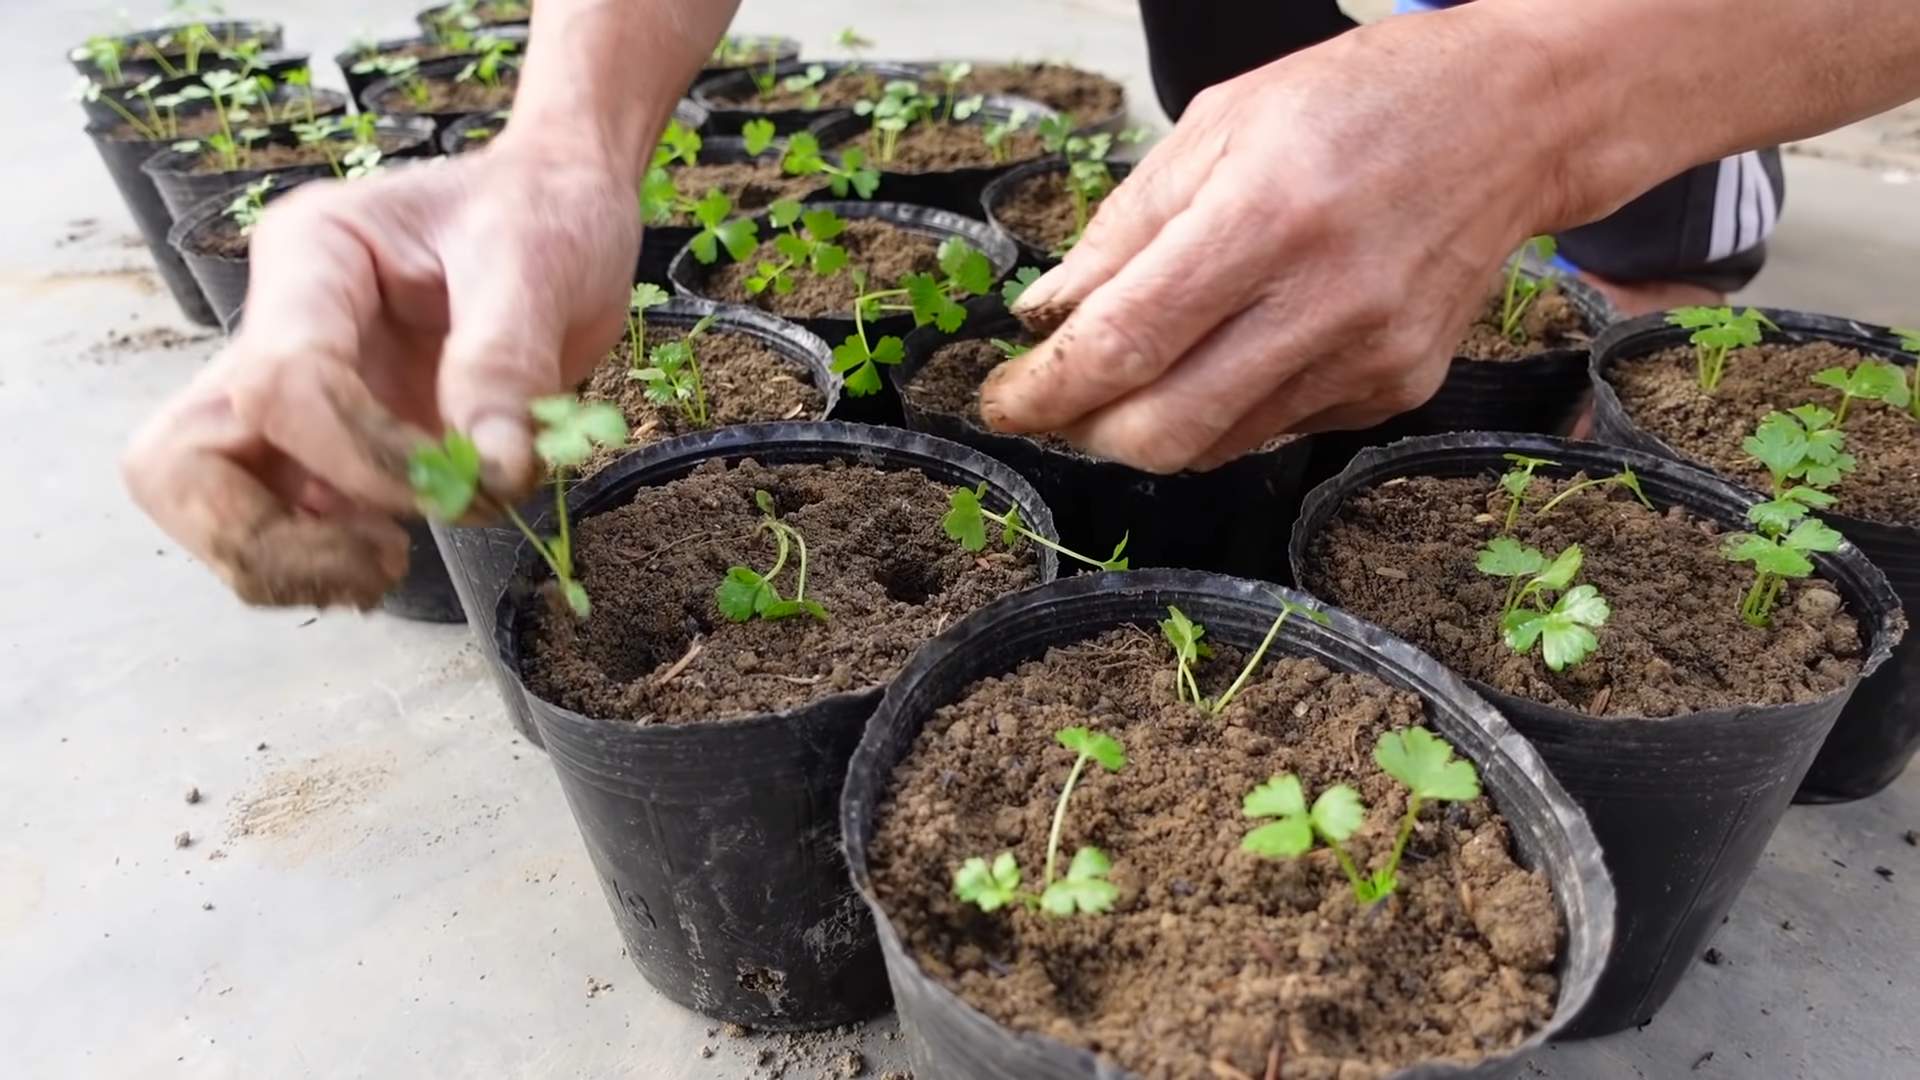
1. Prepare Your Pot: Fill your chosen container with potting mix, leaving about an inch of space at the top.
2. Make a Hole: Use your finger or a small trowel to create a hole in the center of the potting mix, large enough to accommodate the celery base and its roots.
3. Carefully Transplant: Gently remove the celery base from the water and carefully place it in the hole. Make sure the roots are spread out and covered with potting mix.
4. Water Thoroughly: Water the celery thoroughly after transplanting, until the water drains out of the bottom of the pot. This will help settle the soil and encourage root growth.
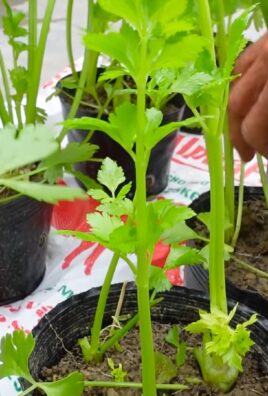
5. Provide Support (Optional): If your celery is getting tall and wobbly, you can provide some support by gently staking it with a small stick or bamboo skewer.
Caring for Your Indoor Celery: Keeping it Happy and Healthy
Now that your celery is planted, it’s important to provide it with the right care to keep it growing strong.
* Watering: Celery likes to be kept consistently moist, but not soggy. Water when the top inch of soil feels dry to the touch. Avoid overwatering, as this can lead to root rot. I usually water my celery every 2-3 days, but this will depend on the humidity and temperature in your home.
* Fertilizing: Celery is a heavy feeder, so it needs regular fertilization. Use a balanced liquid fertilizer diluted to half strength every 2-3 weeks. I like to use an organic fertilizer to keep things natural.
* Light: As mentioned earlier, celery needs plenty of light. If you’re not getting enough natural light, use a grow light to supplement.
* Temperature: Celery prefers cooler temperatures, ideally between 60-70°F (15-21°C). Avoid placing your celery near heat sources, such as radiators or vents.
* Humidity: Celery likes humidity, so you can increase the humidity around your plant by misting it with water regularly or placing it on a tray filled with pebbles and water.
* Pest Control: Keep an eye out for pests, such as aphids or spider mites. If you notice any pests, you can try spraying your celery with insecticidal soap or neem oil. I prefer to use natural methods to control pests whenever possible.
Harvesting Your Celery: Enjoying the Fruits (or Stalks!) of Your Labor
After a few months, your celery should be ready to harvest.
1. Harvesting Stalks: You can harvest individual stalks as needed by cutting them off at the base of the plant. This will allow the remaining stalks to continue growing.
2. Harvesting the Whole Plant: If you want to harvest the entire plant, simply cut it off at the base.
3. Enjoy Your Harvest: Use your fresh celery in soups, salads, smoothies, or as a healthy snack. The possibilities are endless!
Troubleshooting: Addressing Common Problems
Even with the best care, you might encounter some problems along the way. Here are a few common issues and how to address them:
* Yellowing Leaves: This can be caused by overwatering, underwatering, or nutrient deficiencies. Check the soil moisture and adjust your watering accordingly. If the soil is dry, water more frequently. If the soil is soggy, water less frequently. You can also try fertilizing your celery with a balanced fertilizer.
* Leggy Growth: This is usually caused by insufficient light. Make sure your celery is getting enough light, either from a sunny windowsill or a grow light.
* Slow Growth: This can be caused by a variety of factors, including insufficient light, nutrient deficiencies, or cool temperatures. Make sure your celery is getting enough light and nutrients, and keep it in a warm location.
* Root Rot: This is caused by overwatering and poor drainage. Make sure your pot has drainage holes and that you’re not overwatering your celery. If you suspect root rot, you can try repotting your celery in fresh potting mix.
Tips and Tricks for Success
Here are a few extra tips to help you succeed with growing celery indoors:
* Rotate Your Plant: Rotate your celery plant regularly to ensure that all sides get equal exposure to light.
* Pinch Off Flower Stalks: If your celery starts to produce flower stalks, pinch them off to encourage leaf growth.
* Succession Planting: To have a continuous supply of celery, start new plants every few weeks.
* Experiment with Varieties: There are many different varieties of celery, so experiment to find one that you like.
* Have Fun! Growing celery indoors is a rewarding experience, so relax and enjoy the process.
Growing celery indoors is a fun and rewarding project that anyone can do. With a little bit of care and attention, you can enjoy fresh, homegrown celery all year round. So, give it a try! I promise you won’t regret it. Happy growing!
Conclusion
So, there you have it! Growing celery indoors might seem like a challenge, but with a little patience and the right approach, you can enjoy fresh, crisp celery right from your own home. This DIY trick isn’t just about saving money; it’s about connecting with your food, reducing your carbon footprint, and experiencing the satisfaction of nurturing something from a humble celery base to a thriving plant.
Why is this a must-try? Because store-bought celery, while convenient, often lacks the vibrant flavor and freshness of homegrown. Plus, think about the environmental impact of transporting produce across long distances. By growing your own, you’re contributing to a more sustainable lifestyle. And let’s be honest, there’s something incredibly rewarding about snipping off a stalk of celery that you’ve personally cultivated for your soup, salad, or even just a healthy snack.
Beyond the basic method, there are plenty of ways to personalize your indoor celery growing experience. Experiment with different celery varieties to discover your favorite flavor profile. Try using different types of potting mix to see which yields the best results. You can even explore hydroponic systems for a more advanced and efficient growing method. Consider adding companion plants like basil or parsley to your indoor garden to enhance the flavor of your celery and create a more diverse ecosystem.
Don’t be afraid to get creative! If you find that your celery stalks are a bit pale, try supplementing with a grow light to provide them with the extra sunshine they need. If you’re short on space, consider using a vertical planter to maximize your growing area. The possibilities are endless!
We wholeheartedly encourage you to give this DIY celery growing trick a try. It’s a fun, educational, and ultimately rewarding experience that will bring a touch of freshness and sustainability to your home. Once you’ve embarked on your indoor celery growing journey, we’d love to hear about your experiences! Share your tips, tricks, and triumphs in the comments below. Let’s build a community of indoor celery enthusiasts and inspire others to embrace the joy of homegrown goodness. Remember, even if you don’t have a green thumb, this is a great way to start! You might be surprised at how easy and enjoyable it is to grow your own **celery indoors**.
Frequently Asked Questions (FAQs)
How long does it take to grow celery indoors from a base?
The time it takes to grow celery indoors from a base can vary depending on several factors, including the variety of celery, the growing conditions (light, temperature, humidity), and the quality of the potting mix. Generally, you can expect to see new growth within a week or two after placing the celery base in water. However, it will take several months to grow a full-sized celery plant that is ready for harvest. Be patient and consistent with your care, and you’ll be rewarded with fresh celery in due time.
What kind of light does indoor celery need?
Celery thrives in bright, indirect light. Ideally, you should place your celery plant near a sunny window that receives at least 6 hours of sunlight per day. However, avoid direct sunlight, especially during the hottest part of the day, as it can scorch the leaves. If you don’t have access to a sunny window, you can supplement with a grow light. Position the grow light about 6-12 inches above the plant and keep it on for 12-16 hours per day.
How often should I water my indoor celery plant?
Celery needs consistent moisture to thrive. Water your celery plant regularly, keeping the soil consistently moist but not waterlogged. Check the soil moisture level daily by sticking your finger about an inch into the soil. If the soil feels dry to the touch, it’s time to water. When watering, water deeply until water drains out of the bottom of the pot. Avoid letting the plant sit in standing water, as this can lead to root rot.
What kind of soil is best for growing celery indoors?
Celery prefers a rich, well-draining soil that is high in organic matter. A good potting mix for celery should be a blend of peat moss, perlite, and vermiculite. You can also amend your potting mix with compost or other organic matter to improve its fertility and drainage. Avoid using heavy clay soils, as they can become waterlogged and suffocate the roots.
How do I fertilize my indoor celery plant?
Celery is a heavy feeder and requires regular fertilization to thrive. Start fertilizing your celery plant about two weeks after it starts growing. Use a balanced liquid fertilizer, such as a 10-10-10 or 20-20-20, diluted to half strength. Fertilize every two weeks during the growing season. Avoid over-fertilizing, as this can burn the roots.
Can I grow celery indoors in water only?
While you can initially sprout celery from a base in water, it’s not sustainable for long-term growth. Celery needs nutrients from the soil to develop into a healthy plant. Once the celery base has sprouted roots and new leaves, it’s essential to transplant it into a pot filled with potting mix.
How do I prevent pests and diseases from affecting my indoor celery plant?
To prevent pests and diseases from affecting your indoor celery plant, start by using a clean potting mix and a clean pot. Inspect your plant regularly for signs of pests or diseases, such as aphids, spider mites, or fungal infections. If you notice any problems, treat them promptly with an appropriate insecticide or fungicide. Good air circulation can also help prevent fungal diseases. Avoid overwatering, as this can create a favorable environment for pests and diseases.
How do I harvest my indoor celery?
You can harvest celery stalks as needed once they reach a desirable size. To harvest, simply cut the outer stalks near the base of the plant with a sharp knife. The inner stalks will continue to grow and mature. You can also harvest the entire plant at once by cutting it off at the base.
Can I regrow celery from the same base multiple times?
Yes, you can regrow celery from the same base multiple times. After harvesting the stalks, leave the base in the pot and continue to water and fertilize it. New stalks will eventually emerge from the base. However, the subsequent harvests may be smaller than the initial harvest.
What are some common problems when growing celery indoors and how can I fix them?
Some common problems when growing celery indoors include:
* **Yellowing leaves:** This can be caused by overwatering, underwatering, nutrient deficiencies, or lack of light. Adjust your watering schedule, fertilize your plant, and move it to a brighter location.
* **Stunted growth:** This can be caused by poor soil, lack of nutrients, or pests. Repot your plant in fresh potting mix, fertilize it regularly, and inspect it for pests.
* **Root rot:** This is caused by overwatering and poor drainage. Repot your plant in fresh potting mix and make sure the pot has drainage holes.
* **Pests:** Aphids, spider mites, and other pests can infest celery plants. Treat infestations with an appropriate insecticide.
By addressing these common problems promptly, you can ensure that your indoor celery plant thrives and provides you with a bountiful harvest.


Leave a Comment