

Growing Bush Beans in Pots: Imagine stepping onto your balcony or into your small backyard and harvesting a handful of fresh, crisp bush beans, ready to be tossed into a salad or steamed as a delicious side. Sounds idyllic, right? Well, it’s more achievable than you might think, even without acres of land! For centuries, container gardening has allowed people to cultivate food and beauty in limited spaces. From the hanging gardens of Babylon to the humble window boxes of today, the desire to nurture plants close to home is deeply ingrained in us.
But let’s be honest, sometimes gardening feels intimidating. Where do you even start? That’s where this DIY guide comes in! I’m going to share my favorite tricks and hacks for successfully growing bush beans in pots, transforming even the tiniest space into a thriving mini-farm. Whether you’re a seasoned gardener or a complete newbie, these tips will help you avoid common pitfalls and maximize your harvest. We’ll cover everything from choosing the right pot and soil to providing the perfect amount of sunlight and water. So, ditch the store-bought beans and get ready to enjoy the satisfaction of growing your own delicious, homegrown goodness!
Growing Bush Beans in Pots: A Complete DIY Guide
Hey there, fellow gardening enthusiasts! I’m so excited to share my tried-and-true method for growing bush beans in pots. It’s surprisingly easy, even if you’re a beginner, and the reward of fresh, homegrown beans is absolutely worth it. Forget those bland supermarket beans – get ready for a burst of flavor straight from your patio!
Why Bush Beans in Pots?
Bush beans are fantastic for container gardening because, unlike pole beans, they don’t require a trellis or support structure. They stay compact and bushy, making them perfect for balconies, patios, or even a sunny windowsill. Plus, you can move them around to chase the sun or protect them from unexpected frost.
What You’ll Need: The Essentials
Before we dive in, let’s gather our supplies. This is what I always have on hand when I’m planting my bush beans:
* Bush Bean Seeds: Choose your favorite variety! I personally love Blue Lake Bush Beans for their classic flavor and prolific yields, but Contender and Provider are also excellent choices.
* Pots: Opt for pots that are at least 12 inches in diameter and 12 inches deep. This gives the roots plenty of room to grow. Fabric pots are also a great option as they allow for better drainage and aeration.
* Potting Mix: Don’t use garden soil! It’s too heavy and compacts easily in containers. A good quality potting mix is essential for healthy bean growth. Look for a mix that contains peat moss, perlite, and vermiculite.
* Fertilizer: A balanced, slow-release fertilizer is ideal. Alternatively, you can use a liquid fertilizer specifically formulated for vegetables.
* Watering Can or Hose: Consistent watering is key, especially during hot weather.
* Sunlight: Bush beans need at least 6-8 hours of direct sunlight per day.
* Optional:
* Seed Starting Tray: If you want to get a head start, you can start your seeds indoors.
* Plant Markers: To keep track of your bean varieties.
* Gloves: To keep your hands clean.
* Mulch: To help retain moisture and suppress weeds.
Step-by-Step Planting Guide
Alright, let’s get our hands dirty! Here’s how I plant my bush beans in pots:
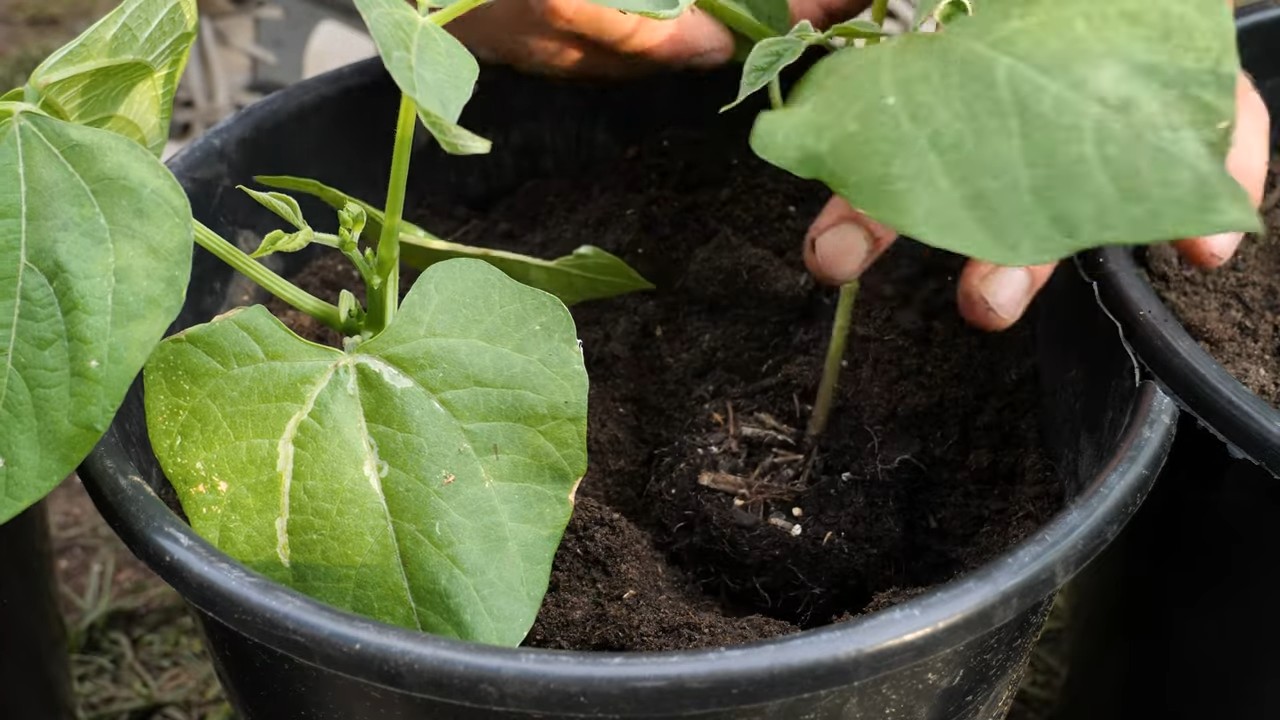
1. Choose the Right Pot: As I mentioned before, make sure your pot is at least 12 inches in diameter and depth. Clean the pot thoroughly before using it. This helps prevent the spread of diseases. Ensure that the pot has drainage holes.
2. Prepare the Potting Mix: Fill your pot with potting mix, leaving about an inch or two of space at the top. Gently pat down the soil to remove any air pockets.
3. Sow the Seeds: Bush beans are best sown directly into the pot. Sow the seeds about 1 inch deep and 2-3 inches apart. I usually plant 3-4 seeds per pot to ensure good germination.
4. Water Gently: Water the soil thoroughly after planting, but be careful not to overwater. The soil should be moist but not soggy.
5. Find a Sunny Spot: Place your pot in a location that receives at least 6-8 hours of direct sunlight per day.
6. Wait for Germination: Bush bean seeds typically germinate in 5-10 days, depending on the temperature and moisture levels. Keep the soil consistently moist during this time.
7. Thin Seedlings (If Necessary): Once the seedlings emerge, thin them out to the strongest one or two plants per pot. This will give them enough space to grow and thrive.
8. Fertilize Regularly: Start fertilizing your bush beans about 2-3 weeks after germination. Use a balanced, slow-release fertilizer or a liquid fertilizer according to the package instructions. I usually fertilize every 2-3 weeks.
9. Water Consistently: Bush beans need consistent watering, especially during hot weather. Water deeply whenever the top inch of soil feels dry to the touch. Avoid overwatering, as this can lead to root rot.
10. Mulch (Optional): Add a layer of mulch around the base of the plants to help retain moisture, suppress weeds, and regulate soil temperature. Straw, wood chips, or shredded leaves are all good options.
11. Watch for Pests and Diseases: Keep an eye out for common bean pests like aphids, bean beetles, and spider mites. You can usually control these pests with insecticidal soap or neem oil. Also, watch for diseases like powdery mildew and bean rust. Ensure good air circulation and avoid overhead watering to prevent these diseases.
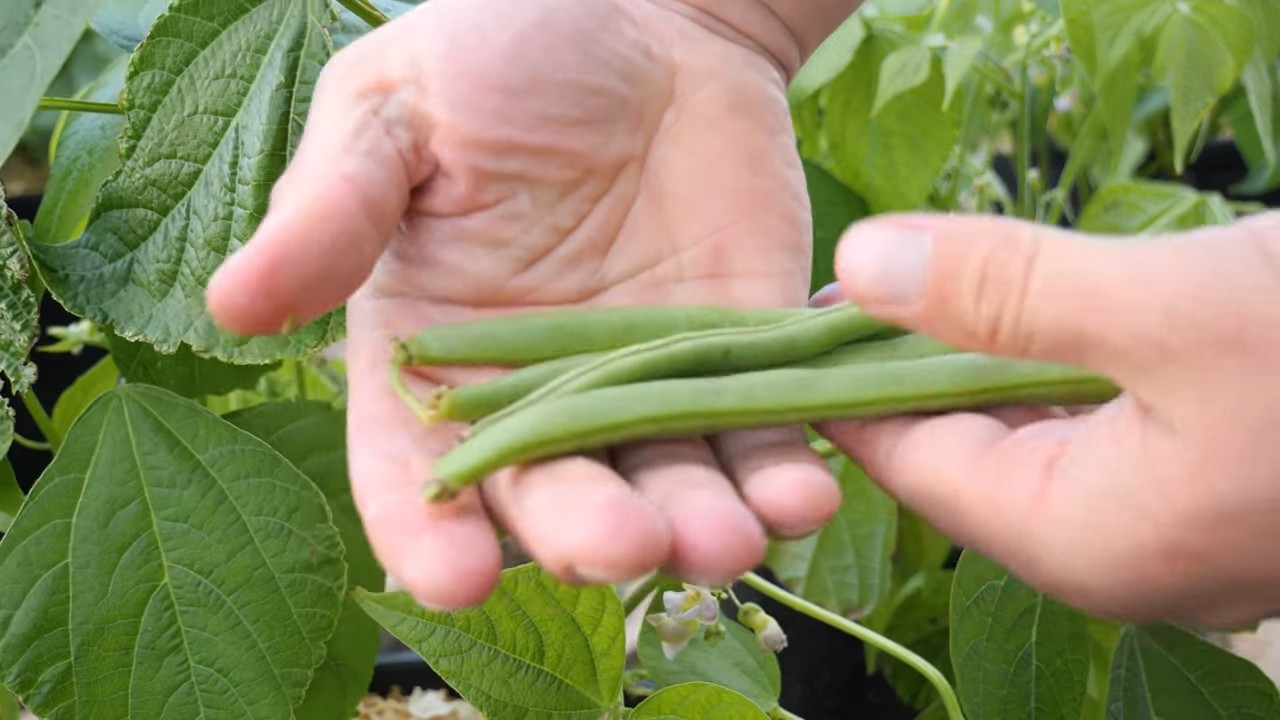
12. Harvest Your Beans: Bush beans are typically ready to harvest in 50-60 days after planting. Harvest the beans when they are young and tender, before the seeds inside become too large. Pick the beans regularly to encourage continued production.
Troubleshooting: Common Issues and Solutions
Even with the best care, you might encounter a few challenges along the way. Here are some common problems and how I deal with them:
* Poor Germination: If your seeds aren’t germinating, it could be due to several factors:
* Old Seeds: Bean seeds lose their viability over time. Make sure you’re using fresh seeds.
* Cold Soil: Bean seeds need warm soil to germinate. Wait until the soil temperature is consistently above 60°F (15°C) before planting.
* Overwatering: Soggy soil can cause the seeds to rot. Make sure the soil is moist but not waterlogged.
* Underwatering: Dry soil can prevent the seeds from germinating. Keep the soil consistently moist.
* Yellowing Leaves: Yellowing leaves can indicate a nutrient deficiency. Try fertilizing with a balanced fertilizer or a fertilizer specifically formulated for vegetables. It could also be a sign of overwatering or poor drainage.
* Pests: Aphids, bean beetles, and spider mites are common bean pests. You can control these pests with insecticidal soap or neem oil. Regularly inspect your plants for signs of infestation.
* Diseases: Powdery mildew and bean rust are common bean diseases. Ensure good air circulation and avoid overhead watering to prevent these diseases. You can also use a fungicide if necessary.
* Lack of Flowers or Beans: If your plants are growing well but not producing flowers or beans, it could be due to several factors:
* Insufficient Sunlight: Bush beans need at least 6-8 hours of direct sunlight per day.
* Over-Fertilization: Too much nitrogen can promote leafy growth at the expense of flowers and beans. Use a balanced fertilizer or a fertilizer with a lower nitrogen content.
* High Temperatures: Extreme heat can inhibit flowering and bean production. Provide shade during the hottest part of the day.
Harvesting and Enjoying Your Bounty
Harvesting is the most rewarding part of growing bush beans! Here’s what I do:
* Harvest Time: Bush beans are typically ready to harvest in 50-60 days after planting. The beans should be young and tender, before the seeds inside become too large.
* How to Harvest: Gently snap the beans off the plant. Be careful not to damage the plant.
* Harvest Regularly: Pick the beans regularly to encourage continued production. The more you harvest, the more beans your plants will produce.
* Storage: Freshly harvested bush beans are best eaten right away. You can store them in the refrigerator for a few days, but they will lose their flavor and texture over time.
* Enjoy Your Harvest: There are so many ways to enjoy your homegrown bush beans! You can steam them, sauté them, roast them, or add them to salads, soups, and stews.
Extending the Harvest: Succession Planting
To enjoy a continuous harvest of bush beans throughout the growing season, I practice succession planting. This involves planting new seeds every 2-3 weeks. This way, you’ll always have a fresh supply of beans ready to harvest.
Choosing the Right Bush Bean Variety
There are many different varieties of bush beans to choose from, each with its own unique flavor and characteristics. Here are a few of my favorites:
* Blue Lake Bush Beans: A classic variety with excellent flavor and high yields.
* Contender Bush Beans: An early-maturing variety that is resistant to many common bean diseases.
* Provider Bush Beans: A very productive variety that is well-suited to container gardening.
* Roma Bush Beans: A flat-podded variety with a distinctive flavor.
* Purple Queen Bush Beans: A beautiful variety with purple pods that turn green when cooked.
Final Thoughts: Happy Gardening!
Growing bush beans in pots is a simple and rewarding experience. With a little care
Conclusion
So, there you have it! Growing bush beans in pots is not only achievable but also incredibly rewarding. We’ve walked through the simple steps, from selecting the right pot and soil to nurturing your plants and harvesting your bounty. But why should you take the plunge and try this DIY trick?
Firstly, it’s about accessibility. Even if you lack a sprawling garden, you can still enjoy the satisfaction of growing your own fresh produce. A sunny balcony, a patio, or even a well-lit windowsill can become your personal bean farm. Secondly, it’s about control. You have complete control over the soil quality, watering schedule, and pest management, ensuring your bush beans receive the best possible care. This often translates to healthier, more flavorful beans than you might find at the grocery store.
Thirdly, it’s about the sheer joy of watching something grow. There’s a unique connection you form with your plants as you tend to them, witnessing their transformation from tiny seeds to vibrant, bean-laden bushes. This connection can be incredibly therapeutic and fulfilling.
But the beauty of growing bush beans in pots lies in its adaptability. Feel free to experiment with different varieties of bush beans. Consider trying ‘Blue Lake Bush’, known for its classic flavor and high yield, or ‘Contender’, a reliable and early-maturing variety. For a touch of color, explore purple bush bean varieties like ‘Royal Burgundy’.
You can also play around with companion planting. Marigolds, for instance, are known to deter bean beetles, while nasturtiums can attract aphids away from your bean plants. Basil is another excellent companion plant, believed to improve the flavor of your beans.
Don’t be afraid to get creative with your pot design. Use colorful containers to add a splash of personality to your space, or repurpose old buckets or tubs for a rustic, eco-friendly look. Just ensure your chosen container has adequate drainage.
Growing bush beans in pots is more than just a gardening project; it’s an opportunity to connect with nature, cultivate your own food, and add a touch of green to your surroundings. It’s a chance to learn, experiment, and enjoy the fruits (or rather, the beans) of your labor.
We wholeheartedly encourage you to give this DIY trick a try. It’s easier than you might think, and the rewards are well worth the effort. Once you’ve harvested your first batch of homegrown bush beans, we’d love to hear about your experience! Share your photos, tips, and stories in the comments section below. Let’s create a community of pot-grown bean enthusiasts and inspire others to embrace the joy of gardening, no matter how small their space may be. Happy growing!
Frequently Asked Questions (FAQ)
What is the best size pot for growing bush beans?
A pot that is at least 12 inches in diameter and 12 inches deep is generally recommended for growing bush beans. This size provides enough space for the roots to develop properly and supports the plant as it grows. Larger pots (15-18 inches) are even better, especially if you plan to grow multiple plants in the same container. The key is to ensure adequate drainage to prevent root rot.
How many bush bean plants can I grow in one pot?
This depends on the size of the pot. In a 12-inch pot, you can typically grow 2-3 bush bean plants. In a larger 15-18 inch pot, you can grow 4-5 plants. Avoid overcrowding, as this can lead to competition for resources and reduced yields. Ensure each plant has enough space to receive sunlight and air circulation.
What type of soil is best for growing bush beans in pots?
Bush beans thrive in well-draining, fertile soil. A good potting mix is essential. Avoid using garden soil directly in pots, as it can become compacted and doesn’t drain well. A mix of potting soil, compost, and perlite or vermiculite is ideal. The compost provides nutrients, while the perlite or vermiculite improves drainage and aeration. You can also add a slow-release fertilizer to the soil mix to provide a steady supply of nutrients throughout the growing season.
How often should I water my bush bean plants in pots?
Watering frequency depends on the weather, the size of the pot, and the type of soil. Generally, you should water your bush bean plants when the top inch of soil feels dry to the touch. Water deeply, ensuring the water drains out of the bottom of the pot. Avoid overwatering, as this can lead to root rot. During hot, dry weather, you may need to water daily. In cooler, wetter weather, you may only need to water every few days.
How much sunlight do bush beans need?
Bush beans need at least 6-8 hours of direct sunlight per day to thrive. Choose a location that receives plenty of sunlight throughout the day. If you live in a particularly hot climate, some afternoon shade can be beneficial to prevent the plants from overheating. If you don’t have a sunny spot, you can supplement with grow lights.
Do I need to fertilize my bush bean plants?
Yes, bush beans benefit from regular fertilization. Use a balanced fertilizer (e.g., 10-10-10) or a fertilizer specifically formulated for vegetables. Follow the instructions on the fertilizer package. You can also use organic fertilizers, such as compost tea or fish emulsion. Fertilize every 2-3 weeks during the growing season. Avoid over-fertilizing, as this can lead to excessive foliage growth and reduced bean production.
How do I protect my bush bean plants from pests and diseases?
Regularly inspect your plants for signs of pests and diseases. Common pests that affect bush beans include aphids, bean beetles, and spider mites. You can control these pests with insecticidal soap, neem oil, or by handpicking them off the plants. Diseases that can affect bush beans include powdery mildew and bean rust. Ensure good air circulation around the plants to prevent these diseases. You can also use fungicides if necessary.
When can I harvest my bush beans?
Bush beans are typically ready to harvest 50-60 days after planting. The beans should be firm, plump, and snap easily when bent. Harvest the beans regularly to encourage continued production. Overripe beans will become tough and stringy.
Can I grow bush beans indoors?
Yes, you can grow bush beans indoors, but it requires providing them with adequate light. A sunny south-facing window is ideal, but you may need to supplement with grow lights. Ensure the plants receive at least 6-8 hours of light per day. Also, ensure good air circulation to prevent diseases.
What are some good companion plants for bush beans?
Good companion plants for bush beans include marigolds, nasturtiums, basil, rosemary, and carrots. Marigolds deter bean beetles, nasturtiums attract aphids away from bean plants, basil is believed to improve the flavor of the beans, rosemary deters bean flies, and carrots help to loosen the soil. Avoid planting bush beans near onions or garlic, as these can inhibit their growth.

Leave a Comment