

Growing Brussel Sprouts in Pots might seem like a challenge reserved for seasoned gardeners with sprawling acres, but I’m here to tell you it’s totally achievable, even if your “garden” is just a sunny balcony or a small patio! Forget those sad, overcooked sprouts you might remember from childhood dinners. We’re talking about fresh, flavorful, homegrown goodness right at your fingertips.
For centuries, Brussel sprouts have been a staple in European cuisine, with their cultivation dating back to 13th-century Belgium – hence the name! But you don’t need a Belgian farm to enjoy these nutritious little cabbages. In fact, growing Brussel Sprouts in Pots offers a fantastic solution for urban gardeners and those with limited space.
Why should you try this DIY project? Well, store-bought Brussel sprouts can be expensive and often lack the vibrant flavor of freshly picked ones. Plus, knowing exactly where your food comes from and how it’s grown is incredibly rewarding. I’m going to share some simple, effective tricks and hacks that will guide you through the process, from choosing the right pot and soil to warding off pests and harvesting your delicious bounty. Get ready to impress your friends and family with your green thumb and enjoy the satisfaction of growing your own food!
Growing Brussels Sprouts in Pots: A Complete DIY Guide
Hey there, fellow gardening enthusiasts! Ever dreamt of harvesting your own fresh, delicious Brussels sprouts right from your patio or balcony? Well, dream no more! Growing Brussels sprouts in pots is totally achievable, and I’m here to guide you through every step of the process. It might seem daunting, but trust me, with a little patience and the right know-how, you’ll be enjoying homegrown sprouts in no time.
Why Grow Brussels Sprouts in Pots?
Before we dive in, let’s talk about why container gardening is a fantastic option for Brussels sprouts:
* Space Saver: Perfect for those with limited garden space, like apartment dwellers or anyone with a small yard.
* Control: You have complete control over the soil quality, watering, and sunlight exposure.
* Mobility: You can easily move your pots to chase the sun or protect them from harsh weather.
* Pest Control: It’s easier to monitor and manage pests when your plants are contained.
What You’ll Need
Here’s a list of everything you’ll need to embark on your Brussels sprouts growing adventure:
* Brussels Sprouts Seeds or Seedlings: Choose a variety that’s well-suited for your climate and container gardening. Dwarf varieties are generally a good choice.
* Large Pots: Each plant needs at least a 12-inch diameter pot, but bigger is better! Aim for 15-18 inches to give the roots plenty of room to grow.
* High-Quality Potting Mix: Avoid garden soil, as it can compact in pots. Opt for a well-draining potting mix rich in organic matter.
* Slow-Release Fertilizer: This will provide your plants with a steady supply of nutrients throughout the growing season.
* Watering Can or Hose: For regular watering.
* Trowel: For planting and transplanting.
* Gardening Gloves: To protect your hands.
* Optional:
* Stakes or cages for support (especially for taller varieties).
* Mulch (to retain moisture and suppress weeds).
* Insecticidal soap (for pest control).
Choosing the Right Brussels Sprouts Variety
Not all Brussels sprouts are created equal! When growing in pots, it’s crucial to select a variety that’s compact and well-suited for container gardening. Here are a few recommendations:
* ‘Dwarf Rosette’: As the name suggests, this is a compact variety that produces small, tightly packed sprouts.
* ‘Long Island Improved’: A classic variety that’s relatively compact and produces good yields.
* ‘Jade Cross’: A hybrid variety known for its disease resistance and uniform sprouts.
* ‘Redarling’: A beautiful red-purple variety that adds a pop of color to your garden.
Getting Started: Planting Your Brussels Sprouts
Now for the fun part! Let’s get those Brussels sprouts planted. You can start from seeds or seedlings, but I personally prefer seedlings because they give you a head start.
Starting from Seeds:
1. Sow Seeds Indoors (Optional): If you live in a region with a short growing season, start your seeds indoors 6-8 weeks before the last expected frost. Sow the seeds about ½ inch deep in seed-starting trays filled with seed-starting mix. Keep the soil moist and warm (around 70-75°F).
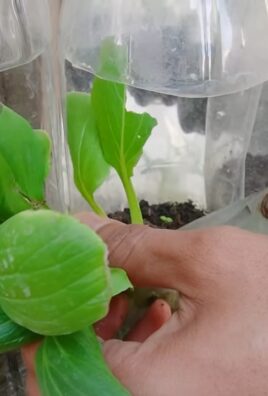
2. Harden Off Seedlings: Once the seedlings have developed a few sets of true leaves, gradually acclimate them to outdoor conditions over a week or two. This process is called “hardening off.” Start by placing them in a sheltered spot for a few hours each day, gradually increasing the amount of time they spend outdoors.
3. Direct Sow (If Climate Allows): In milder climates, you can direct sow the seeds directly into your pots after the last frost. Sow the seeds about ½ inch deep and space them about 18-24 inches apart.
4. Thin Seedlings: Once the seedlings emerge, thin them to one plant per pot. Choose the strongest, healthiest seedling and snip off the others at the soil line.
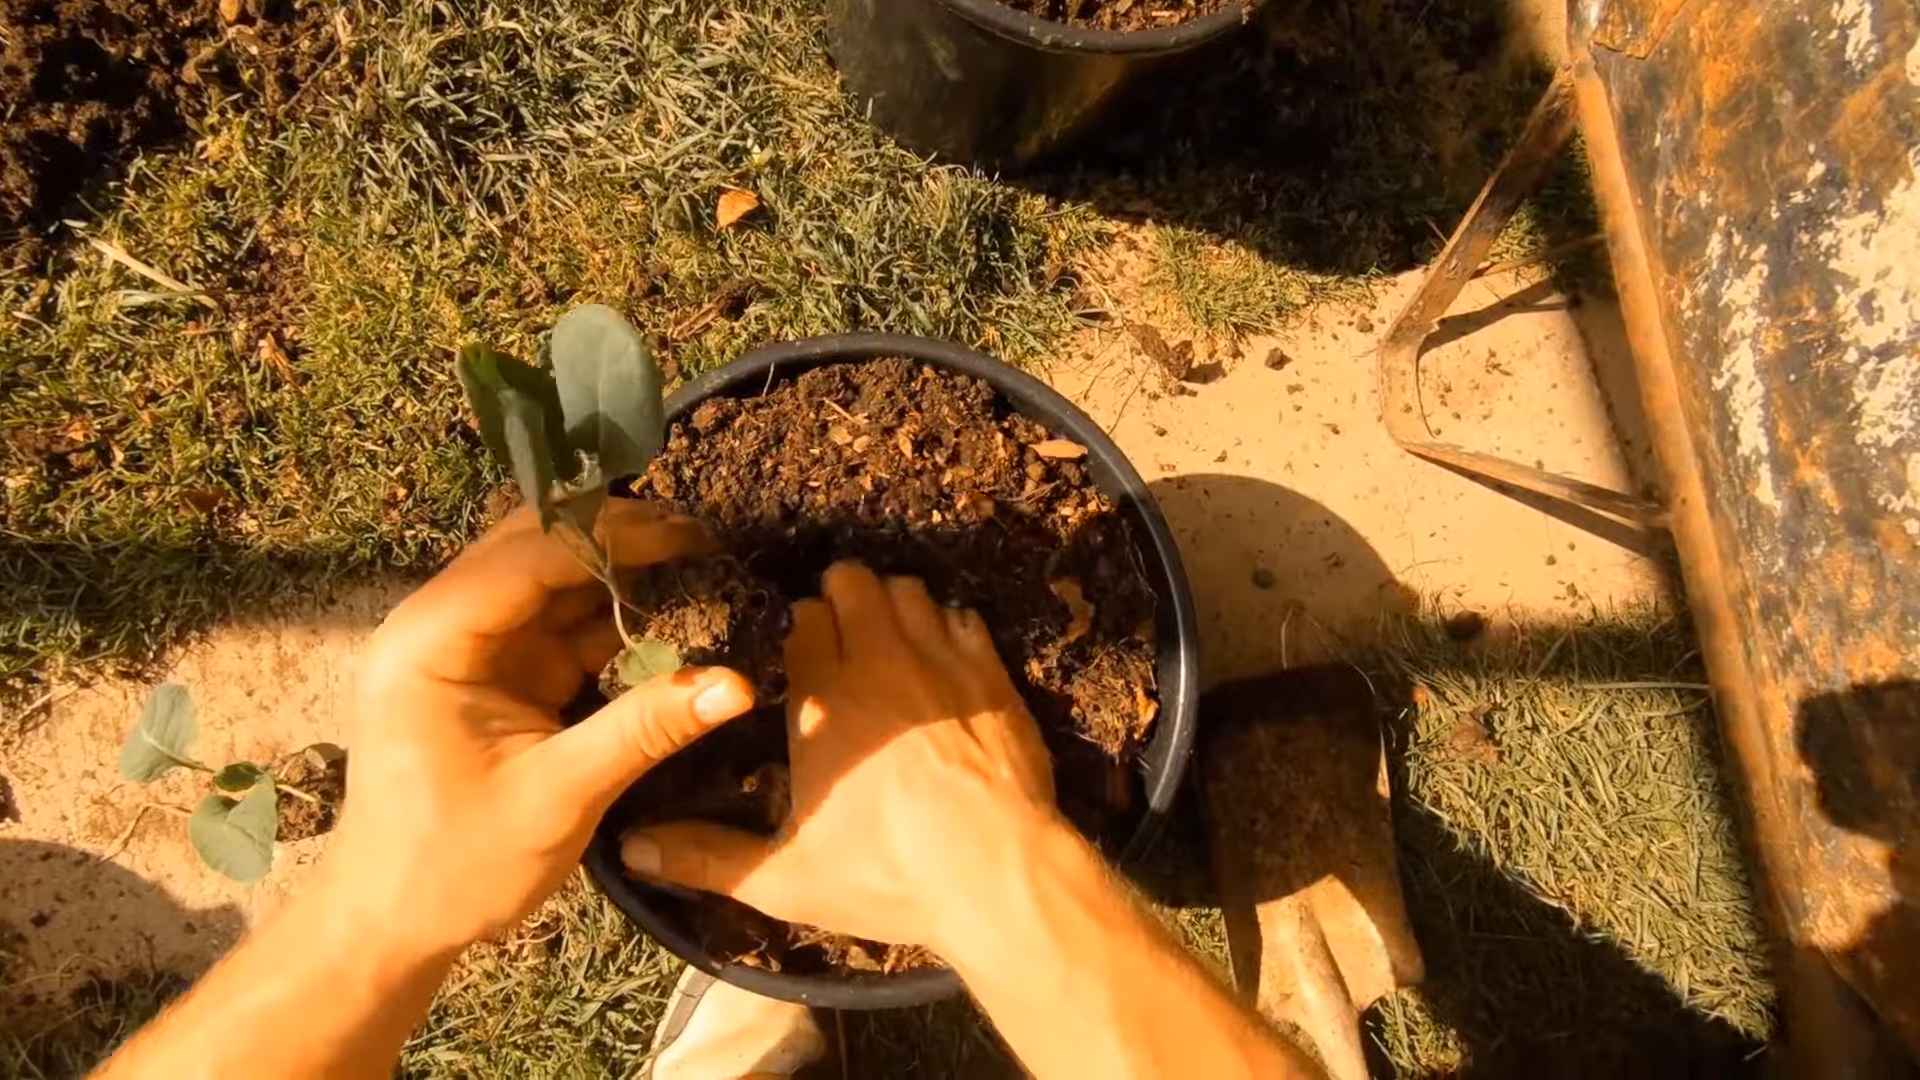
Planting Seedlings:
1. Prepare Your Pots: Fill your pots with high-quality potting mix, leaving a few inches of space at the top.
2. Dig a Hole: Dig a hole in the center of each pot that’s slightly larger than the root ball of the seedling.
3. Gently Remove Seedling: Carefully remove the seedling from its container, being careful not to damage the roots. Gently loosen the roots if they’re tightly packed.
4. Plant the Seedling: Place the seedling in the hole, ensuring that the top of the root ball is level with the soil surface.
5. Backfill with Soil: Fill in the hole with potting mix, gently firming the soil around the base of the plant.
6. Water Thoroughly: Water the newly planted seedlings thoroughly to help settle the soil and encourage root growth.
Caring for Your Brussels Sprouts
Once your Brussels sprouts are planted, it’s time to provide them with the care they need to thrive.
Sunlight:
Brussels sprouts need at least 6 hours of direct sunlight per day. Place your pots in a sunny location where they’ll receive plenty of light. If you don’t have a sunny spot, you can supplement with grow lights.
Watering:
Water your Brussels sprouts regularly, especially during hot, dry weather. Keep the soil consistently moist, but avoid overwatering, which can lead to root rot. Check the soil moisture by sticking your finger into the soil. If the top inch feels dry, it’s time to water.
Fertilizing:
Brussels sprouts are heavy feeders, so they need regular fertilization. Apply a slow-release fertilizer at planting time, and then supplement with a liquid fertilizer every 2-3 weeks throughout the growing season. Choose a fertilizer that’s high in nitrogen, phosphorus, and potassium.
Support:
As your Brussels sprouts grow, they may need support to prevent them from toppling over. Use stakes or cages to provide support, especially for taller varieties.
Pest and Disease Control:
Brussels sprouts are susceptible to a few common pests and diseases, including aphids, cabbage worms, and clubroot.
* Aphids: These tiny insects can suck the sap from your plants, causing them to weaken and become distorted. Control aphids by spraying them with insecticidal soap or neem oil.
* Cabbage Worms: These caterpillars can devour the leaves of your Brussels sprouts. Handpick them off the plants or use a biological insecticide like Bacillus thuringiensis (Bt).
* Clubroot: This fungal disease causes the roots of your plants to become swollen and distorted. Prevent clubroot by ensuring good drainage and avoiding planting Brussels sprouts in the same spot year after year.
Mulching:
Apply a layer of mulch around the base of your plants to help retain moisture, suppress weeds, and regulate soil temperature. Organic mulches like straw, wood chips, or shredded leaves are excellent choices.
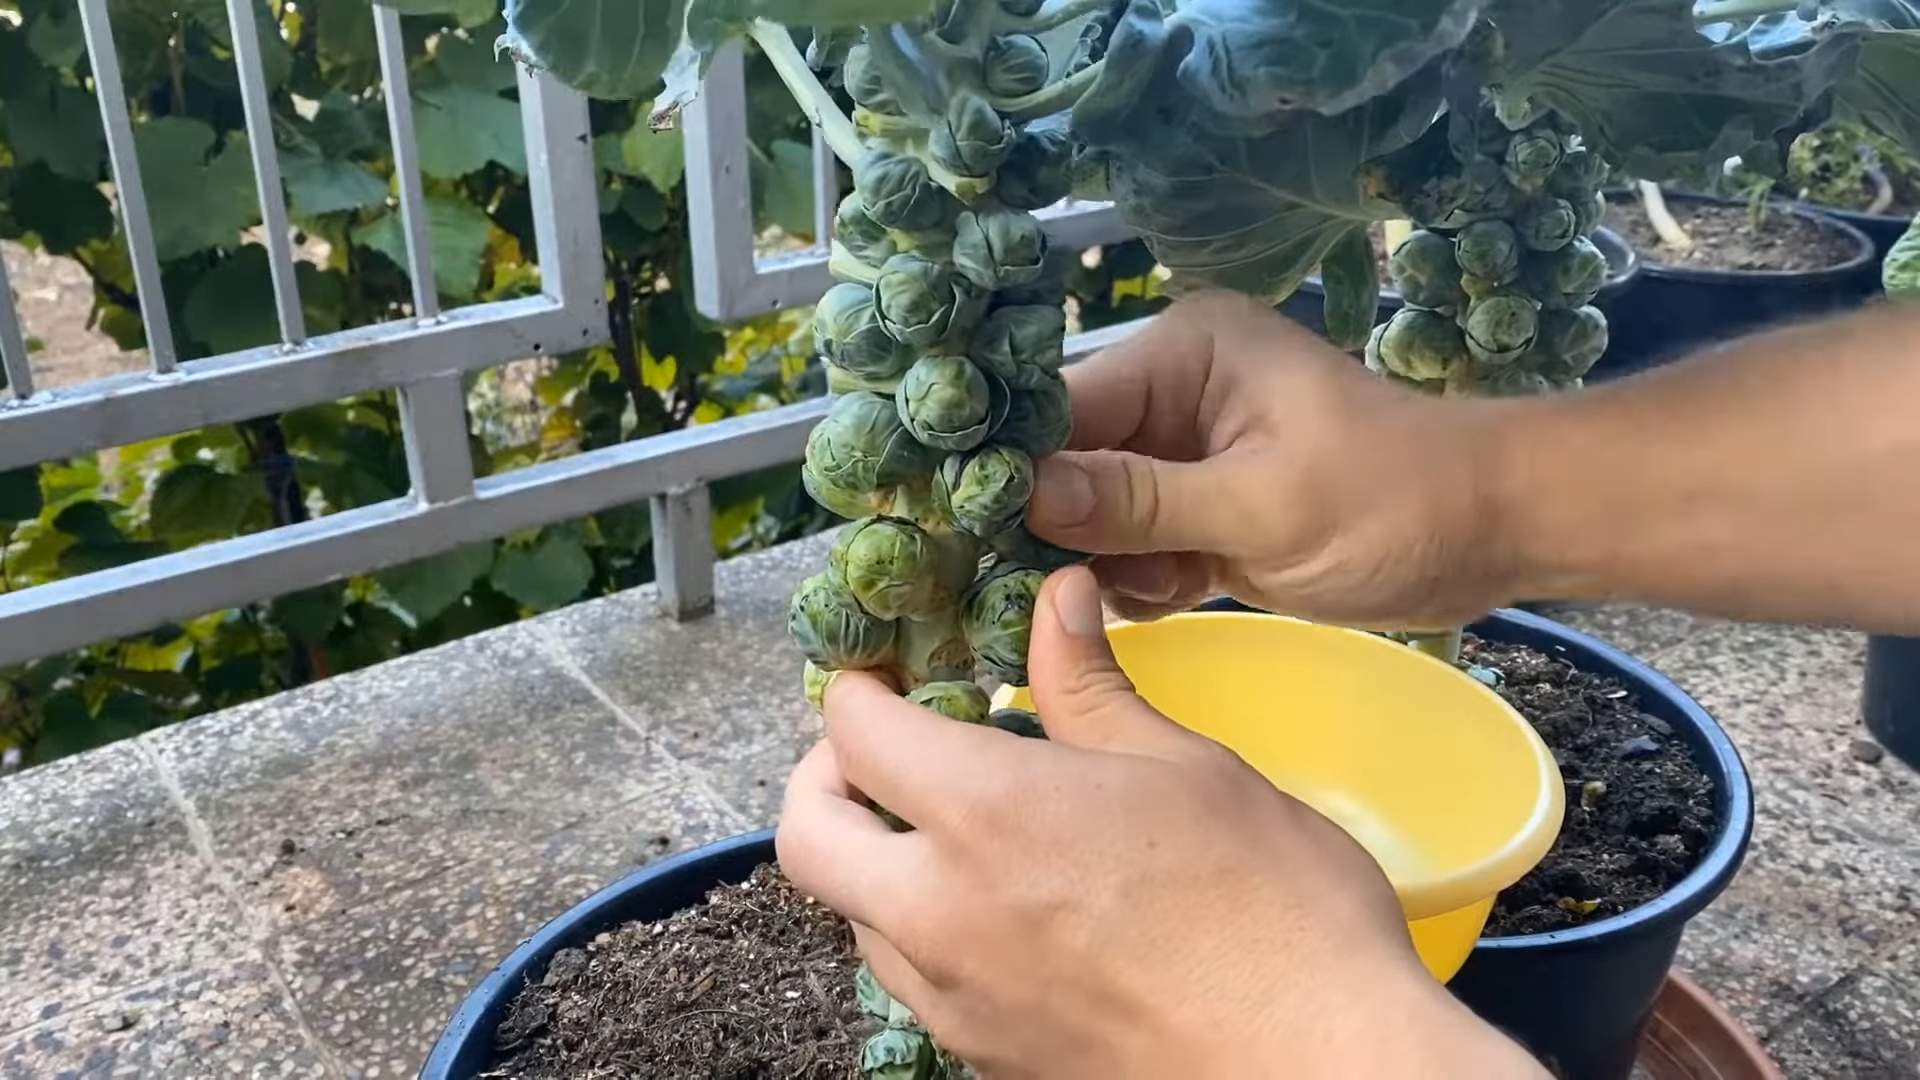
Harvesting Your Brussels Sprouts
The moment you’ve been waiting for! Harvesting your homegrown Brussels sprouts is incredibly rewarding.
1. Timing is Key: Brussels sprouts are typically ready to harvest in the fall, after they’ve been exposed to a few light frosts. The cold weather helps to sweeten the sprouts.
2. Check for Firmness: The sprouts should be firm, tightly closed, and about 1-2 inches in diameter.
3. Harvest from the Bottom Up: Start harvesting the sprouts from the bottom of the plant, as they mature first.
4. Twist and Snap: To harvest, simply twist the sprout until it snaps off the stem.
5. Remove Yellowing Leaves: As you harvest, remove any yellowing or damaged leaves from the plant.
6. Continue Harvesting: Continue harvesting the sprouts as they mature, working your way up the stem.
7. Enjoy Your Harvest: Enjoy your fresh, homegrown Brussels sprouts in a variety of dishes! They’re delicious roasted, sautéed, steamed, or even shredded in salads.
Troubleshooting
Even with the best care, you might encounter a few challenges along the way. Here are some common problems and how to address them:
* Sprouts are Loose and Open: This can be caused by hot weather or inconsistent watering. Ensure consistent watering and provide shade during the hottest part of the day.
* Sprouts are Small: This can be due to insufficient nutrients or overcrowding. Fertilize regularly and ensure that your plants have enough space to grow.
* Plants are Not Producing Sprouts: This can be caused by a lack of sunlight or improper fertilization. Ensure that your plants are getting at least 6 hours of direct sunlight per day and fertilize regularly with a balanced fertilizer.
* Pest Infestations
Conclusion
So, there you have it! Growing Brussel sprouts in pots isn’t just a possibility; it’s a pathway to fresh, delicious sprouts right outside your door, even if you’re short on garden space. This DIY trick is a must-try for several compelling reasons. First and foremost, it offers unparalleled convenience. No more trekking to the grocery store for subpar sprouts; you’ll have a readily available supply of these nutritional powerhouses at your fingertips. Secondly, container gardening allows for greater control over the growing environment. You can easily move your pots to chase the sun, protect them from harsh weather, and ensure optimal soil conditions. Finally, and perhaps most importantly, growing your own Brussel sprouts is incredibly rewarding. There’s a unique satisfaction in nurturing a plant from seedling to harvest, knowing you’ve played a direct role in producing your own food.
But the benefits don’t stop there. Growing Brussel sprouts in pots opens up a world of possibilities for customization and experimentation. Consider these variations to tailor the experience to your specific needs and preferences:
* Vertical Gardening: If you’re truly limited on space, explore vertical gardening options. Trellises or stacked planters can maximize your growing area and add a visually appealing element to your patio or balcony.
* Companion Planting: Enhance your Brussel sprout pots by incorporating companion plants. Marigolds can deter pests, while herbs like rosemary and thyme can improve flavor and attract beneficial insects.
* Succession Planting: Extend your harvest season by planting Brussel sprouts in stages. Start a new batch of seedlings every few weeks to ensure a continuous supply of fresh sprouts throughout the fall and winter.
* Different Varieties: Don’t be afraid to experiment with different varieties of Brussel sprouts. ‘Long Island Improved’ is a classic choice, while ‘Redarling’ offers a beautiful red hue and a slightly sweeter flavor.
* Organic Fertilizers: Use organic fertilizers like compost tea or fish emulsion to nourish your Brussel sprouts and promote healthy growth. Avoid synthetic fertilizers, which can harm the environment and affect the flavor of your sprouts.
Ultimately, the best way to discover the joys of growing Brussel sprouts in pots is to simply give it a try. Don’t be intimidated by the perceived challenges; with a little planning and effort, you can successfully cultivate these delicious vegetables in your own backyard. We encourage you to embark on this gardening adventure and share your experiences with us. Let us know what varieties you’ve tried, what challenges you’ve overcome, and what tips you’ve discovered along the way. Your insights can help other aspiring gardeners achieve success and further enrich our collective knowledge of this rewarding DIY trick. So, grab a pot, some soil, and a few Brussel sprout seedlings, and get ready to enjoy the taste of homegrown goodness!
Frequently Asked Questions (FAQ)
Q: What size pot is best for growing Brussel sprouts?
A: The ideal pot size for growing Brussel sprouts is at least 12 inches in diameter and 12 inches deep. A 5-gallon container is a good starting point, but larger pots (7-10 gallons) are even better, especially if you plan to grow multiple plants in the same container. The larger the pot, the more room the roots have to grow, and the more moisture the soil will retain.
Q: What type of soil should I use?
A: Brussel sprouts thrive in well-draining, fertile soil with a slightly acidic to neutral pH (6.0-7.0). A good potting mix specifically formulated for vegetables is an excellent choice. You can also amend your own potting mix by combining equal parts of compost, peat moss (or coco coir), and perlite or vermiculite. Compost provides essential nutrients, peat moss (or coco coir) helps retain moisture, and perlite or vermiculite improves drainage.
Q: How much sunlight do Brussel sprouts need?
A: Brussel sprouts require at least 6 hours of direct sunlight per day to produce a good harvest. Choose a sunny location for your pots, preferably one that receives morning sun and afternoon shade in hotter climates. If you don’t have a spot that gets full sun, you can supplement with grow lights.
Q: How often should I water my Brussel sprouts?
A: Water your Brussel sprouts regularly, especially during hot, dry weather. The soil should be consistently moist but not waterlogged. Check the soil moisture by sticking your finger about an inch deep; if it feels dry, it’s time to water. Water deeply, allowing the water to drain out of the bottom of the pot. Avoid overhead watering, which can promote fungal diseases.
Q: What kind of fertilizer should I use?
A: Brussel sprouts are heavy feeders and benefit from regular fertilization. Use a balanced fertilizer (e.g., 10-10-10) or a fertilizer specifically formulated for vegetables. Apply fertilizer according to the package directions, usually every 2-3 weeks. You can also supplement with organic fertilizers like compost tea or fish emulsion.
Q: How do I deal with pests and diseases?
A: Brussel sprouts are susceptible to several pests and diseases, including aphids, cabbage worms, and clubroot. Inspect your plants regularly for signs of infestation or disease. Handpick pests whenever possible. For more severe infestations, use insecticidal soap or neem oil. To prevent clubroot, ensure good soil drainage and avoid planting Brussel sprouts in the same spot year after year.
Q: When are Brussel sprouts ready to harvest?
A: Brussel sprouts are typically ready to harvest 90-100 days after planting. The sprouts should be firm, green, and about 1-2 inches in diameter. Start harvesting from the bottom of the plant upwards, twisting the sprouts off the stem. You can continue harvesting as the sprouts mature.
Q: Can I grow Brussel sprouts in the winter?
A: In mild climates, you can grow Brussel sprouts throughout the winter. In colder climates, you may need to protect your plants from frost. You can cover them with row covers or move the pots indoors to a sheltered location.
Q: My Brussel sprouts are producing leaves but no sprouts. What’s wrong?
A: There are several reasons why your Brussel sprouts might not be producing sprouts. One possibility is that the plants are not getting enough sunlight. Another possibility is that they are not getting enough fertilizer. Make sure your plants are getting at least 6 hours of direct sunlight per day and that you are fertilizing them regularly. Also, ensure the variety you are growing is suitable for your climate and growing season. Some varieties require longer growing periods than others.
Q: Can I grow Brussel sprouts from seed directly in the pot?
A: While it’s possible to direct sow Brussel sprout seeds in pots, it’s generally recommended to start them indoors 6-8 weeks before the last expected frost. This gives the seedlings a head start and increases your chances of a successful harvest. Transplant the seedlings into your pots once they have developed a few sets of true leaves.
Leave a Comment