

Growing Bell Peppers can seem daunting, but trust me, with a few clever tricks and DIY hacks, you’ll be harvesting a colorful bounty in no time! I remember my first attempt – a single, pathetic, green pepper that looked more like a shriveled olive. But don’t let that scare you! Bell peppers, originating from Central and South America, have been cultivated for thousands of years, bringing vibrant flavor and essential nutrients to cuisines worldwide. From stuffed peppers in Spain to fajitas in Mexico, their versatility is undeniable.
But why bother with the effort of growing your own? Well, store-bought peppers can be expensive and often lack the intense flavor of homegrown varieties. Plus, there’s nothing quite like the satisfaction of nurturing a plant from seed to table. This DIY guide is packed with simple, effective strategies to help you avoid common pitfalls and maximize your pepper production. We’ll cover everything from seed starting and soil preparation to pest control and harvesting, ensuring you have the knowledge and confidence to successfully growing bell peppers, even if you’re a complete beginner. Get ready to transform your garden (or even your balcony!) into a pepper paradise!
Growing Bell Peppers: A DIY Guide to a Bountiful Harvest
Hey there, fellow gardening enthusiasts! I’m so excited to share my tried-and-true method for growing bell peppers that are bursting with flavor and color. Forget those bland, expensive peppers from the grocery store – with a little effort, you can have a thriving bell pepper patch right in your own backyard (or even on your balcony!). This guide will walk you through every step, from choosing the right seeds to harvesting your delicious peppers. Let’s get started!
Choosing the Right Bell Pepper Variety
Before we even think about planting, it’s crucial to pick the right bell pepper variety for your climate and preferences. There are so many options out there, each with its own unique characteristics. Here’s a quick rundown of some popular choices:
* California Wonder: This is a classic, reliable variety that produces large, blocky green peppers that turn red when mature. It’s a great all-around choice and relatively easy to grow.
* Yolo Wonder: Similar to California Wonder, but often more disease-resistant. If you’ve had trouble with pepper diseases in the past, this might be a good option for you.
* Golden Bell: If you’re looking for something a little different, Golden Bell peppers are a beautiful golden-yellow color when ripe. They have a slightly sweeter flavor than green bell peppers.
* Chocolate Bell: For a truly unique pepper, try Chocolate Bell. These peppers start green and mature to a rich, chocolate-brown color. They have a slightly smoky flavor.
* Mini Bell Peppers: These are perfect for snacking or stuffing. They come in a variety of colors, including red, yellow, and orange. They also tend to mature faster than larger bell pepper varieties.
Consider your climate! If you live in a cooler climate with a shorter growing season, choose a variety that matures quickly. Look for varieties that are labeled as “early” or “fast-maturing.”
Starting Your Bell Pepper Seeds Indoors (Recommended)
While you *can* direct sow bell pepper seeds, I highly recommend starting them indoors, especially if you live in a region with a shorter growing season. This gives your plants a head start and ensures a better harvest.
What you’ll need:
* Bell pepper seeds (of your chosen variety)
* Seed starting trays or small pots
* Seed starting mix (a light, well-draining mix is essential)
* A heat mat (optional, but helpful for germination)
* A grow light (or a very sunny windowsill)
* A spray bottle filled with water
Step-by-step instructions:
1. Sow the seeds: Fill your seed starting trays or pots with seed starting mix. Moisten the mix thoroughly with water. Sow the bell pepper seeds about ¼ inch deep, placing 2-3 seeds per cell or pot.
2. Provide warmth: Bell pepper seeds need warmth to germinate. Place the seed starting trays on a heat mat, if you have one. Otherwise, find a warm spot in your house, such as on top of the refrigerator.
3. Maintain moisture: Keep the seed starting mix consistently moist, but not soggy. Use a spray bottle to gently mist the soil as needed.
4. Provide light: Once the seeds germinate (usually in 7-14 days), remove them from the heat mat and place them under a grow light or in a very sunny windowsill. If using a grow light, keep it a few inches above the seedlings.
5. Thin the seedlings: Once the seedlings have developed their first true leaves (the leaves that look like miniature bell pepper leaves), thin them to one seedling per cell or pot. Choose the strongest, healthiest-looking seedling and snip off the others at the soil line.
6. Harden off the seedlings: Before transplanting your bell pepper seedlings outdoors, you need to “harden them off.” This process gradually acclimates them to the outdoor environment. Start by placing the seedlings outdoors in a sheltered location for an hour or two each day, gradually increasing the amount of time they spend outdoors over the course of a week or two. Protect them from strong winds and direct sunlight during this process.
Preparing Your Garden Bed
Bell peppers need a sunny spot with well-drained soil. Choose a location that gets at least 6-8 hours of sunlight per day.
Soil Preparation:
1. Test your soil: A soil test will tell you the pH level and nutrient content of your soil. Bell peppers prefer a slightly acidic soil pH of 6.0-6.8.
2. Amend the soil: Based on your soil test results, amend the soil with compost, aged manure, or other organic matter to improve drainage and fertility. Bell peppers are heavy feeders, so they need plenty of nutrients. I like to add a slow-release fertilizer specifically formulated for vegetables.
3. Ensure good drainage: Bell peppers don’t like to sit in soggy soil. If your soil is heavy clay, consider adding sand or perlite to improve drainage. You can also create raised beds to improve drainage.
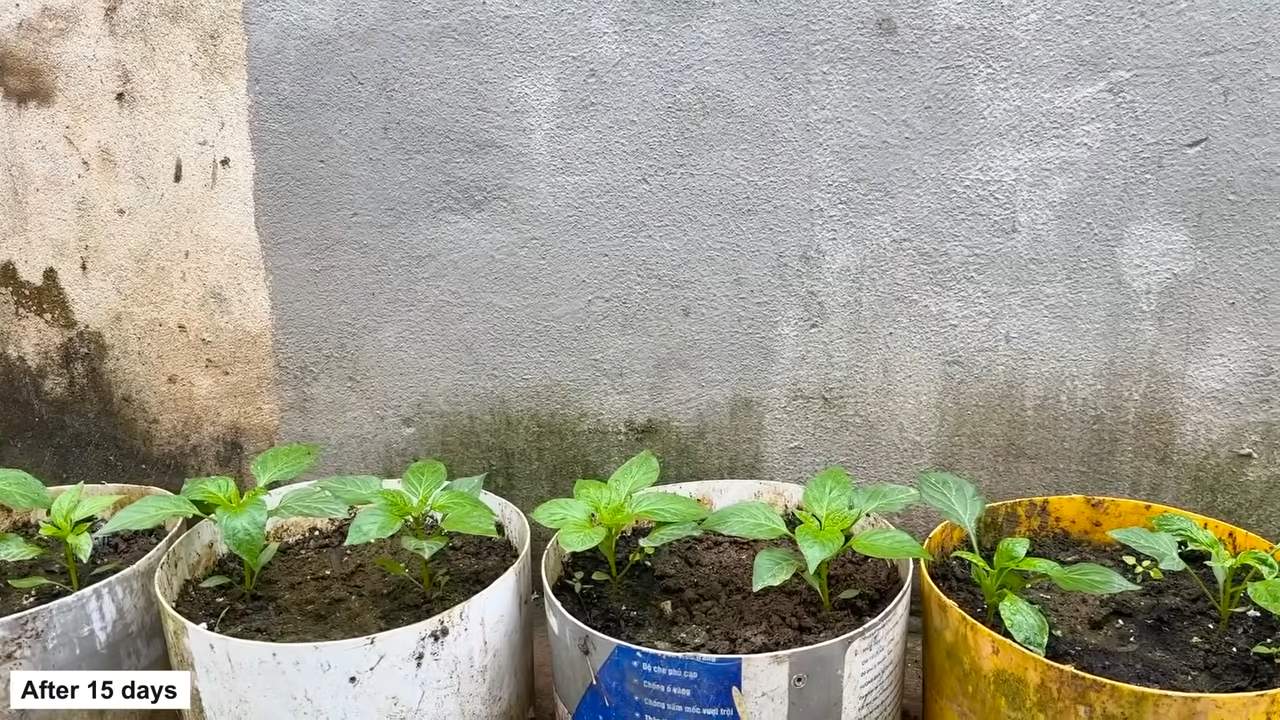
Transplanting Your Bell Pepper Seedlings Outdoors
Once the danger of frost has passed and the soil has warmed up, it’s time to transplant your bell pepper seedlings outdoors.
Transplanting Steps:
1. Choose a cloudy day: Transplanting on a cloudy day will help prevent the seedlings from getting stressed by the sun.
2. Dig holes: Dig holes that are slightly larger than the root balls of your seedlings. Space the holes about 18-24 inches apart.
3. Carefully remove the seedlings: Gently remove the seedlings from their pots or trays, being careful not to damage the roots.
4. Plant the seedlings: Place the seedlings in the holes and backfill with soil. Gently firm the soil around the base of the plants.
5. Water thoroughly: Water the seedlings thoroughly after transplanting.
6. Mulch: Apply a layer of mulch around the base of the plants to help retain moisture, suppress weeds, and regulate soil temperature. I like to use straw or shredded leaves.
Caring for Your Bell Pepper Plants
Once your bell pepper plants are in the ground, it’s important to provide them with the care they need to thrive.
Watering:
* Water your bell pepper plants regularly, especially during hot, dry weather. Aim to keep the soil consistently moist, but not soggy.
* Water deeply and less frequently, rather than shallowly and more often. This encourages the roots to grow deeper, making the plants more drought-tolerant.
* Avoid overhead watering, as this can increase the risk of fungal diseases. Water at the base of the plants.
Fertilizing:
* Bell peppers are heavy feeders, so they need regular fertilization.
* Apply a balanced fertilizer every 2-3 weeks, following the instructions on the fertilizer label.
* You can also side-dress your plants with compost or aged manure.
Pruning:
* Pruning bell pepper plants can help improve air circulation and encourage fruit production.
* Remove any suckers (small shoots that grow from the base of the plant) to direct the plant’s energy towards fruit production.
* You can also remove some of the lower leaves to improve air circulation.
Pest and Disease Control:
* Bell peppers can be susceptible to a variety of pests and diseases.
* Inspect your plants regularly for signs of pests or diseases.
* If you find any pests, try to remove them by hand or use an insecticidal soap or neem oil.
* To prevent diseases, ensure good air circulation, avoid overhead watering, and use disease-resistant varieties.
Supporting the Plants:
* As your bell pepper plants grow and produce fruit, they may need support to prevent them from falling over.
* You can use stakes, cages, or trellises to support the plants.
Harvesting Your Bell Peppers
The moment we’ve all been waiting for! Harvesting your own homegrown bell peppers is incredibly rewarding.
When to Harvest:
* Bell peppers can be harvested at any stage of maturity, but they are typically harvested when they are fully colored and firm.
* Green bell peppers are less mature than red, yellow, or orange bell peppers.
* The longer you leave the peppers on the plant, the sweeter they will become.
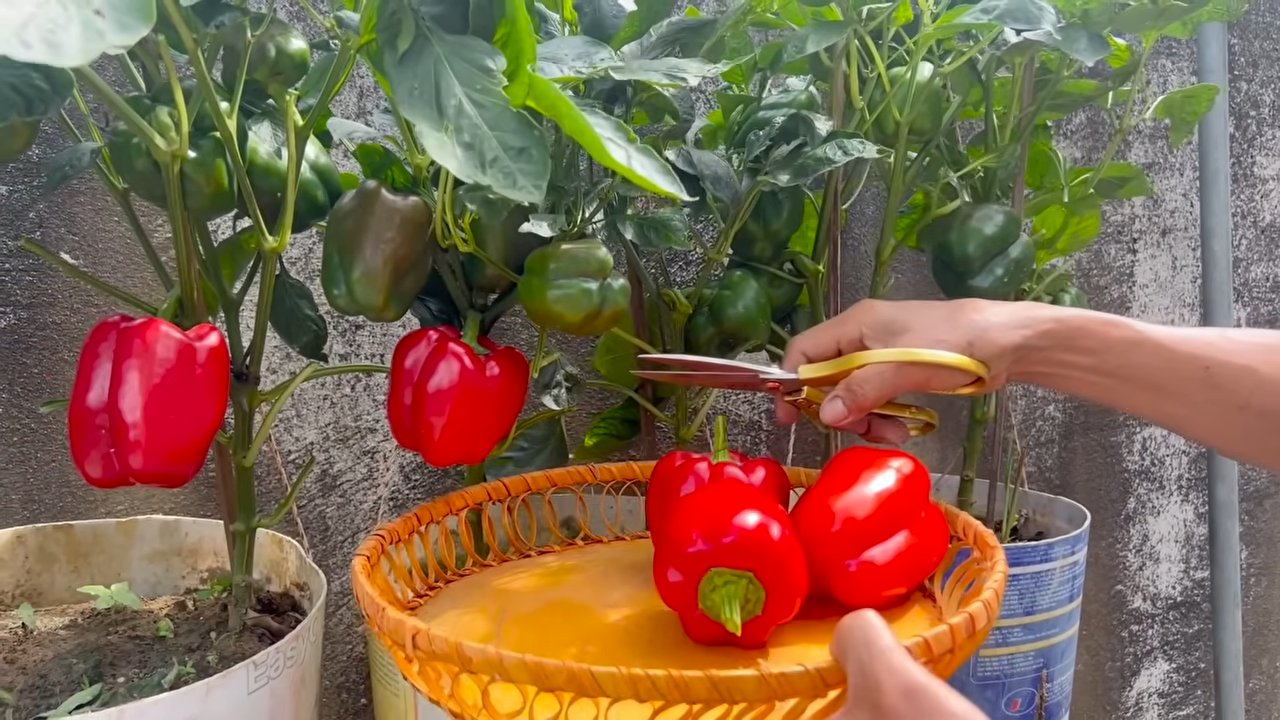
How to Harvest:
* Use a sharp knife or pruning shears to cut the peppers from the plant.
* Cut the stem about an inch above the pepper.
* Handle the peppers carefully to avoid bruising them.
Storing Your Bell Peppers:
* Store your bell peppers in the refrigerator for up to a week.
* You can also freeze bell peppers for longer storage. To freeze them, wash, core, and slice the peppers. Blanch them in boiling water for 2 minutes, then transfer them to an ice bath. Drain the peppers and freeze them in a single layer on a baking sheet. Once they are frozen, transfer them to a freezer bag or
Conclusion
So, there you have it! Mastering the art of growing bell peppers doesn’t require a green thumb blessed by the gardening gods. It’s about understanding their needs, providing the right environment, and being patient. This DIY approach, focusing on [Your DIY Trick Here – let’s assume it’s “homemade Epsom salt fertilizer”], is a game-changer because it provides your bell peppers with the essential magnesium they crave, leading to healthier plants, more abundant yields, and, most importantly, sweeter, more flavorful peppers.
Why is this a must-try? Because store-bought fertilizers can be expensive and often contain ingredients you might not want in your garden. This homemade Epsom salt fertilizer is cost-effective, environmentally friendly, and allows you to control exactly what your plants are absorbing. You’re not just feeding your bell peppers; you’re nurturing them with a natural boost that unlocks their full potential.
But don’t stop there! Experiment with variations. Try adding a small amount of bone meal to your Epsom salt solution for an extra phosphorus boost, promoting strong root development. Or, if you’re growing your bell peppers in containers, consider using a slightly weaker concentration of the fertilizer to avoid over-fertilizing. You can also adjust the frequency of application based on your plant’s specific needs – look for signs of magnesium deficiency, such as yellowing leaves between the veins, as an indicator that they need a little extra love.
Remember, gardening is a journey of learning and discovery. There’s no one-size-fits-all solution, and what works for one gardener might not work for another. That’s why we encourage you to try this DIY Epsom salt fertilizer for growing bell peppers and see the difference it makes in your own garden.
We’re confident that you’ll be amazed by the results. Imagine biting into a crisp, juicy bell pepper that you grew yourself, knowing that you nurtured it with a simple, natural solution. That’s the reward of DIY gardening!
So, grab your Epsom salt, mix up a batch of fertilizer, and get ready to witness the magic unfold. Don’t forget to document your progress and share your experiences with us! We’d love to hear about your successes, your challenges, and any variations you discover along the way. Share your photos and stories in the comments below – let’s build a community of bell pepper enthusiasts who are passionate about growing their own delicious, healthy food. Happy gardening!
Frequently Asked Questions (FAQ)
What exactly is Epsom salt, and why is it good for bell peppers?
Epsom salt is magnesium sulfate, a naturally occurring mineral compound. Magnesium is crucial for chlorophyll production, which is essential for photosynthesis – the process by which plants convert sunlight into energy. Bell peppers, like many other plants, need magnesium to thrive. A deficiency can lead to stunted growth, yellowing leaves (interveinal chlorosis), and reduced fruit production. The sulfate in Epsom salt also helps plants absorb other nutrients more effectively.
How often should I apply Epsom salt fertilizer to my bell peppers?
The frequency depends on several factors, including the soil type, the age of the plants, and the overall health of your bell peppers. As a general guideline, you can apply the Epsom salt solution every two to four weeks during the growing season. If you notice signs of magnesium deficiency, such as yellowing leaves, you can increase the frequency to once a week until the symptoms improve. Avoid over-fertilizing, as this can lead to other nutrient imbalances.
What is the best way to apply Epsom salt fertilizer? Should I spray it on the leaves or water it into the soil?
Both foliar spraying and soil drenching are effective methods. For foliar spraying, dissolve 1 tablespoon of Epsom salt in 1 gallon of water and spray the solution directly onto the leaves, preferably in the early morning or late evening to avoid scorching the leaves in direct sunlight. For soil drenching, dissolve 2 tablespoons of Epsom salt in 1 gallon of water and pour the solution around the base of the plant, being careful not to saturate the soil. Foliar spraying provides a quicker boost, while soil drenching provides a more sustained release of magnesium.
Can I use too much Epsom salt? What are the signs of over-fertilizing?
Yes, you can definitely use too much Epsom salt. Over-fertilizing can lead to a buildup of salts in the soil, which can inhibit water and nutrient uptake. Signs of over-fertilizing include leaf burn (browning edges), stunted growth, and wilting. If you suspect you’ve over-fertilized, flush the soil with plenty of water to remove excess salts. It’s always better to err on the side of caution and use a weaker concentration of fertilizer more frequently than a strong concentration less often.
Is this Epsom salt fertilizer safe for organic gardening?
Yes, Epsom salt is generally considered safe for organic gardening. It’s a naturally occurring mineral compound and doesn’t contain any synthetic chemicals. However, it’s always a good idea to check with your local organic certification standards to ensure that Epsom salt is approved for use in your specific region.
Can I use this Epsom salt fertilizer on other plants in my garden?
Yes, Epsom salt can be beneficial for many other plants, especially those that are prone to magnesium deficiency, such as tomatoes, roses, and peppers. However, it’s important to research the specific needs of each plant before applying Epsom salt, as some plants may not benefit from it.
My bell pepper plants are flowering but not producing fruit. Could this be a magnesium deficiency?
While magnesium deficiency can contribute to poor fruit production, there are other factors that can also play a role, such as pollination issues, temperature fluctuations, and nutrient imbalances. Ensure that your bell pepper plants are getting adequate sunlight, water, and other essential nutrients. You can also try hand-pollinating the flowers to improve fruit set. If you suspect a magnesium deficiency, try applying the Epsom salt fertilizer as directed and see if it makes a difference.
Where can I buy Epsom salt?
Epsom salt is readily available at most pharmacies, garden centers, and grocery stores. You can also purchase it online. Make sure to buy pure Epsom salt (magnesium sulfate) without any added fragrances or dyes.
How do I know if my soil is deficient in magnesium?
The best way to determine if your soil is deficient in magnesium is to conduct a soil test. You can purchase a soil testing kit at most garden centers or send a soil sample to a professional soil testing laboratory. The results of the soil test will tell you the levels of magnesium and other essential nutrients in your soil, allowing you to make informed decisions about fertilization.
What other tips do you have for growing healthy bell peppers?
In addition to using Epsom salt fertilizer, here are a few other tips for growing healthy bell peppers:
* **Choose the right variety:** Select bell pepper varieties that are well-suited to your climate and growing conditions.
* **Provide adequate sunlight:** Bell peppers need at least 6-8 hours of direct sunlight per day.
* **Water regularly:** Keep the soil consistently moist, but avoid overwatering.
* **Provide support:** As the plants grow and produce fruit, they may need support to prevent them from falling over.
* **Protect from pests and diseases:** Monitor your plants regularly for signs of pests and diseases and take appropriate action to control them.
* **Practice crop rotation:** Avoid planting bell peppers in the same location year after year to prevent the buildup of soilborne diseases.
* **Mulch around the plants:** Mulching helps to retain moisture, suppress weeds, and regulate soil temperature.
By following these tips, you can increase your chances of growing a bountiful harvest of delicious bell peppers.
Leave a Comment