

Grow Watermelon Faster? Absolutely! Imagine biting into a juicy, sweet, homegrown watermelon weeks ahead of your neighbors. Sounds like a dream, right? Well, it doesn’t have to be! For centuries, gardeners have sought ways to coax the most out of their crops, and watermelons, with their thirst for sun and space, have always presented a delightful challenge.
I’m here to share some tried-and-true DIY tricks and hacks that will help you grow watermelon faster and enjoy a bountiful harvest. Forget waiting all summer; these methods will give your melons a head start and ensure they reach their full, delicious potential.
Why do you need these tricks? Because let’s face it, patience isn’t always a gardener’s strongest virtue! Plus, a longer growing season means more chances for pests and diseases to wreak havoc. By accelerating the growth process, you’re not only getting to enjoy your watermelons sooner, but you’re also minimizing potential problems. So, let’s dive in and unlock the secrets to a faster, sweeter watermelon harvest!
How to Extend Your Pumpkin Harvest: A DIY Guide to Continuous Pumpkin Production
Okay, pumpkin lovers, let’s talk about how to get more pumpkins from your existing plants! Instead of just getting one big harvest at the end of the season, I’m going to show you how to encourage your pumpkin vines to keep producing, giving you a longer and more bountiful harvest. This isn’t about some magical trick, but rather about understanding how pumpkins grow and giving them a little boost.
Understanding Pumpkin Growth for Continuous Harvesting
Before we dive into the DIY hacks, it’s important to understand a few key things about pumpkin growth. This will help you understand *why* these techniques work, and allow you to adapt them to your specific garden conditions.
* Pumpkin Vines are Hungry: These guys are heavy feeders! They need a lot of nutrients, especially nitrogen, phosphorus, and potassium, to support all that vine growth and those big, orange fruits.
* Pollination is Key: Obviously, you need successful pollination for pumpkins to form. Bees are your best friends here!
* Energy Allocation: Pumpkin plants will naturally prioritize the first few pumpkins that set on the vine. If you want more, you need to manage this energy allocation.
* Vine Health Matters: A healthy vine is a productive vine. We need to protect our plants from pests and diseases.
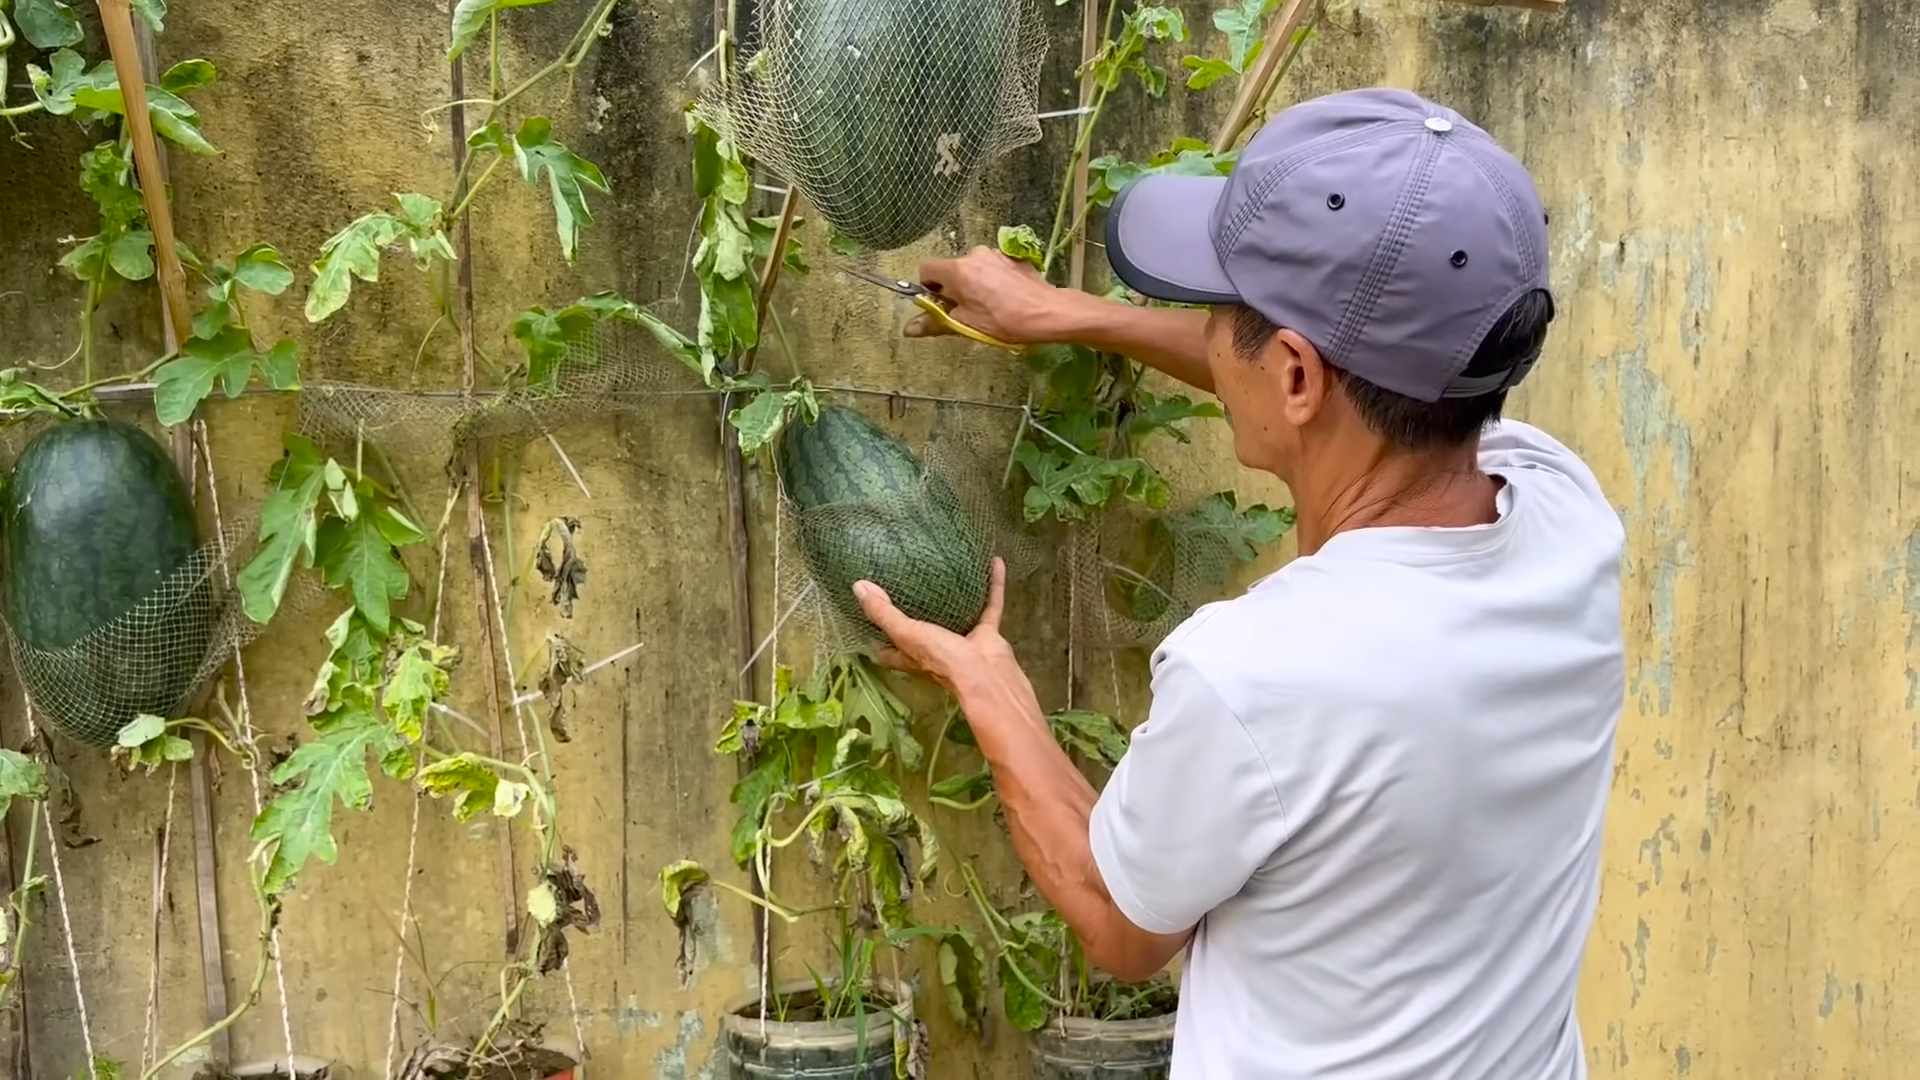
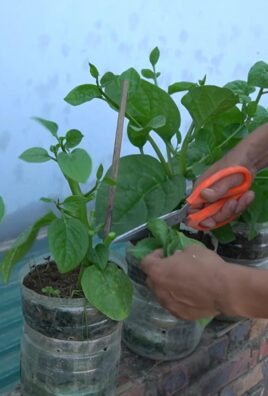
DIY Hack #1: Strategic Pruning for More Pumpkins
Pruning might seem counterintuitive – why would you cut back a plant you want to produce more? But trust me, it works! Strategic pruning helps redirect the plant’s energy and encourages new growth, which can lead to more flowers and, ultimately, more pumpkins.
What You’ll Need:
* Sharp, clean pruning shears or a knife.
* Gloves (optional, but recommended to avoid skin irritation).
Step-by-Step Instructions:
1. Identify the Main Vine: Locate the main vine of your pumpkin plant. This is the thickest, longest vine that originates from the base of the plant.
2. Prune Lateral Vines After a Pumpkin Sets: Once you have a pumpkin that’s about the size of a softball (or bigger) on a lateral (side) vine, prune the vine *after* the pumpkin, leaving about 10-12 leaves beyond the fruit. This forces the plant to focus its energy on that pumpkin and encourages the development of new lateral vines.
3. Remove Unproductive Vines: If you see any lateral vines that are not producing flowers or pumpkins, prune them back to the main vine. These vines are just taking up energy that could be used elsewhere.
4. Trim Crowded Areas: If your pumpkin patch is getting too dense, prune some of the leaves to improve air circulation. This will help prevent fungal diseases.
5. Remove Damaged or Diseased Leaves: Regularly inspect your plants for any signs of disease or pest damage. Remove any affected leaves immediately to prevent the problem from spreading.
6. Avoid Pruning During Wet Weather: Pruning during wet weather can increase the risk of fungal infections. Try to prune on a dry, sunny day.
DIY Hack #2: Hand-Pollination for Guaranteed Pumpkin Production
Sometimes, even with plenty of bees around, pollination can be a bit hit-or-miss. Hand-pollination ensures that you get the best possible chance of pumpkin formation.
What You’ll Need:
* Small, soft paintbrush or cotton swab.
Step-by-Step Instructions:
1. Identify Male and Female Flowers: This is crucial! Male flowers have a long, thin stem and a stamen covered in pollen inside. Female flowers have a short, thick stem and a small, immature pumpkin at the base of the flower.
2. Pollinate Early in the Morning: Pumpkin flowers typically open early in the morning and close by midday. This is the best time to hand-pollinate.
3. Collect Pollen from a Male Flower: Gently brush the paintbrush or cotton swab against the stamen of a male flower to collect the pollen. You should see the pollen transferring to the brush.
4. Transfer Pollen to a Female Flower: Carefully brush the pollen-covered paintbrush or cotton swab onto the stigma (the sticky part in the center) of a female flower. Make sure you get good coverage.
5. Repeat Daily: Repeat this process daily for several days to ensure successful pollination.
6. Mark Pollinated Flowers: You can use a small piece of ribbon or tape to mark the flowers you’ve hand-pollinated. This will help you keep track of your progress.
DIY Hack #3: Fertilizing for Continuous Growth and Fruit Production
As I mentioned earlier, pumpkins are heavy feeders. Regular fertilization is essential for supporting continuous growth and fruit production.
What You’ll Need:
* Balanced fertilizer (e.g., 10-10-10) or a fertilizer specifically formulated for pumpkins.
* Watering can or hose.
Step-by-Step Instructions:
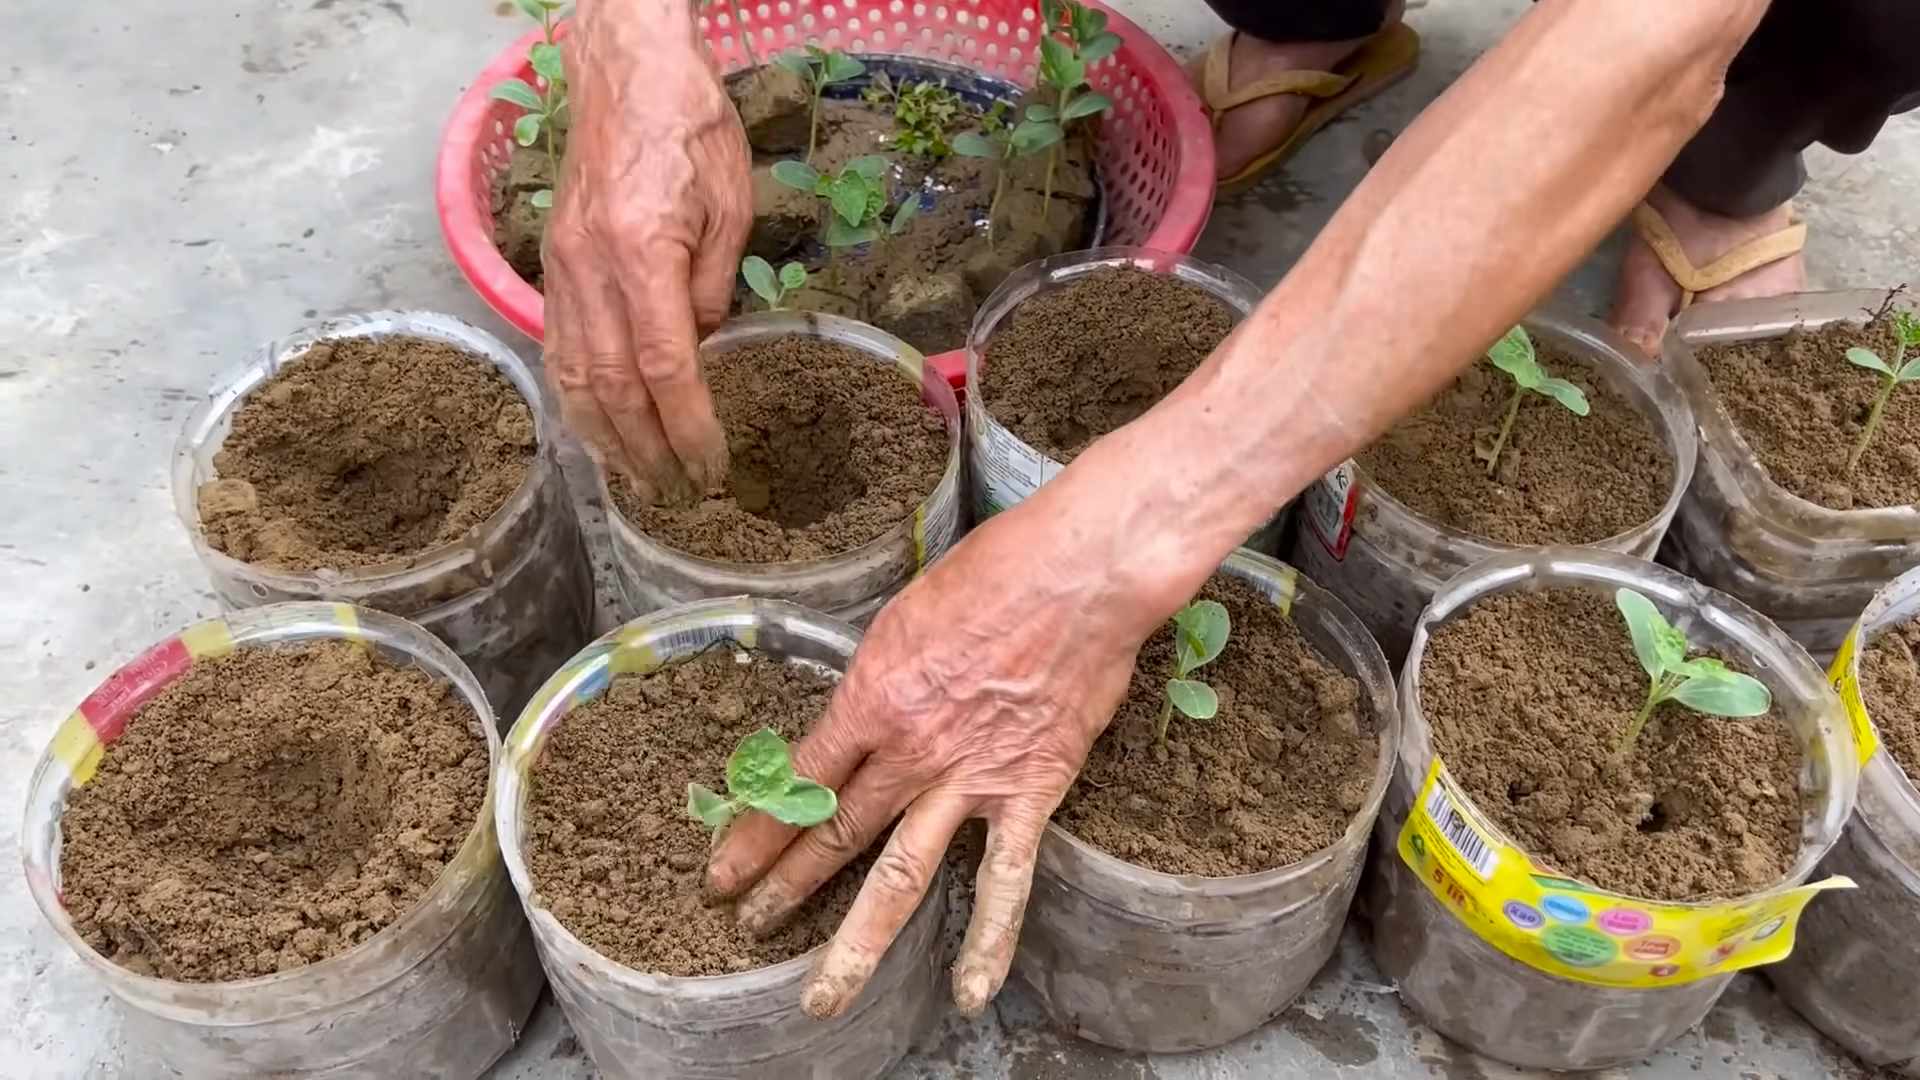
1. Initial Fertilization: When you first plant your pumpkin seedlings or transplants, mix a balanced fertilizer into the soil according to the package directions.
2. Side-Dress Regularly: Once your plants start to vine, side-dress them with fertilizer every 2-3 weeks. Side-dressing involves applying fertilizer along the sides of the plants, a few inches away from the stems.
3. Use a Liquid Fertilizer: You can also use a liquid fertilizer to give your plants a quick boost. Follow the package directions for dilution rates.
4. Water After Fertilizing: Always water your plants thoroughly after fertilizing to help the nutrients soak into the soil.
5. Consider Compost Tea: Compost tea is a great natural fertilizer that can provide your plants with essential nutrients and beneficial microbes.
6. Adjust Based on Plant Needs: Pay attention to your plants and adjust your fertilization schedule as needed. If your plants are looking pale or stunted, they may need more fertilizer. If they’re growing too quickly and producing lots of leaves but few flowers, you may need to reduce the amount of nitrogen in your fertilizer.
DIY Hack #4: Protecting Your Pumpkins from Pests and Diseases
Pests and diseases can quickly derail your pumpkin harvest. Taking preventative measures and addressing problems early is crucial for continuous production.
What You’ll Need:
* Insecticidal soap or neem oil (for pest control).
* Copper fungicide or baking soda spray (for disease control).
* Row covers (optional, for early-season protection).
Step-by-Step Instructions:
1. Regularly Inspect Your Plants: Check your plants regularly for signs of pests or diseases. Look for things like holes in the leaves, wilting, powdery mildew, or squash bugs.
2. Use Insecticidal Soap or Neem Oil: If you find pests, spray your plants with insecticidal soap or neem oil according to the package directions. Be sure to spray both the tops and bottoms of the leaves.
3. Apply Copper Fungicide or Baking Soda Spray: If you see signs of fungal diseases, such as powdery mildew, apply a copper fungicide or baking soda spray. Baking soda spray can be made by mixing 1 tablespoon of baking soda with 1 gallon of water and a few drops of dish soap.
4. Remove Infested Leaves: If you find any leaves that are heavily infested with pests or diseases, remove them and dispose of them properly.
5. Use Row Covers: Row covers can be used to protect your plants from pests early in the season. Remove the row covers once the plants start to flower so that pollinators can access the flowers.
6. Practice Crop Rotation: Avoid planting pumpkins in the same spot year after year. Crop rotation can help prevent the buildup of soilborne diseases.
7. Maintain Good Air Circulation: As mentioned earlier, good air circulation is important for preventing fungal diseases. Prune your plants to improve air circulation and avoid overcrowding.
DIY Hack #5: Supporting Developing Pumpkins
As your pumpkins grow larger, they may need some support to prevent them from rotting or breaking off the vine.
What You’ll Need:
* Wooden boards, bricks, or straw.
Step-by-Step Instructions:
1. Place Support Under Pumpkins: As your pumpkins start to develop, place a wooden board, brick, or thick layer of straw under each pumpkin to lift it off the ground. This will help prevent the pumpkin from rotting due to contact with the soil.
2. Protect from Sun Scald: If your pumpkins are exposed to direct sunlight, you may need to provide some shade to prevent sun scald. You can use a piece of cloth or cardboard to shade the pumpkins during the hottest part of the day.
3. Monitor for Cracks: Keep an eye on your pumpkins for any signs of cracks. If you see a crack, you can try to repair it with duct tape.
DIY Hack #6: Watering Strategically
Proper watering is essential for healthy pumpkin growth and fruit production.
Conclusion
So, there you have it! This simple yet effective DIY trick to grow watermelon faster is a game-changer for any gardener, regardless of experience level. We’ve walked you through the process, highlighting the key steps and explaining the science behind why it works. It’s not just about getting watermelons; it’s about maximizing your yield, shortening the waiting time, and enjoying the fruits (literally!) of your labor sooner.
Why is this a must-try? Because it addresses the critical factors that often limit watermelon growth: temperature and nutrient availability. By creating a warmer microclimate around the roots and providing a readily accessible source of nourishment, you’re essentially giving your watermelon plants a head start and a continuous boost throughout their development. Imagine biting into a juicy, sweet, homegrown watermelon weeks earlier than you ever thought possible!
But don’t just take our word for it. The beauty of gardening lies in experimentation and adaptation. Feel free to explore variations on this technique. For instance, if you live in an area with particularly poor soil, consider amending the soil in the planting hole with compost or well-rotted manure in addition to the fertilizer. You could also experiment with different types of mulch, such as black plastic mulch, which can further enhance soil warming.
Another variation to consider is the type of fertilizer you use. While we recommended a balanced fertilizer, you can tailor the nutrient ratios to the specific needs of your watermelon plants at different stages of growth. For example, during the early vegetative stage, a fertilizer higher in nitrogen can promote leafy growth. Once the plants start flowering and fruiting, switch to a fertilizer higher in phosphorus and potassium to support fruit development.
Furthermore, you can adapt this technique for other heat-loving plants like cantaloupe, squash, and even cucumbers. The principle remains the same: create a warmer, nutrient-rich environment to accelerate growth and improve yields. Just be sure to research the specific needs of each plant to ensure you’re providing the optimal conditions.
We understand that gardening can sometimes feel daunting, but this DIY trick is designed to be accessible and straightforward. It requires minimal effort and readily available materials, making it a perfect project for both beginner and experienced gardeners alike.
The key takeaway here is that you don’t need expensive equipment or specialized knowledge to significantly improve your watermelon growing success. A little bit of planning, a few simple steps, and a willingness to experiment can make all the difference.
So, what are you waiting for? Grab your gardening gloves, gather your supplies, and give this DIY trick a try. We’re confident that you’ll be amazed by the results. And most importantly, don’t forget to share your experience with us! We’d love to hear about your successes, your challenges, and any variations you’ve tried. Share your photos and stories on social media using [Your Hashtag Here] and let’s inspire other gardeners to grow watermelon faster and enjoy the delicious rewards of their hard work. Happy gardening!
Frequently Asked Questions (FAQ)
What kind of fertilizer should I use?
A balanced fertilizer with an NPK ratio of 10-10-10 or 14-14-14 is a good starting point. However, as your watermelon plants grow, you might want to adjust the fertilizer to meet their specific needs. During the early vegetative stage, a fertilizer higher in nitrogen will promote leafy growth. Once the plants start flowering and fruiting, switch to a fertilizer higher in phosphorus and potassium to support fruit development. Look for fertilizers specifically formulated for fruiting vegetables. Organic options like compost tea or fish emulsion can also be beneficial. Always follow the instructions on the fertilizer packaging to avoid over-fertilizing, which can damage your plants.
How often should I water my watermelon plants?
Watermelon plants need consistent moisture, especially during hot weather. Water deeply and regularly, aiming for about 1-2 inches of water per week. Check the soil moisture regularly by sticking your finger about an inch into the soil. If it feels dry, it’s time to water. Avoid overhead watering, as this can lead to fungal diseases. Instead, water at the base of the plants, using a soaker hose or drip irrigation system if possible. During fruit development, ensure consistent watering to prevent blossom-end rot.
How much sunlight do watermelon plants need?
Watermelons are sun-loving plants and require at least 6-8 hours of direct sunlight per day to thrive. Choose a planting location that receives full sun throughout the day. If you live in a particularly hot climate, some afternoon shade might be beneficial to prevent the plants from overheating. Insufficient sunlight can lead to poor fruit development and reduced yields.
What if I don’t have a lot of space? Can I still grow watermelons?
While watermelons are known for their sprawling vines, there are ways to grow them in smaller spaces. Choose bush or dwarf varieties, which are specifically bred to be more compact. You can also train the vines to grow vertically on a trellis or fence. Container gardening is another option, but you’ll need a large container (at least 20 gallons) and ensure adequate drainage. Provide regular watering and fertilization to compensate for the limited space.
How do I know when my watermelon is ripe?
Determining watermelon ripeness can be tricky, but there are several indicators to look for. The tendril closest to the fruit should be brown and dry. The underside of the watermelon, where it rests on the ground (the ground spot), should be yellow or cream-colored. A ripe watermelon will also have a dull, hollow sound when you thump it. Avoid picking watermelons based solely on size or color, as these can be misleading.
What are some common pests and diseases that affect watermelons?
Common pests that attack watermelons include aphids, squash bugs, and vine borers. Regularly inspect your plants for signs of infestation and take appropriate action, such as using insecticidal soap or hand-picking the pests. Common diseases include powdery mildew, fusarium wilt, and blossom-end rot. Preventative measures include providing good air circulation, avoiding overhead watering, and using disease-resistant varieties. If you notice signs of disease, treat promptly with a fungicide or other appropriate remedy.
Can I use this trick for other plants besides watermelons?
Yes, this trick can be adapted for other heat-loving plants like cantaloupe, squash, cucumbers, and even some types of peppers. The principle remains the same: creating a warmer, nutrient-rich environment to accelerate growth and improve yields. However, it’s important to research the specific needs of each plant to ensure you’re providing the optimal conditions. Adjust the fertilizer and watering schedule accordingly.
How long does it take to grow a watermelon using this method?
The time it takes to grow a watermelon depends on several factors, including the variety, climate, and growing conditions. Generally, watermelons take 70-90 days to mature from planting. This DIY trick can potentially shorten that time by a week or two by providing a warmer and more nutrient-rich environment. However, results may vary.
What if I live in a colder climate? Will this trick still work?
This trick can be particularly beneficial in colder climates, as it helps to create a warmer microclimate around the roots of the watermelon plants. However, you may need to take additional measures to protect your plants from frost, such as using row covers or cold frames. Start your watermelon seeds indoors several weeks before the last expected frost and transplant them outdoors once the weather has warmed up.
Is it necessary to use plastic mulch?
No, plastic mulch is not strictly necessary, but it can provide several benefits, including warming the soil, suppressing weeds, and conserving moisture. If you prefer not to use plastic, you can use organic mulches like straw, hay, or wood chips. However, organic mulches may not warm the soil as effectively as plastic mulch.


Leave a Comment