

Grow Watermelon Backyard – the very thought conjures images of juicy, sweet slices enjoyed on a hot summer day, doesn’t it? Imagine stepping out your back door and harvesting your own homegrown watermelon! Forget those bland, store-bought melons; we’re talking about vibrant, flavorful watermelons bursting with sunshine and the satisfaction of your own hard work.
For centuries, watermelons have been a symbol of abundance and refreshment, gracing tables from ancient Egypt to modern-day picnics. Their history is as rich and colorful as their flesh, and now, you can be a part of that story, right in your own backyard. But let’s be honest, growing watermelons can seem intimidating. They’re big, they need space, and you might be wondering if you even have the right conditions.
That’s where this DIY guide comes in! I’m here to share some simple yet effective tricks and hacks that will empower you to grow watermelon backyard, even if you’re a beginner gardener. We’ll demystify the process, covering everything from choosing the right variety for your climate to maximizing your yield with clever techniques. Why spend money on inferior watermelons when you can cultivate your own delicious bounty? Let’s get started and turn your backyard into a watermelon wonderland!
Growing Strawberries From Seed: A Comprehensive DIY Guide
Okay, so you want to grow strawberries from seed? Awesome! It’s a bit more challenging than buying starter plants, but the satisfaction of nurturing those tiny seeds into delicious berries is totally worth it. Plus, you’ll have access to varieties you might not find at your local garden center. Let’s dive in!
Understanding the Strawberry Seed Journey
Before we get our hands dirty, let’s talk about what we’re up against. Strawberry seeds need a little encouragement to germinate. They have a tough outer coating and require a period of cold stratification to break dormancy. Don’t worry, it sounds more complicated than it is!
Materials You’ll Need
Here’s a list of everything you’ll need to get started. I’ve tried to be as specific as possible, but feel free to substitute based on what you have available.
* Strawberry Seeds: Choose a variety you love! Alpine strawberries are a great option for beginners, as they’re relatively easy to grow and produce fruit quickly.
* Seed Starting Trays or Small Pots: I prefer seed starting trays with a clear plastic dome to maintain humidity.
* Seed Starting Mix: This is crucial! Regular potting soil is too heavy for delicate seedlings. Look for a fine-textured, sterile mix specifically designed for seed starting.
* Spray Bottle: For gently watering the seeds.
* Refrigerator: For cold stratification.
* Grow Lights (Optional but Recommended): Strawberries need plenty of light, especially indoors.
* Heat Mat (Optional): Can speed up germination.
* Small Labels and a Permanent Marker: To keep track of your varieties.
* Small Tweezers or a Toothpick: For handling tiny seeds.
* Well-Draining Potting Mix: For transplanting seedlings.
* Fertilizer: A balanced liquid fertilizer diluted to half strength.
Phase 1: Cold Stratification (The Chill Out Period)
This is where we trick the seeds into thinking they’ve been through winter.
1. Prepare the Seeds: Place your strawberry seeds in a small container or zip-top bag.
2. Moisten a Paper Towel: Dampen a paper towel with distilled water. It should be moist, not soaking wet.
3. Wrap the Seeds: Place the seeds on the damp paper towel and fold it over to enclose them.
4. Seal and Label: Place the paper towel with the seeds inside the container or zip-top bag. Label the bag with the date and the variety of strawberry.
5. Refrigerate: Place the container in your refrigerator for 4-6 weeks. This cold period is essential for breaking seed dormancy. Make sure the temperature is consistently around 35-45°F (2-7°C).
6. Check Periodically: Check the paper towel every week or so to make sure it’s still moist. If it’s drying out, lightly mist it with distilled water.
Phase 2: Sowing the Seeds (Let’s Get Planting!)
After the cold stratification, it’s time to sow those seeds!
1. Prepare the Seed Starting Trays: Fill your seed starting trays or small pots with seed starting mix. Gently tap the trays to settle the mix.
2. Moisten the Soil: Lightly moisten the seed starting mix with your spray bottle. You want it to be damp, but not soggy.
3. Sow the Seeds: Strawberry seeds are tiny, so this can be a bit fiddly. Use your tweezers or a toothpick to carefully place the seeds on the surface of the soil. Don’t bury them too deep; they need light to germinate. Aim for about 2-3 seeds per cell or pot.
4. Lightly Cover (Optional): You can very lightly sprinkle a tiny bit of seed starting mix over the seeds, but it’s not strictly necessary. The key is to make sure they’re in good contact with the soil.
5. Water Gently: Use your spray bottle to gently mist the surface of the soil again. Be careful not to dislodge the seeds.
6. Cover and Create Humidity: Cover the seed starting trays with the clear plastic dome (if you have one) or place them in a plastic bag to create a humid environment. This will help the seeds germinate.
7. Provide Warmth: Place the seed starting trays on a heat mat (if using) or in a warm location. The ideal temperature for germination is around 70-75°F (21-24°C).
8. Provide Light: Place the seed starting trays under grow lights or in a very bright location. Strawberries need plenty of light to germinate and grow. If using grow lights, keep them a few inches above the trays.
Phase 3: Germination and Early Growth (The Waiting Game)
This is where patience comes in. Germination can take anywhere from 1-4 weeks, so don’t get discouraged if you don’t see sprouts right away.
1. Monitor Moisture Levels: Check the soil moisture daily. Keep the soil consistently moist, but not waterlogged. Mist with your spray bottle as needed.
2. Ventilation: Once you see seedlings emerging, start to vent the humidity dome or plastic bag for a few hours each day. This will help prevent fungal diseases.
3. Remove the Dome: Once most of the seeds have germinated, remove the humidity dome or plastic bag completely.
4. Maintain Light and Warmth: Continue to provide plenty of light and warmth. If using grow lights, adjust the height as the seedlings grow.
5. Thin Seedlings: Once the seedlings have their first true leaves (the second set of leaves that appear after the initial seed leaves), thin them out to one seedling per cell or pot. Choose the strongest, healthiest-looking seedling and gently snip off the others at the soil line.
Phase 4: Transplanting (Moving to Bigger Homes)
Once your seedlings are big enough to handle, it’s time to transplant them into larger pots.
1. Prepare the Pots: Fill small pots (around 3-4 inches in diameter) with well-draining potting mix.
2. Gently Remove Seedlings: Carefully remove the seedlings from the seed starting trays or small pots. Use a small spoon or fork to gently loosen the soil around the roots.
3. Transplant: Make a small hole in the center of the potting mix in the new pot. Gently place the seedling in the hole and cover the roots with soil.
4. Water Thoroughly: Water the transplanted seedlings thoroughly.
5. Fertilize: Start fertilizing the seedlings with a diluted liquid fertilizer every 2-3 weeks.
6. Provide Light and Warmth: Continue to provide plenty of light and warmth.
Phase 5: Hardening Off (Preparing for the Great Outdoors)
Before you can plant your strawberry plants outdoors, you need to “harden them off.” This process gradually acclimates them to the outdoor environment.
1. Gradual Exposure: Start by placing the plants outdoors in a sheltered location for a few hours each day. Gradually increase the amount of time they spend outdoors over the course of a week or two.
2. Protect from Harsh Conditions: Protect the plants from direct sunlight, strong winds, and frost.
3. Monitor Moisture Levels: Check the soil moisture regularly and water as needed.
Phase 6: Planting Outdoors (The Final Frontier)
Now for the exciting part – planting your strawberry plants in their permanent home!
1. Choose a Sunny Location: Strawberries need at least 6-8 hours of sunlight per day.
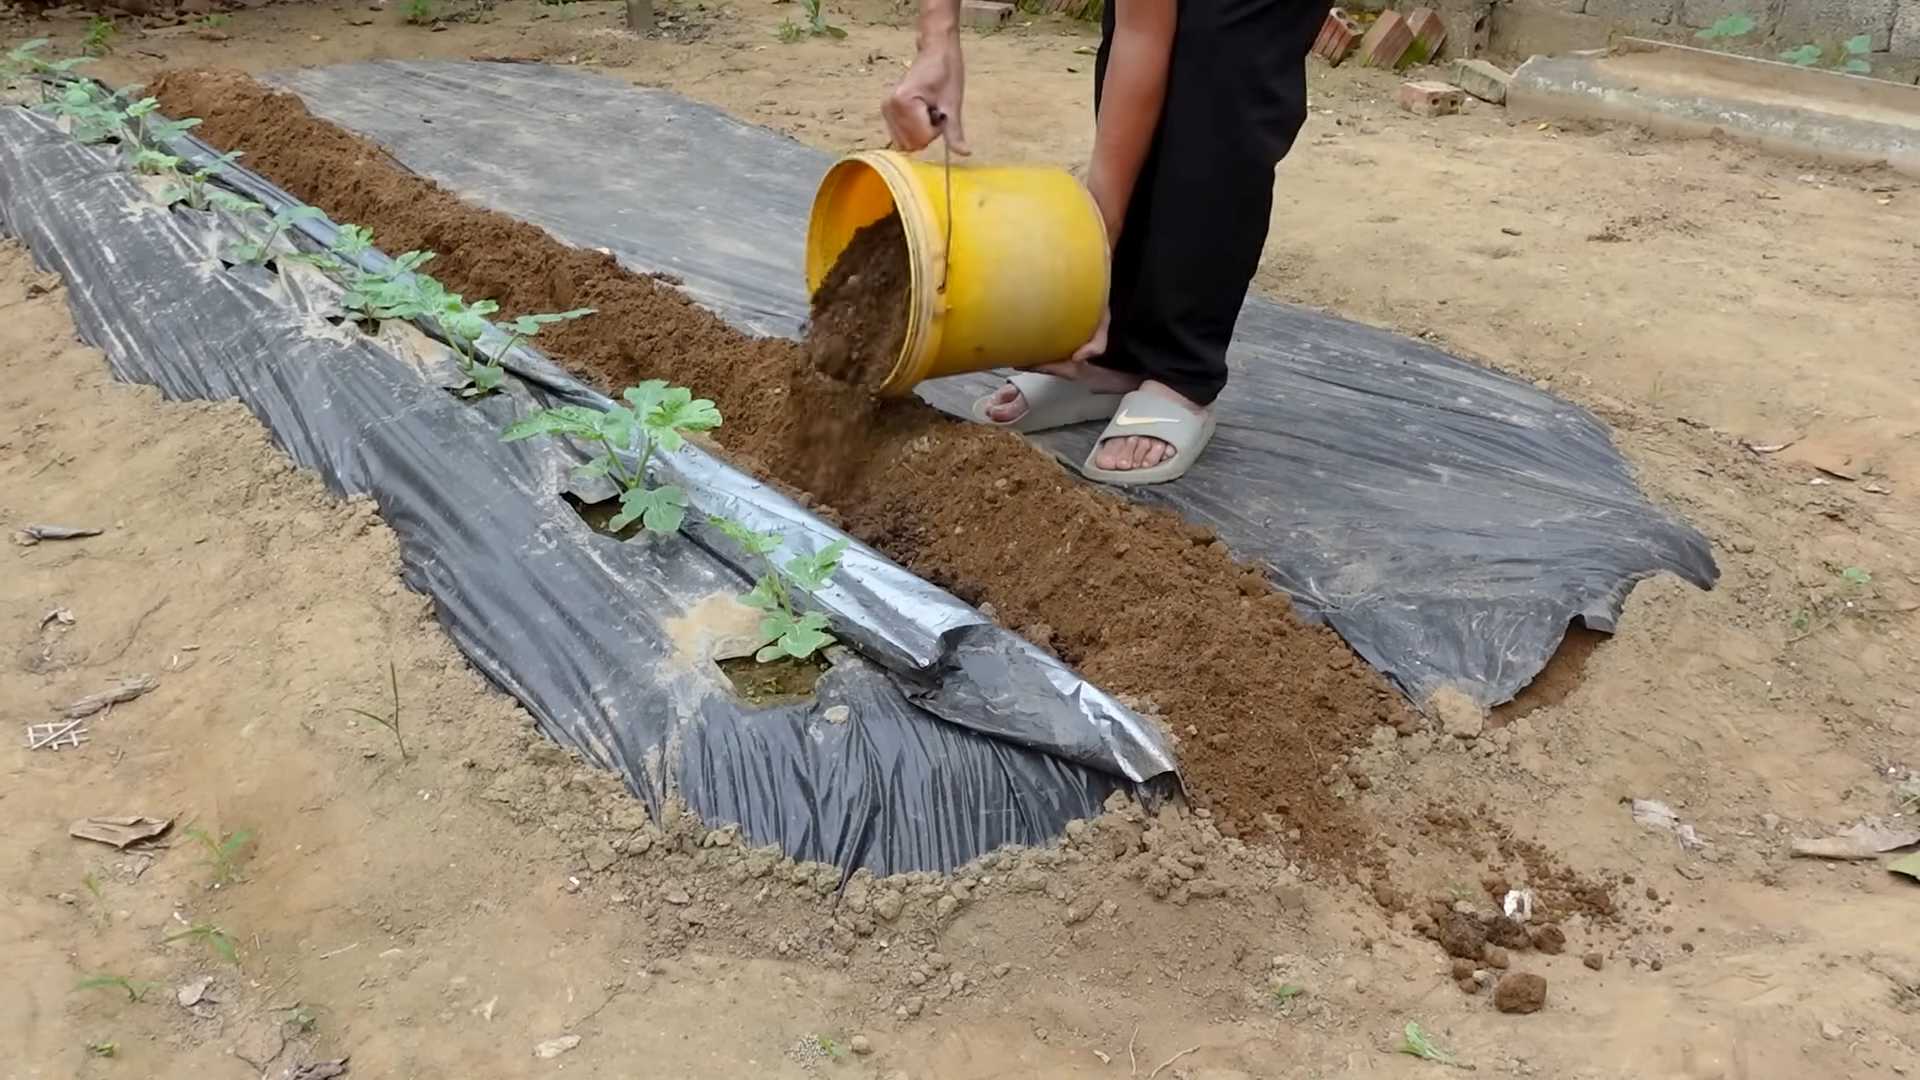
2. Prepare the Soil: Strawberries prefer well-draining soil that is rich in organic matter. Amend the soil with compost or well-rotted manure before planting.
3. Planting Distance: Space the plants about 12-18 inches apart.
4. Planting Depth: Plant the strawberries so that the crown (the point where the roots meet the stem) is at soil level.
5. Water Thoroughly: Water the newly planted strawberries thoroughly.
6. Mulch: Apply a layer of mulch around the plants to help retain moisture, suppress weeds, and keep the berries clean. Straw, pine needles, or wood chips are good options.
Ongoing Care (Keeping Your Strawberries Happy)
* Watering: Water regularly, especially during dry periods. Strawberries need consistent moisture to produce juicy berries.
* Fertilizing: Fertilize every few weeks with a balanced fertilizer.
* Weeding: Keep the area around the plants free of weeds.
* Pest and Disease Control: Monitor the plants for pests and diseases. Treat any problems promptly.
* Pruning: Remove runners (
Conclusion
So, there you have it! Growing watermelons in your backyard might seem daunting at first, but with a little planning, preparation, and the right DIY tricks, you can be harvesting your own juicy, sweet watermelons before you know it. This isn’t just about saving money; it’s about the satisfaction of nurturing something from seed to table, knowing exactly what went into it, and enjoying a flavor that far surpasses anything you can buy in a store. The freshness alone is worth the effort!
This DIY approach to growing watermelons offers a level of control and customization you simply can’t achieve otherwise. You get to choose the variety that best suits your taste and climate, tailor the soil to perfection, and protect your precious plants from pests and diseases using organic methods. Plus, it’s a fantastic learning experience for the whole family, connecting you to the natural world in a meaningful way.
Why is this DIY trick a must-try? Because it empowers you to take control of your food source, enjoy the freshest, most flavorful watermelons imaginable, and experience the joy of gardening firsthand. It’s a rewarding project that yields delicious results.
Consider these variations to personalize your watermelon-growing journey:
* Vertical Gardening: If space is limited, explore vertical gardening techniques using trellises or sturdy supports. This not only saves space but also improves air circulation around the plants, reducing the risk of fungal diseases. Choose smaller watermelon varieties for this method.
* Companion Planting: Experiment with companion plants like marigolds, basil, or nasturtiums to deter pests and attract beneficial insects. These natural allies can help protect your watermelons without the need for harsh chemicals.
* Grafting: For advanced gardeners, grafting watermelon scions onto disease-resistant rootstock can significantly improve plant vigor and yield. This technique is particularly useful in areas with challenging soil conditions or prevalent soilborne diseases.
* Different Varieties: Don’t limit yourself to just one type of watermelon! Explore heirloom varieties like ‘Moon and Stars’ or ‘Black Diamond’ for unique flavors and appearances. Experiment with seedless varieties for convenience.
* Container Gardening: Even if you don’t have a traditional backyard, you can still grow watermelons in large containers. Choose dwarf or bush varieties specifically bred for container gardening. Ensure the containers have adequate drainage and provide consistent watering and fertilization.
We’re confident that with these tips and tricks, you’ll be well on your way to enjoying homegrown watermelons. Don’t be afraid to experiment, adapt, and learn from your experiences. Every garden is unique, and what works for one person may not work for another. The key is to be observant, patient, and persistent.
So, grab your seeds, prepare your soil, and get ready to embark on this exciting adventure. We encourage you to try this DIY trick for growing watermelons in your backyard and share your experiences with us! Let us know what varieties you’re growing, what challenges you’ve faced, and what successes you’ve achieved. Share your photos, tips, and tricks in the comments below. We can all learn from each other and create a thriving community of watermelon growers. Happy gardening!
FAQ
Here are some frequently asked questions to help you on your watermelon-growing journey:
What is the best time to start growing watermelons?
The ideal time to start growing watermelons depends on your climate. Watermelons are warm-season crops and require a long growing season of at least 70-90 days. In general, you should start seeds indoors 6-8 weeks before the last expected frost. If you live in a warm climate with a long growing season, you can direct sow seeds outdoors after the soil has warmed up to at least 70°F (21°C). Check your local frost dates and adjust your planting schedule accordingly.
What kind of soil do watermelons need?
Watermelons thrive in well-drained, sandy loam soil that is rich in organic matter. The soil pH should be between 6.0 and 6.8. Before planting, amend the soil with compost, aged manure, or other organic materials to improve drainage and fertility. Avoid heavy clay soils, as they can retain too much moisture and lead to root rot. If you have clay soil, consider growing watermelons in raised beds or containers.
How much sunlight do watermelons need?
Watermelons require at least 6-8 hours of direct sunlight per day to produce abundant, sweet fruit. Choose a planting location that receives full sun throughout the day. If your garden is shaded for part of the day, try to position your watermelon plants so that they receive the most sunlight possible. Insufficient sunlight can result in smaller, less flavorful watermelons.
How often should I water my watermelon plants?
Watermelons need consistent watering, especially during hot, dry weather. Water deeply and regularly, aiming to keep the soil consistently moist but not waterlogged. Avoid overhead watering, as this can promote fungal diseases. Instead, water at the base of the plants using a soaker hose or drip irrigation system. As the watermelons ripen, reduce watering slightly to prevent them from splitting.
How do I fertilize my watermelon plants?
Watermelons are heavy feeders and require regular fertilization to produce large, healthy fruit. Before planting, incorporate a slow-release fertilizer into the soil. During the growing season, fertilize every 2-3 weeks with a balanced fertilizer that is high in phosphorus and potassium. Avoid over-fertilizing with nitrogen, as this can promote excessive foliage growth at the expense of fruit production.
How do I protect my watermelons from pests and diseases?
Watermelons are susceptible to various pests and diseases, including aphids, squash bugs, vine borers, and fungal diseases like powdery mildew and anthracnose. To prevent pest and disease problems, practice good garden hygiene, such as removing weeds and debris, and providing adequate air circulation around the plants. Use organic pest control methods, such as insecticidal soap or neem oil, to control aphids and squash bugs. Apply a fungicide to prevent or treat fungal diseases. Consider using row covers to protect young plants from pests.
How do I know when my watermelons are ripe?
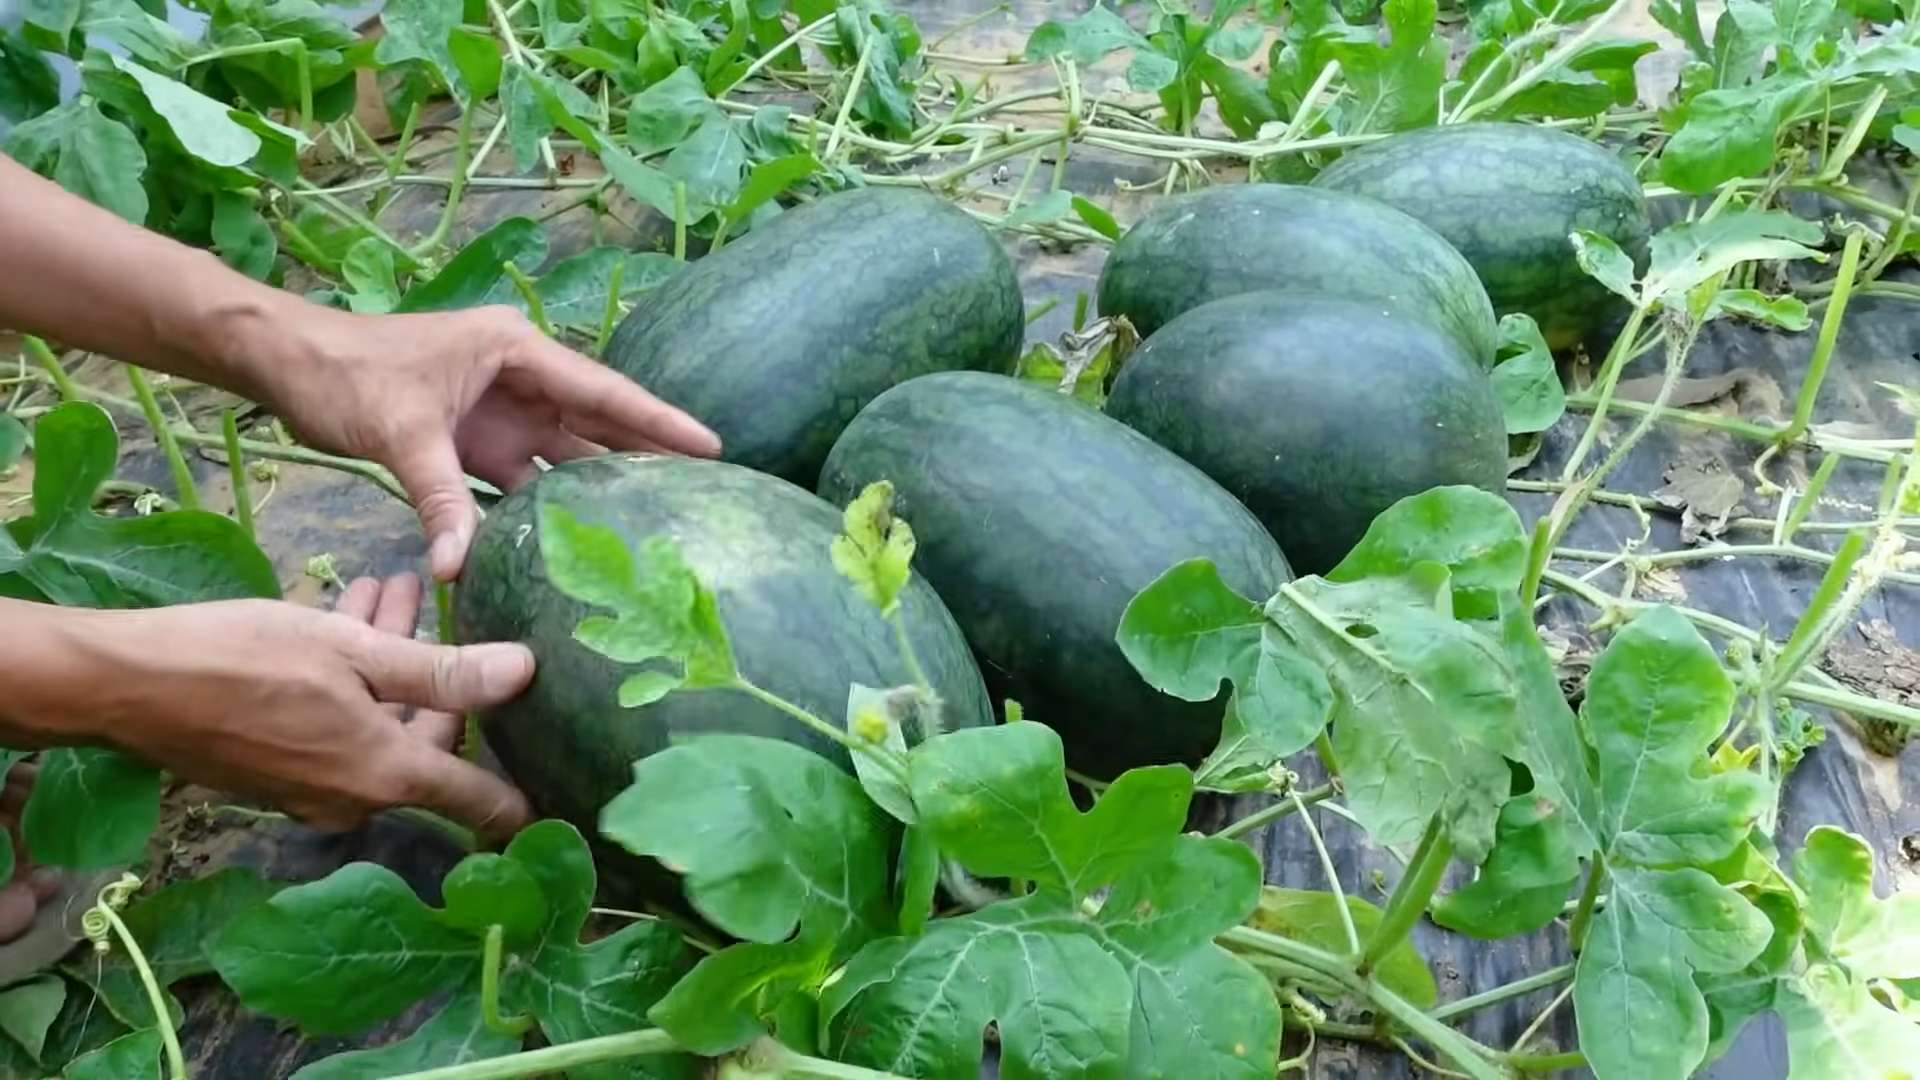
Determining when a watermelon is ripe can be tricky, but there are several indicators to look for. The tendril closest to the watermelon should be brown and dry. The spot where the watermelon rests on the ground (the “ground spot”) should be yellow or cream-colored. When you thump the watermelon, it should sound hollow and deep. The skin should be dull rather than shiny. These are general guidelines, and the best way to determine ripeness is to taste a small piece of the watermelon.
Can I grow watermelons in containers?
Yes, you can grow watermelons in containers, but you’ll need to choose a large container (at least 20 gallons) and select a dwarf or bush variety specifically bred for container gardening. Ensure the container has adequate drainage and provide consistent watering and fertilization. You may also need to provide support for the vines as they grow. Container-grown watermelons may not be as large as those grown in the ground, but they can still produce delicious fruit.
What are some common problems when growing watermelons?
Some common problems when growing watermelons include blossom-end rot, which is caused by calcium deficiency; poor pollination, which can result in small or misshapen fruit; and pest and disease problems. To prevent blossom-end rot, ensure the soil is well-drained and provide consistent watering. Hand-pollinate the flowers if necessary. Use organic pest control methods and fungicides to manage pests and diseases.
How can I improve the sweetness of my watermelons?
Several factors can influence the sweetness of watermelons, including sunlight, water, and soil fertility. Ensure your watermelon plants receive at least 6-8 hours of direct sunlight per day. Water deeply and regularly, but reduce watering slightly as the watermelons ripen. Fertilize with a balanced fertilizer that is high in potassium, which promotes sugar production. Avoid over-fertilizing with nitrogen, as this can reduce sweetness. Also, choose watermelon varieties that are known for their sweetness.


Leave a Comment