

Grow vegetables at home, even if you think you have a “brown thumb,” is easier than you might imagine! Have you ever dreamt of stepping into your backyard and picking fresh, juicy tomatoes or crisp, vibrant lettuce for your salad? It’s a truly rewarding experience, and with a few clever DIY tricks, you can transform your outdoor space – or even your windowsill – into a thriving mini-farm.
For centuries, cultivating our own food has been a cornerstone of human civilization. From ancient Roman kitchen gardens to the victory gardens of World War II, growing vegetables at home has provided sustenance, fostered community, and connected us to the natural world. Today, with concerns about food security and the desire for healthier, more sustainable living, the practice is experiencing a vibrant resurgence.
But let’s be honest, getting started can feel daunting. Where do you begin? What if you don’t have a lot of space? What about pests and diseases? That’s where these DIY home gardening tricks come in! I’m going to share some simple, effective hacks that will help you grow vegetables at home successfully, regardless of your experience level or the size of your garden. These tips will save you time, money, and frustration, allowing you to enjoy the delicious fruits (and vegetables!) of your labor. So, grab your gardening gloves, and let’s get started!
DIY Home Vegetable Garden: From Seed to Supper!
Okay, so you want to grow your own veggies? Awesome! There’s nothing quite like the taste of a tomato you’ve nurtured from a tiny seed. It’s rewarding, saves money, and you know exactly what’s going into your food. This guide will walk you through creating a thriving vegetable garden, even if you’re a complete beginner. Let’s get our hands dirty!
Choosing Your Location and Preparing the Soil
Before you even think about seeds, you need to figure out where your garden will live and get the soil ready. This is crucial for success!
* Sunlight is Key: Most vegetables need at least 6-8 hours of direct sunlight per day. Observe your yard throughout the day to see where the sun shines the longest. South-facing areas are usually best.
* Water Access: You’ll need a water source nearby. Lugging watering cans across the yard gets old fast. Consider a hose or even a rain barrel.
* Soil Testing: Don’t skip this step! Knowing your soil’s pH and nutrient levels will help you choose the right amendments. You can buy a soil testing kit at most garden centers or send a sample to your local agricultural extension office.
* Clearing the Area: Remove any grass, weeds, rocks, and debris from your chosen spot. A shovel and a little elbow grease are your best friends here.
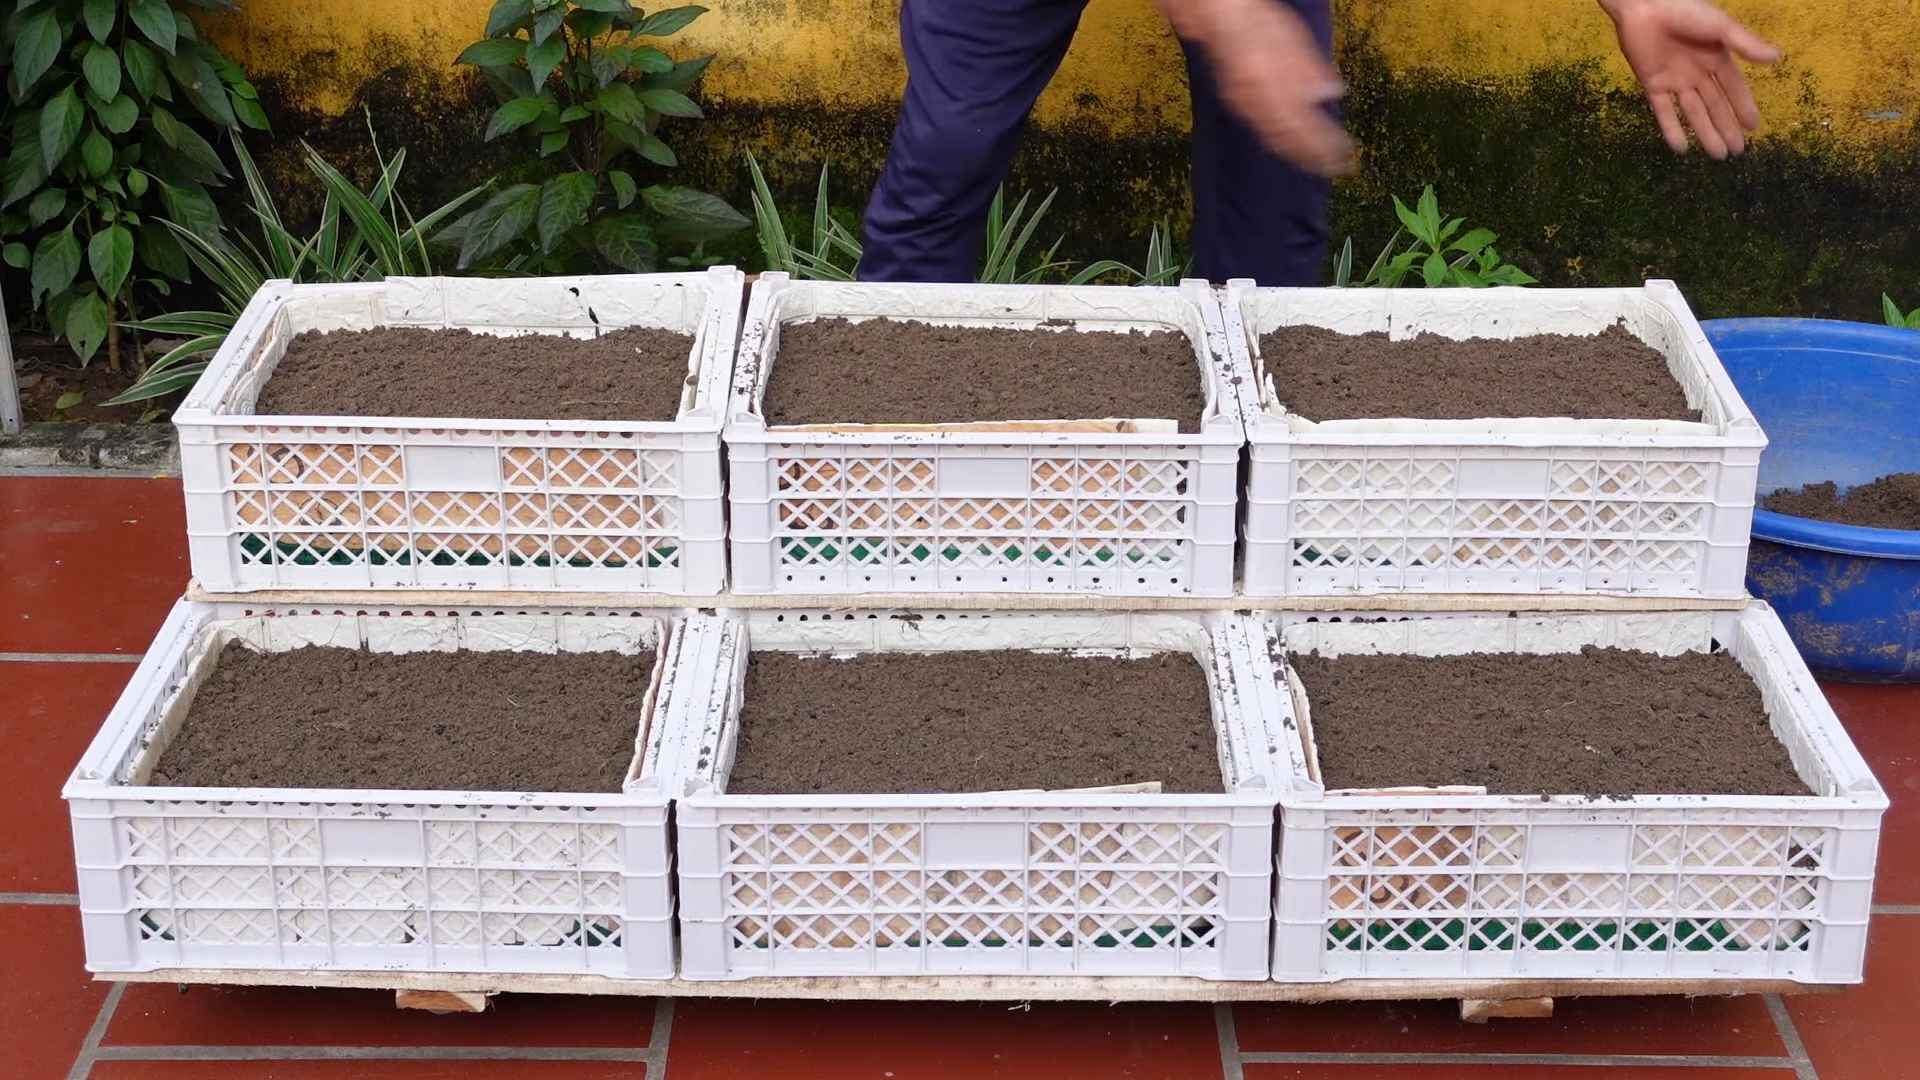
* Improving the Soil: Most garden soils benefit from amendments. Compost is your best friend! It adds nutrients, improves drainage, and helps retain moisture. Other options include aged manure, peat moss, and leaf mold.
Step-by-Step Soil Preparation:
1. Clear the Area: As mentioned, remove everything from the garden bed. This includes grass, weeds (roots and all!), rocks, and any other debris. A garden fork can be helpful for loosening the soil and pulling out weeds.
2. Loosen the Soil: Use a garden fork or tiller to loosen the soil to a depth of at least 12 inches. This will allow roots to penetrate easily and improve drainage.
3. Amend the Soil: Spread a 2-4 inch layer of compost over the entire area. If your soil test indicated other deficiencies, add the appropriate amendments according to the instructions on the product. For example, if your soil is acidic, you might add lime.
4. Incorporate the Amendments: Use a garden fork or tiller to thoroughly mix the compost and other amendments into the soil. Aim for a uniform consistency.
5. Rake Smooth: Rake the surface of the garden bed smooth, removing any large clumps or rocks that may have surfaced.
6. Water Thoroughly: Water the prepared bed thoroughly to help settle the soil and activate the amendments.
Choosing Your Vegetables
Now for the fun part! Think about what you like to eat and what grows well in your climate.
* Consider Your Climate: Different vegetables thrive in different climates. Check your local planting calendar to see which vegetables are best suited for your region and when to plant them.
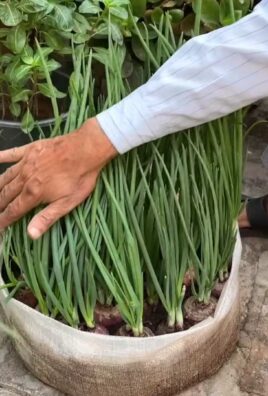
* Start Small: Don’t try to grow everything at once! Begin with a few easy-to-grow vegetables like tomatoes, lettuce, zucchini, and herbs.
* Think About Space: Some vegetables, like pumpkins and watermelons, need a lot of space. Others, like lettuce and radishes, can be grown in a small area.
* Consider Companion Planting: Some plants benefit each other when grown together. For example, basil repels pests that attack tomatoes. Research companion planting to maximize your garden’s productivity.
* Decide on Seeds or Seedlings: You can start vegetables from seeds or buy seedlings (small plants) from a garden center. Starting from seeds is cheaper, but it requires more time and effort. Seedlings are more expensive, but they give you a head start.
Starting Seeds Indoors (Optional)
Starting seeds indoors gives you a jump on the growing season, especially in colder climates.
* Gather Your Supplies: You’ll need seed starting trays or pots, seed starting mix, seeds, a heat mat (optional), and a grow light (optional).
* Plant the Seeds: Follow the instructions on the seed packet for planting depth and spacing.
* Provide Warmth and Light: Keep the seed starting trays warm and moist. A heat mat can help speed up germination. Once the seedlings emerge, provide them with plenty of light. A grow light is ideal, but a sunny windowsill can also work.
* Harden Off the Seedlings: Before transplanting the seedlings outdoors, you need to “harden them off” by gradually exposing them to outdoor conditions. Start by placing them outside for a few hours each day, gradually increasing the amount of time they spend outdoors over the course of a week or two.
Step-by-Step Seed Starting:
1. Prepare Your Seed Starting Trays: Fill your seed starting trays or pots with seed starting mix. Gently tap the trays to settle the mix.
2. Sow the Seeds: Follow the instructions on your seed packet for the correct planting depth and spacing. Generally, you’ll make a small indentation in the soil, drop in the seed, and gently cover it with soil.
3. Water Gently: Water the seed starting trays gently to avoid disturbing the seeds. A spray bottle works well for this.
4. Provide Warmth: Place the seed starting trays on a heat mat (if using) or in a warm location. The ideal temperature for germination varies depending on the vegetable, so check your seed packet.
5. Maintain Moisture: Keep the seed starting mix consistently moist, but not soggy. You can cover the trays with a clear plastic dome or plastic wrap to help retain moisture.
6. Provide Light: Once the seedlings emerge, remove the plastic dome and provide them with plenty of light. A grow light is ideal, but a sunny windowsill can also work. Rotate the trays regularly to ensure that the seedlings receive even light.
7. Thin the Seedlings: If more than one seedling emerges in each cell, thin them out by snipping off the weaker seedlings at the soil line. This will give the remaining seedlings more room to grow.
8. Harden Off: About a week or two before you plan to transplant the seedlings outdoors, begin hardening them off. Place them outside for a few hours each day, gradually increasing the amount of time they spend outdoors. Protect them from strong winds and direct sunlight during the hardening off process.
Planting Your Vegetables
Whether you’re transplanting seedlings or planting seeds directly in the garden, proper planting is essential.
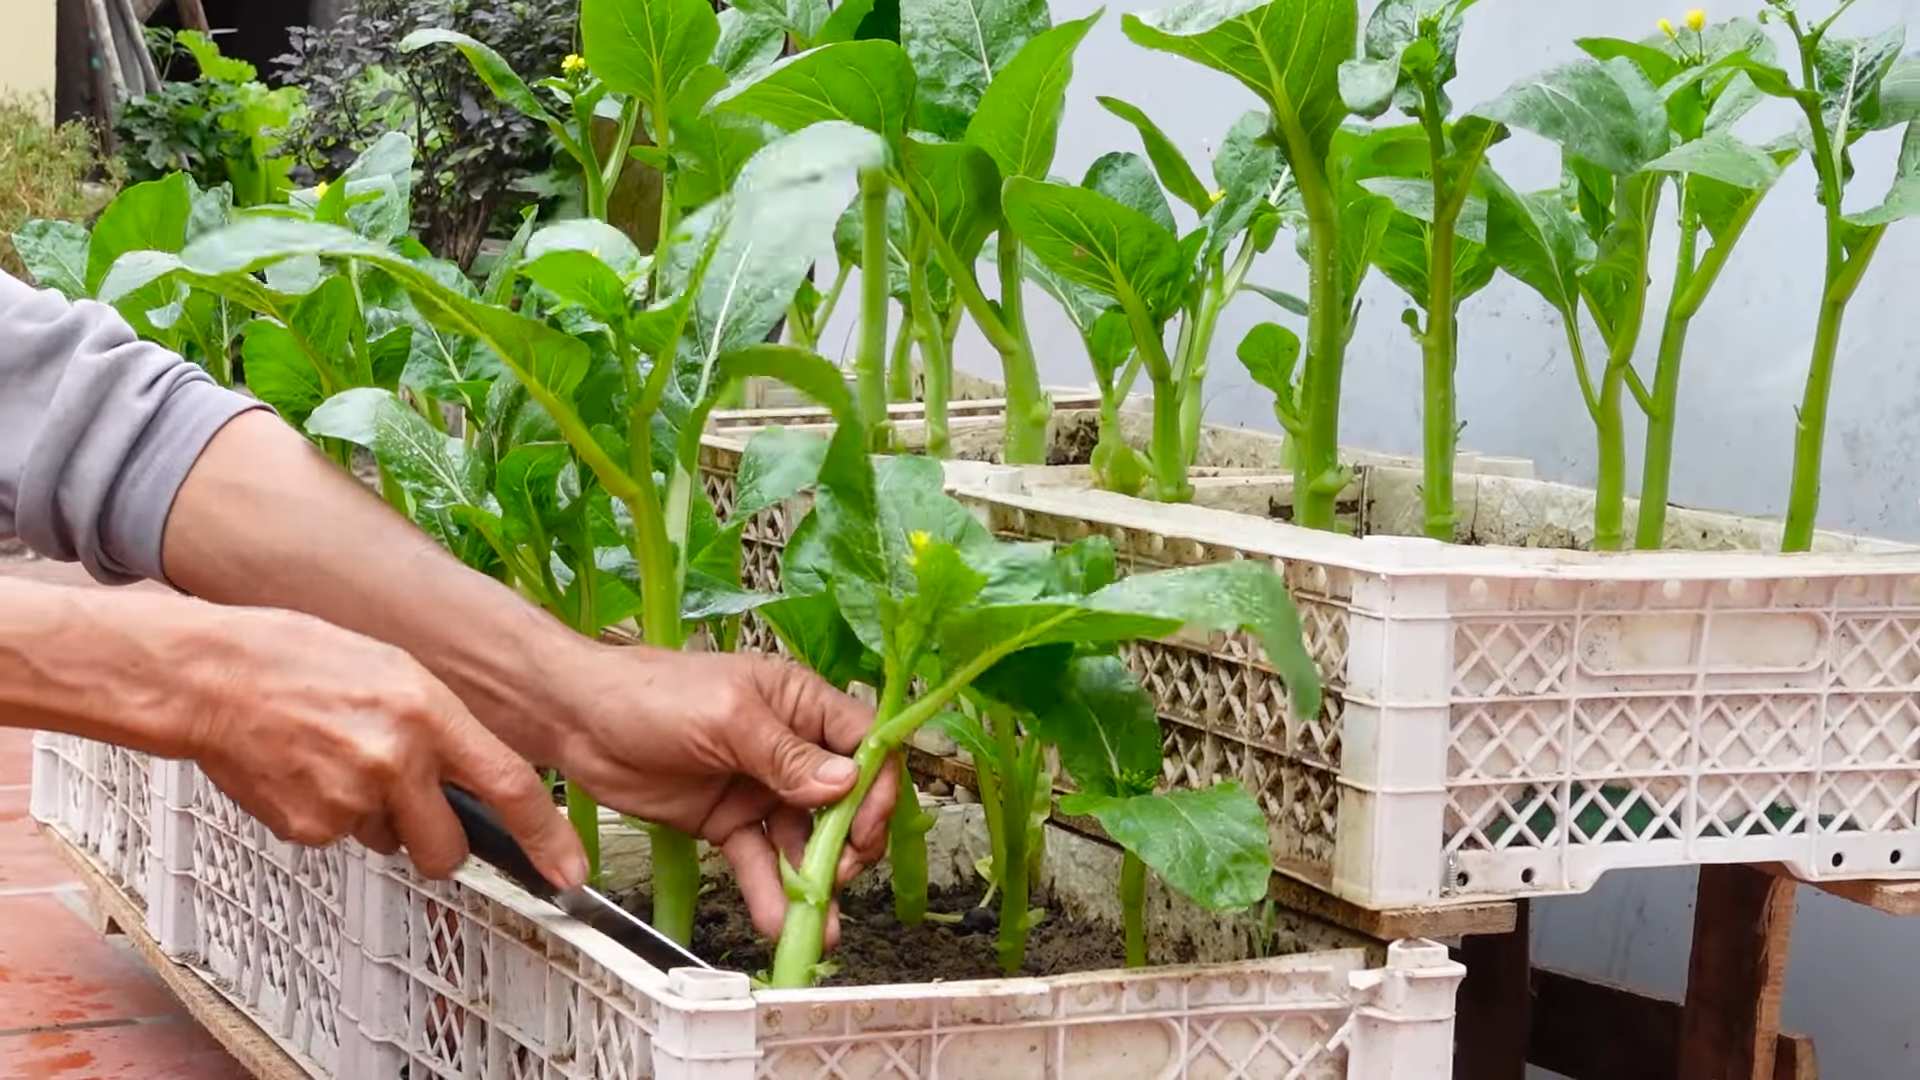
* Follow Spacing Guidelines: Give your vegetables enough space to grow. Overcrowding can lead to disease and reduced yields. Check the seed packet or plant tag for spacing recommendations.
* Plant at the Correct Depth: Planting too deep or too shallow can also affect growth. Again, follow the instructions on the seed packet or plant tag.
* Water Thoroughly: After planting, water the vegetables thoroughly to help them establish their roots.
* Mulch: Apply a layer of mulch around the plants to help retain moisture, suppress weeds, and regulate soil temperature. Straw, wood chips, and shredded leaves are all good options.
Step-by-Step Planting:
1. Prepare the Planting Hole: Dig a hole that is slightly larger than the root ball of the seedling or the recommended depth for the seed.
2. Amend the Planting Hole (Optional): You can add a small amount of compost or fertilizer to the planting hole to give the plant a boost.
3. Remove the Seedling from its Container: Gently squeeze the sides of the container to loosen the root ball. Carefully remove the seedling from the container, being careful not to damage the roots.
4. Loosen the Root Ball: If the roots are tightly bound, gently loosen them with your fingers.
5. Place the Seedling in the Hole: Place the seedling in the hole, making sure that the top of the root ball is level with the surrounding soil. For seeds, follow the instructions on the seed packet for planting depth.
6. Backfill the Hole: Fill the hole with soil, gently firming it around the plant.
7. Water Thoroughly: Water the plant thoroughly to help settle the soil and establish the roots.
8. Mulch: Apply a layer of mulch around the plant to help retain moisture, suppress weeds, and regulate soil temperature.
Caring for Your Vegetable Garden
Once your vegetables are planted, you need to provide them with ongoing care to ensure a bountiful harvest.
* Water Regularly: Water deeply and regularly, especially during dry spells. Aim to water at the base of the plants to avoid wetting the foliage, which can lead to disease.
* Fertilize as Needed: Vegetables need nutrients to grow. Fertilize regularly with a balanced fertilizer or a fertilizer specifically formulated for vegetables. Follow the instructions on the fertilizer label.
* Weed
Conclusion
So, there you have it! Taking the leap and learning to grow vegetables at home is more than just a trendy hobby; it’s a rewarding journey that connects you to your food, saves you money, and enhances your well-being. We’ve explored a simple yet effective DIY trick that can significantly boost your success, even if you’re a complete beginner with limited space.
This isn’t just about saving a few dollars at the grocery store; it’s about experiencing the unparalleled flavor of freshly harvested produce, knowing exactly where your food comes from, and reducing your environmental footprint. Imagine biting into a sun-ripened tomato you nurtured from a tiny seed, or adding vibrant, fragrant herbs to your dishes that you snipped just moments before. That’s the magic of homegrown vegetables.
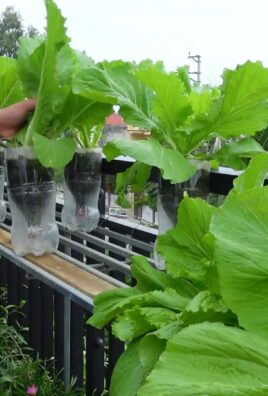
But the best part? This DIY trick is incredibly versatile. Feel free to experiment with different types of containers. Upcycled buckets, old tires (painted, of course!), or even repurposed dresser drawers can become thriving vegetable gardens. Consider companion planting to maximize space and deter pests naturally. Basil and tomatoes are a classic pairing, while marigolds can help keep nematodes away.
Don’t be afraid to adapt the soil mixture to suit the specific needs of your chosen vegetables. Leafy greens like a slightly more nitrogen-rich soil, while root vegetables prefer looser soil that allows for easy growth. Research the specific requirements of your plants and adjust accordingly.
And if you’re feeling adventurous, why not try succession planting? By staggering your planting times, you can ensure a continuous harvest throughout the growing season. Plant a new batch of lettuce every few weeks, or sow seeds for different varieties of tomatoes that mature at different times.
The possibilities are endless! The key is to start small, be patient, and learn from your experiences. Don’t get discouraged if you encounter setbacks along the way. Gardening is a learning process, and even experienced gardeners face challenges.
We wholeheartedly encourage you to give this DIY trick a try. It’s a simple, affordable, and effective way to kickstart your home vegetable garden and reap the many benefits of growing your own food.
Once you’ve given it a go, we’d love to hear about your experience! Share your successes, your challenges, and any variations you’ve tried in the comments below. Let’s build a community of home gardeners and inspire each other to grow more of our own food. What vegetables are you most excited to grow? What challenges are you anticipating? Let’s learn together!
Remember, the journey to a thriving home garden starts with a single seed. So, grab your supplies, get your hands dirty, and start growing! You’ll be amazed at what you can achieve. Happy gardening!
Frequently Asked Questions (FAQ)
What if I don’t have a lot of sunlight?
Sunlight is crucial for vegetable growth, but even if you have limited sunlight, you can still grow certain vegetables successfully. Leafy greens like lettuce, spinach, and kale can tolerate partial shade, requiring only about 4-6 hours of direct sunlight per day. Root vegetables like radishes and carrots can also grow in partial shade. Consider using grow lights to supplement natural sunlight, especially during the shorter days of the year. Position your containers in the sunniest spot available, and rotate them regularly to ensure even light exposure. You can also choose varieties of vegetables that are specifically bred for shade tolerance.
What kind of soil should I use?
The ideal soil for growing vegetables is a well-draining, nutrient-rich mix. Avoid using garden soil directly in containers, as it can become compacted and doesn’t drain well. A good starting point is a mix of equal parts potting soil, compost, and perlite or vermiculite. Potting soil provides a good base, compost adds nutrients and improves drainage, and perlite or vermiculite helps to aerate the soil and prevent compaction. You can also purchase pre-mixed vegetable potting mixes from garden centers. Amend the soil with organic fertilizers like bone meal or blood meal to provide essential nutrients for healthy growth.
How often should I water my vegetables?
Watering frequency depends on several factors, including the type of vegetable, the weather, and the type of container. Generally, you should water your vegetables when the top inch of soil feels dry to the touch. Avoid overwatering, as this can lead to root rot. Water deeply and thoroughly, ensuring that the water reaches the roots. During hot, dry weather, you may need to water daily. Use a watering can or a hose with a gentle spray nozzle to avoid damaging the plants. Consider using a moisture meter to accurately gauge the moisture level in the soil.
How do I deal with pests and diseases?
Prevention is key when it comes to pests and diseases. Start by choosing disease-resistant varieties of vegetables. Inspect your plants regularly for signs of pests or diseases. Remove any affected leaves or plants immediately. Use organic pest control methods, such as insecticidal soap, neem oil, or diatomaceous earth. Attract beneficial insects to your garden, such as ladybugs and lacewings, which prey on common pests. Avoid overcrowding your plants, as this can create a humid environment that is conducive to disease. Ensure good air circulation by pruning your plants regularly.
What if I don’t have a green thumb?
Don’t worry! Gardening is a skill that can be learned. Start with easy-to-grow vegetables like lettuce, spinach, radishes, and herbs. These vegetables are relatively low-maintenance and can tolerate some neglect. Read up on the specific requirements of the vegetables you want to grow. Join a local gardening club or online forum to connect with other gardeners and learn from their experiences. Don’t be afraid to experiment and make mistakes. Gardening is a learning process, and even experienced gardeners face challenges. The most important thing is to have fun and enjoy the process of growing your own food. Remember, even a small harvest is a success!
Can I really save money by growing my own vegetables?
Absolutely! While there is an initial investment in seeds, soil, and containers, growing your own vegetables can save you money in the long run. Homegrown vegetables are often fresher and more flavorful than store-bought produce, and you can avoid the cost of transportation and packaging. You can also grow organic vegetables without paying the premium price at the grocery store. By growing your own food, you can reduce your reliance on the commercial food system and save money on your grocery bill. Plus, the satisfaction of harvesting your own food is priceless!
What are some good vegetables to start with for beginners?
Some excellent choices for beginner gardeners include:
* **Lettuce:** Easy to grow from seed and provides a continuous harvest.
* **Radishes:** Fast-growing and require minimal care.
* **Spinach:** Tolerates partial shade and provides a nutritious harvest.
* **Herbs (Basil, Mint, Chives):** Relatively low-maintenance and add flavor to your dishes.
* **Tomatoes (Determinate Varieties):** Bush-type tomatoes that don’t require staking and are relatively easy to manage.
* **Zucchini:** Prolific producers that are relatively pest-resistant.
* **Green Beans:** Easy to grow from seed and provide a bountiful harvest.
These vegetables are generally forgiving and can tolerate some beginner mistakes. They are also relatively quick to mature, so you’ll see results relatively quickly, which can be encouraging.
Leave a Comment