

Grow Taro at Home Organically? Absolutely! Imagine harvesting your own creamy, nutty-flavored taro root, right from your backyard. It’s easier than you think, and I’m here to guide you through the process with some simple DIY tricks and hacks. For centuries, taro has been a staple food in many cultures, particularly in the Pacific Islands, Asia, and Africa. It’s more than just a food source; it’s deeply intertwined with cultural traditions and sustainable living.
But why should you bother growing taro at home? Well, store-bought taro can be expensive and sometimes hard to find. Plus, growing your own ensures you know exactly what’s going into your food – no harmful pesticides or chemicals! I’ve found that the satisfaction of nurturing a plant from start to finish, and then enjoying the fruits (or in this case, the roots!) of your labor, is incredibly rewarding. This DIY guide will provide you with the knowledge and confidence to successfully grow taro at home organically, even if you’re a complete beginner. Get ready to get your hands dirty and enjoy the delicious rewards!
Growing Taro Organically at Home: A Beginner’s Guide
Hey there, fellow plant enthusiasts! Ever thought about growing your own taro? It’s a fantastic plant, not only for its delicious and versatile corms (the underground stems we eat) but also for its beautiful, large leaves that can add a tropical vibe to your garden or even your indoor space. And the best part? You can absolutely grow it organically! I’m going to walk you through everything you need to know to successfully cultivate taro at home, from choosing the right variety to harvesting your own homegrown goodness.
Choosing Your Taro Variety
Before we dive into the nitty-gritty, let’s talk about taro varieties. There are many different types, each with its own unique characteristics. Some are better suited for drier conditions, while others thrive in waterlogged environments. Some are known for their sweeter corms, while others have a more savory flavor.
* Dryland Taro: These varieties are more tolerant of drier soil conditions and are a good choice if you don’t have a consistently wet area to grow your taro.
* Wetland Taro: As the name suggests, these varieties prefer to be grown in flooded or very wet conditions. If you have a pond or a boggy area in your garden, wetland taro might be perfect for you.
* Edible Leaf Varieties: Some taro varieties are specifically grown for their leaves, which can be cooked and eaten like spinach. These are a great option if you’re looking for a dual-purpose plant.
I recommend doing a little research to find a variety that’s well-suited to your local climate and growing conditions. Your local nursery or agricultural extension office can be a great resource for finding the right taro variety for your area.
Preparing for Planting
Okay, so you’ve chosen your taro variety. Now it’s time to get ready for planting! This involves preparing your soil, choosing the right location, and gathering all the necessary supplies.
* Soil Preparation: Taro thrives in rich, well-draining soil that’s high in organic matter. If you’re planting in the ground, amend your soil with plenty of compost, aged manure, or other organic materials. If you’re planting in a container, use a high-quality potting mix that’s specifically formulated for vegetables.
* Location, Location, Location: Taro needs plenty of sunlight to grow and produce healthy corms. Choose a location that gets at least 6-8 hours of direct sunlight per day. If you’re growing wetland taro, make sure the area is consistently wet or flooded.
* Gather Your Supplies: Here’s a list of the things you’ll need to get started:
* Taro corms or slips (small shoots that grow from the corm)
* Compost or aged manure
* Potting mix (if planting in containers)
* Gardening gloves
* Shovel or trowel
* Watering can or hose
* Organic fertilizer (optional)
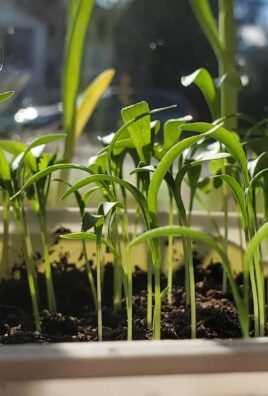
Planting Your Taro
Alright, let’s get our hands dirty! Here’s how to plant your taro, step by step:
1. Prepare the Planting Hole: Dig a hole that’s about twice as wide and as deep as the taro corm or slip.
2. Amend the Soil: Mix some compost or aged manure into the soil at the bottom of the hole. This will provide your taro with a boost of nutrients.
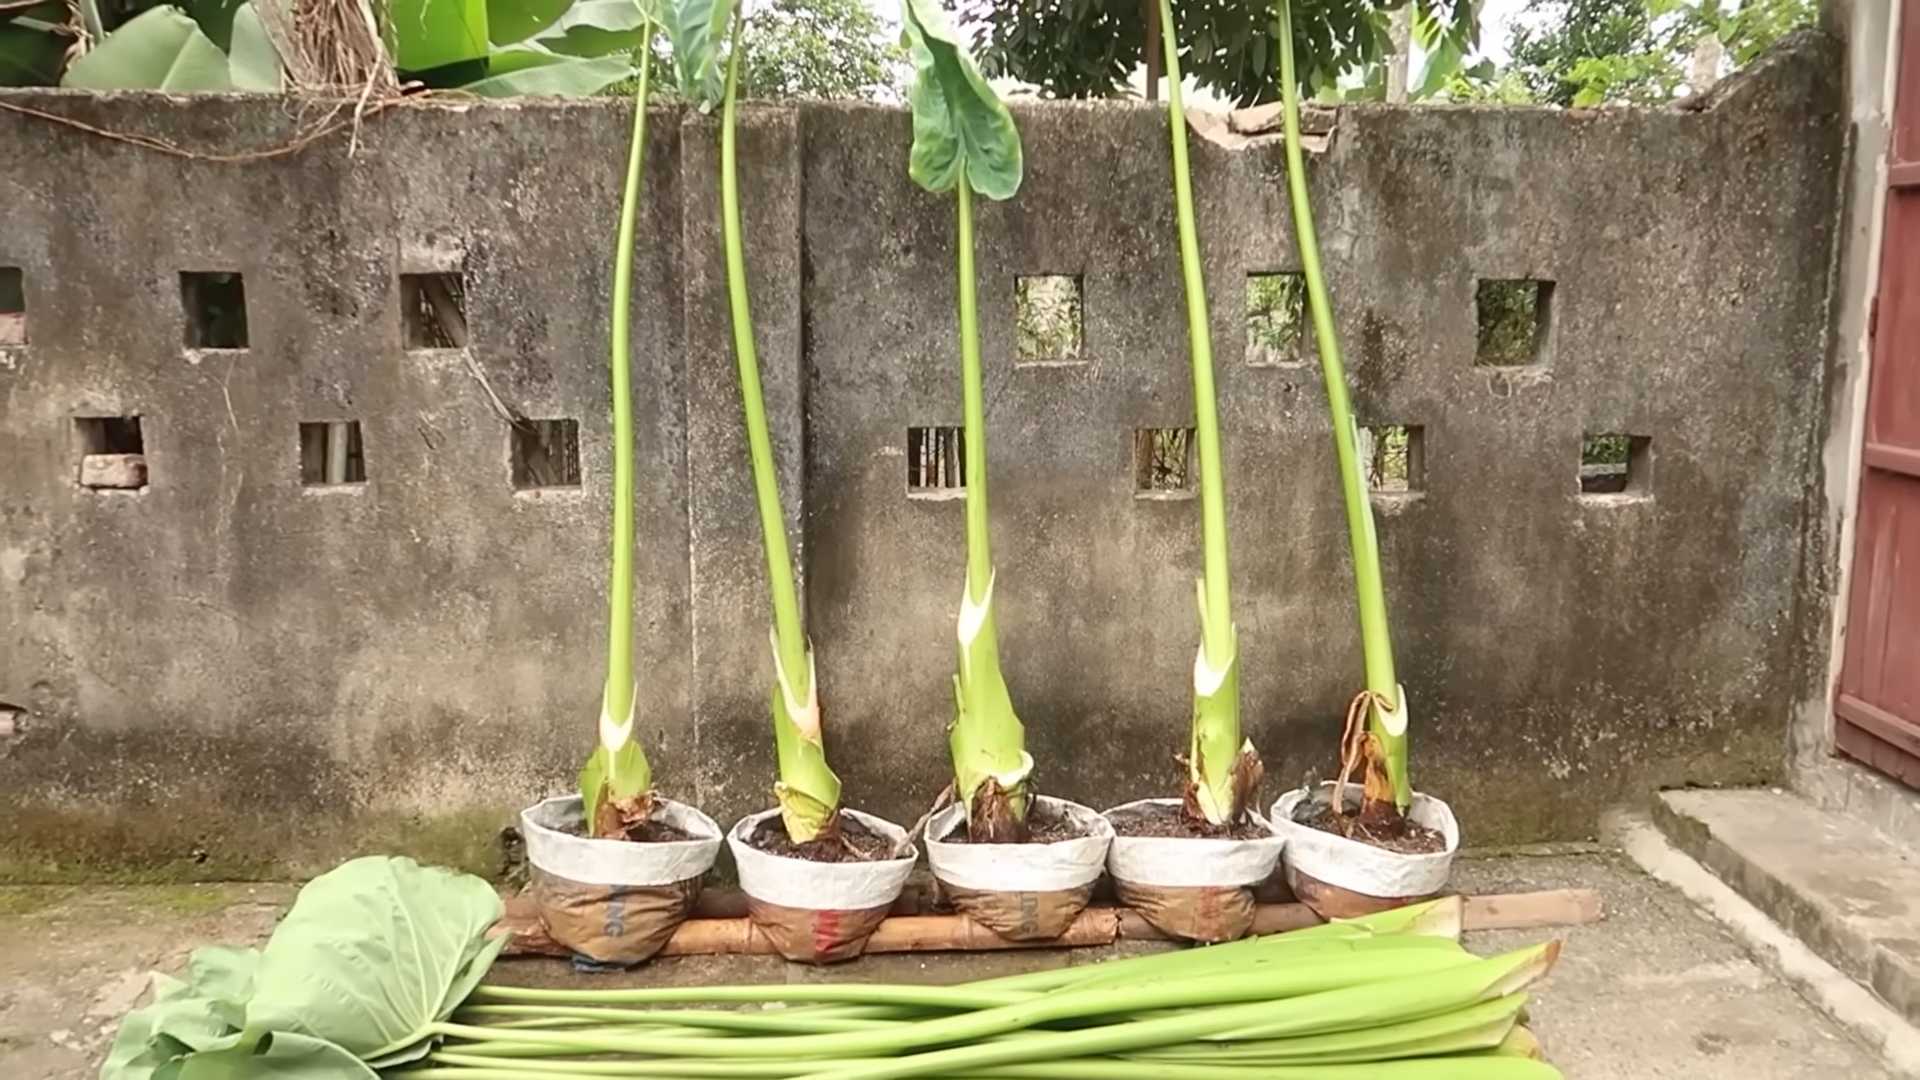
3. Plant the Corm or Slip: Place the taro corm or slip in the hole, making sure the top of the corm or the base of the slip is just below the soil surface.
4. Backfill the Hole: Gently backfill the hole with soil, being careful not to damage the corm or slip.
5. Water Thoroughly: Water the newly planted taro thoroughly to help settle the soil and encourage root growth.
Caring for Your Taro
Once your taro is planted, it’s important to provide it with the right care to ensure it grows and thrives. This includes watering, fertilizing, and protecting it from pests and diseases.
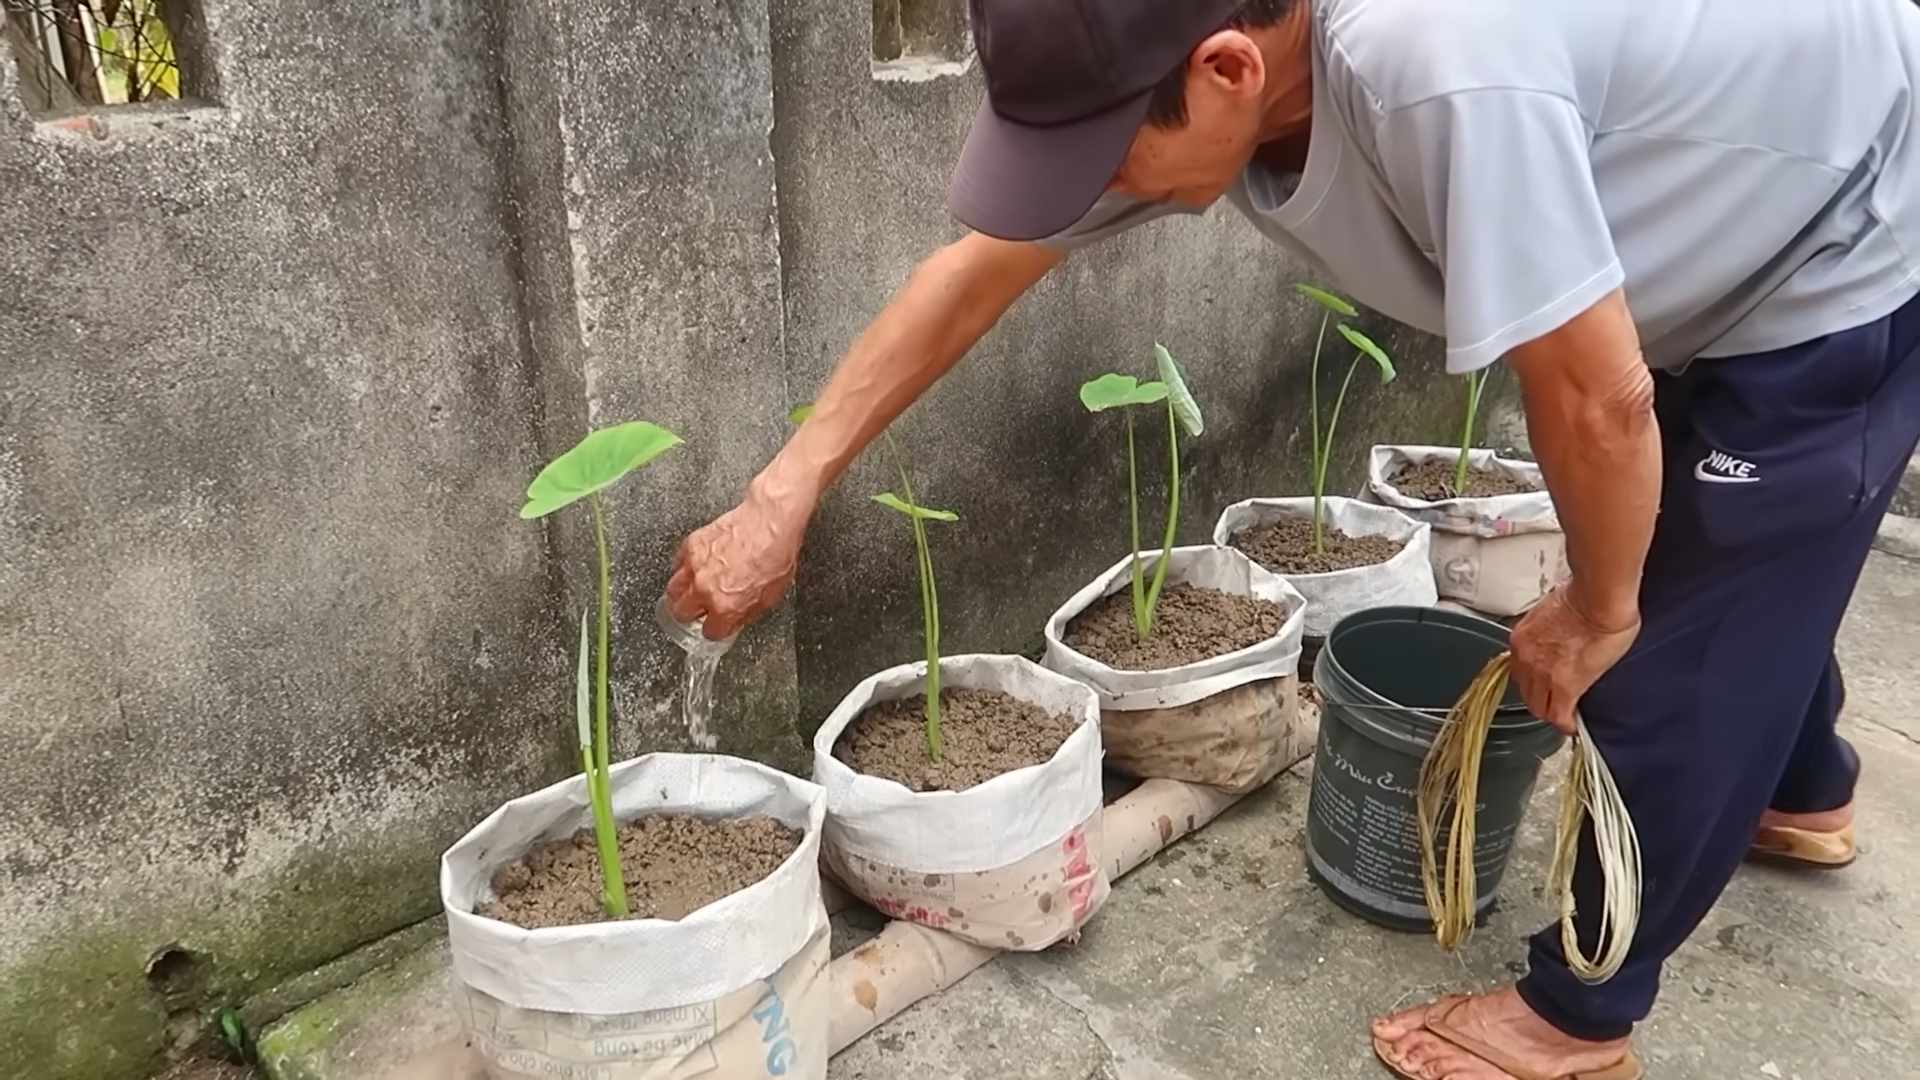
* Watering: Taro needs consistent moisture to grow well. Water your taro regularly, especially during dry periods. Wetland taro should be kept constantly flooded. Dryland taro should be watered deeply whenever the soil feels dry to the touch.
* Fertilizing: Taro is a heavy feeder, so it benefits from regular fertilization. Use an organic fertilizer that’s specifically formulated for vegetables. Apply the fertilizer according to the package directions. I like to use compost tea as a gentle, organic fertilizer.
* Weeding: Keep the area around your taro free of weeds. Weeds can compete with your taro for nutrients and water.
* Pest and Disease Control: Taro is generally resistant to pests and diseases, but it can be susceptible to certain problems, such as aphids, spider mites, and fungal diseases. Inspect your taro regularly for signs of pests or diseases. If you find any problems, treat them promptly with an organic insecticide or fungicide. Neem oil is a great organic option for controlling many common pests.
Harvesting Your Taro
The moment we’ve all been waiting for! Harvesting your own homegrown taro is a rewarding experience. Here’s how to know when your taro is ready to harvest and how to do it:
* When to Harvest: Taro is typically ready to harvest about 6-12 months after planting, depending on the variety and growing conditions. The leaves will start to turn yellow and die back when the corms are mature.
* How to Harvest: To harvest your taro, carefully dig around the base of the plant with a shovel or trowel. Gently lift the plant out of the ground, being careful not to damage the corms.
* Cleaning and Curing: Once you’ve harvested your taro, clean the corms with water to remove any dirt or debris. Allow the corms to cure in a cool, dry place for a few days before storing or cooking them. Curing helps to improve the flavor and texture of the corms.
Growing Taro in Containers
Don’t have a garden? No problem! You can absolutely grow taro in containers. Here’s what you need to know:
* Choose the Right Container: Select a large container that’s at least 12 inches in diameter and 12 inches deep. Make sure the container has drainage holes to prevent waterlogging.
* Use a Good Potting Mix: Fill the container with a high-quality potting mix that’s specifically formulated for vegetables.
* Plant and Care for Your Taro: Plant and care for your taro in the container as you would in the ground. Be sure to water it regularly and fertilize it as needed.
* Consider a Water Tray: For wetland varieties, place the container in a tray of water to keep the soil consistently moist.
Troubleshooting Common Problems
Even with the best care, you might encounter some problems when growing taro. Here are a few common issues and how to address them:
* Yellowing Leaves: Yellowing leaves can be a sign of overwatering, underwatering, nutrient deficiency, or pest infestation. Check the soil moisture and adjust your watering accordingly. Fertilize your taro with an organic fertilizer. Inspect the leaves for signs of pests.
* Stunted Growth: Stunted growth can be caused by poor soil, lack of sunlight, or pest infestation. Amend your soil with compost or aged manure. Make sure your taro is getting enough sunlight. Check the leaves for signs of pests.
* Root Rot: Root rot is a fungal disease that can occur in waterlogged soil. Make sure your soil is well-draining. Avoid overwatering. If you suspect root rot, remove the affected plant from the soil and trim away any rotten roots. Replant the taro in fresh soil.
Enjoying Your Homegrown Taro
Now that you’ve successfully grown your own taro, it’s time to enjoy the fruits (or rather, corms) of your labor! Taro corms can be cooked in a variety of ways, including boiling, steaming, baking, and frying. They can be used in soups, stews, curries, and desserts. The leaves can also be cooked and eaten like spinach.
Important Note: Raw taro corms contain calcium oxalate crystals, which can cause irritation and discomfort if ingested. Always cook taro corms thoroughly before eating them. Cooking breaks down the calcium oxalate crystals and makes the taro safe to eat.
I hope this guide has inspired you to try growing your own taro at home. It’s a rewarding experience that will provide you with delicious and nutritious food, as well as a beautiful and unique plant to add to your garden or indoor space. Happy gardening!
Conclusion
So, there you have it! Growing taro at home organically isn’t just a gardening project; it’s an experience. It’s about connecting with nature, understanding the life cycle of a plant, and ultimately, enjoying the fruits (or rather, the corms and leaves) of your labor. We’ve walked you through the process, from selecting the right taro variety to nurturing it with organic methods, ensuring a healthy and sustainable harvest.
Why is this DIY trick a must-try? Because it empowers you to control the quality of your food. You know exactly what goes into your taro – no harmful pesticides, no synthetic fertilizers, just pure, organic goodness. Plus, there’s an undeniable satisfaction in harvesting something you’ve grown yourself. It’s a rewarding journey from start to finish.
But the adventure doesn’t stop here! Feel free to experiment with different growing mediums. While we’ve focused on a soil-based approach, you can also explore hydroponic or aquaponic systems for growing taro. Consider adding companion plants like basil or marigolds to deter pests naturally. You can also try different varieties of taro, each with its unique flavor and texture profile. Some varieties thrive better in drier conditions, while others prefer consistently moist soil. Researching and adapting your approach based on your local climate and resources is part of the fun.
Don’t be afraid to get your hands dirty and embrace the learning process. Gardening is all about trial and error, and every mistake is a valuable lesson. The key is to be patient, observant, and responsive to your taro plant’s needs.
We’ve provided you with a solid foundation, but the real magic happens when you personalize the process. Perhaps you’ll discover a unique organic fertilizer blend that works wonders for your taro. Or maybe you’ll develop a clever pest control strategy using ingredients from your own kitchen. The possibilities are endless!
Now, it’s your turn to embark on this exciting journey of growing taro at home organically. We’re confident that you’ll find it to be a fulfilling and rewarding experience. And we can’t wait to hear about your successes (and even your challenges!). Share your experiences, tips, and photos with us in the comments below. Let’s create a community of taro enthusiasts, sharing our knowledge and inspiring each other to grow our own food sustainably.
Remember, growing your own food is not just about saving money or having access to fresh produce. It’s about taking control of your health, reducing your environmental impact, and connecting with the natural world. So, grab your gardening gloves, gather your supplies, and get ready to experience the joy of growing taro at home organically! We are eager to see your taro thriving!
FAQ
What are the best taro varieties to grow at home?
The best taro varieties for home growing depend on your climate and growing conditions. In general, varieties like ‘Bun Long’ and ‘Lehua’ are popular choices for their adaptability and flavor. ‘Bun Long’ is known for its large corms and mild flavor, while ‘Lehua’ is prized for its reddish-purple leaves and slightly sweeter taste. Consider your local climate and soil conditions when making your selection. Contact your local agricultural extension office for recommendations specific to your region. Also, consider the size of your growing space. Some taro varieties can grow quite large, so choose one that fits comfortably in your garden or container.
How often should I water my taro plant?
Taro plants thrive in consistently moist soil. Water deeply whenever the top inch of soil feels dry to the touch. During hot and dry periods, you may need to water more frequently. Avoid overwatering, as this can lead to root rot. Ensure that your pot or garden bed has good drainage to prevent waterlogging. A good rule of thumb is to check the soil moisture daily and adjust your watering schedule accordingly. You can also use a moisture meter to get a more accurate reading of the soil’s moisture level.
What are some common pests and diseases that affect taro plants, and how can I control them organically?
Common pests that affect taro plants include aphids, spider mites, and taro hornworms. Diseases include root rot, leaf blight, and fungal infections. To control pests organically, you can use insecticidal soap, neem oil, or introduce beneficial insects like ladybugs. For diseases, ensure good air circulation, avoid overwatering, and use organic fungicides if necessary. Regularly inspect your plants for signs of pests or diseases and take action promptly. You can also create a homemade garlic spray by blending garlic cloves with water and spraying it on your plants to deter pests.
What kind of fertilizer should I use for growing taro organically?
Use a balanced organic fertilizer that is rich in nitrogen, phosphorus, and potassium. Compost, aged manure, and fish emulsion are excellent choices. Apply fertilizer every 4-6 weeks during the growing season. Avoid synthetic fertilizers, as they can harm the soil and the plant. You can also amend your soil with organic matter like compost or leaf mold to improve its fertility and drainage. Consider using a slow-release organic fertilizer to provide a steady supply of nutrients to your taro plant.
How long does it take for taro to mature and be ready for harvest?
Taro typically takes 7-12 months to mature, depending on the variety and growing conditions. You’ll know it’s ready to harvest when the leaves start to turn yellow and die back. The corms should be firm and well-developed. Gently dig up the plant and harvest the corms. You can also harvest the leaves for consumption, but be sure to cook them thoroughly to remove any calcium oxalate crystals.
Can I grow taro in a container?
Yes, you can grow taro in a container, but make sure it’s large enough to accommodate the plant’s root system. A container that is at least 18 inches in diameter and 18 inches deep is recommended. Use a well-draining potting mix and provide adequate sunlight and water. Container-grown taro may require more frequent watering and fertilization than taro grown in the ground. Choose a container with drainage holes to prevent waterlogging.
Are taro leaves edible?
Yes, taro leaves are edible, but they must be cooked thoroughly to remove calcium oxalate crystals, which can cause irritation. Boil or steam the leaves for at least 30 minutes before consuming them. Taro leaves are a popular ingredient in many cuisines and can be used in soups, stews, and other dishes. Always cook taro leaves thoroughly before eating them to avoid any adverse reactions.
How do I store harvested taro corms?
Store harvested taro corms in a cool, dry, and dark place. They can be stored for several weeks if properly stored. Avoid storing them in the refrigerator, as this can cause them to spoil more quickly. You can also freeze cooked taro corms for longer storage. Ensure the corms are dry before storing them to prevent mold growth.
What are the ideal soil conditions for growing taro?
Taro prefers well-draining soil that is rich in organic matter. The ideal pH range is between 5.5 and 6.5. Amend your soil with compost or other organic matter to improve its fertility and drainage. Avoid heavy clay soils, as they can become waterlogged and lead to root rot. Conduct a soil test to determine the pH and nutrient levels of your soil and amend it accordingly.
How much sunlight does taro need?
Taro needs at least 6 hours of sunlight per day. However, it can also tolerate partial shade, especially in hot climates. Provide your taro plant with adequate sunlight to ensure healthy growth and corm development. If you are growing taro indoors, place it near a sunny window or use grow lights to supplement the natural light.
Leave a Comment