

Grow peppers indoors in small pots? Absolutely! Imagine plucking fresh, vibrant peppers right from your windowsill, even when the snow is falling outside. It’s not just a dream; it’s a deliciously achievable reality with a few simple tricks and a dash of DIY spirit. For centuries, cultivating food indoors has been a necessity and a source of immense satisfaction. From ancient Roman greenhouses to modern-day urban farms, the desire to nurture life within our homes has always been strong.
But why should you bother learning how to grow peppers indoors in small pots? Well, think about it: fresh, organic peppers at your fingertips, a splash of vibrant green to brighten your living space, and the sheer joy of watching something grow from seed to fruit. Plus, it’s a fantastic way to extend the growing season, experiment with different pepper varieties, and even save money on groceries. This DIY guide will provide you with the knowledge and confidence to successfully cultivate these fiery fruits, even if you’re short on space or experience. So, grab your gardening gloves, and let’s get started on this exciting journey!
Growing Peppers Indoors: A Beginner’s Guide to Small-Pot Success
Hey there, fellow gardening enthusiasts! Ever dreamed of having fresh, spicy peppers right at your fingertips, even when the weather outside is frightful? Well, you’re in luck! Growing peppers indoors is totally achievable, even if you’re working with limited space and small pots. I’m going to walk you through everything you need to know to get started, from choosing the right peppers to troubleshooting common problems. Let’s get our hands dirty (figuratively, for now!) and grow some peppers!
Choosing the Right Pepper Variety
Not all peppers are created equal, especially when it comes to indoor growing. Some varieties are naturally more compact and better suited for container gardening. Here are a few of my favorites:
* ‘Thai Hot’ Peppers: These little guys pack a punch! They’re relatively small plants, producing tons of fiery peppers. Perfect for adding a kick to your dishes.
* ‘Jalapeño’ Peppers: A classic for a reason! Jalapeños are relatively easy to grow and produce a good yield, even in smaller pots.
* ‘Sweet Banana’ Peppers: If you prefer something milder, sweet banana peppers are a great choice. They’re prolific and have a lovely, slightly sweet flavor.
* ‘Poblano’ Peppers: These are larger than the others, but if you have a slightly bigger pot, they are worth it. They are great for stuffing or roasting.
* Ornamental Peppers: These are grown for their beauty as much as their flavor. They come in a range of colors and shapes, adding a vibrant touch to your indoor garden.
Important Tip: Always check the mature size of the pepper plant before you buy seeds or seedlings. You want to choose varieties that won’t outgrow your available space.
Gathering Your Supplies
Before we dive into the planting process, let’s make sure we have everything we need. Here’s a checklist:
* Pepper Seeds or Seedlings: Choose your desired variety from the list above.
* Small Pots (4-6 inches): These are perfect for starting your pepper plants. Make sure they have drainage holes!
* High-Quality Potting Mix: Avoid using garden soil, as it can compact and drain poorly. A good potting mix will provide the right nutrients and drainage for your peppers.
* Grow Lights (Optional, but Recommended): If you don’t have a sunny windowsill, grow lights will be essential for providing your peppers with the light they need to thrive.
* Watering Can or Spray Bottle: For gentle watering.
* Fertilizer: A balanced liquid fertilizer formulated for vegetables.
* Small Shovel or Trowel: For transplanting seedlings.
* Spray Bottle with Water: For misting the plants.
Planting Your Pepper Seeds or Seedlings
Okay, let’s get planting! This is where the magic happens.
Starting from Seeds:
1. Prepare Your Pots: Fill your small pots with potting mix, leaving about an inch of space at the top.
2. Sow the Seeds: Make a small indentation (about 1/4 inch deep) in the center of each pot. Place 2-3 pepper seeds in each indentation.
3. Cover the Seeds: Gently cover the seeds with potting mix.
4. Water Thoroughly: Water the pots gently until the soil is evenly moist.
5. Create a Humid Environment: Cover the pots with plastic wrap or a humidity dome to help retain moisture.
6. Provide Warmth: Place the pots in a warm location (around 70-80°F). A heat mat can be helpful.
7. Wait for Germination: Pepper seeds can take anywhere from 7 to 21 days to germinate, so be patient! Keep the soil consistently moist.
8. Remove the Cover: Once the seedlings emerge, remove the plastic wrap or humidity dome.
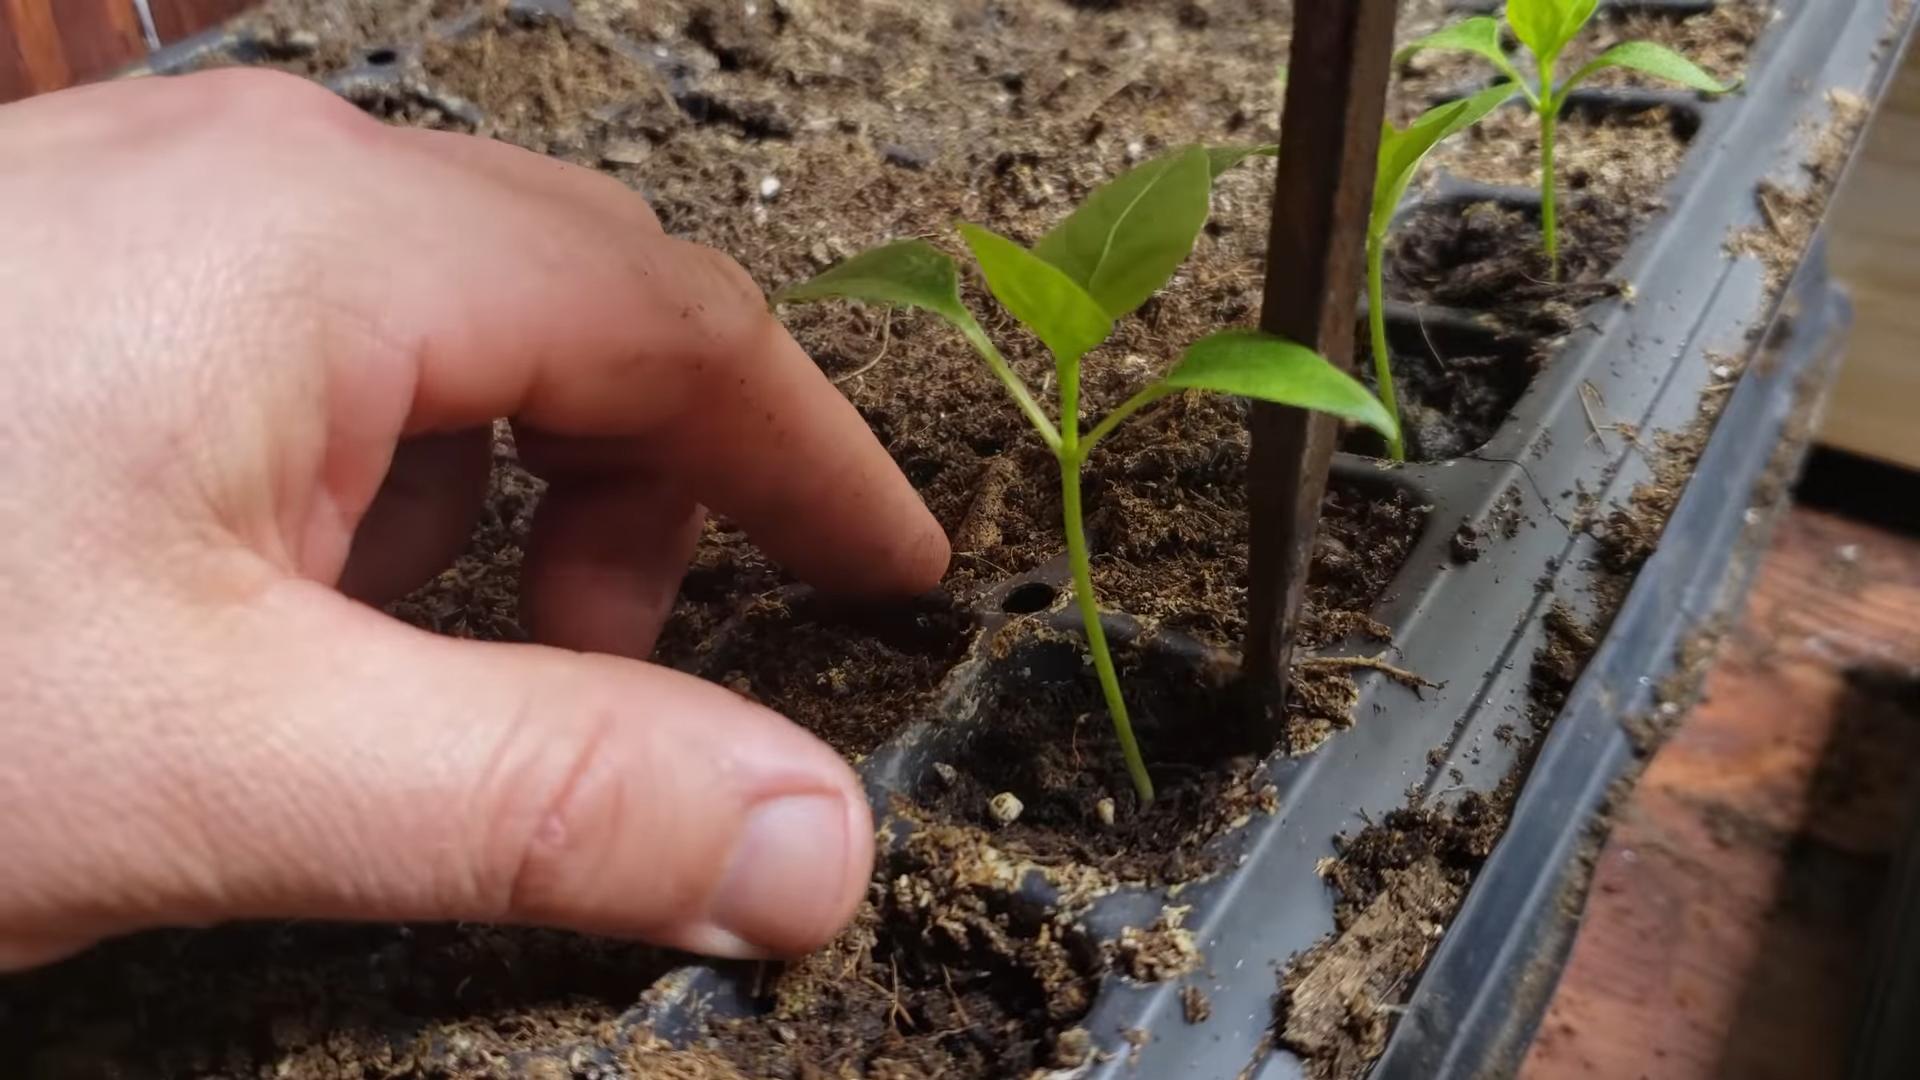
9. Thin the Seedlings: Once the seedlings have a few sets of true leaves, thin them to one plant per pot. Choose the strongest, healthiest-looking seedling and snip off the others at the soil line.
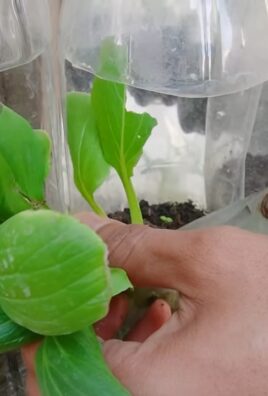
Transplanting Seedlings:
1. Prepare Your Pots: Fill your small pots with potting mix, leaving about an inch of space at the top.
2. Gently Remove the Seedling: Carefully remove the seedling from its original container, being careful not to damage the roots.
3. Create a Hole: Make a hole in the center of the pot that’s large enough to accommodate the seedling’s root ball.
4. Place the Seedling: Gently place the seedling in the hole, making sure the top of the root ball is level with the soil surface.
5. Fill with Soil: Fill in the hole with potting mix, gently firming the soil around the seedling.
6. Water Thoroughly: Water the pot gently until the soil is evenly moist.
Providing the Right Environment
Peppers are sun-loving plants, so providing them with the right environment is crucial for their success.
* Light: Peppers need at least 6-8 hours of sunlight per day. If you don’t have a sunny windowsill, invest in grow lights. Place the lights about 6-12 inches above the plants.
* Temperature: Peppers thrive in temperatures between 70-85°F during the day and 60-70°F at night.
* Humidity: Peppers prefer moderate humidity. You can increase humidity by misting the plants regularly or placing a tray of water near them.
* Air Circulation: Good air circulation helps prevent fungal diseases. A small fan can help.
Watering and Fertilizing
Proper watering and fertilizing are essential for healthy pepper plants.
* Watering: Water your peppers when the top inch of soil feels dry to the touch. Avoid overwatering, as this can lead to root rot. Water thoroughly, allowing excess water to drain out of the drainage holes.
* Fertilizing: Feed your peppers with a balanced liquid fertilizer every 2-3 weeks. Follow the instructions on the fertilizer label. During the flowering and fruiting stage, you can switch to a fertilizer that’s higher in phosphorus and potassium.
Pollinating Your Peppers
Peppers are self-pollinating, but they sometimes need a little help, especially indoors where there are no bees or wind to assist.
* Hand-Pollination: Use a small paintbrush or cotton swab to gently transfer pollen from one flower to another. You can also gently shake the plants to help release pollen.
Dealing with Pests and Diseases
Even indoors, your pepper plants can be susceptible to pests and diseases. Here are a few common problems and how to deal with them:
* Aphids: These tiny insects suck the sap from plants. You can control them by spraying the plants with insecticidal soap or neem oil.
* Spider Mites: These tiny pests create webs on plants. You can control them by spraying the plants with insecticidal soap or neem oil. Increasing humidity can also help.
* Whiteflies: These small, white insects fly around plants when disturbed. You can control them by using sticky traps or spraying the plants with insecticidal soap.
* Fungal Diseases: These can be caused by overwatering or poor air circulation. Prevent them by watering properly and providing good air circulation. If you see signs of fungal disease, remove the affected leaves and spray the plants with a fungicide.
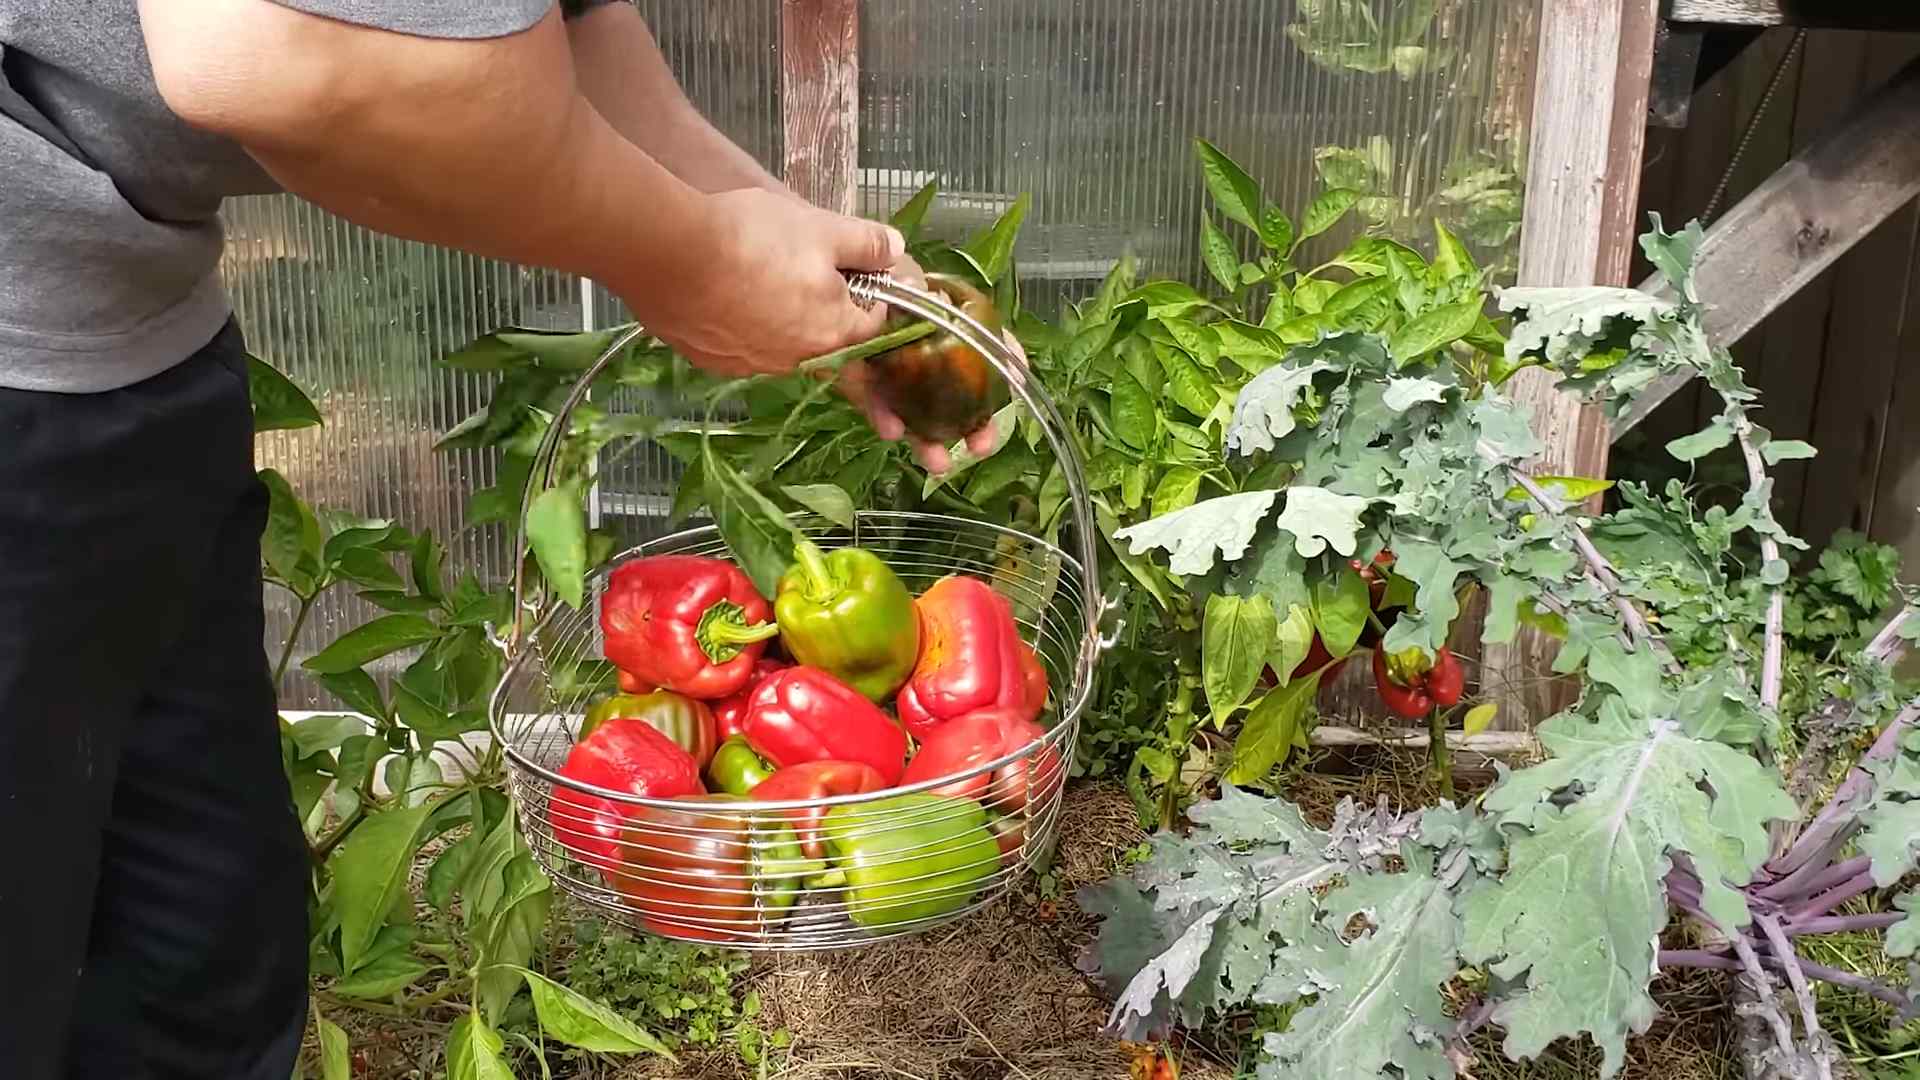
Harvesting Your Peppers
The moment you’ve been waiting for! Harvesting your peppers is the most rewarding part of the process.
* When to Harvest: Peppers are typically ready to harvest when they’ve reached their mature size and color. The exact timing will depend on the variety.
* How to Harvest: Use a sharp knife or scissors to cut the peppers from the plant. Be careful not to damage the plant.
Troubleshooting Common Problems
Even with the best care, you might encounter some problems along the way. Here are a few common issues and how to fix them:
* Yellowing Leaves: This can be caused by overwatering, underwatering, nutrient deficiencies, or pests. Check the soil moisture, fertilize the plants, and inspect for pests.
* Blossom Drop: This is when the flowers fall off the plant without producing fruit. It can be caused by temperature stress, lack of pollination, or nutrient deficiencies. Make sure the temperature is within the ideal range, hand-pollinate the flowers, and fertilize the plants.
* Stunted Growth: This can be caused by lack of light, poor soil, or pests. Provide adequate light, use a high-quality potting mix, and inspect for pests.
Moving to Bigger Pots
As your pepper plants grow, they may need to be transplanted into larger pots. This is especially true if you started them in very small containers.
Conclusion
So, there you have it! Growing peppers indoors in small pots might seem daunting at first, but with a little patience and these simple steps, you can enjoy fresh, homegrown peppers all year round. This DIY trick isn’t just about saving money; it’s about connecting with nature, understanding the growing process, and experiencing the unparalleled satisfaction of harvesting something you nurtured from seed.
Why is this a must-try? Because it puts you in control. You dictate the environment, the nutrients, and the care your peppers receive, resulting in a potentially higher yield and superior flavor compared to store-bought varieties. Imagine the vibrant colors and spicy aromas filling your kitchen, a constant reminder of your green thumb prowess. Plus, it’s a fantastic conversation starter!
Don’t be afraid to experiment! Try different varieties of peppers to discover your favorites. Jalapeños, bell peppers, habaneros – the possibilities are endless. You can also explore different potting mixes to find what works best for your growing conditions. Consider adding companion plants like basil or marigolds to your indoor garden to deter pests and enhance the flavor of your peppers. Another variation is to use self-watering pots to simplify the watering process, especially if you tend to forget. You can also try different lighting solutions, from simple grow lights to more advanced LED systems, to optimize pepper growth.
This method of growing peppers indoors is a game-changer for anyone who loves fresh produce and enjoys a hands-on approach to gardening.
But the real magic happens when you share your experience. Did you discover a particularly effective fertilizer? Did you find a unique way to support your pepper plants? Did you encounter any challenges and how did you overcome them? Share your tips, tricks, and triumphs in the comments below! Let’s build a community of indoor pepper growers and learn from each other.
We encourage you to take the plunge and try this DIY trick for growing peppers indoors. You might be surprised at how rewarding and enjoyable it is. Not only will you have a steady supply of fresh peppers, but you’ll also gain a deeper appreciation for the natural world. So, grab your seeds, your pots, and your enthusiasm, and get ready to embark on a flavorful adventure! We can’t wait to hear about your success! Remember, the key to successful indoor pepper growing is consistent care and attention. Check your plants regularly for pests and diseases, and adjust your watering and fertilizing schedule as needed. With a little effort, you’ll be enjoying homegrown peppers in no time.
Frequently Asked Questions (FAQ)
Q: What type of peppers are best for growing indoors in small pots?
A: Smaller pepper varieties like jalapeños, habaneros, Thai peppers, and certain bell pepper cultivars (specifically bred for container gardening) tend to thrive best in small pots. These varieties generally have a more compact growth habit and don’t require as much space as larger pepper plants. Look for seeds or seedlings specifically labeled as “container-friendly” or “dwarf” for optimal results.
Q: What size pot is considered “small” for growing peppers indoors?
A: A “small” pot for growing peppers indoors typically ranges from 3 to 5 gallons. While you can start seedlings in smaller containers, you’ll eventually need to transplant them into a larger pot to accommodate their root system. A 5-gallon pot provides ample space for the roots to develop and support healthy pepper production. Ensure the pot has adequate drainage holes to prevent waterlogging.
Q: What type of soil should I use for growing peppers in small pots?
A: Use a well-draining potting mix specifically formulated for containers. Avoid using garden soil, as it can become compacted and doesn’t provide adequate drainage. A good potting mix will contain ingredients like peat moss, perlite, and vermiculite, which help retain moisture while allowing excess water to drain away. You can also amend the potting mix with compost or other organic matter to provide additional nutrients.
Q: How much sunlight do indoor peppers need?
A: Peppers require at least 6-8 hours of direct sunlight per day to thrive. If you don’t have a sunny window, you’ll need to supplement with grow lights. LED grow lights are a great option, as they are energy-efficient and provide the full spectrum of light that peppers need. Position the grow lights a few inches above the plants and adjust the height as they grow.
Q: How often should I water my indoor pepper plants?
A: Water your pepper plants when the top inch of soil feels dry to the touch. Avoid overwatering, as this can lead to root rot. Water deeply, ensuring that the water drains out of the drainage holes. The frequency of watering will depend on factors like the size of the pot, the type of potting mix, and the temperature and humidity of your home.
Q: What kind of fertilizer should I use for indoor pepper plants?
A: Use a balanced fertilizer specifically formulated for vegetables. Look for a fertilizer with an NPK ratio (nitrogen, phosphorus, potassium) of around 5-10-5 or 10-10-10. Fertilize your pepper plants every 2-3 weeks during the growing season. Follow the instructions on the fertilizer label for proper application rates. You can also use organic fertilizers like compost tea or fish emulsion.
Q: How do I pollinate my indoor pepper plants?
A: Peppers are self-pollinating, but indoor plants may need a little help. You can hand-pollinate your peppers by gently shaking the plants or using a small paintbrush to transfer pollen from one flower to another. You can also use a fan to circulate air around the plants, which can help with pollination.
Q: How do I deal with pests on my indoor pepper plants?
A: Common pests that can affect indoor pepper plants include aphids, spider mites, and whiteflies. Inspect your plants regularly for signs of infestation. If you find pests, you can try spraying them with insecticidal soap or neem oil. You can also manually remove pests by hand.
Q: How long does it take for peppers to grow indoors?
A: The time it takes for peppers to grow indoors depends on the variety and growing conditions. Generally, it takes about 60-90 days from transplanting to harvest. Be patient and provide your plants with the care they need, and you’ll be rewarded with a bountiful harvest.
Q: Can I grow peppers indoors year-round?
A: Yes, you can grow peppers indoors year-round, provided you provide them with adequate light, water, and nutrients. You may need to adjust your growing practices depending on the season. For example, you may need to use grow lights more during the winter months.
Leave a Comment