

Grow Melons at Home, even if you think you don’t have the space! Imagine biting into a juicy, sun-ripened melon you nurtured from a tiny seed, right in your own backyard (or balcony!). Sounds like a dream, right? Well, it doesn’t have to be! This article is packed with DIY tricks and hacks that will transform you into a melon-growing maestro, regardless of your gardening experience.
Melons have a rich history, dating back to ancient Egypt and beyond, where they were prized for their sweetness and refreshing qualities. For centuries, cultivating these delicious fruits was seen as a sign of prosperity and skill. Today, while we can easily buy melons at the store, there’s something incredibly satisfying about growing your own.
But let’s be honest, growing melons can seem intimidating. They’re often perceived as demanding plants that require vast amounts of space and expert knowledge. That’s where these DIY tricks come in! I’m going to share simple, effective techniques to help you grow melons at home successfully, even if you’re short on space or time. From choosing the right varieties to clever trellising methods and DIY pest control, we’ll cover everything you need to know to enjoy a bountiful melon harvest. So, grab your gardening gloves, and let’s get started!
Growing Melons at Home: A Sweet DIY Project
Hey there, fellow gardening enthusiasts! I’m so excited to share my experience with growing melons at home. It might seem daunting, but trust me, with a little patience and these simple steps, you’ll be enjoying juicy, homegrown melons in no time. Let’s dive in!
Choosing Your Melon Variety
First things first, you need to decide what kind of melon you want to grow. This is crucial because different varieties have different needs and growing times. Here are a few popular options:
* **Watermelon:** A classic summer favorite! Look for smaller, bush-type varieties if you have limited space. ‘Sugar Baby’ is a great choice for beginners.
* **Cantaloupe:** Known for its sweet, orange flesh. ‘Athena’ and ‘Hales Best Jumbo’ are reliable options.
* **Honeydew:** A refreshing, pale green melon. ‘Honeycrisp’ is a popular and relatively easy-to-grow variety.
* **Galia Melon:** A cross between cantaloupe and honeydew, offering a unique flavor.
Consider your local climate and the amount of space you have when making your decision. Check the seed packet or plant label for specific growing requirements.
Preparing Your Melon Patch
Melons are sun-loving, hungry plants, so proper preparation is key.
* **Sunlight:** Melons need at least 6-8 hours of direct sunlight per day. Choose a location in your garden that gets plenty of sunshine.
* **Soil:** Melons thrive in well-drained, fertile soil. Amend your soil with compost or well-rotted manure to improve drainage and add nutrients. A slightly acidic to neutral pH (6.0-7.0) is ideal.
* **Space:** Melons need plenty of space to spread out. Watermelons, in particular, can take up a lot of room. If you’re growing in a small garden, consider using a trellis to train the vines vertically.
* **Watering:** Consistent watering is essential, especially during fruit development. Aim for about 1-2 inches of water per week.
* **Fertilizing:** Melons are heavy feeders, so regular fertilization is important. Use a balanced fertilizer (e.g., 10-10-10) according to the package directions.
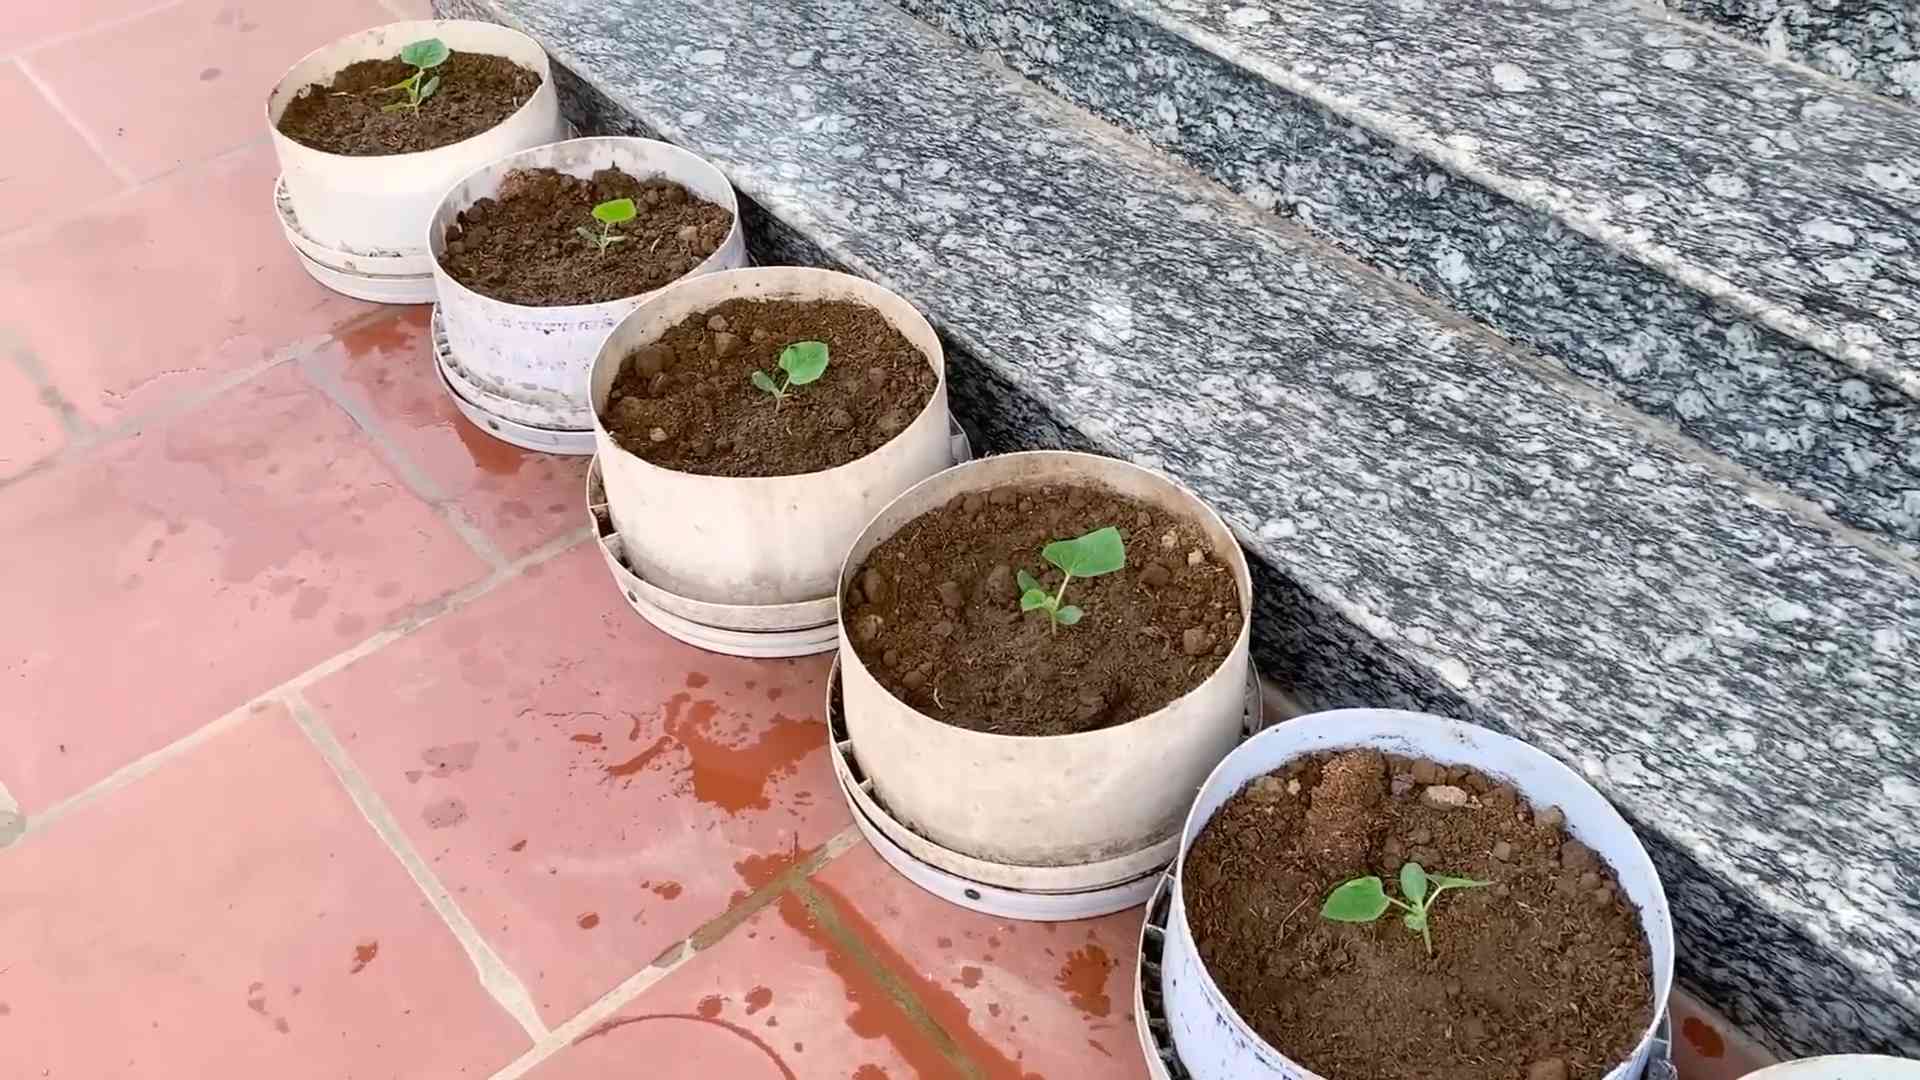
Starting Your Melon Seeds
You can either start your melon seeds indoors or direct sow them in your garden. I prefer starting them indoors to get a head start, especially in cooler climates.
* **Indoor Starting (Recommended):**
* **Timing:** Start your seeds about 4-6 weeks before the last expected frost.
* **Containers:** Use peat pots or biodegradable containers to avoid disturbing the roots when transplanting.
* **Soil:** Use a seed-starting mix.
* **Planting:** Sow the seeds about 1 inch deep.
* **Watering:** Keep the soil moist but not soggy.
* **Light:** Provide plenty of light, either with a grow light or a sunny windowsill.
* **Hardening Off:** Before transplanting, gradually acclimate the seedlings to outdoor conditions by exposing them to increasing amounts of sunlight and wind over a week or two.
* **Direct Sowing:**
* **Timing:** Sow the seeds after the last frost when the soil has warmed up to at least 70°F (21°C).
* **Planting:** Sow the seeds about 1 inch deep in hills or rows.
* **Watering:** Keep the soil moist until the seedlings emerge.
* **Thinning:** Thin the seedlings to the strongest plant per hill or space them according to the recommended spacing for your chosen variety.
Transplanting Your Melon Seedlings
Once your seedlings have developed a few true leaves and the weather has warmed up, it’s time to transplant them into your garden.
1. **Prepare the Planting Hole:** Dig a hole that is slightly larger than the root ball of the seedling.
2. **Amend the Soil:** Mix some compost or well-rotted manure into the soil at the bottom of the hole.
3. **Carefully Remove the Seedling:** Gently remove the seedling from its container, being careful not to damage the roots. If you used peat pots, you can plant the entire pot.
4. **Place the Seedling in the Hole:** Position the seedling in the hole so that the top of the root ball is level with the surrounding soil.
5. **Fill the Hole:** Fill the hole with soil and gently firm it around the base of the plant.
6. **Water Thoroughly:** Water the seedling thoroughly to help it settle in.
7. **Mulch:** Apply a layer of mulch around the plant to help retain moisture and suppress weeds. I like to use straw or shredded leaves.
Caring for Your Melon Plants
Now that your melon plants are in the ground, it’s time to provide them with the care they need to thrive.
* **Watering:** Water deeply and regularly, especially during hot, dry weather. Avoid overhead watering, as this can promote fungal diseases. Drip irrigation is a great option.
* **Fertilizing:** Fertilize your melon plants every 2-3 weeks with a balanced fertilizer. You can also use a liquid fertilizer, such as fish emulsion or seaweed extract.
* **Weeding:** Keep the area around your melon plants free of weeds. Weeds compete with your plants for water and nutrients.
* **Pest Control:** Keep an eye out for common melon pests, such as aphids, squash bugs, and cucumber beetles. Use organic pest control methods, such as insecticidal soap or neem oil, to control these pests.
Hey there, fellow gardening enthusiasts! I’m so excited to share my experience with growing melons at home. It might seem daunting, but trust me, with a little patience and these simple steps, you’ll be enjoying juicy, homegrown melons in no time. Let’s dive in!
Choosing Your Melon Variety
First things first, you need to decide what kind of melon you want to grow. This is crucial because different varieties have different needs and growing times. Here are a few popular options:
* **Watermelon:** A classic summer favorite! Look for smaller, bush-type varieties if you have limited space. ‘Sugar Baby’ is a great choice for beginners.
* **Cantaloupe:** Known for its sweet, orange flesh. ‘Athena’ and ‘Hales Best Jumbo’ are reliable options.
* **Honeydew:** A refreshing, pale green melon. ‘Honeycrisp’ is a popular and relatively easy-to-grow variety.
* **Galia Melon:** A cross between cantaloupe and honeydew, offering a unique flavor.
Consider your local climate and the amount of space you have when making your decision. Check the seed packet or plant label for specific growing requirements.
Preparing Your Melon Patch
Melons are sun-loving, hungry plants, so proper preparation is key.
* **Sunlight:** Melons need at least 6-8 hours of direct sunlight per day. Choose a location in your garden that gets plenty of sunshine.
* **Soil:** Melons thrive in well-drained, fertile soil. Amend your soil with compost or well-rotted manure to improve drainage and add nutrients. A slightly acidic to neutral pH (6.0-7.0) is ideal.
* **Space:** Melons need plenty of space to spread out. Watermelons, in particular, can take up a lot of room. If you’re growing in a small garden, consider using a trellis to train the vines vertically.
* **Watering:** Consistent watering is essential, especially during fruit development. Aim for about 1-2 inches of water per week.
* **Fertilizing:** Melons are heavy feeders, so regular fertilization is important. Use a balanced fertilizer (e.g., 10-10-10) according to the package directions.
Starting Your Melon Seeds
You can either start your melon seeds indoors or direct sow them in your garden. I prefer starting them indoors to get a head start, especially in cooler climates.
* **Indoor Starting (Recommended):**
* **Timing:** Start your seeds about 4-6 weeks before the last expected frost.
* **Containers:** Use peat pots or biodegradable containers to avoid disturbing the roots when transplanting.
* **Soil:** Use a seed-starting mix.
* **Planting:** Sow the seeds about 1 inch deep.
* **Watering:** Keep the soil moist but not soggy.
* **Light:** Provide plenty of light, either with a grow light or a sunny windowsill.
* **Hardening Off:** Before transplanting, gradually acclimate the seedlings to outdoor conditions by exposing them to increasing amounts of sunlight and wind over a week or two.
* **Direct Sowing:**
* **Timing:** Sow the seeds after the last frost when the soil has warmed up to at least 70°F (21°C).
* **Planting:** Sow the seeds about 1 inch deep in hills or rows.
* **Watering:** Keep the soil moist until the seedlings emerge.
* **Thinning:** Thin the seedlings to the strongest plant per hill or space them according to the recommended spacing for your chosen variety.
Transplanting Your Melon Seedlings
Once your seedlings have developed a few true leaves and the weather has warmed up, it’s time to transplant them into your garden.
1. **Prepare the Planting Hole:** Dig a hole that is slightly larger than the root ball of the seedling.
2. **Amend the Soil:** Mix some compost or well-rotted manure into the soil at the bottom of the hole.
3. **Carefully Remove the Seedling:** Gently remove the seedling from its container, being careful not to damage the roots. If you used peat pots, you can plant the entire pot.
4. **Place the Seedling in the Hole:** Position the seedling in the hole so that the top of the root ball is level with the surrounding soil.
5. **Fill the Hole:** Fill the hole with soil and gently firm it around the base of the plant.
6. **Water Thoroughly:** Water the seedling thoroughly to help it settle in.
7. **Mulch:** Apply a layer of mulch around the plant to help retain moisture and suppress weeds. I like to use straw or shredded leaves.
Caring for Your Melon Plants
Now that your melon plants are in the ground, it’s time to provide them with the care they need to thrive.
* **Watering:** Water deeply and regularly, especially during hot, dry weather. Avoid overhead watering, as this can promote fungal diseases. Drip irrigation is a great option.
* **Fertilizing:** Fertilize your melon plants every 2-3 weeks with a balanced fertilizer. You can also use a liquid fertilizer, such as fish emulsion or seaweed extract.
* **Weeding:** Keep the area around your melon plants free of weeds. Weeds compete with your plants for water and nutrients.
* **Pest Control:** Keep an eye out for common melon pests, such as aphids, squash bugs, and cucumber beetles. Use organic pest control methods, such as insecticidal soap or neem oil, to control these pests.
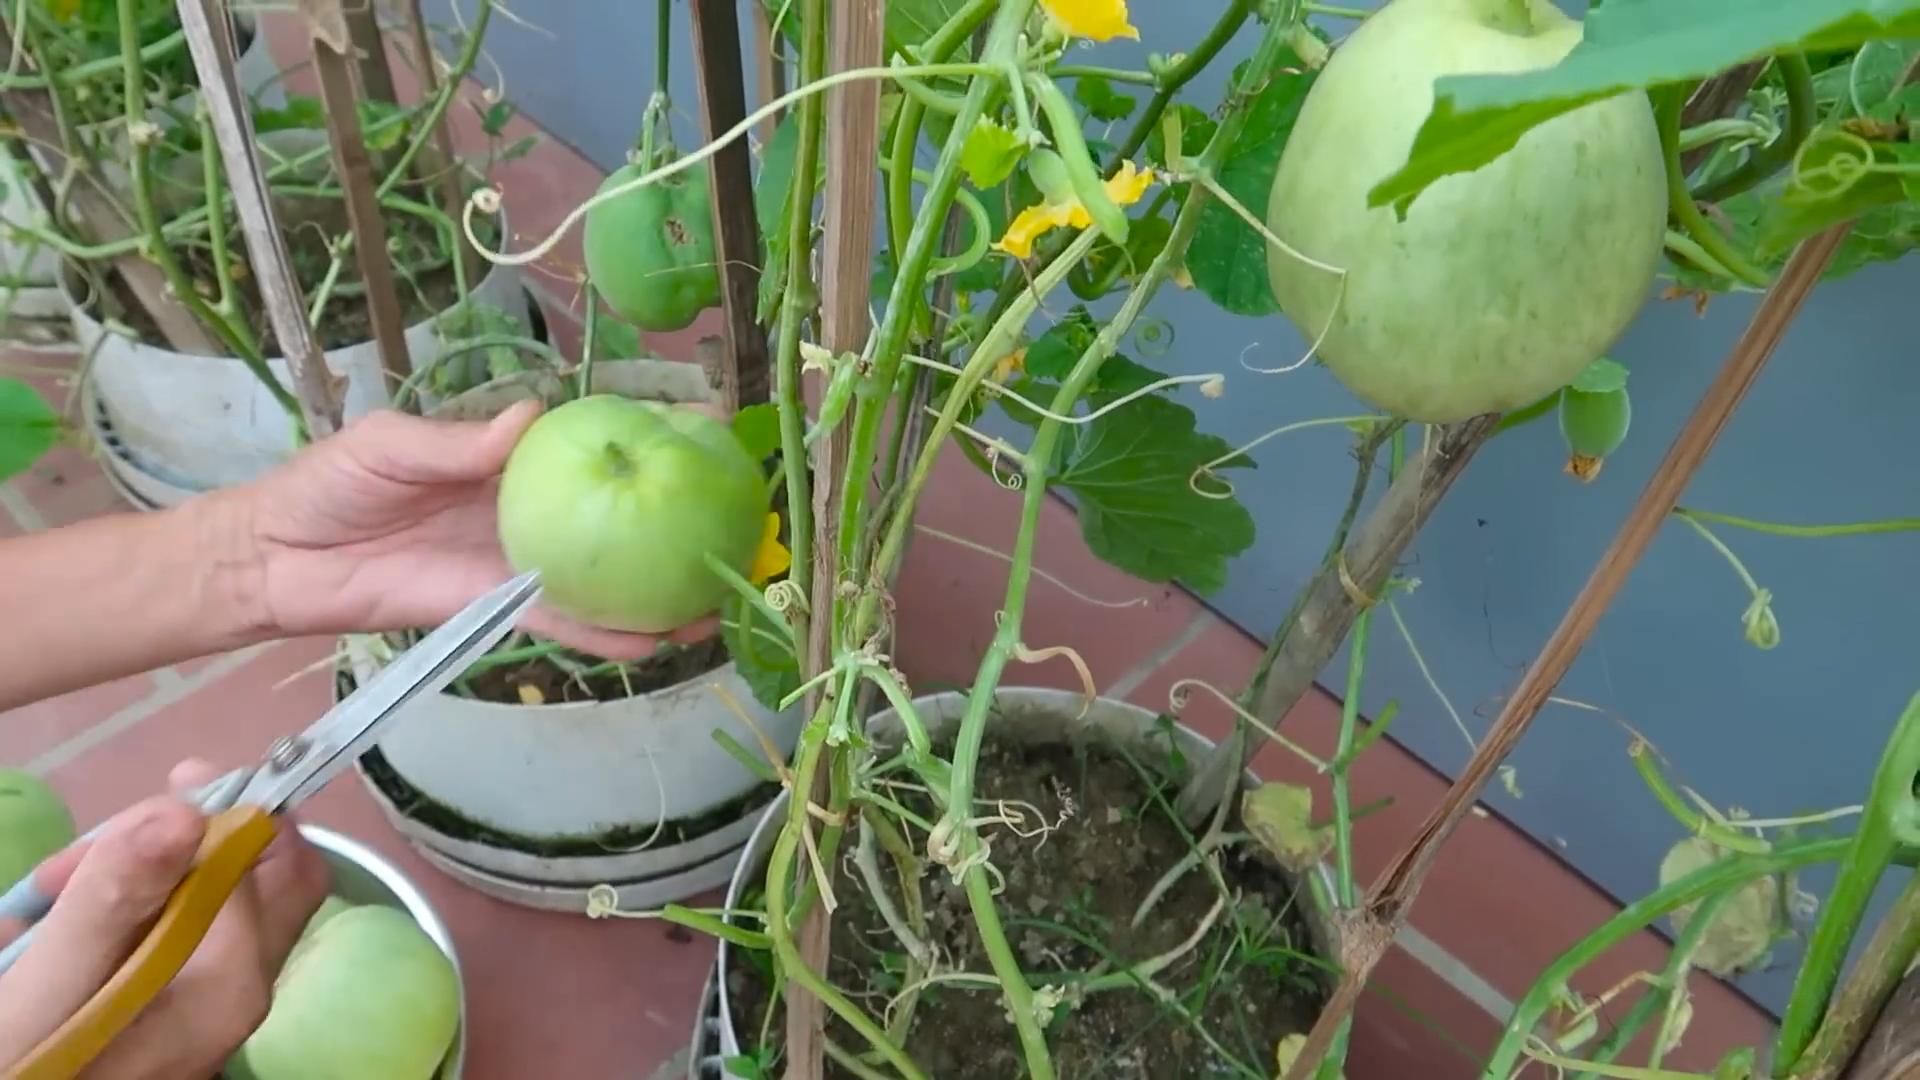
* **Pollination:** Melons require pollination to produce fruit. If you’re not seeing any fruit set, you may need to hand-pollinate the flowers. To do this, use a small paintbrush to transfer pollen from the male flowers to the female flowers. Female flowers have a small swelling at the base of the flower (the developing fruit), while male flowers do not.
* **Pruning (Optional):** Some gardeners prune their melon vines to encourage fruit production. You can prune off any side shoots that don’t have flowers or fruit. This will help the plant focus its energy on producing larger, more flavorful melons.
Supporting Your Melons
As your melons grow, they may need some support to prevent them from rotting on the ground or breaking the vines.
* **Trellising:** If you’re growing melons vertically on a trellis, you’ll need to provide support for the fruits. You can use slings made from pantyhose, netting, or fabric to support the melons.
* **Ground Support:** If you’re growing melons on the ground, you can place a piece of cardboard or straw under each melon to prevent it from rotting.
Harvesting Your Melons
Harvesting your melons at the right time is crucial for getting the best flavor. Here are some tips for determining when your melons are ripe:
* **Watermelon:** Look for a dull, rather than shiny, rind. The underside of the melon (where it rests on the ground) should be yellow or cream-colored. The tendril closest to the melon should be brown and dry. When you thump the melon, it should sound hollow.
* **Cantaloupe:** The melon should have a sweet aroma. The stem should slip easily from the melon when it’s ripe. The rind should be a golden color.
* **Honeydew:** The melon should have a slightly waxy feel. The blossom end (the opposite end from the stem) should be slightly soft. The rind should be a creamy white color.
* **Galia Melon:** The melon should have a strong, sweet aroma. The rind should turn from green to yellow.
Once you’ve determined that your melon is ripe, carefully cut it from the vine with a sharp knife.
Enjoying Your Homegrown Melons
Congratulations! You’ve successfully grown your own melons at home. Now it’s time to enjoy the fruits (literally!) of your labor.
* **Storage:** Store your melons in a cool, dry place. Whole melons can be stored for several weeks. Cut melons should be stored in the refrigerator.
* **Serving:** Melons are delicious on their own, but they can also be used in a variety of recipes. Try adding them to salads, smoothies, or desserts.
Troubleshooting
Even with the best care, you may encounter some problems when growing melons. Here are a few common issues and how to address them:
* **Blossom-End Rot:** This is caused by a calcium deficiency. Amend your soil with calcium-rich amendments, such as bone meal or crushed eggshells. Ensure consistent watering.
* **Powdery Mildew:** This is a fungal disease that causes a white, powdery coating on the leaves. Improve air circulation around your plants and treat with a fungicide if necessary.
* **Pests:** As mentioned earlier, keep an eye out for common melon pests and use organic pest control methods to control them.
Final Thoughts
Growing melons at home is a rewarding experience. With a
Conclusion
So, there you have it! Growing melons at home, while it might seem daunting at first, is entirely achievable with a little planning, patience, and our simple DIY trick. We’ve shown you how to bypass some of the common pitfalls and create the ideal environment for your melon vines to thrive, even if you don’t have acres of farmland. This isn’t just about saving money on store-bought melons; it’s about experiencing the unparalleled satisfaction of nurturing something from seed to fruit, and enjoying the freshest, most flavorful melons you’ve ever tasted.
The beauty of this DIY approach is its adaptability. Feel free to experiment with different melon varieties. Watermelons, cantaloupes, honeydews – each offers a unique flavor profile and growing experience. You can also tailor the soil amendments and watering schedule to suit your specific climate and growing conditions. Consider adding companion plants like marigolds to deter pests or basil to improve the overall health of your melon patch. The possibilities are endless!
Why is this DIY trick a must-try? Because it empowers you to take control of your food source, reduce your environmental impact, and enjoy the incredible taste of homegrown melons. It’s a rewarding project that connects you with nature and provides a delicious, healthy treat for you and your family. Plus, imagine the bragging rights when you serve up a slice of your own homegrown watermelon at your next barbecue!
We’re confident that with our guidance, you’ll be harvesting juicy, delicious melons in no time. Don’t be afraid to get your hands dirty and embrace the learning process. Gardening is all about experimentation and discovery.
Now, it’s your turn! We encourage you to try this DIY trick for growing melons at home. Start small, be patient, and don’t be discouraged by setbacks. Every gardener faces challenges, but the rewards are well worth the effort.
Most importantly, we want to hear about your experience! Share your photos, tips, and stories with us in the comments below. Let us know what worked for you, what challenges you faced, and what delicious melon varieties you grew. Your feedback will help other aspiring melon growers and contribute to a thriving community of home gardeners. Let’s grow together!
Frequently Asked Questions (FAQs)
What are the best melon varieties to grow for beginners?
For beginners, we recommend starting with smaller, easier-to-manage melon varieties like Sugar Baby watermelons or Minnesota Midget cantaloupes. These varieties tend to mature faster and are more forgiving of beginner mistakes. They also require less space, making them ideal for smaller gardens or container gardening. Honeydew melons can be a bit more challenging, but if you’re feeling adventurous, give them a try! Remember to choose varieties that are well-suited to your local climate. Check with your local nursery or agricultural extension office for recommendations.
How much sunlight do melons need?
Melons are sun-loving plants and require at least 6-8 hours of direct sunlight per day to thrive. Insufficient sunlight can lead to stunted growth, poor fruit production, and bland-tasting melons. Choose a location in your garden that receives full sun throughout the day. If you’re growing melons in containers, make sure to position them in a sunny spot and rotate them regularly to ensure even sun exposure.
What kind of soil is best for growing melons?
Melons prefer well-drained, fertile soil that is rich in organic matter. The ideal soil pH is between 6.0 and 6.8. Before planting, amend your soil with compost, aged manure, or other organic materials to improve its drainage, fertility, and water-holding capacity. Avoid heavy clay soils, as they can become waterlogged and suffocate the roots. If you have clay soil, consider growing your melons in raised beds or containers filled with a well-draining potting mix.
How often should I water my melon plants?
Melons need consistent watering, especially during hot, dry weather. Water deeply and regularly, aiming to keep the soil consistently moist but not waterlogged. Avoid overhead watering, as this can promote fungal diseases. Instead, water at the base of the plants, using a soaker hose or drip irrigation system. As the melons ripen, you can reduce watering slightly to concentrate the sugars and improve their flavor.
How do I know when my melons are ripe?
Determining when a melon is ripe can be tricky, but there are a few telltale signs to look for. For watermelons, check the underside of the melon where it rests on the ground. This spot should be creamy yellow or slightly orange. Also, thump the melon with your knuckles. A ripe watermelon will sound hollow and deep. For cantaloupes, the stem should slip easily from the vine when the melon is ripe. The melon should also have a fragrant aroma. For honeydew melons, look for a creamy yellow color and a slightly waxy feel.
What are some common pests and diseases that affect melon plants?
Melon plants can be susceptible to a variety of pests and diseases, including aphids, squash bugs, vine borers, powdery mildew, and fusarium wilt. To prevent pest and disease problems, practice good garden hygiene, such as removing weeds and debris, and rotate your crops regularly. Inspect your plants regularly for signs of pests or diseases, and take action promptly if you spot any problems. Organic pest control methods, such as insecticidal soap or neem oil, can be effective for controlling aphids and other pests. Fungicides can be used to treat fungal diseases like powdery mildew.
Can I grow melons in containers?
Yes, you can grow melons in containers, but you’ll need to choose a large container (at least 20 gallons) and select a compact or bush-type melon variety. Make sure the container has drainage holes to prevent waterlogging. Use a high-quality potting mix and fertilize regularly with a balanced fertilizer. Container-grown melons may require more frequent watering than those grown in the ground.
How can I improve the sweetness of my melons?
Several factors can influence the sweetness of your melons, including sunlight, water, and soil fertility. Make sure your plants receive plenty of sunlight and water them consistently, especially during fruit development. Avoid over-watering as the melons ripen, as this can dilute the sugars. Fertilize regularly with a fertilizer that is high in potassium, which promotes fruit development and sweetness. You can also try pinching off some of the smaller melons to allow the plant to focus its energy on ripening the remaining fruits.
What are some companion plants for melons?
Companion planting can help to improve the health and productivity of your melon plants. Some good companion plants for melons include marigolds (which deter pests), basil (which improves flavor and repels insects), nasturtiums (which attract beneficial insects), and radishes (which deter squash vine borers). Avoid planting melons near potatoes or other members of the nightshade family, as they can compete for nutrients.
How do I save seeds from my melons?
Saving seeds from your melons is a great way to preserve your favorite varieties and ensure a supply of seeds for future plantings. To save seeds, allow the melon to fully ripen on the vine. Scoop out the seeds and rinse them thoroughly to remove any pulp. Spread the seeds out on a paper towel to dry completely. Once the seeds are dry, store them in an airtight container in a cool, dark, and dry place.

Leave a Comment