

Grow Malabar Spinach Indoors? Absolutely! Imagine fresh, vibrant, and nutritious greens readily available right in your kitchen, no matter the season. Forget those bland, pre-packaged spinach options from the grocery store. With a little know-how, you can cultivate your own thriving Malabar spinach, adding a unique and delicious twist to your meals.
Malabar spinach, also known as Ceylon spinach or vine spinach, isn’t actually a true spinach, but a climbing vine with succulent leaves that have been enjoyed for centuries in Asian and African cuisines. Its history is rich, with evidence of its cultivation dating back to ancient times. It’s prized not only for its flavor but also for its resilience and nutritional value, packed with vitamins A and C, iron, and calcium.
But why should you bother learning to grow Malabar spinach indoors? Well, for starters, it’s incredibly rewarding! Plus, it’s a fantastic way to ensure a constant supply of fresh greens, especially if you live in an area with a short growing season or limited outdoor space. I know I love having fresh greens available year-round. This DIY guide will walk you through every step, from selecting the right container and soil to providing the ideal light and watering conditions. Get ready to unleash your inner gardener and enjoy the delicious rewards of your indoor Malabar spinach harvest!
DIY Floating Shelves: A Simple Guide to Stylish Storage
Hey there, fellow DIY enthusiasts! I’m super excited to share one of my favorite projects with you: building floating shelves. These shelves are not only incredibly stylish, adding a touch of modern minimalism to any room, but they’re also surprisingly easy to make. Plus, you get the satisfaction of saying, “Yeah, I built that!” when your friends admire them. So, grab your tools, and let’s get started!
Materials You’ll Need
Before we dive in, let’s gather everything we need. This will save you time and frustration later. Trust me, nothing’s worse than realizing you’re missing a crucial screw halfway through!
* **Wood for the Shelves:** This is where you can get creative! I personally love using solid wood like pine, oak, or maple for a more rustic look. You can also use plywood, but make sure it’s a high-quality grade with a nice veneer. The thickness will depend on what you plan to put on the shelves, but I recommend at least ¾ inch for good stability. Decide on the length and depth of your shelves beforehand.
* **Wood for the Mounting Brackets:** We’ll be building hidden brackets that attach to the wall and slide into the shelves. For these, I usually use 1×2 or 1×3 lumber. The length will depend on the depth of your shelves.
* **Screws:** You’ll need wood screws of various lengths. I recommend having 1 ¼ inch, 2 inch, and 2 ½ inch screws on hand.
* **Wood Glue:** A good quality wood glue is essential for strong joints.
* **Sandpaper:** Various grits, from coarse (80-grit) to fine (220-grit), for smoothing the wood.
* **Wood Stain or Paint:** Choose a color that complements your decor.
* **Polyurethane or Varnish:** To protect the wood and give it a nice finish.
* **Wall Anchors:** Depending on your wall type (drywall, plaster, concrete), you’ll need appropriate wall anchors to securely attach the brackets.
* **Painter’s Tape:** For clean lines when staining or painting.
* **Wood Filler (Optional):** To fill any imperfections in the wood.
Tools You’ll Need
Having the right tools makes all the difference. Here’s a list of what I use:
* **Measuring Tape:** For accurate measurements, of course!
* **Pencil:** For marking cut lines.
* **Saw:** A circular saw or miter saw is ideal for cutting the wood, but a hand saw will also work.
* **Drill:** With various drill bits for pilot holes and driving screws.
* **Screwdriver:** Or a drill with a screwdriver bit.
* **Sander:** An orbital sander makes sanding much faster and easier, but you can also sand by hand.
* **Clamps:** To hold the wood pieces together while the glue dries.
* **Level:** Absolutely crucial for ensuring your shelves are straight.
* **Stud Finder:** To locate wall studs for secure mounting.
* **Paintbrushes or Rags:** For applying stain, paint, and polyurethane.
* **Safety Glasses:** Always protect your eyes!
* **Dust Mask:** To avoid inhaling sawdust.
Building the Shelves
Okay, let’s get our hands dirty! This is where the magic happens.
1. **Cut the Wood:** Using your saw, cut the wood for the shelves to the desired length and depth. Make sure your cuts are straight and clean. I always double-check my measurements before cutting to avoid mistakes.
2. **Sand the Wood:** Start with the coarse sandpaper (80-grit) to remove any rough spots or imperfections. Then, gradually move to finer grits (120-grit, 180-grit, and finally 220-grit) to achieve a smooth finish. Sand with the grain of the wood for the best results.
3. **Stain or Paint the Shelves:** If you’re staining the shelves, apply the stain evenly with a brush or rag, following the manufacturer’s instructions. Let it sit for the recommended time, then wipe off any excess stain. If you’re painting, apply a primer first, then two coats of paint, allowing each coat to dry completely. Use painter’s tape to create clean lines if needed.
4. **Apply Polyurethane or Varnish:** Once the stain or paint is dry, apply a coat of polyurethane or varnish to protect the wood and give it a durable finish. Follow the manufacturer’s instructions for application and drying time. I usually apply two coats for extra protection.
Building the Mounting Brackets
These brackets are the key to the “floating” effect. They’ll be hidden inside the shelves, providing strong support.
1. **Cut the Bracket Pieces:** Cut the 1×2 or 1×3 lumber into the following pieces for each bracket:
* **Back Piece:** This piece will attach to the wall. Its length should be slightly shorter than the width of the shelf.
* **Top and Bottom Pieces:** These pieces will create the “box” that the shelf slides onto. Their length should be equal to the depth of the shelf minus the thickness of the back piece.
* **Support Pieces (Optional):** For longer shelves, you might want to add a few support pieces inside the bracket for extra strength. Cut these to the same length as the top and bottom pieces.
2. **Assemble the Brackets:**
* Apply wood glue to the edges of the top and bottom pieces.
* Attach the top and bottom pieces to the back piece, forming a “U” shape.
* Use clamps to hold the pieces together while the glue dries.
* Once the glue is dry, reinforce the joints with screws. Drill pilot holes first to prevent the wood from splitting.
* If you’re using support pieces, glue and screw them inside the bracket, evenly spaced.
3. **Sand the Brackets:** Sand the brackets to smooth any rough edges or imperfections.
4. **Paint or Stain the Brackets:** Paint or stain the brackets to match the shelves or the wall color. This will help them blend in and be less noticeable.
Mounting the Shelves
This is the final step! Take your time and make sure everything is level and secure.
1. **Locate the Wall Studs:** Use a stud finder to locate the wall studs where you want to mount the shelves. Mounting the brackets directly into studs is the strongest and most secure option. If you can’t mount into studs, you’ll need to use wall anchors.
2. **Mark the Bracket Locations:** Use a level and measuring tape to mark the locations for the brackets on the wall. Make sure the brackets are evenly spaced and at the desired height.
3. **Attach the Brackets to the Wall:**
* If mounting into studs, drill pilot holes through the back piece of the bracket and into the stud. Then, drive screws through the bracket and into the stud.
* If using wall anchors, drill holes in the wall according to the anchor manufacturer’s instructions. Insert the anchors into the holes, then attach the brackets to the wall using screws.
4. **Slide the Shelves onto the Brackets:** Carefully slide the shelves onto the brackets. Make sure they fit snugly and are fully supported.
5. **Secure the Shelves (Optional):** For extra security, you can add a few small screws through the top of the shelf and into the top piece of the bracket. This will prevent the shelves from sliding off.
Tips and Tricks for Perfect Floating Shelves
Here are a few extra tips I’ve learned along the way to help you achieve the best results:
* Choose the Right Wood: The type of wood you choose will affect the look and feel of your shelves. Consider the overall style of your room and choose a wood that complements it.
* Measure Twice, Cut Once: This is a classic DIY saying for a reason! Accurate measurements are crucial for a successful project.
* Use a Level: A level is your best friend when mounting shelves. Make sure the brackets are level before attaching them to the wall, and double-check that the shelves are level after sliding them onto the brackets.
* Don’t Overload the Shelves: Floating shelves are strong, but they’re not invincible. Avoid overloading them with heavy items. Distribute the weight evenly across the shelf.
* Consider the Depth: The depth of your shelves will affect how much they can hold and how they look in the room. Deeper shelves can hold more, but they can also make a room feel smaller.
* Experiment with Different Styles: Floating shelves come in all shapes and sizes. Experiment with different styles to find what works best for your space. You can try different wood types, stains, paints, and bracket designs.
* Hide the Screws: If you’re using screws to secure the shelves to the brackets, you can hide them by using wood filler
Conclusion
So, there you have it! Growing Malabar spinach indoors is not only achievable, but it’s also a rewarding experience that brings a touch of the tropics right into your home. We’ve walked through the essential steps, from selecting the right seeds and preparing the perfect potting mix to providing adequate light and consistent watering. But why is this DIY trick a must-try?
Firstly, consider the sheer convenience. Imagine having fresh, vibrant Malabar spinach leaves readily available whenever you need them, regardless of the season. No more last-minute trips to the grocery store or settling for wilted greens. You control the quality and freshness, ensuring you’re always using the best ingredients in your culinary creations.
Secondly, growing your own Malabar spinach indoors is an incredibly sustainable practice. You’re reducing your carbon footprint by minimizing transportation and packaging waste. Plus, you can use organic gardening practices, avoiding harmful pesticides and herbicides, which is better for you and the environment.
Thirdly, it’s a fantastic learning opportunity. Gardening, even on a small scale, connects you to the natural world and teaches you valuable lessons about plant life cycles, soil science, and the importance of nurturing. It’s a therapeutic activity that can reduce stress and improve your overall well-being.
But the benefits don’t stop there! You can experiment with different varieties of Malabar spinach, such as the red-stemmed or green-stemmed cultivars, to see which one you prefer. You can also try growing it in different types of containers, from hanging baskets to vertical planters, to maximize space and add visual appeal to your indoor garden.
Variations and Suggestions:
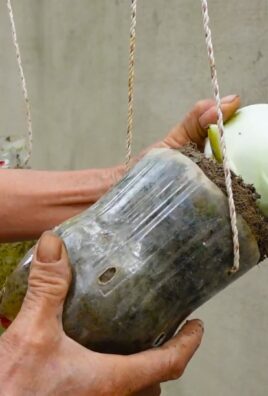
* Vertical Gardening: If you’re short on space, consider using a vertical planter or trellis to train your Malabar spinach to grow upwards. This not only saves space but also creates a beautiful green wall.
* Hydroponics: For a more advanced approach, you can try growing Malabar spinach hydroponically. This method involves growing plants without soil, using nutrient-rich water solutions.
* Companion Planting: Plant your Malabar spinach alongside other herbs or vegetables that thrive in similar conditions, such as basil or peppers. This can help to deter pests and improve the overall health of your indoor garden.
* Seed Saving: Once your Malabar spinach plants mature, you can collect the seeds and save them for future planting. This is a great way to ensure a continuous supply of fresh greens.
Growing Malabar spinach indoors is more than just a gardening project; it’s an investment in your health, your home, and the environment. It’s a chance to connect with nature, learn new skills, and enjoy the satisfaction of harvesting your own fresh produce.
So, what are you waiting for? Grab some seeds, prepare your potting mix, and get ready to embark on this exciting gardening adventure. We’re confident that you’ll be amazed by the results.
We encourage you to try this DIY trick and share your experience with us. Post photos of your indoor Malabar spinach garden on social media using #IndoorMalabarSpinach and tag us so we can see your progress. We’re eager to hear your tips, tricks, and success stories. Let’s create a community of indoor gardeners who are passionate about growing their own fresh, healthy food. Happy gardening!
Frequently Asked Questions (FAQ)
What is the best time of year to start growing Malabar spinach indoors?
The best time to start growing Malabar spinach indoors is typically in early spring, about 6-8 weeks before the last expected frost. This allows the seedlings to get a head start before being transplanted outdoors (if you choose to move them outside later) or to establish themselves well for continuous indoor growth. However, because you’re controlling the environment indoors, you can technically start growing Malabar spinach at any time of year, provided you can provide adequate light and warmth.
How much light does Malabar spinach need when grown indoors?
Malabar spinach requires a significant amount of light to thrive. Ideally, it needs at least 6-8 hours of direct sunlight per day. If you don’t have a sunny window that provides this much light, you’ll need to supplement with artificial grow lights. Fluorescent or LED grow lights are excellent options. Place the lights about 6-12 inches above the plants and keep them on for 12-16 hours per day. Insufficient light can lead to leggy growth and reduced leaf production.
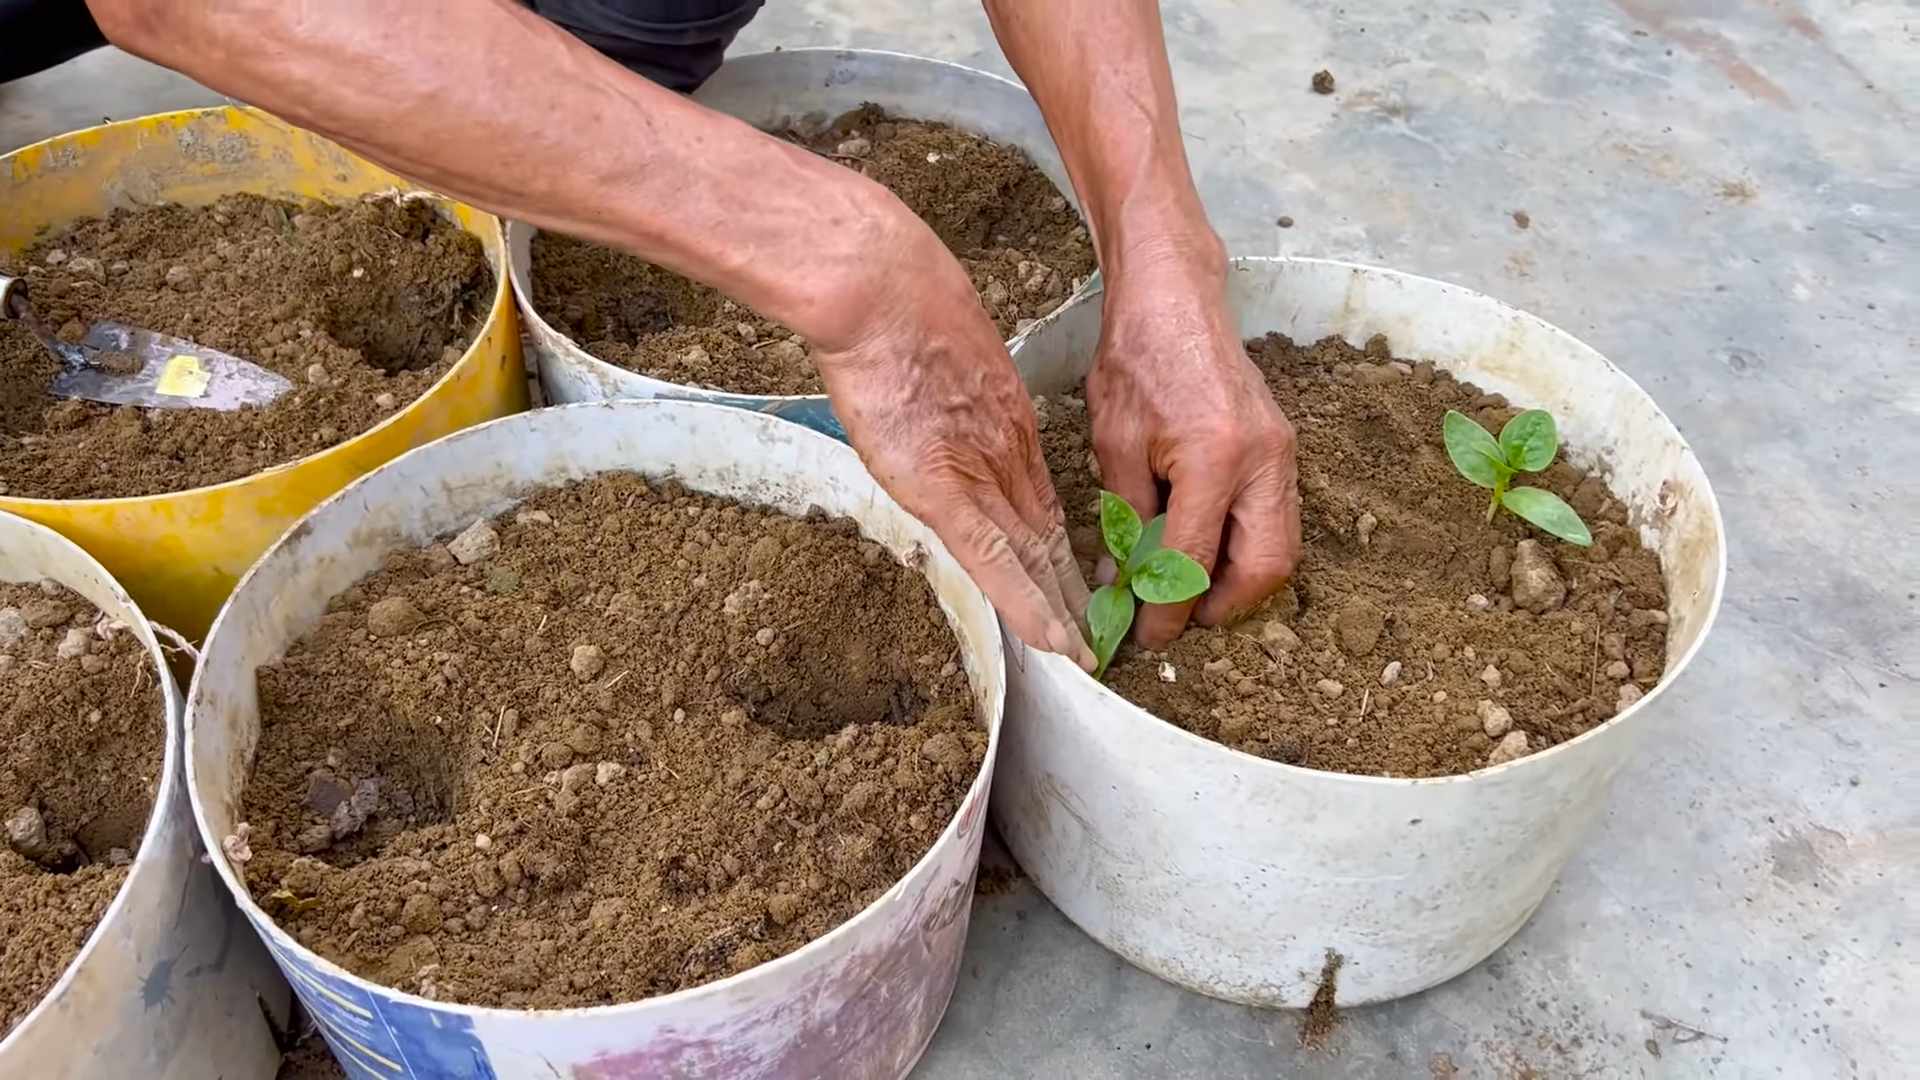
What type of soil is best for growing Malabar spinach in containers?
Malabar spinach prefers well-draining, fertile soil. A good potting mix for containers should consist of a combination of peat moss or coco coir, perlite or vermiculite, and compost or aged manure. This mixture provides good drainage, aeration, and nutrients. Avoid using garden soil, as it can become compacted in containers and doesn’t drain well. You can also add a slow-release fertilizer to the potting mix to provide a steady supply of nutrients.
How often should I water my Malabar spinach plants?
Water your Malabar spinach plants regularly, keeping the soil consistently moist but not waterlogged. Check the soil moisture level daily by sticking your finger about an inch into the soil. If it feels dry, it’s time to water. Water deeply, allowing the excess water to drain out of the bottom of the container. Avoid overwatering, as this can lead to root rot. During hot weather, you may need to water more frequently.
How do I fertilize my Malabar spinach plants?
Malabar spinach is a heavy feeder and benefits from regular fertilization. Use a balanced liquid fertilizer, such as a 20-20-20 formula, diluted to half strength. Fertilize every 2-3 weeks during the growing season. You can also use organic fertilizers, such as compost tea or fish emulsion. Avoid over-fertilizing, as this can lead to excessive vegetative growth and reduced leaf quality.
Are there any common pests or diseases that affect Malabar spinach?
Malabar spinach is generally resistant to pests and diseases, but it can occasionally be affected by aphids, spider mites, or whiteflies. These pests can be controlled with insecticidal soap or neem oil. Root rot can also be a problem if the soil is poorly drained or if the plants are overwatered. To prevent root rot, ensure that your containers have drainage holes and avoid overwatering.
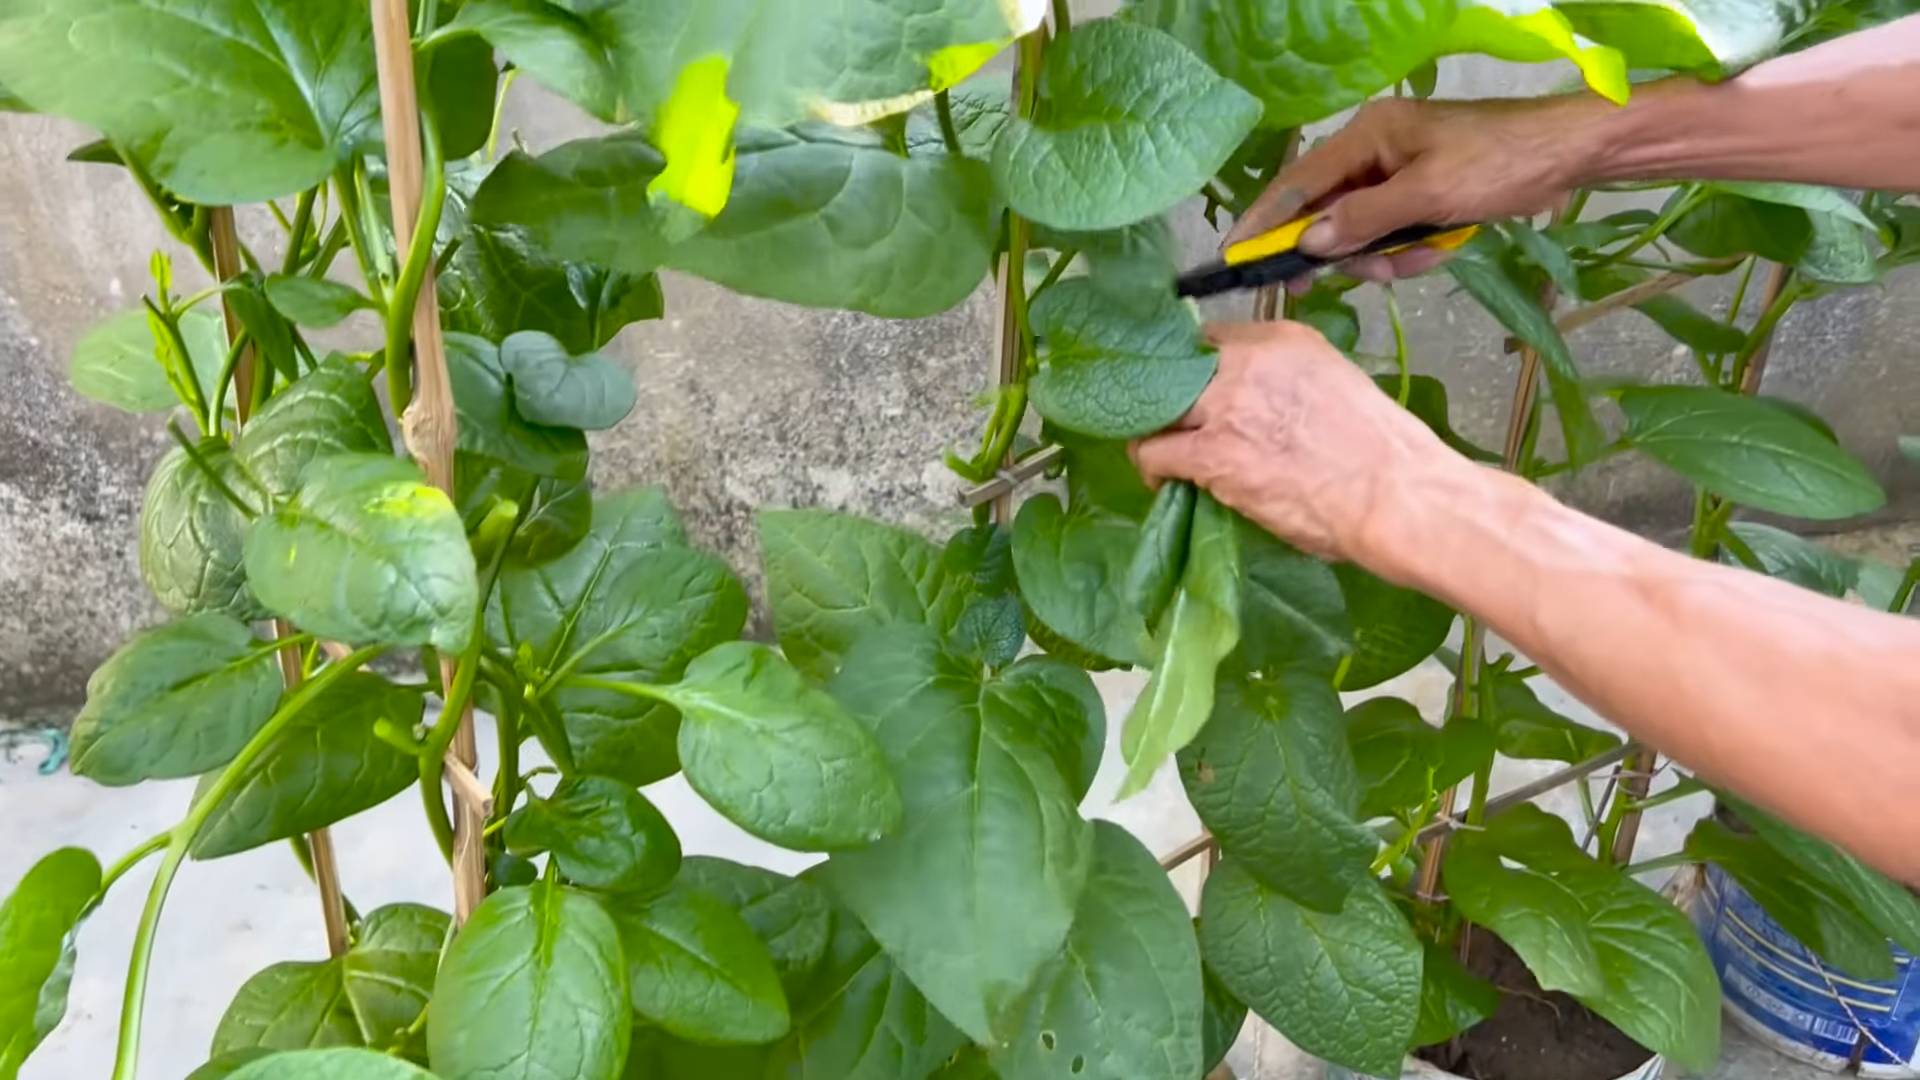
How do I harvest Malabar spinach leaves?
You can start harvesting Malabar spinach leaves when the plants are about 6-8 inches tall. Harvest the leaves by snipping them off with scissors or pruning shears. Avoid removing more than one-third of the leaves at a time, as this can stress the plant. Regular harvesting encourages new growth and keeps the plants productive.
Can I grow Malabar spinach from cuttings?
Yes, Malabar spinach can be easily propagated from cuttings. Take a 4-6 inch cutting from a healthy stem and remove the lower leaves. Place the cutting in a glass of water or directly into moist potting mix. Keep the cutting in a warm, bright location and change the water regularly (if using water propagation). Roots should develop within a few weeks. Once the cutting has developed roots, you can transplant it into a larger container.
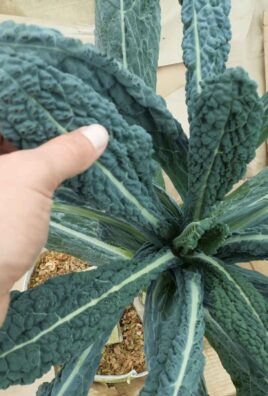
Is Malabar spinach safe to eat?
Yes, Malabar spinach is safe to eat and is a nutritious addition to your diet. It is rich in vitamins A and C, iron, and calcium. The leaves can be eaten raw in salads or cooked like spinach. The stems are also edible and can be used in soups and stir-fries. However, like all leafy greens, it’s important to wash Malabar spinach thoroughly before eating to remove any dirt or debris.
How can I encourage my Malabar spinach to climb?
To encourage your Malabar spinach to climb, provide it with a trellis, stake, or other support structure. Train the vines to climb by gently wrapping them around the support. As the plants grow, they will naturally cling to the support and climb upwards. Regular pruning can also help to encourage branching and create a fuller, more attractive plant.
Leave a Comment