

Grow Gourds in Bags: Unlock the secrets to a bountiful harvest, even without a sprawling garden! Have you ever dreamed of adorning your home with whimsical, handcrafted gourds but felt limited by space? I understand! Many gardeners believe they need acres of land to cultivate these fascinating fruits, but I’m here to tell you that’s simply not true.
For centuries, gourds have held a special place in cultures around the world, serving as everything from practical containers to artistic canvases. From the indigenous peoples of the Americas who used them for dippers and rattles to the vibrant gourd art traditions of Africa and Asia, these versatile plants have a rich and fascinating history. Now, you can easily participate in this tradition, no matter how small your living space is.
This DIY guide will empower you to grow gourds in bags, transforming balconies, patios, and even sunny windowsills into thriving gourd gardens. I’ll walk you through every step, from selecting the right varieties and preparing the perfect soil mix to providing essential support and harvesting your beautiful creations. Imagine the satisfaction of crafting your own unique decorations, gifts, or even musical instruments from gourds you’ve nurtured yourself. This is more than just gardening; it’s a chance to connect with nature, unleash your creativity, and add a touch of homespun charm to your life. Let’s get started!
Grow Gourds in Bags: A Comprehensive DIY Guide
Hey there, fellow gardening enthusiasts! I’m super excited to share my experience with growing gourds in bags. It’s a fantastic way to cultivate these amazing plants, especially if you’re short on space or have challenging soil conditions. Plus, it’s a really fun and rewarding project! Let’s dive in!
Why Grow Gourds in Bags?
Before we get started, you might be wondering why you’d even *want* to grow gourds in bags. Well, here are a few compelling reasons:
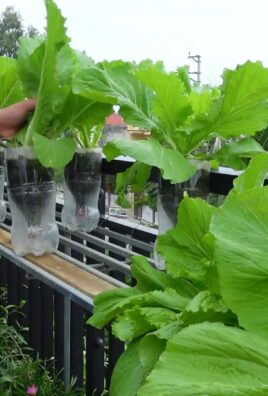
* Space Saving: Bags are perfect for patios, balconies, or small gardens. You can easily move them around to optimize sunlight exposure.
* Soil Control: You have complete control over the soil composition, ensuring your gourds get the nutrients they need.
* Improved Drainage: Bags generally offer better drainage than in-ground planting, preventing root rot.
* Pest Control: It’s easier to monitor and manage pests when your plants are contained in bags.
* Early Start: You can start your gourds indoors in bags and then move them outside when the weather warms up.
Materials You’ll Need
Okay, let’s gather our supplies. Here’s what you’ll need to successfully grow gourds in bags:
* Gourd Seeds: Choose your favorite gourd variety! Bottle gourds, birdhouse gourds, and dipper gourds are all great options. Make sure you get them from a reputable source.
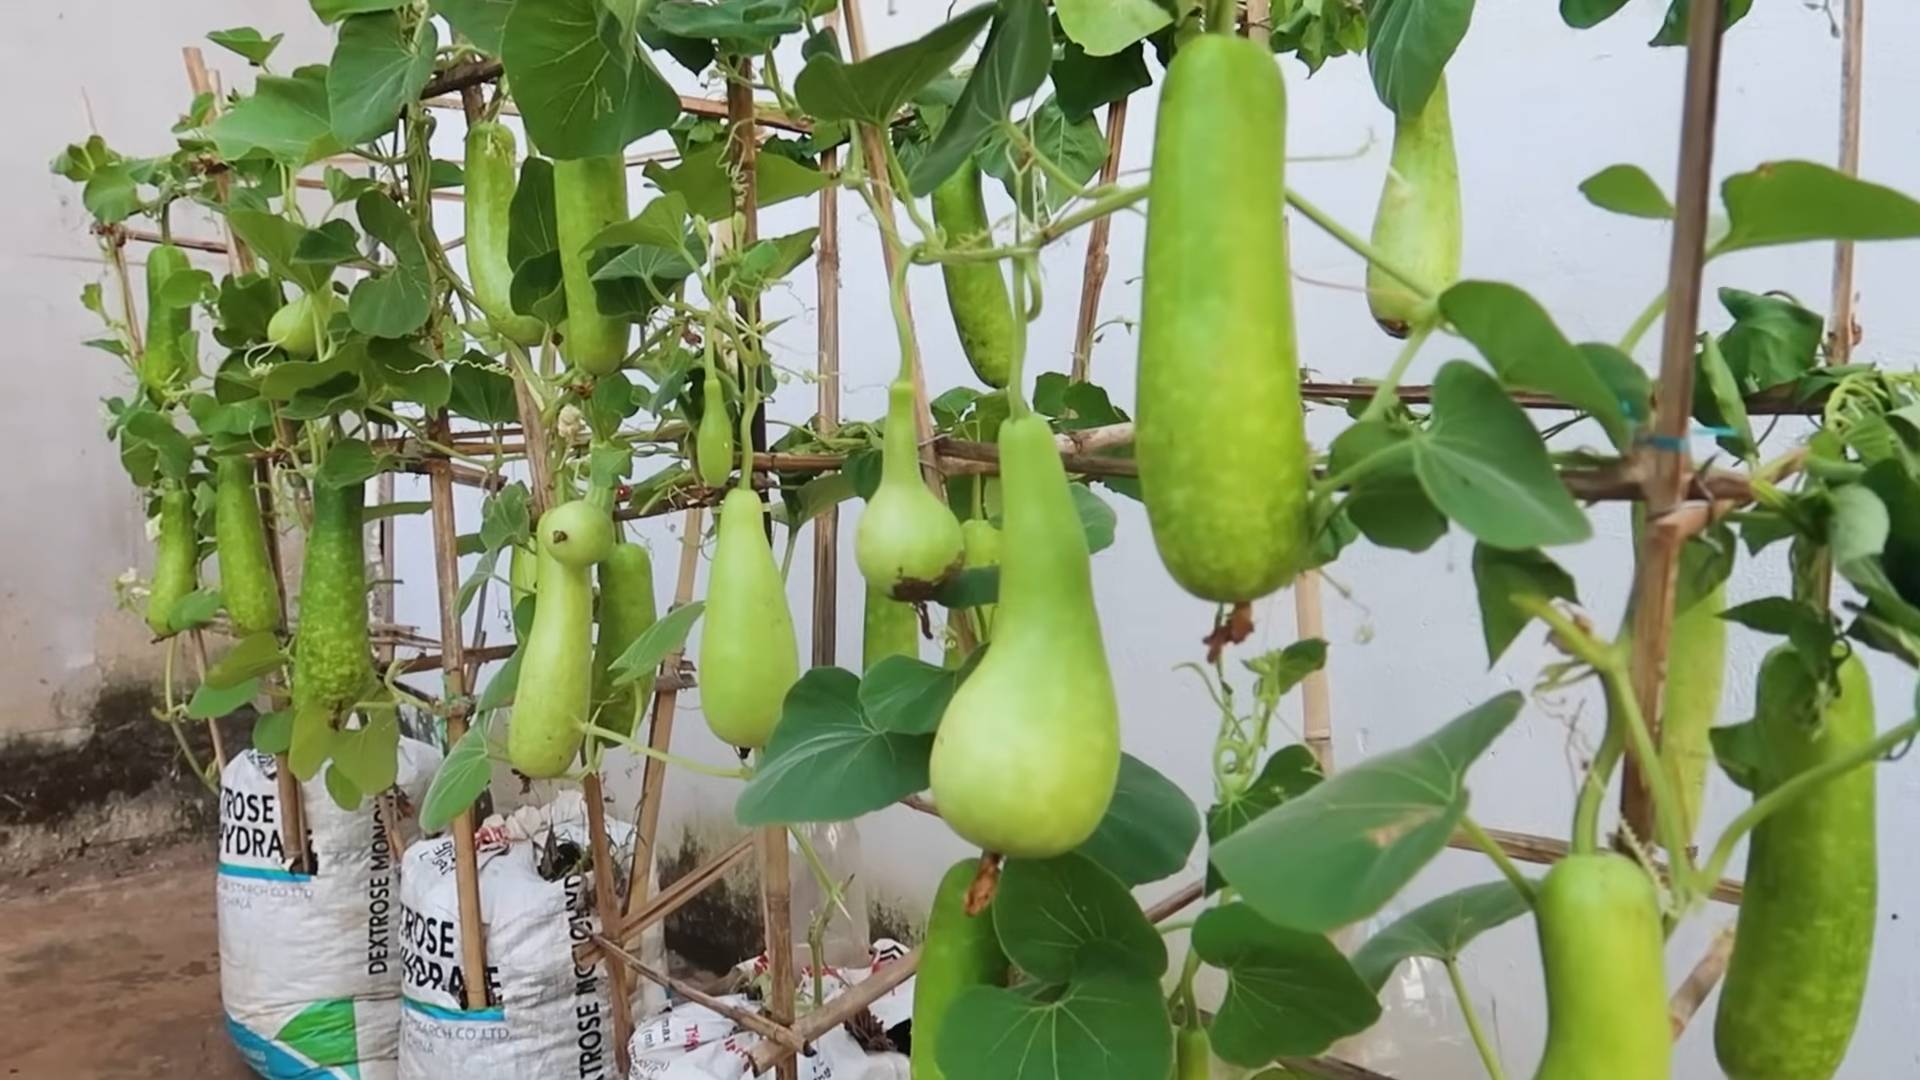
* Grow Bags: I recommend using fabric grow bags that are at least 15-20 gallons in size. Fabric bags allow for good drainage and aeration. You can find them online or at your local garden center.
* Potting Mix: A high-quality potting mix is crucial. Look for a mix that’s well-draining and contains plenty of organic matter. I usually mix equal parts of compost, peat moss (or coco coir), and perlite.
* Fertilizer: Gourds are heavy feeders, so you’ll need a good fertilizer. I like to use a slow-release fertilizer at planting time and then supplement with a liquid fertilizer every few weeks. A balanced fertilizer (like 10-10-10) or one formulated for vegetables will work well.
* Watering Can or Hose: You’ll need a way to water your gourds regularly.
* Trellis or Support Structure: Gourds are vines, so they’ll need something to climb on. A trellis, fence, or even a sturdy stake will work.
* Gloves: Gardening gloves will protect your hands.
* Hand Trowel or Shovel: For filling the grow bags with soil.
* Optional:
* Seed starting tray and dome (if starting seeds indoors)
* Heat mat (if starting seeds indoors)
* pH meter (to test soil pH)
* Mycorrhizae (beneficial fungi that can improve root growth)
Getting Started: Seed Germination
You can directly sow gourd seeds into the grow bags, but I prefer to start them indoors for a head start, especially if you live in a cooler climate.
1. Soak the Seeds: Before planting, soak your gourd seeds in warm water for 24 hours. This will help soften the seed coat and improve germination rates.
2. Prepare Seed Starting Trays: Fill your seed starting trays with a seed starting mix. Moisten the mix thoroughly.
3. Plant the Seeds: Plant the seeds about 1 inch deep in the seed starting mix. Place one seed per cell.
4. Provide Warmth and Moisture: Cover the trays with a humidity dome and place them on a heat mat (optional). Keep the soil consistently moist but not soggy.
5. Wait for Germination: Gourd seeds typically germinate in 7-14 days. Once the seedlings emerge, remove the humidity dome and heat mat.
6. Provide Light: Place the seedlings under grow lights or in a sunny window. Rotate the trays regularly to ensure even growth.
Preparing the Grow Bags
Now, let’s get those grow bags ready for our gourd seedlings!
1. Choose a Location: Select a sunny spot for your grow bags. Gourds need at least 6-8 hours of direct sunlight per day.
2. Position the Bags: Place the grow bags in their final location before filling them with soil. Once they’re full, they’ll be heavy and difficult to move.
3. Prepare the Soil Mix: In a large container or wheelbarrow, mix together your compost, peat moss (or coco coir), and perlite. Add a slow-release fertilizer according to the package directions. If you’re using mycorrhizae, mix it into the soil as well.
4. Fill the Bags: Fill the grow bags with the prepared soil mix, leaving a few inches of space at the top.
5. Water the Soil: Water the soil thoroughly until it’s evenly moist.
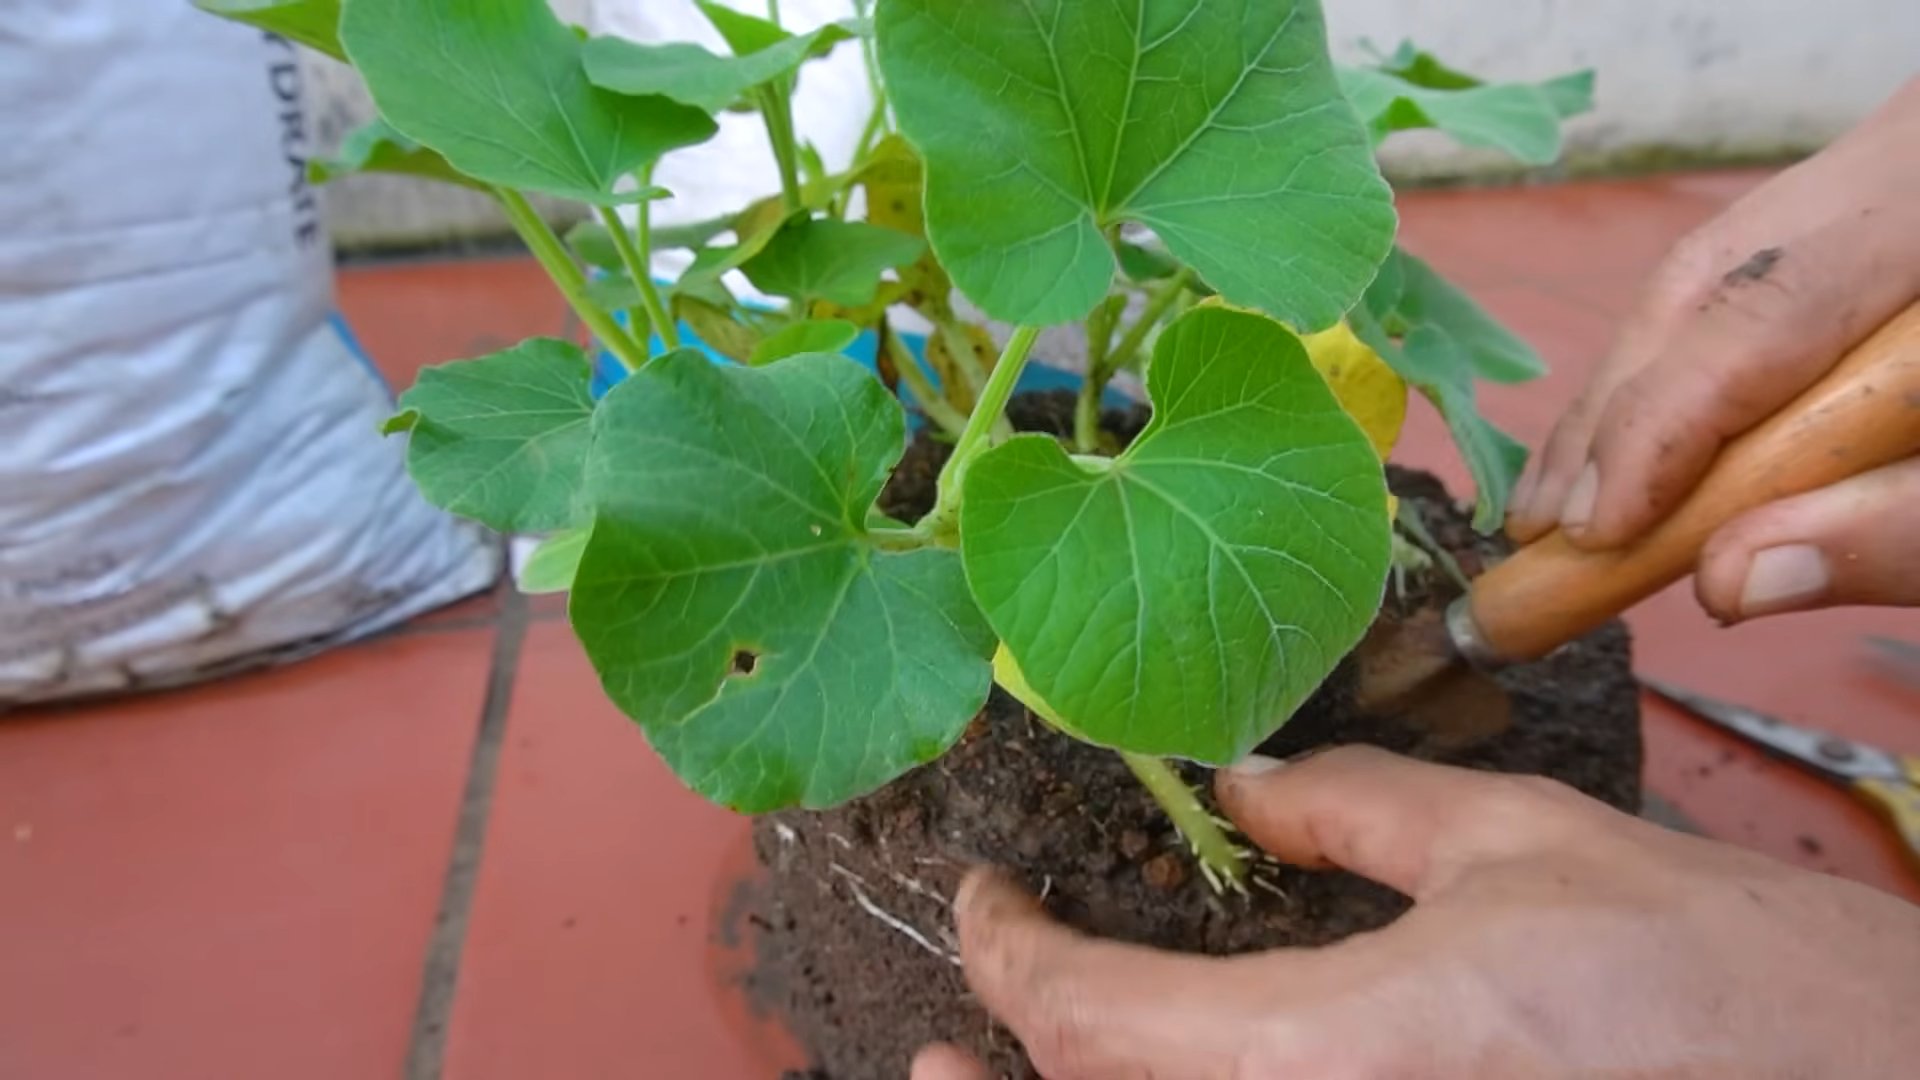
Transplanting the Seedlings
Once your gourd seedlings have developed a few sets of true leaves, they’re ready to be transplanted into the grow bags.
1. Harden Off the Seedlings: Before transplanting, you’ll need to harden off the seedlings. This means gradually exposing them to outdoor conditions over a period of 7-10 days. Start by placing them outside for a few hours each day in a sheltered location, gradually increasing the amount of time they spend outdoors.
2. Dig a Hole: Dig a hole in the center of each grow bag that’s large enough to accommodate the root ball of the seedling.
3. Remove the Seedling: Gently remove the seedling from the seed starting tray. Be careful not to damage the roots.
4. Plant the Seedling: Place the seedling in the hole and backfill with soil. Gently firm the soil around the base of the plant.
5. Water Thoroughly: Water the newly transplanted seedlings thoroughly.
Providing Support: Trellising Your Gourds
Gourds are vines, so they’ll need a trellis or other support structure to climb on. This will help
Hey there, fellow gardening enthusiasts! I’m super excited to share my experience with growing gourds in bags. It’s a fantastic way to cultivate these amazing plants, especially if you’re short on space or have challenging soil conditions. Plus, it’s a really fun and rewarding project! Let’s dive in!
Why Grow Gourds in Bags?
Before we get started, you might be wondering why you’d even *want* to grow gourds in bags. Well, here are a few compelling reasons:
* Space Saving: Bags are perfect for patios, balconies, or small gardens. You can easily move them around to optimize sunlight exposure.
* Soil Control: You have complete control over the soil composition, ensuring your gourds get the nutrients they need.
* Improved Drainage: Bags generally offer better drainage than in-ground planting, preventing root rot.
* Pest Control: It’s easier to monitor and manage pests when your plants are contained in bags.
* Early Start: You can start your gourds indoors in bags and then move them outside when the weather warms up.
Materials You’ll Need
Okay, let’s gather our supplies. Here’s what you’ll need to successfully grow gourds in bags:
* Gourd Seeds: Choose your favorite gourd variety! Bottle gourds, birdhouse gourds, and dipper gourds are all great options. Make sure you get them from a reputable source.
* Grow Bags: I recommend using fabric grow bags that are at least 15-20 gallons in size. Fabric bags allow for good drainage and aeration. You can find them online or at your local garden center.
* Potting Mix: A high-quality potting mix is crucial. Look for a mix that’s well-draining and contains plenty of organic matter. I usually mix equal parts of compost, peat moss (or coco coir), and perlite.
* Fertilizer: Gourds are heavy feeders, so you’ll need a good fertilizer. I like to use a slow-release fertilizer at planting time and then supplement with a liquid fertilizer every few weeks. A balanced fertilizer (like 10-10-10) or one formulated for vegetables will work well.
* Watering Can or Hose: You’ll need a way to water your gourds regularly.
* Trellis or Support Structure: Gourds are vines, so they’ll need something to climb on. A trellis, fence, or even a sturdy stake will work.
* Gloves: Gardening gloves will protect your hands.
* Hand Trowel or Shovel: For filling the grow bags with soil.
* Optional:
* Seed starting tray and dome (if starting seeds indoors)
* Heat mat (if starting seeds indoors)
* pH meter (to test soil pH)
* Mycorrhizae (beneficial fungi that can improve root growth)
Getting Started: Seed Germination
You can directly sow gourd seeds into the grow bags, but I prefer to start them indoors for a head start, especially if you live in a cooler climate.
1. Soak the Seeds: Before planting, soak your gourd seeds in warm water for 24 hours. This will help soften the seed coat and improve germination rates.
2. Prepare Seed Starting Trays: Fill your seed starting trays with a seed starting mix. Moisten the mix thoroughly.
3. Plant the Seeds: Plant the seeds about 1 inch deep in the seed starting mix. Place one seed per cell.
4. Provide Warmth and Moisture: Cover the trays with a humidity dome and place them on a heat mat (optional). Keep the soil consistently moist but not soggy.
5. Wait for Germination: Gourd seeds typically germinate in 7-14 days. Once the seedlings emerge, remove the humidity dome and heat mat.
6. Provide Light: Place the seedlings under grow lights or in a sunny window. Rotate the trays regularly to ensure even growth.
Preparing the Grow Bags
Now, let’s get those grow bags ready for our gourd seedlings!
1. Choose a Location: Select a sunny spot for your grow bags. Gourds need at least 6-8 hours of direct sunlight per day.
2. Position the Bags: Place the grow bags in their final location before filling them with soil. Once they’re full, they’ll be heavy and difficult to move.
3. Prepare the Soil Mix: In a large container or wheelbarrow, mix together your compost, peat moss (or coco coir), and perlite. Add a slow-release fertilizer according to the package directions. If you’re using mycorrhizae, mix it into the soil as well.
4. Fill the Bags: Fill the grow bags with the prepared soil mix, leaving a few inches of space at the top.
5. Water the Soil: Water the soil thoroughly until it’s evenly moist.
Transplanting the Seedlings
Once your gourd seedlings have developed a few sets of true leaves, they’re ready to be transplanted into the grow bags.
1. Harden Off the Seedlings: Before transplanting, you’ll need to harden off the seedlings. This means gradually exposing them to outdoor conditions over a period of 7-10 days. Start by placing them outside for a few hours each day in a sheltered location, gradually increasing the amount of time they spend outdoors.
2. Dig a Hole: Dig a hole in the center of each grow bag that’s large enough to accommodate the root ball of the seedling.
3. Remove the Seedling: Gently remove the seedling from the seed starting tray. Be careful not to damage the roots.
4. Plant the Seedling: Place the seedling in the hole and backfill with soil. Gently firm the soil around the base of the plant.
5. Water Thoroughly: Water the newly transplanted seedlings thoroughly.
Providing Support: Trellising Your Gourds
Gourds are vines, so they’ll need a trellis or other support structure to climb on. This will help keep the plants off the ground, improve air circulation, and make it easier to harvest the gourds.
1. Install the Trellis: Install the trellis or support structure near the grow bag. Make sure it’s sturdy enough to support the weight of the mature gourd vines.
2. Train the Vines: As the gourd vines grow, gently train them to climb the trellis. You may need to tie them to the trellis with twine or plant ties.
3. Prune as Needed: Prune the vines as needed to encourage branching and fruit production. You can also remove any yellowing or diseased leaves.
Ongoing Care: Watering, Fertilizing, and Pest Control
Once your gourds are established, it’s important to provide them with regular care to ensure healthy growth and abundant fruit production.
1. Watering: Water your gourds regularly, especially during hot, dry weather. Check the soil moisture regularly and water when the top inch of soil feels dry. Avoid overwatering, as this can lead to root rot.
2. Fertilizing: Gourds are heavy feeders, so you’ll need to fertilize them regularly. Apply a liquid fertilizer every few weeks, following the package directions. You can also side-dress the plants with compost or aged manure.
3. Pest Control: Monitor your gourds regularly for pests such as squash bugs, squash vine borers, and aphids. Handpick pests as you see them. You can also use insecticidal soap or neem oil to control pests.
4. Pollination: Gourds require pollination to produce fruit. If you’re not seeing any fruit set, you may need to hand-pollinate the flowers. To hand-pollinate, use a small paintbrush to transfer pollen from the male flowers to the female flowers. Female flowers have a small fruit behind the flower, while male flowers do not.
Harvesting Your Gourds
The time it takes for gourds to mature depends on the variety. Generally, gourds are ready to harvest in the fall, after the vines have died back and the gourds have hardened.
1. Check for Maturity: To check for maturity, tap the gourd. If it sounds hollow, it’s ready to harvest. The stem should also be dry and brown.
2. Harvest Carefully: Cut the gourd from the vine, leaving a few inches of stem attached. Be careful not to damage the gourd.
3. Curing: Cure the gourds in a warm, dry, well-ventilated place for several weeks. This will help them dry out and prevent them from rotting.
4. Cleaning: Once the gourds are cured, you can clean them with soap and water. You can also sand them down to remove any rough spots.
Troubleshooting
Conclusion
So, there you have it! Growing gourds in bags is not just a viable option; it’s a game-changer for gardeners with limited space, challenging soil conditions, or simply a desire for greater control over their growing environment. We’ve explored the ins and outs of this method, from selecting the right bag size and potting mix to providing adequate support and ensuring proper drainage.
Why is this DIY trick a must-try? Because it unlocks the potential for anyone, anywhere, to cultivate these fascinating and versatile plants. Imagine the satisfaction of harvesting your own gourds, knowing you nurtured them from seed to maturity, all within the confines of a simple bag. Think of the creative possibilities that await – crafting birdhouses, bowls, dippers, or even musical instruments from your homegrown gourds.
But the benefits extend beyond the harvest. Growing gourds in bags allows for greater mobility. You can easily move your plants to chase the sun, protect them from unexpected frosts, or even bring them indoors during severe weather. This flexibility is invaluable, especially in regions with unpredictable climates. Furthermore, you have complete control over the soil composition, ensuring your gourds receive the precise nutrients they need to thrive. This is particularly advantageous if your native soil is heavy clay, sandy, or nutrient-poor.
Don’t be afraid to experiment! Consider trying different varieties of gourds in bags. Luffa gourds, with their sponge-like interiors, are excellent for exfoliating scrubs. Bottle gourds, with their classic shape, are perfect for crafting decorative items. And snake gourds, with their elongated forms, add a touch of whimsy to any garden. You can also explore different potting mix combinations. Adding compost or aged manure will boost nutrient levels, while perlite or vermiculite will improve drainage and aeration.
For those looking to maximize their yield, consider companion planting. Marigolds can deter pests, while nasturtiums can attract beneficial insects. Basil can improve the flavor of your gourds, while beans can fix nitrogen in the soil, enriching it for future crops.
Growing gourds in bags is more than just a gardening technique; it’s an invitation to connect with nature, unleash your creativity, and experience the joy of growing your own food and crafts.
We encourage you to embrace this DIY trick and embark on your own gourd-growing adventure. Don’t be intimidated by the process. Start small, learn as you go, and most importantly, have fun! And once you’ve harvested your first crop, we’d love to hear about your experience. Share your photos, tips, and stories in the comments below. Let’s build a community of gourd-growing enthusiasts and inspire others to discover the magic of this rewarding hobby. Your success with growing gourds in bags could be the inspiration someone else needs to start their own garden!
Frequently Asked Questions (FAQ)
What size bag is best for growing gourds?
The ideal bag size depends on the variety of gourd you’re growing. For smaller gourds, like ornamental varieties, a 10-gallon bag may suffice. However, for larger gourds, such as bottle gourds or luffa gourds, a 20-gallon or even a 30-gallon bag is recommended. The larger the bag, the more room the roots have to grow, and the more nutrients and water the plant can access. Ensure the bag is sturdy and made of a breathable material like fabric or burlap to allow for proper drainage and aeration.
What type of potting mix should I use?
A well-draining potting mix is crucial for growing healthy gourds in bags. Avoid using garden soil, as it can become compacted and waterlogged in a container. A good mix consists of equal parts of the following:
* **Compost:** Provides essential nutrients and improves soil structure.
* **Peat moss or coco coir:** Retains moisture and provides aeration.
* **Perlite or vermiculite:** Improves drainage and prevents compaction.
You can also add a slow-release fertilizer to the mix to provide a steady supply of nutrients throughout the growing season.
How often should I water my gourds in bags?
The frequency of watering depends on several factors, including the weather, the size of the bag, and the type of potting mix. Generally, you should water your gourds whenever the top inch of soil feels dry to the touch. During hot, dry weather, you may need to water daily. Be sure to water deeply, allowing the water to drain out of the bottom of the bag. Avoid overwatering, as this can lead to root rot.
Do gourds grown in bags need support?
Yes, most gourd varieties require support, especially as they grow larger and heavier. You can use a trellis, stakes, or even a fence to provide support. Train the vines to climb the support structure as they grow. This will help to prevent the gourds from dragging on the ground, which can lead to rot and pest problems.
How much sunlight do gourds need?
Gourds need at least 6-8 hours of direct sunlight per day to thrive. Choose a location that receives plenty of sunlight throughout the growing season. If you live in a particularly hot climate, you may need to provide some afternoon shade to prevent the plants from overheating.
How do I prevent pests and diseases?
To prevent pests and diseases, start with healthy plants and a well-draining potting mix. Regularly inspect your plants for signs of pests or diseases. If you spot any problems, take action immediately. You can use organic pest control methods, such as insecticidal soap or neem oil, to control pests. To prevent diseases, avoid overwatering and ensure good air circulation around the plants.
Can I grow gourds in bags indoors?
While it’s possible to start gourds indoors, they require a lot of sunlight and space to thrive. Unless you have a very sunny and spacious indoor area, it’s best to grow gourds outdoors. If you do grow them indoors, be sure to provide them with plenty of light and support.
How long does it take for gourds to mature?
The time it takes for gourds to mature depends on the variety. Some gourds, like ornamental varieties, may mature in as little as 90 days. Others, like bottle gourds, may take up to 120 days or more. Check the seed packet or plant tag for specific information on the maturity time for your chosen variety.
How do I know when my gourds are ready to harvest?
Gourds are typically ready to harvest when the stems have dried and turned brown. The skin of the gourd should also be hard and firm. Before a hard frost, harvest all mature gourds, leaving a few inches of stem attached.
How do I cure gourds after harvesting?
Curing is essential for preserving gourds and preventing them from rotting. To cure gourds, wash them with soapy water and dry them thoroughly. Place them in a well-ventilated area, away from direct sunlight, for several weeks or months. Turn them regularly to ensure even drying. The gourds are fully cured when they are lightweight and the seeds rattle inside.
Leave a Comment