

Grow Dill at Home? Absolutely! Imagine stepping into your kitchen, needing a sprig of fresh, fragrant dill, and simply snipping it right from your own windowsill. No more last-minute grocery store runs or settling for dried herbs that just don’t pack the same punch.
For centuries, dill has been more than just a culinary herb. Ancient Egyptians used it for medicinal purposes, and the Romans believed it brought good fortune. Today, while we might not be warding off evil spirits with it, dill remains a beloved herb worldwide, adding a distinctive flavor to everything from pickles and salads to creamy dips and seafood dishes.
But let’s be honest, buying fresh dill from the store can be expensive, and it often wilts before you even get a chance to use it all. That’s where the magic of DIY comes in! I’m going to share some simple, effective tricks and hacks that will empower you to grow dill at home, regardless of your gardening experience or the size of your space. Whether you have a sprawling backyard or just a sunny windowsill, I’ll show you how to cultivate your own thriving dill patch. Get ready to enjoy the freshest, most flavorful dill you’ve ever tasted, all thanks to your own green thumb!
Growing Dill at Home: A Beginner’s Guide
Hey there, fellow gardening enthusiasts! I’m so excited to share my experience with growing dill at home. It’s surprisingly easy, and having fresh dill on hand for cooking is a total game-changer. Plus, the feathery foliage is just beautiful! Let’s dive into how you can cultivate your own thriving dill patch.
Choosing Your Dill Variety
First things first, let’s talk about dill varieties. While all dill is, well, dill, some varieties are better suited for specific purposes or climates. Here are a few popular choices:
* ‘Bouquet’: This is a classic, widely available variety known for its abundant foliage and strong flavor. It’s a great all-around choice for both fresh use and pickling. I’ve had great success with ‘Bouquet’ in my own garden.
* ‘Dukat’: If you’re looking for a more compact variety, ‘Dukat’ is a fantastic option. It’s slower to bolt (go to seed), which means you’ll have a longer harvest of flavorful leaves.
* ‘Long Island Mammoth’: As the name suggests, this variety produces large, robust plants. It’s ideal for pickling because it yields plenty of seed heads.
* ‘Fernleaf’: This variety is known for its attractive, finely divided foliage. It’s also slower to bolt than some other varieties, making it a good choice for continuous harvesting.
Consider your climate and intended use when selecting your dill variety. If you’re unsure, ‘Bouquet’ is always a safe bet!
Preparing for Planting
Before you even think about sowing seeds, let’s get the groundwork done. Dill needs the right environment to flourish.
* Sunlight: Dill loves sunshine! Aim for at least 6 hours of direct sunlight per day. A sunny windowsill can work if you’re growing indoors, but outdoor planting is generally more successful.
* Soil: Well-draining soil is crucial. Dill doesn’t like soggy roots. Amend your soil with compost or other organic matter to improve drainage and fertility. A slightly acidic to neutral pH (around 6.0 to 7.0) is ideal. I usually add a good amount of compost to my garden beds before planting anything.
* Location: Choose a location where dill can grow undisturbed. It doesn’t transplant well, so pick a spot where it can stay for the entire growing season. Also, consider that dill can grow quite tall (up to 3-4 feet), so position it where it won’t shade other plants.
* Container (if applicable): If you’re growing dill in a container, choose a pot that’s at least 12 inches in diameter and depth. Make sure it has drainage holes to prevent waterlogging.
Planting Dill Seeds
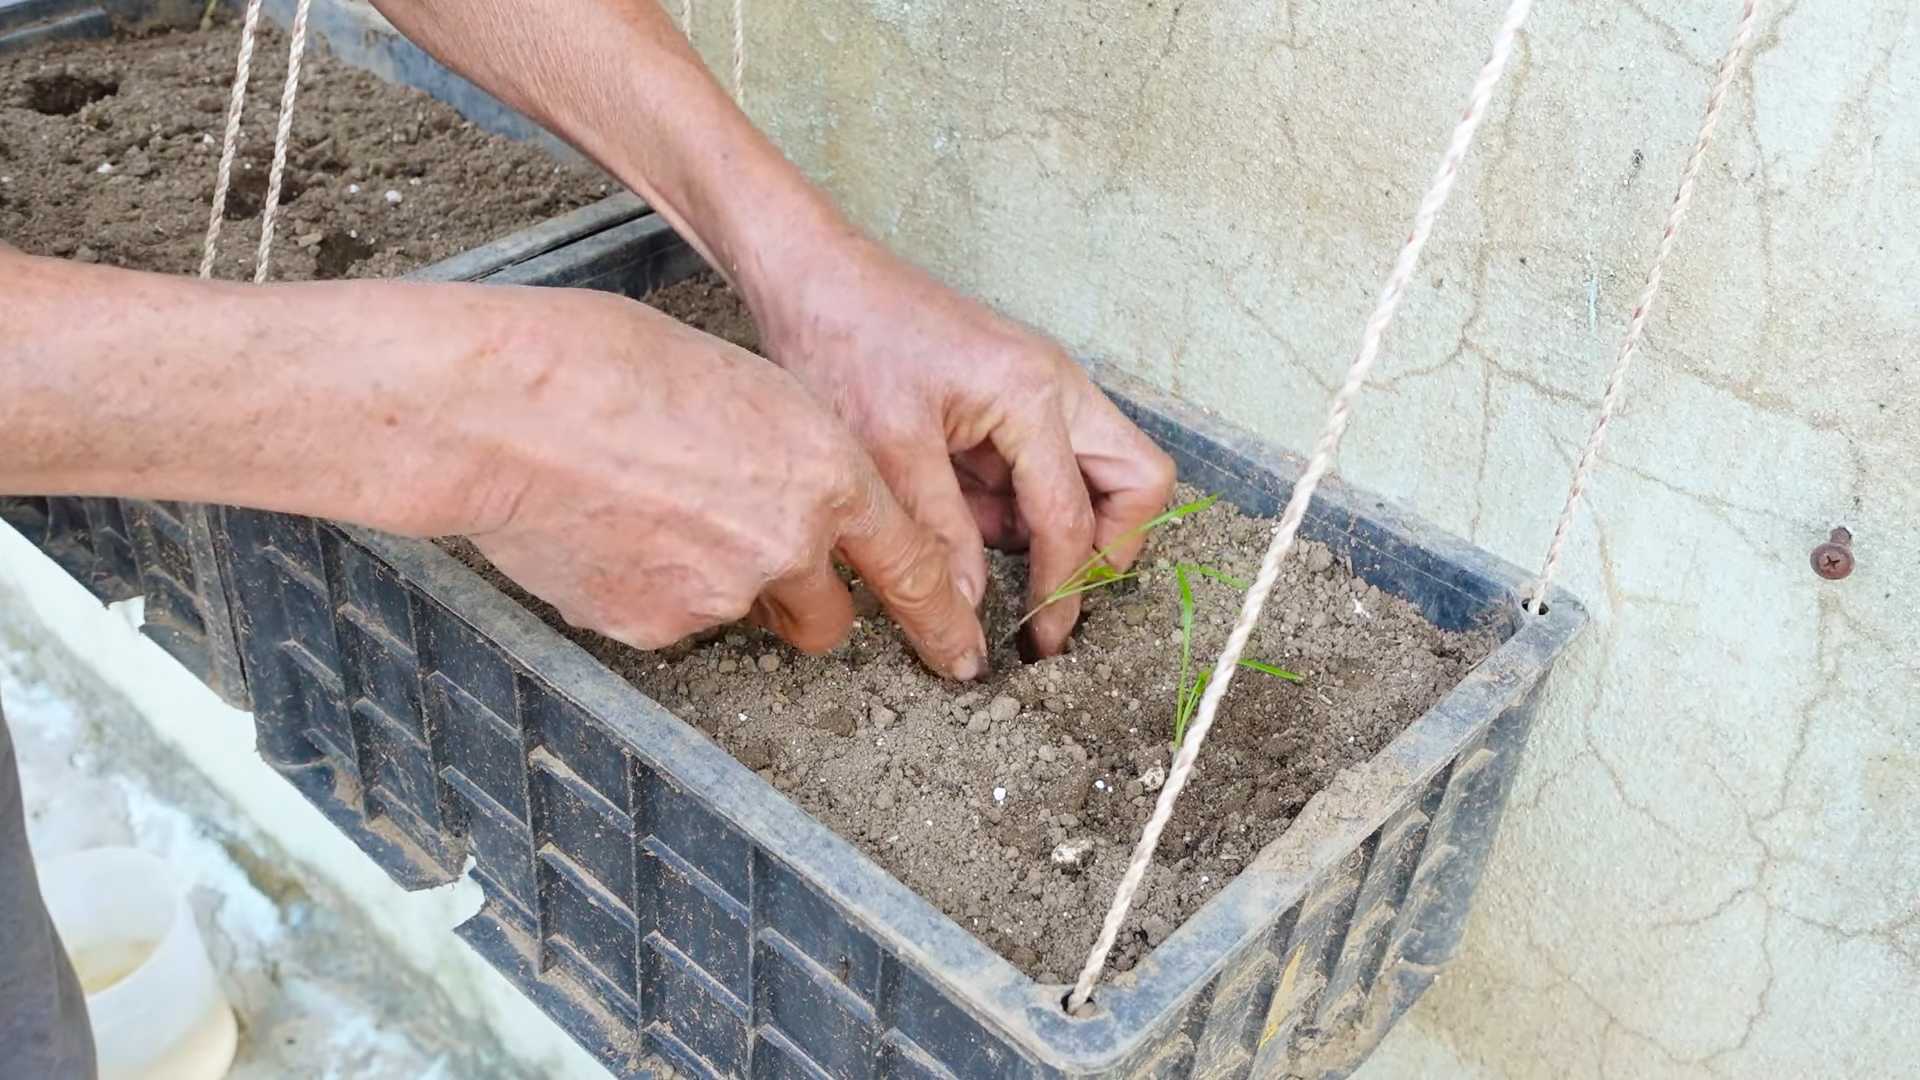
Now for the fun part – planting! Dill is easy to grow from seed, and you can either direct sow it in the garden or start it indoors.
* Direct Sowing: This is my preferred method because it avoids the stress of transplanting.
1. Timing: Sow dill seeds directly into the garden in early spring, after the last frost. You can also sow seeds in late summer for a fall harvest.
2. Preparation: Prepare the soil by loosening it and removing any weeds or debris.
3. Sowing: Sow seeds about ¼ inch deep and 1 inch apart. Gently cover them with soil and water thoroughly.
4. Thinning: Once the seedlings emerge (usually in 7-14 days), thin them to about 6-12 inches apart. This will give them enough space to grow and prevent overcrowding.
* Starting Indoors: If you want to get a head start on the growing season, you can start dill seeds indoors 4-6 weeks before the last frost.
1. Materials: You’ll need seed starting trays or small pots, seed starting mix, and a grow light (optional).
2. Sowing: Sow seeds about ¼ inch deep in the seed starting mix. Water gently and keep the soil moist.
3. Light: Place the trays or pots under a grow light or in a sunny window.
4. Transplanting: Once the seedlings have developed a few sets of true leaves, you can transplant them into the garden. Be very careful when transplanting dill, as it’s sensitive to root disturbance. Harden off the seedlings by gradually exposing them to outdoor conditions for a week before transplanting.
Caring for Your Dill Plants
Once your dill plants are established, they’re relatively low-maintenance. Here’s what you need to do to keep them happy and healthy:
* Watering: Water dill regularly, especially during dry periods. Keep the soil consistently moist, but avoid overwatering. I usually water deeply once or twice a week, depending on the weather.
* Fertilizing: Dill doesn’t need a lot of fertilizer. A light feeding with a balanced fertilizer or compost tea every few weeks is usually sufficient. Avoid over-fertilizing, as this can lead to leggy growth and reduced flavor.
* Weeding: Keep the area around your dill plants free of weeds. Weeds compete for nutrients and water, and they can also harbor pests and diseases.
* Pest Control: Dill is generally pest-resistant, but aphids and spider mites can sometimes be a problem. If you notice any pests, try spraying them with a strong stream of water or using insecticidal soap.
* Bolting: Dill tends to bolt (go to seed) in hot weather. To prolong the harvest of leaves, pinch off the flower buds as soon as they appear. If you want to collect dill seeds, let some of the plants bolt.
Harvesting Dill
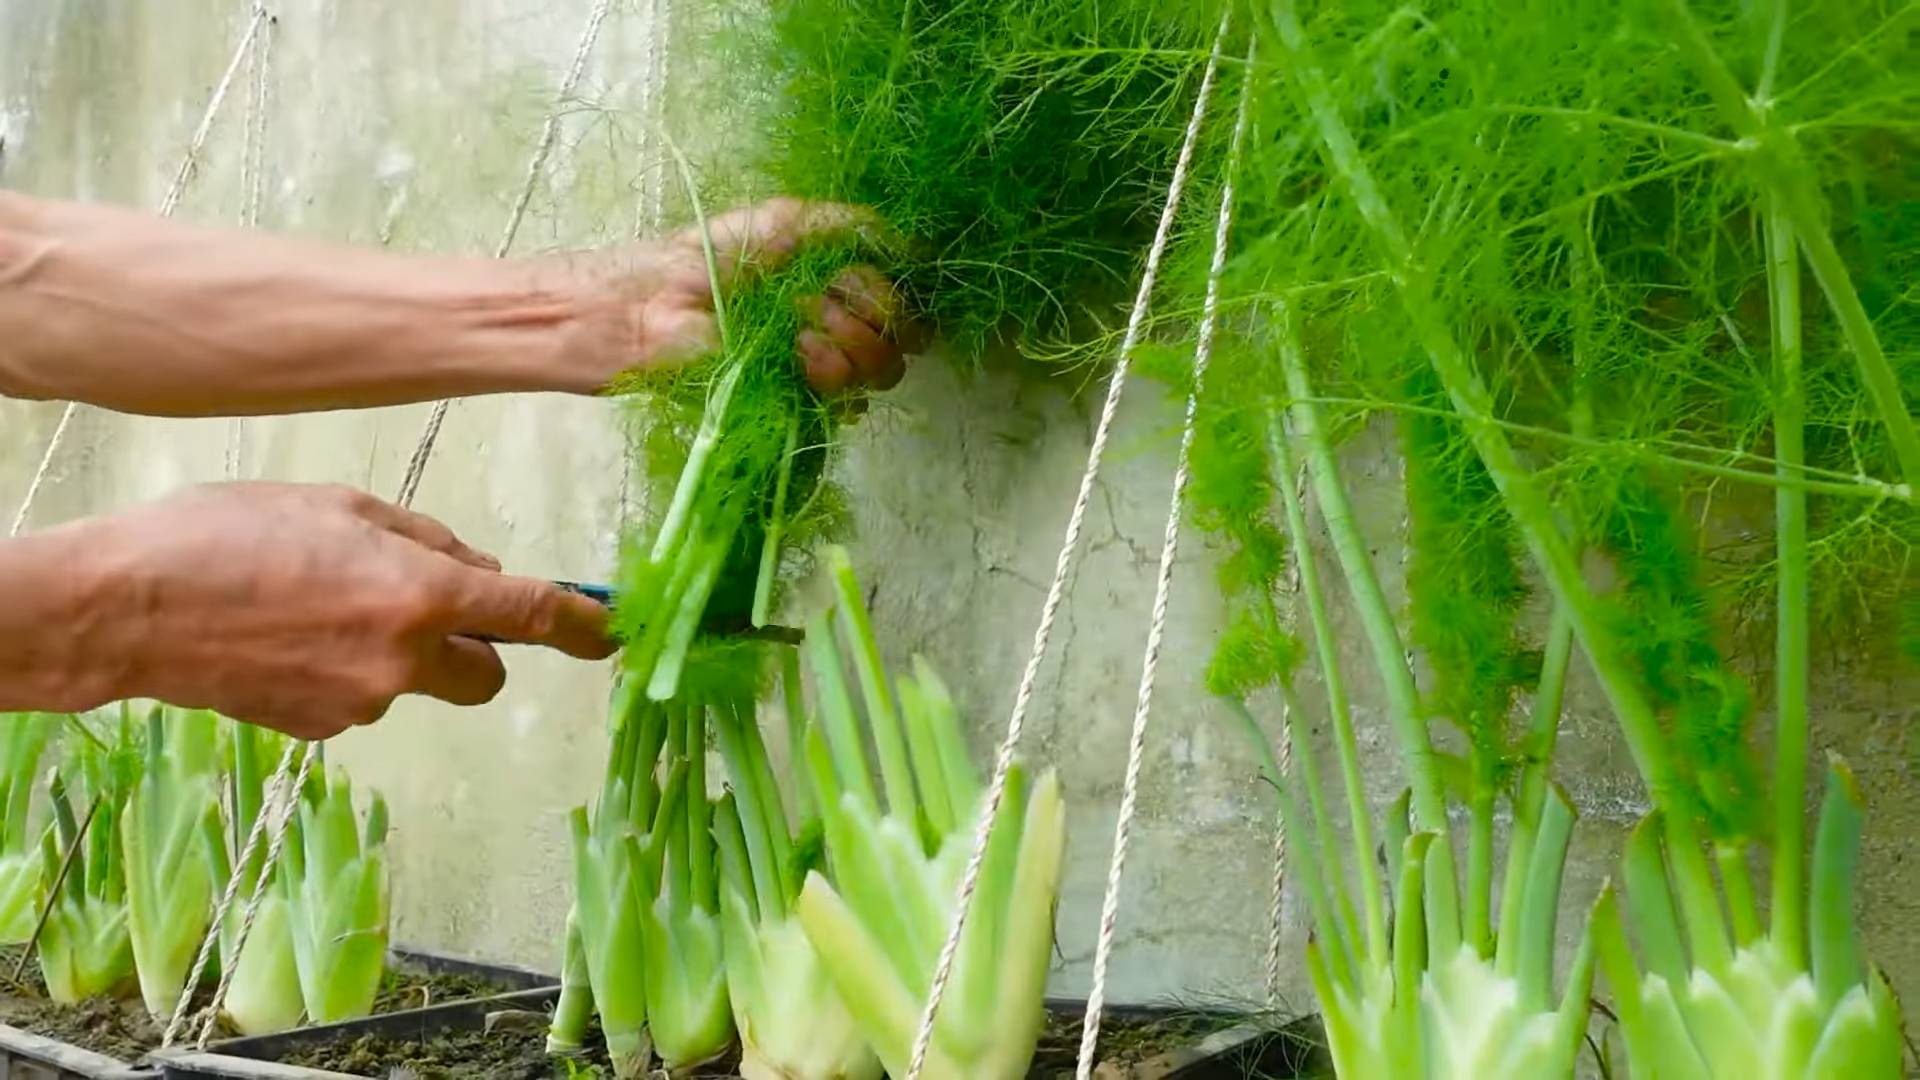
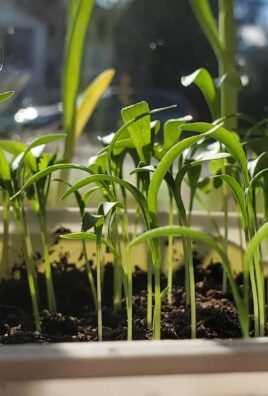
Harvesting dill is easy and rewarding! You can start harvesting leaves as soon as the plants are about 6 inches tall.
* Leaves: Snip off the leaves with scissors or your fingers. Harvest from the top of the plant to encourage bushier growth. The leaves are most flavorful before the plant flowers.
* Seeds: If you’re harvesting dill seeds, wait until the seed heads turn brown and dry. Cut off the seed heads and hang them upside down in a paper bag to dry completely. Once dry, you can shake the seeds out of the seed heads.
* Storage: Fresh dill leaves can be stored in the refrigerator for a few days. Wrap them in a damp paper towel and place them in a plastic bag. Dill seeds can be stored in an airtight container in a cool, dry place for up to a year. You can also freeze dill leaves for longer storage. Chop them up and freeze them in ice cube trays with water or olive oil.
Troubleshooting
Even with the best care, you might encounter some problems while growing dill. Here are a few common issues and how to address them:
* Yellowing Leaves: This can be caused by overwatering, underwatering, nutrient deficiencies, or pests. Check the soil moisture and adjust your watering accordingly. Fertilize with a balanced fertilizer if necessary. Inspect the plants for pests and treat them as needed.
* Leggy Growth: This is often caused by insufficient sunlight or over-fertilizing. Make sure your dill plants are getting enough sunlight and avoid over-fertilizing.
* Bolting: As mentioned earlier, dill tends to bolt in hot weather. Pinch off the flower buds to prolong the harvest of leaves. You can also try planting dill in a partially shaded location to help prevent bolting.
* Aphids: These tiny pests can suck the sap from dill plants, causing them to weaken and yellow. Spray aphids with a strong stream of water or use insecticidal soap.
* Spider Mites: These tiny pests can also cause yellowing and stippling on dill leaves. Spray spider mites with a strong stream of water or use insecticidal soap.
Using Your Homegrown Dill
Now that you’ve successfully grown your own dill, it’s time to enjoy the fruits (or rather, leaves and seeds) of your labor! Dill is a versatile herb that can be used in a variety of dishes.
* Fresh Dill: Use fresh dill leaves to flavor salads, soups, sauces, dips, and egg dishes. It’s also a classic addition to fish and seafood dishes. I love adding fresh dill to my potato salad and cucumber sandwiches.
* Dill Seeds: Use dill seeds to flavor pickles, sauerkraut, and other fermented foods. They can also be used in breads, crackers, and spice blends.
* Dill Vinegar: Infuse vinegar with dill leaves and seeds for a flavorful condiment.
* Dill Oil: Infuse olive oil with dill leaves for a flavorful cooking oil.
Growing dill at home is a rewarding experience that will provide you with a steady supply of fresh herbs for your culinary creations. With a little bit of care and attention, you can enjoy the delicious flavor and beautiful foliage of dill all season long. Happy gardening!
Conclusion
So, there you have it! Growing dill at home isn’t just a fun project; it’s a game-changer for your culinary adventures. Imagine stepping into your garden or onto your balcony and snipping fresh, fragrant dill whenever a recipe calls for it. No more wilted, overpriced bunches from the grocery store! This DIY trick is a must-try because it puts you in control of the quality and freshness of your dill, ensuring that every dish bursts with vibrant flavor.
Beyond the convenience and cost savings, growing your own dill offers a unique connection to your food. You’ll witness the entire life cycle of the plant, from tiny seed to feathery fronds, and gain a deeper appreciation for the ingredients you use. Plus, it’s incredibly rewarding to harvest something you’ve nurtured yourself.
But the benefits don’t stop there. Fresh dill is far superior in taste and aroma to its dried counterpart. The delicate, anise-like flavor is more pronounced, adding a bright, herbaceous note to everything from creamy dips and tangy sauces to savory soups and flavorful pickles. You’ll be amazed at the difference fresh dill makes in your favorite recipes.
Ready to take your dill game to the next level? Consider these variations:
* **Container Gardening:** If you’re short on space, dill thrives in containers. Choose a pot that’s at least 12 inches deep to accommodate the plant’s taproot.
* **Succession Planting:** Plant new dill seeds every few weeks to ensure a continuous harvest throughout the growing season.
* **Companion Planting:** Dill is a great companion plant for cucumbers, tomatoes, and lettuce. It attracts beneficial insects that help protect these crops from pests.
* **Dill Seed Harvest:** Don’t forget to let some of your dill plants go to seed. Dill seeds are a delicious spice in their own right, adding a warm, slightly citrusy flavor to breads, pickles, and other dishes.
* Experiment with Varieties: Explore different dill varieties like ‘Bouquet’ or ‘Fernleaf’ to discover your favorite flavor profiles and growth habits.
We’re confident that once you experience the joy of growing dill at home, you’ll never go back to store-bought again. It’s an easy, rewarding, and delicious way to elevate your cooking.
So, what are you waiting for? Grab some seeds, find a sunny spot, and get ready to embark on your dill-growing adventure! We can’t wait to hear about your experiences. Share your photos, tips, and favorite dill recipes in the comments below. Let’s create a community of home-grown dill enthusiasts! Let us know how this DIY trick worked for you.
Frequently Asked Questions (FAQ)
What is the best time of year to plant dill?
Dill is an annual herb that thrives in cool weather. The best time to plant dill is in early spring, after the last frost, or in late summer for a fall harvest. In warmer climates, you can plant dill throughout the year, but avoid planting during the hottest months of summer, as high temperatures can cause the plants to bolt (go to seed prematurely).
How much sunlight does dill need?
Dill requires at least 6 hours of direct sunlight per day to thrive. Choose a sunny location in your garden or on your balcony for your dill plants. If you’re growing dill indoors, place it near a south-facing window or use grow lights to provide adequate sunlight.
What kind of soil is best for growing dill?
Dill prefers well-drained soil that is rich in organic matter. Amend your garden soil with compost or other organic materials before planting dill. If you’re growing dill in containers, use a high-quality potting mix that drains well. A slightly acidic to neutral soil pH (6.0-7.0) is ideal.
How often should I water dill?
Water dill regularly, especially during dry periods. Keep the soil consistently moist, but avoid overwatering, which can lead to root rot. Water deeply when the top inch of soil feels dry to the touch. Mulching around the plants can help retain moisture and suppress weeds.
How do I harvest dill?
You can start harvesting dill leaves as soon as the plants are a few inches tall. Simply snip off the leaves with scissors or your fingers. For a continuous harvest, pinch off the flower buds as they appear, which will encourage the plant to produce more leaves. If you want to harvest dill seeds, allow the flower heads to mature and dry on the plant. Once the seeds are brown and dry, cut off the flower heads and shake them into a paper bag to collect the seeds.
Why is my dill bolting (going to seed)?
Bolting is a natural process that occurs when dill plants are exposed to high temperatures or stress. Once a dill plant bolts, it will stop producing leaves and focus on producing seeds. To prevent bolting, plant dill in early spring or late summer, provide adequate water, and avoid exposing the plants to excessive heat. Pinching off the flower buds as they appear can also help delay bolting.
What are some common pests and diseases that affect dill?
Dill is generally a pest-resistant plant, but it can be susceptible to aphids, spider mites, and carrot rust flies. To control these pests, spray the plants with insecticidal soap or neem oil. Dill can also be affected by fungal diseases such as powdery mildew and leaf spot. To prevent these diseases, provide good air circulation around the plants and avoid overwatering.
Can I grow dill indoors?
Yes, you can grow dill indoors, but it requires a sunny location and well-drained soil. Choose a pot that is at least 12 inches deep and fill it with a high-quality potting mix. Place the pot near a south-facing window or use grow lights to provide adequate sunlight. Water regularly and fertilize every few weeks with a balanced fertilizer.
How do I store fresh dill?
To store fresh dill, wrap the stems in a damp paper towel and place them in a plastic bag in the refrigerator. Dill will stay fresh for up to a week using this method. You can also freeze dill for longer storage. To freeze dill, chop it into small pieces and place it in ice cube trays filled with water or olive oil. Once the cubes are frozen, transfer them to a freezer bag.
Is dill a good companion plant?
Yes, dill is a great companion plant for many vegetables, including cucumbers, tomatoes, lettuce, and onions. Dill attracts beneficial insects such as ladybugs and lacewings, which help control pests. It also repels some harmful insects, such as cabbage moths and spider mites. However, dill should not be planted near carrots, as it can attract carrot rust flies.
Leave a Comment