

Grow Celery at Home? Absolutely! Imagine stepping into your garden and snipping off fresh, crisp celery stalks whenever you need them. No more limp, store-bought celery that’s been sitting in the fridge for days! This isn’t just a dream; it’s a reality you can easily achieve with a few simple DIY tricks.
Celery, believe it or not, has a rich history, dating back to ancient times where it was used more for medicinal purposes than culinary delights. Over centuries, it transformed into the crunchy vegetable we know and love today. But did you know that you don’t need acres of farmland to enjoy its fresh flavor?
In today’s world, where we’re all looking for ways to eat healthier, save money, and connect with nature, learning how to grow celery at home is more relevant than ever. Think about it: you’ll have a constant supply of organic celery for your soups, salads, and snacks, all while reducing your carbon footprint and knowing exactly where your food comes from. Plus, it’s incredibly rewarding to nurture a plant from start to finish. So, let’s dive into some easy and effective DIY tricks that will have you harvesting your own celery in no time!
Grow Your Own Celery: A Beginner’s Guide
Okay, so you want to grow celery at home? Awesome! It’s easier than you might think, and there’s nothing quite like the fresh, crisp taste of homegrown celery. I’m going to walk you through the whole process, from saving the base of a store-bought stalk to harvesting your very own crunchy stalks. Let’s get started!
What You’ll Need
Before we dive in, let’s gather our supplies. You’ll need:
* A celery stalk (from the grocery store is perfectly fine!)
* A shallow dish or glass
* Water
* Potting soil
* A pot or container (at least 8 inches deep and wide)
* A sunny spot (or a grow light)
* Optional: Liquid fertilizer
Regrowing Celery from a Base: The First Phase
This is where the magic begins! We’re going to take that leftover celery base and coax it into growing new roots and shoots.
1. Prepare the Celery Base: After you’ve used the celery stalks, don’t throw away the base! Cut off the bottom 2 inches of the celery stalk, making sure the root end is intact. Try to keep the cut as clean as possible.
2. Place in Water: Put the celery base in a shallow dish or glass filled with about an inch of water. Make sure the cut end is submerged, but the top of the base is exposed to air.
3. Find a Sunny Spot: Place the dish in a sunny windowsill or under a grow light. Celery needs plenty of light to thrive.
4. Change the Water Regularly: Every day or two, change the water to keep it fresh and prevent mold growth. This is super important!
5. Wait for Roots and Shoots: Within a few days to a week, you should start to see small roots emerging from the bottom of the base. You’ll also notice new green shoots sprouting from the top. This is a sign that your celery is ready to be planted!
Planting Your Celery: The Second Phase
Now that our celery base has roots and shoots, it’s time to give it a proper home in some soil.
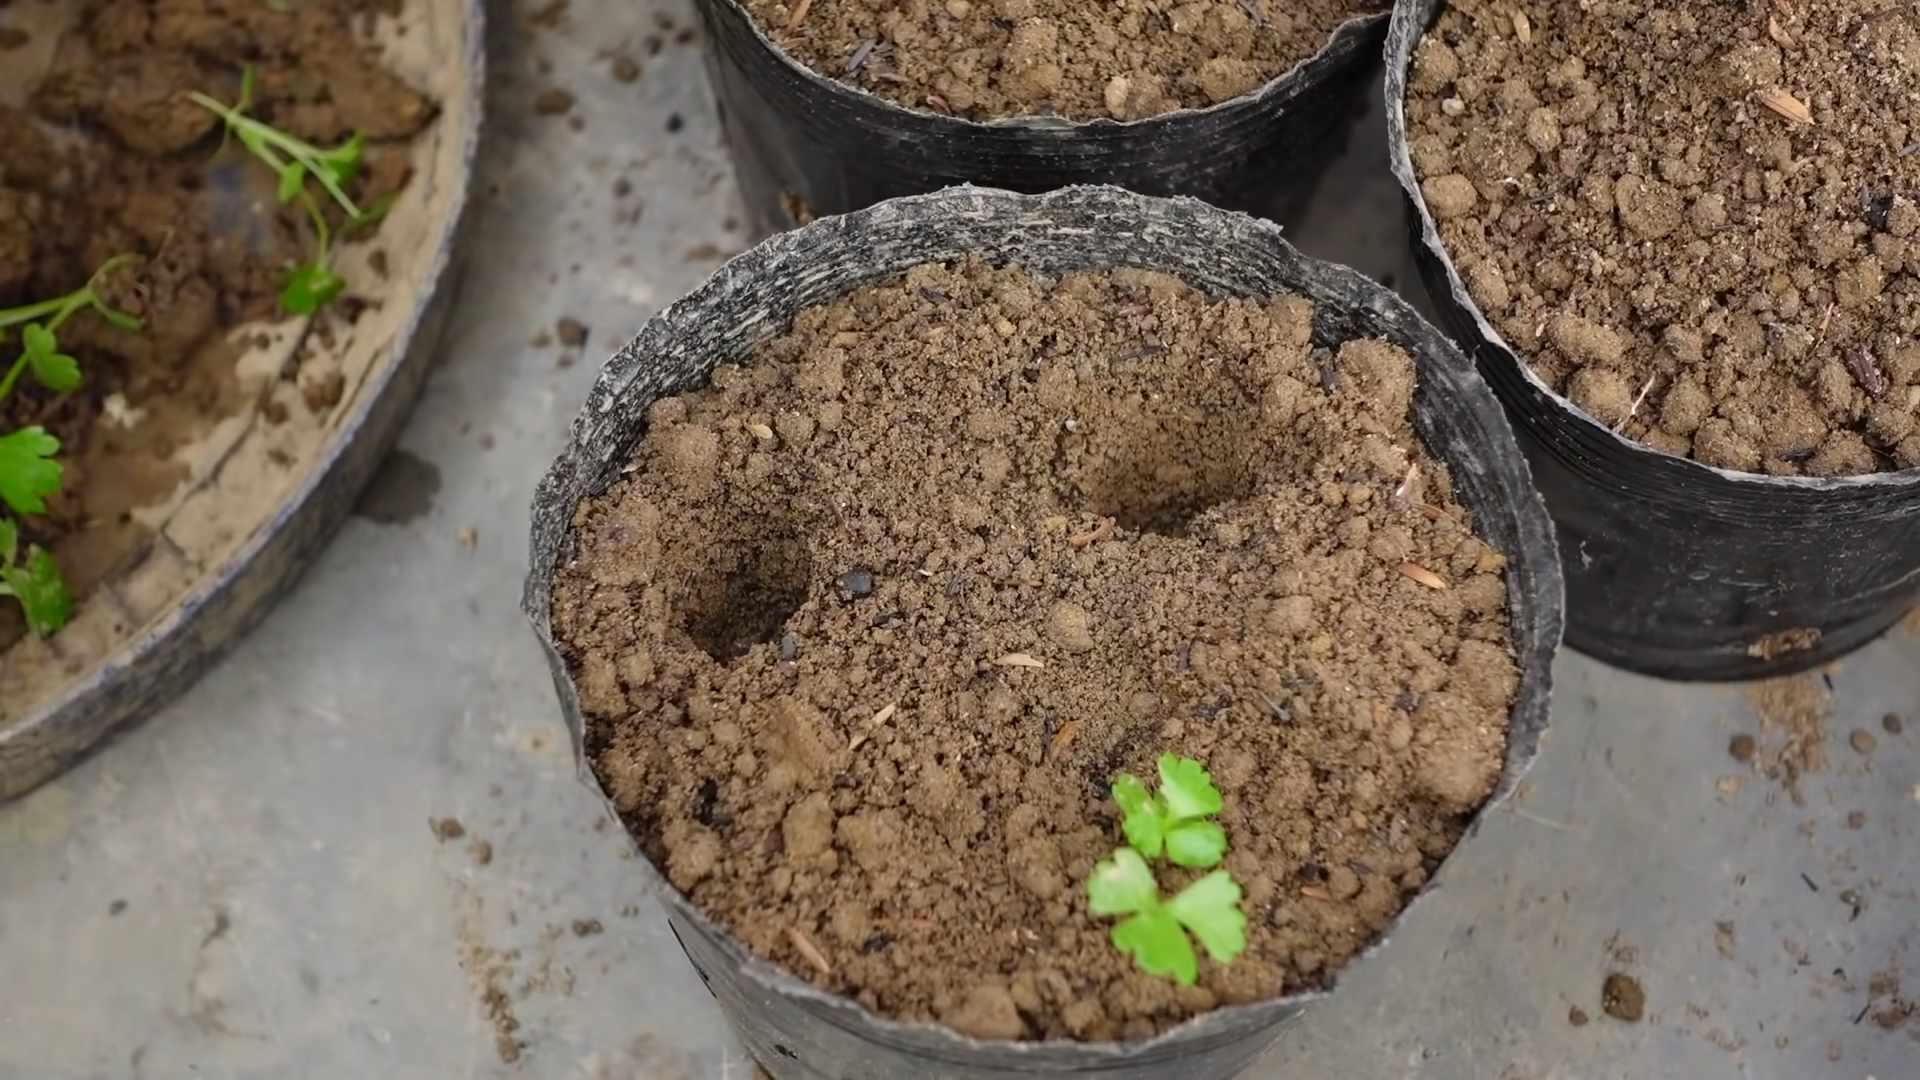
1. Prepare the Pot: Fill your pot or container with good-quality potting soil. Make sure the pot has drainage holes to prevent waterlogging. Celery likes moist soil, but not soggy soil.
2. Make a Hole: Create a hole in the center of the soil that’s large enough to accommodate the celery base and its roots.
3. Carefully Plant the Celery: Gently remove the celery base from the water and place it in the hole. Cover the roots with soil, leaving the top of the base and the new green shoots exposed.
4. Water Thoroughly: Water the soil well after planting. You want the soil to be moist but not waterlogged.
5. Choose the Right Location: Celery needs at least 6 hours of sunlight per day. If you don’t have a sunny spot indoors, consider using a grow light.
Caring for Your Celery: The Third Phase
This is where the patience comes in. Celery takes a while to mature, but with proper care, you’ll be rewarded with delicious, homegrown stalks.
1. Water Regularly: Celery needs consistent moisture. Water the soil whenever the top inch feels dry to the touch. Avoid letting the soil dry out completely.
2. Fertilize (Optional): To give your celery a boost, you can fertilize it every two weeks with a liquid fertilizer diluted to half strength. Follow the instructions on the fertilizer package.
3. Monitor for Pests and Diseases: Keep an eye out for common celery pests like aphids and slugs. You can usually remove them by hand or with a gentle spray of water. Celery can also be susceptible to diseases like blight. If you notice any signs of disease, remove the affected leaves and improve air circulation around the plant.
4. Blanching (Optional): Blanching is the process of excluding light from the celery stalks to make them paler and milder in flavor. About two weeks before you plan to harvest, you can blanch your celery by wrapping the stalks with newspaper or cardboard. Make sure to leave the top of the plant exposed to sunlight. This step is optional, and some people prefer the stronger flavor of unblanched celery.
Harvesting Your Celery: The Final Phase
After about 75-100 days, your celery should be ready to harvest!
1. Check for Maturity: The celery stalks should be at least 6-8 inches long and firm to the touch.
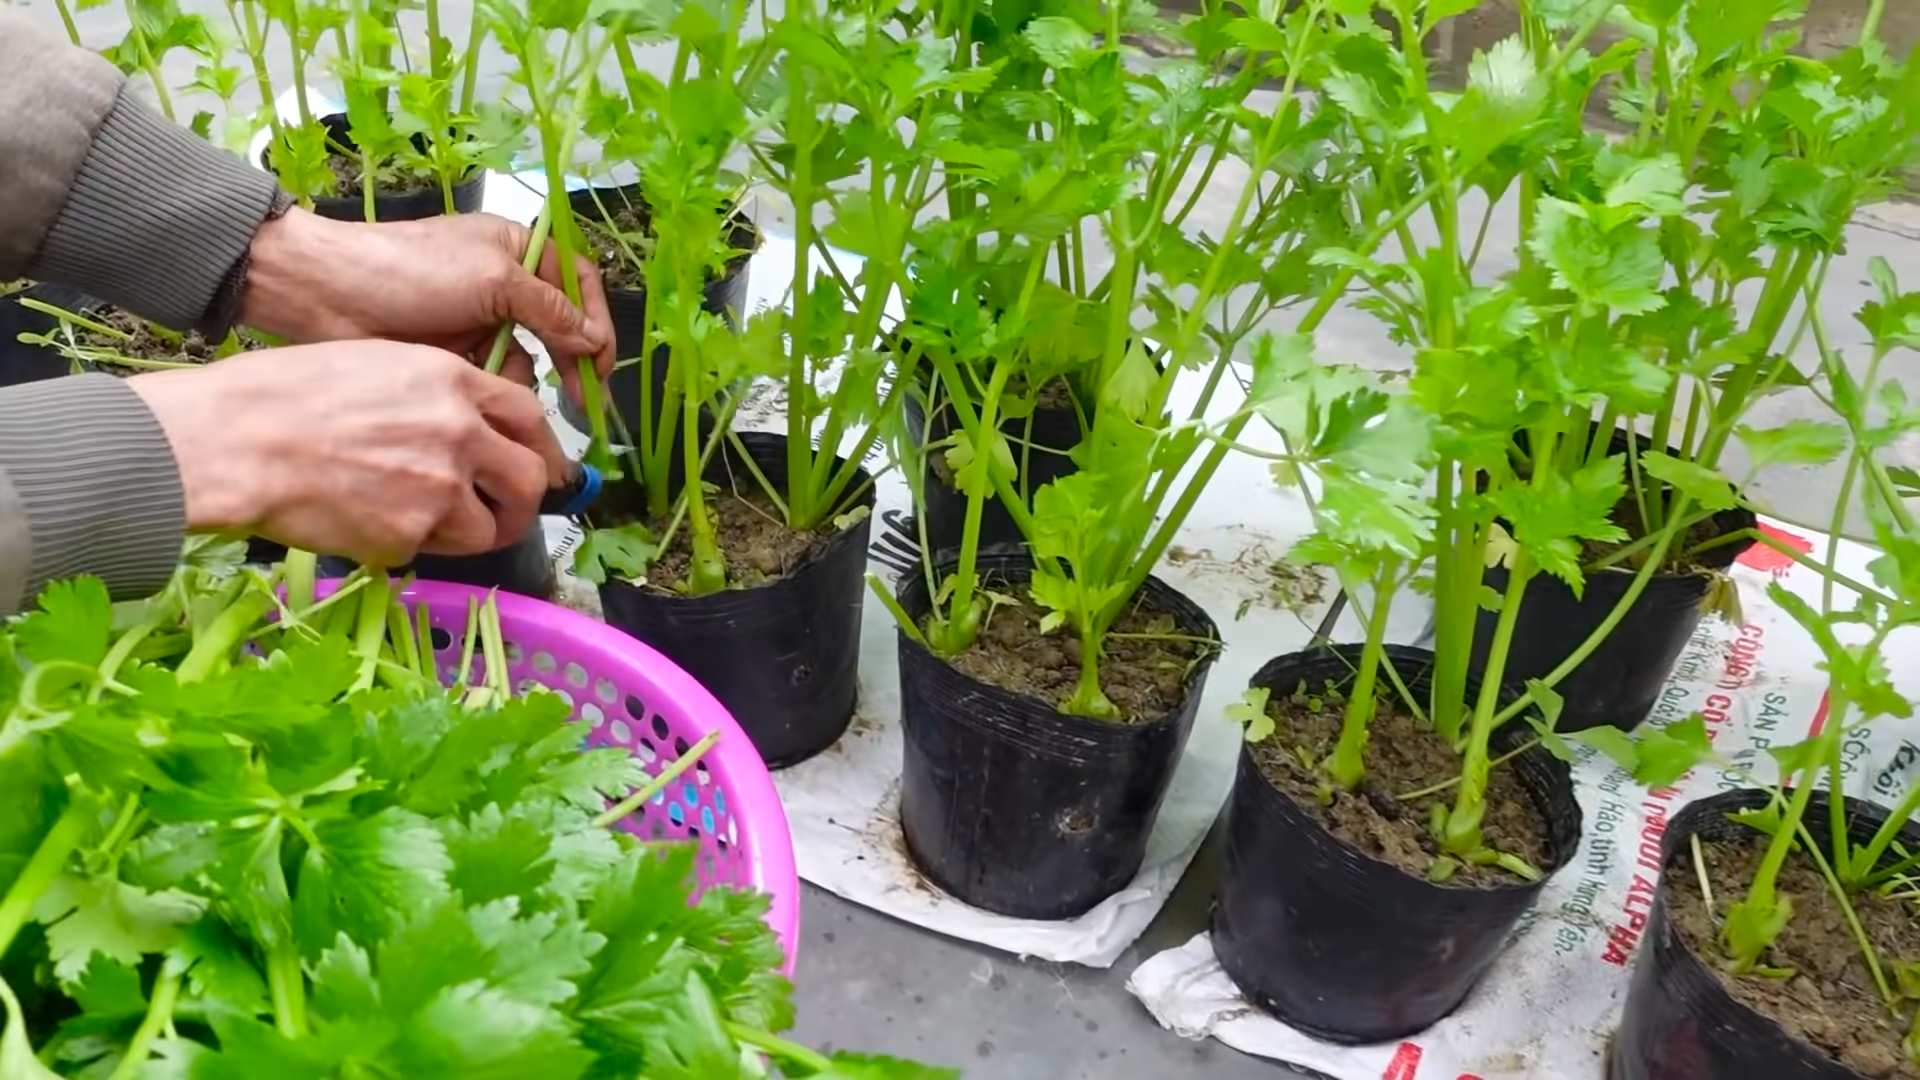
2. Harvest the Stalks: You can harvest the entire plant at once, or you can harvest individual stalks as needed. To harvest the entire plant, cut the stalks off at the base with a sharp knife. To harvest individual stalks, simply cut them off at the base.
3. Enjoy Your Homegrown Celery: Wash the celery stalks thoroughly and enjoy them in salads, soups, stews, or as a healthy snack.
Troubleshooting Tips
Even with the best care, you might encounter some challenges along the way. Here are a few common problems and how to fix them:
* Yellowing Leaves: This could be a sign of overwatering or underwatering. Check the soil moisture and adjust your watering accordingly. It could also be a sign of nutrient deficiency. Try fertilizing with a balanced liquid fertilizer.
* Stunted Growth: This could be due to insufficient sunlight or poor soil. Make sure your celery is getting at least 6 hours of sunlight per day and that the soil is well-draining and rich in nutrients.
* Pests: Aphids, slugs, and other pests can damage celery plants. Inspect your plants regularly and remove any pests you find. You can also use insecticidal soap or other organic pest control methods.
* Bolting: Bolting is when the celery plant prematurely produces flowers and seeds. This can happen if the plant is stressed by heat or drought. To prevent bolting, keep the soil consistently moist and provide shade during the hottest part of the day.
Extra Tips for Success
Here are a few extra tips to help you grow the best celery possible:
* Choose the Right Variety: Some celery varieties are easier to grow than others. Look for varieties that are specifically bred for home gardens.
* Start Indoors: If you live in a cold climate, you can start your celery seeds indoors 8-10 weeks before the last frost. This will give your plants a head start.
* Harden Off Seedlings: Before transplanting your seedlings outdoors, gradually acclimate them to the outdoor conditions by hardening them off for a week or two.
* Mulch: Mulching around your celery plants can help to retain moisture, suppress weeds, and regulate soil temperature.
* Companion Planting: Celery grows well with other vegetables like onions, garlic, and tomatoes.
Growing celery at home is a rewarding experience. With a little patience and care, you can enjoy fresh, homegrown celery all season long. Happy gardening!
Conclusion
So, there you have it! Growing celery at home from kitchen scraps isn’t just a fun experiment; it’s a sustainable way to reduce food waste, enjoy fresh, crisp celery, and even impress your friends and family. Forget those limp, store-bought stalks that have traveled miles – imagine the satisfaction of harvesting your own vibrant, flavorful celery right from your windowsill or garden.
This DIY trick is a must-try for several reasons. First, it’s incredibly easy and requires minimal effort. You’re essentially giving a new lease on life to something you would normally discard. Second, it’s cost-effective. Why buy celery when you can regrow it for free? Third, it’s a fantastic learning experience, especially for kids. It teaches them about plant life cycles, sustainability, and the magic of gardening. Finally, and perhaps most importantly, homegrown celery tastes significantly better than store-bought. The flavor is fresher, crisper, and more intense.
But don’t stop there! Experiment with different varieties of celery. Try growing Pascal celery for its classic flavor, or venture into the world of red celery for a unique visual appeal and slightly sweeter taste. You can also adjust the growing conditions to influence the flavor and texture of your celery. For example, providing more sunlight can result in a sweeter, more robust flavor.
Consider planting your regrown celery in different types of soil. Some gardeners swear by well-draining potting mix, while others prefer a blend of compost and garden soil. Observe how the different soil types affect the growth and flavor of your celery. You can also try growing your celery in a hydroponic system for a faster and more efficient growth rate.
Once you’ve mastered the art of regrowing celery from the base, you can explore other methods of propagation, such as growing celery from seed. This will allow you to cultivate a wider range of celery varieties and experiment with different growing techniques.
Don’t be afraid to get creative with your celery harvest. Use it in salads, soups, stews, smoothies, or as a healthy snack with your favorite dip. You can also juice it for a refreshing and nutritious beverage. The possibilities are endless!
We wholeheartedly encourage you to give this DIY trick a try. It’s a simple, rewarding, and sustainable way to enjoy fresh, homegrown celery. And most importantly, have fun with it! Gardening should be an enjoyable experience, so don’t be afraid to experiment and learn along the way.
Once you’ve successfully regrown your celery, we’d love to hear about your experience. Share your tips, tricks, and photos on social media using the hashtag #HomegrownCelery. Let’s inspire others to embrace the joy of sustainable gardening and the deliciousness of homegrown produce. We are confident that you will find that growing celery at home is easier than you think.
Frequently Asked Questions (FAQ)
What part of the celery do I need to regrow it?
You need the base of the celery stalk, the part that you would normally cut off and discard. This includes the root end and about 2-3 inches of the stalks. Make sure the base is firm and healthy-looking, without any signs of rot or decay.
How long does it take to see new growth?
You should start to see new growth within 5-7 days. The center of the celery base will begin to sprout new leaves. Be patient, and make sure to change the water every 1-2 days to prevent bacterial growth.
What kind of water should I use?
Use tap water that has been left out for a few hours to allow the chlorine to dissipate, or use filtered water. Avoid using distilled water, as it lacks the minerals that plants need to thrive.
How often should I change the water?
Change the water every 1-2 days to prevent bacterial growth and keep the celery base healthy. This is crucial for successful regrowth.
When should I plant the celery in soil?
Once the celery base has developed roots that are about 2-3 inches long and has a good amount of green growth, it’s time to plant it in soil. This usually takes about 1-2 weeks.
What kind of soil should I use?
Use a well-draining potting mix or a blend of compost and garden soil. Celery prefers soil that is rich in organic matter. Ensure the pot you use has drainage holes to prevent waterlogging.
How much sunlight does celery need?
Celery needs at least 6 hours of sunlight per day. Place your potted celery in a sunny location, such as a windowsill or a spot in your garden that receives plenty of sunlight. If you don’t have enough natural light, you can supplement with a grow light.
How often should I water the celery after planting it in soil?
Keep the soil consistently moist, but not waterlogged. Water the celery when the top inch of soil feels dry to the touch. Avoid overwatering, as this can lead to root rot.
Can I grow celery indoors year-round?
Yes, you can grow celery indoors year-round, provided you have enough sunlight or a grow light. Indoor celery may not grow as large as outdoor celery, but you can still harvest fresh stalks for your culinary needs.
How long does it take to harvest celery after planting it in soil?
It typically takes about 75-90 days to harvest celery after planting it in soil. You can start harvesting individual stalks as needed once they reach a desirable size.
What are some common problems when growing celery, and how can I fix them?
Some common problems include pests (like aphids), diseases (like celery blight), and nutrient deficiencies. Regularly inspect your celery plants for signs of pests or diseases. Treat infestations with insecticidal soap or neem oil. Ensure your celery plants receive adequate nutrients by fertilizing them with a balanced fertilizer every few weeks.
Can I use the celery leaves?
Absolutely! Celery leaves are packed with flavor and nutrients. You can use them in salads, soups, stews, or as a garnish. They can also be dried and used as a seasoning.
Is regrowing celery from the base as nutritious as growing it from seed?
Yes, regrowing celery from the base provides the same nutritional benefits as growing it from seed. The celery stalks will contain vitamins, minerals, and antioxidants.
What if my celery base starts to rot?
If your celery base starts to rot, it’s likely due to overwatering or bacterial contamination. Discard the rotting base and start with a fresh one. Make sure to change the water frequently and avoid submerging the entire base in water.
Can I grow celery in a container?
Yes, celery grows well in containers. Choose a pot that is at least 8 inches deep and wide to accommodate the celery’s root system. Make sure the pot has drainage holes to prevent waterlogging.
What fertilizer should I use for celery?
Use a balanced fertilizer with equal parts nitrogen, phosphorus, and potassium (e.g., 10-10-10). You can also use a fertilizer specifically formulated for vegetables. Follow the instructions on the fertilizer package for application rates.
How do I prevent celery from bolting (going to seed)?
Celery is more likely to bolt in hot weather. To prevent bolting, provide your celery plants with shade during the hottest part of the day. You can also choose bolt-resistant celery varieties.
Can I freeze celery?
Yes, you can freeze celery. Blanch the celery stalks in boiling water for 2-3 minutes, then transfer them to an ice bath to stop the cooking process. Drain the celery and pat it dry before freezing it in a freezer-safe bag or container. Frozen celery will be softer than fresh celery, so it’s best used in soups, stews, or other cooked dishes.


Leave a Comment