

Grow Blueberries at Home – imagine plucking juicy, sun-ripened blueberries straight from your own backyard! For centuries, blueberries have been cherished, not just for their delicious taste, but also for their incredible health benefits. Native American cultures revered them, using them for both sustenance and medicinal purposes. Today, we know they’re packed with antioxidants, vitamins, and fiber, making them a superfood staple.
But what if you thought growing these little gems was too difficult or required acres of land? Think again! This DIY guide is your secret weapon to successfully grow blueberries at home, no matter the size of your garden. I’m going to share simple, effective tricks and hacks that will transform even the most novice gardener into a blueberry-growing pro.
Many people shy away from growing blueberries because they believe it’s too complicated or that they need special equipment. The truth is, with a little know-how and the right approach, you can enjoy a bountiful harvest of these delectable berries right outside your door. This article will demystify the process, providing you with easy-to-follow steps and insider tips to ensure your blueberry bushes thrive. Get ready to enjoy fresh, homegrown blueberries in your smoothies, muffins, and more!

Grow Onions Like a Pro: Innovative DIY Methods for a Bountiful Harvest
Hey there, fellow gardening enthusiasts! I’m so excited to share some innovative DIY methods I’ve discovered for growing onions that have seriously boosted my harvests. Forget those tiny, sad onions – we’re talking big, flavorful bulbs that will make your kitchen sing! I’ve experimented with a few different techniques, and I’m going to walk you through my favorites, step-by-step. Let’s get our hands dirty!
Method 1: The Bottle Tower Onion Garden
This method is perfect if you’re short on space or just want a visually appealing way to grow a ton of onions. It’s all about vertical gardening, baby!
What You’ll Need:
* Several (5-10) large plastic bottles (2-liter soda bottles or similar work great)
* A sharp knife or box cutter
* Potting soil (a well-draining mix is crucial)
* Onion sets or seedlings (I prefer sets for this method)
* Drill or nail (for drainage holes)
* Strong rope or wire for hanging
* Watering can or hose
Step-by-Step Instructions:
1. Prepare the Bottles: First, thoroughly clean all your plastic bottles. Remove any labels and residue. This is important for hygiene and aesthetics.
2. Cut the Planting Holes: Using your sharp knife or box cutter, carefully cut circular holes in the sides of each bottle. The size of the holes should be large enough to accommodate your onion sets or seedlings, about 2-3 inches in diameter. Space the holes evenly around the bottle, leaving enough room between them so the onions won’t be overcrowded. I usually aim for 4-5 holes per bottle, depending on the bottle’s size.
3. Create Drainage: This is super important! Use your drill or nail to create several small drainage holes in the bottom of each bottle. Onions hate sitting in soggy soil, so good drainage is essential to prevent root rot.
4. String ‘Em Up: Now, we’re going to create a way to hang the bottles. Carefully poke two holes on opposite sides of the bottle’s neck, near the top. Thread your strong rope or wire through these holes, creating a loop for hanging. Make sure the loop is secure and strong enough to support the weight of the bottle filled with soil and onions.
5. Fill ‘Er Up (Part 1): Start filling the bottles with your potting soil. Add soil until you reach the first planting hole. Gently pack the soil down to create a firm base for your onion sets.
6. Plant Your Onions (Round 1): Carefully insert your onion sets or seedlings into the first set of holes. Make sure the roots are buried in the soil and the green shoots are facing outwards. Gently add more soil around the onion sets to secure them in place.
7. Repeat and Stack: Continue filling the bottle with soil, planting onions in each set of holes as you go. Repeat steps 5 and 6 until the bottle is full.
8. Hang Your Tower: Find a sunny spot in your garden or on your balcony to hang your onion tower. Make sure the location receives at least 6-8 hours of sunlight per day. Hang the bottles securely from a sturdy branch, hook, or railing.
9. Water Thoroughly: Water your onion tower thoroughly after planting. The water should drain freely from the drainage holes at the bottom of the bottles.
10. Maintain and Monitor: Keep the soil consistently moist, but not waterlogged. Water your onion tower regularly, especially during hot, dry weather. Monitor your onions for any signs of pests or diseases and take appropriate action if necessary. I like to give them a little liquid fertilizer every few weeks to give them a boost.
Method 2: The Trench Method for Giant Onions
This method focuses on creating the perfect environment for onions to bulk up and become truly massive. It’s a bit more labor-intensive, but the results are totally worth it!
What You’ll Need:
* Shovel or garden spade
* Compost or well-rotted manure
* Potting soil
* Onion sets or seedlings
* Fertilizer (high in phosphorus and potassium)
* Watering can or hose
* Mulch (straw, wood chips, or shredded leaves)
Step-by-Step Instructions:
1. Prepare the Trench: Choose a sunny location in your garden with well-draining soil. Dig a trench that is approximately 12 inches wide and 6 inches deep. The length of the trench will depend on how many onions you want to plant. I usually make mine about 10 feet long.
2. Amend the Soil: This is where the magic happens! Mix a generous amount of compost or well-rotted manure into the soil at the bottom of the trench. This will provide your onions with the nutrients they need to grow big and strong. I also like to add a little bit of bone meal for extra phosphorus.
3. Plant Your Onions: Plant your onion sets or seedlings in the trench, spacing them about 6 inches apart. Make sure the roots are buried in the soil and the green shoots are facing upwards.
4. Backfill and Water: Gently backfill the trench with potting soil, covering the onion sets or seedlings up to their necks. Water the trench thoroughly after planting.
5. Fertilize Regularly: Onions are heavy feeders, so it’s important to fertilize them regularly. Use a fertilizer that is high in phosphorus and potassium, which are essential for bulb development. I usually fertilize my onions every 2-3 weeks.
6. Mulch for Moisture: Apply a layer of mulch around your onions to help retain moisture and suppress weeds. Straw, wood chips, or shredded leaves all work well.
7. Water Deeply: Water your onions deeply and regularly, especially during hot, dry weather. Onions need consistent moisture to grow properly.
8. Hilling (Optional): As your onions grow, you can gradually hill up the soil around their base. This will help to support the bulbs and encourage them to grow larger. I usually do this a couple of times during the growing season.
Method 3: The Container Gardening Onion Bonanza
This method is all about maximizing your onion yield in containers. It’s great for patios, balconies, or even just a sunny windowsill.
What You’ll Need:
* Large containers (at least 12 inches deep and wide)
* Potting soil (a well-draining mix is essential)
* Onion sets or seedlings
* Fertilizer (balanced liquid fertilizer)
* Watering can or hose
Step-by-Step Instructions:
1. Choose Your Containers: Select large containers that are at least 12 inches deep and wide. This will give your onions plenty of room to grow. Make sure the containers have drainage holes to prevent waterlogging.
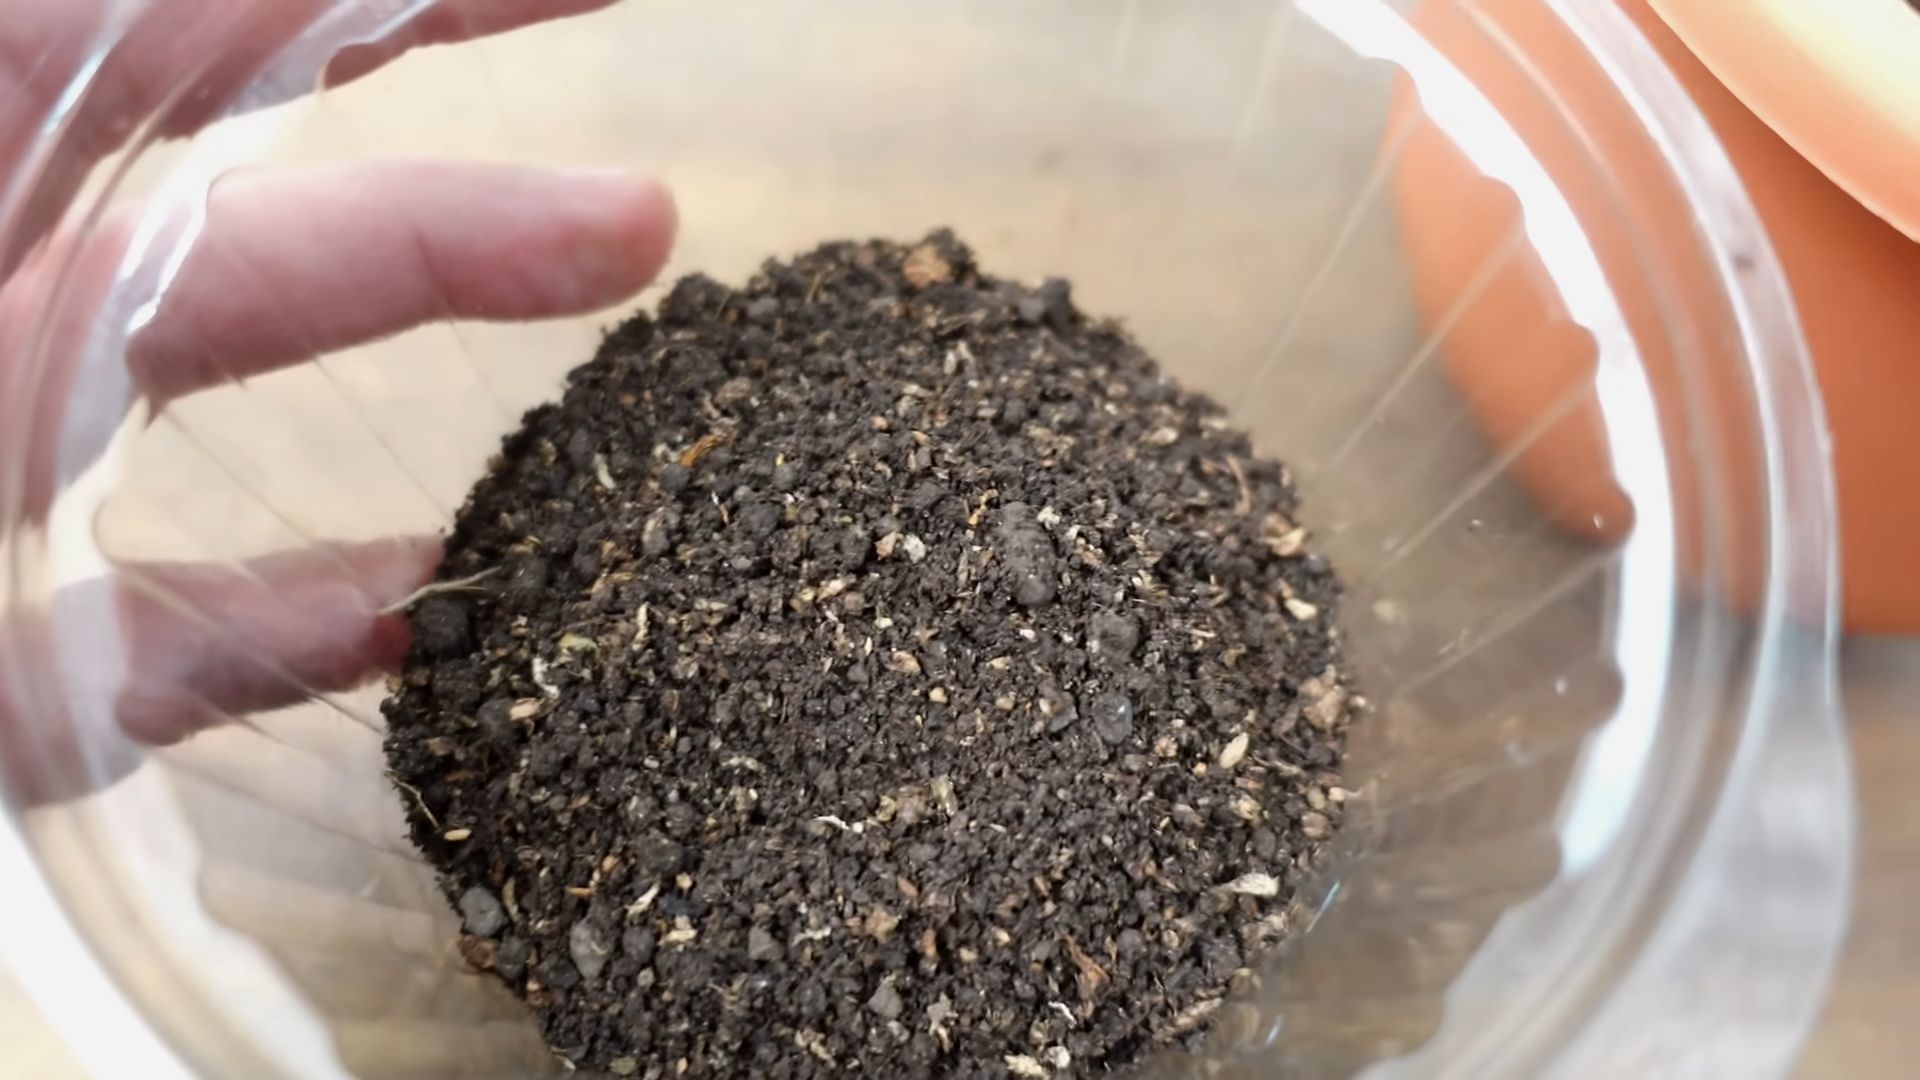
2. Fill with Potting Soil: Fill your containers with a well-draining potting soil mix. Avoid using garden soil, as it can be too heavy and compact for container gardening.
3. Plant Your Onions: Plant your onion sets or seedlings in the containers, spacing them about 4-6 inches apart. You can plant quite a few onions in a single container, as long as you give them enough space to grow.
4. Water Thoroughly: Water your onions thoroughly after planting. The water should drain freely from the drainage holes at the bottom of the containers.
5. Fertilize Regularly: Onions grown in containers need regular fertilization. Use a balanced liquid fertilizer every 2-3 weeks to provide them with the nutrients they need.
6. Sunlight is Key: Place your containers in a sunny location that receives at least 6-8 hours of sunlight per day. Onions need plenty of sunlight to grow properly.
7. Monitor and Maintain: Keep the soil consistently moist, but not waterlogged. Water your onions regularly, especially during hot, dry weather. Monitor your onions for any signs of pests or diseases and take appropriate action if necessary.
General Tips for Onion Success:
* Choose the Right Variety: Select onion varieties that are well-suited to your climate and growing conditions. Short-day onions are best for southern climates, while long-day onions are best for northern climates.
* Start with Healthy Sets or Seedlings: Choose onion sets or seedlings that are firm, healthy, and free from disease.
* Weed Regularly: Onions don’t compete well with weeds, so it’s important to weed your onion patch regularly.
* Harvest at the Right Time: Harvest your onions when the tops start to fall over and turn brown. This indicates that the bulbs are mature.
* Cure Your Onions: After harvesting, cure your onions by laying them out in a dry, well-ventilated place for 1-
Conclusion
So, there you have it! Growing blueberries at home is not only achievable but also incredibly rewarding. Imagine stepping into your backyard and harvesting plump, juicy blueberries, knowing you nurtured them from tiny plants to bountiful producers. This DIY trick, focusing on creating the perfect acidic soil environment, is the key to unlocking blueberry-growing success, even if you thought you didn’t have a green thumb.
Why is this a must-try? Because store-bought blueberries, while convenient, often lack the intense flavor and freshness of homegrown berries. Plus, you have complete control over the growing process, ensuring your blueberries are free from unwanted pesticides and chemicals. You’re not just growing fruit; you’re cultivating a healthier, more sustainable lifestyle.
But the benefits extend beyond just the taste and health aspects. Gardening, in general, is a fantastic stress reliever. Tending to your blueberry plants can be a meditative experience, allowing you to connect with nature and escape the pressures of daily life. And let’s not forget the satisfaction of sharing your homegrown bounty with friends and family!
Ready to take your blueberry growing to the next level? Consider these variations and suggestions:
* Container Gardening: If you’re short on space, blueberries thrive in containers. Choose large pots (at least 20 gallons) and use a well-draining acidic potting mix. This is perfect for balconies, patios, or small yards.
* Variety is the Spice of Life: Experiment with different blueberry varieties to extend your harvest season and enjoy a range of flavors. Consider early-season, mid-season, and late-season varieties. Some popular choices include ‘Bluecrop,’ ‘Elliott,’ and ‘Legacy.’
* Companion Planting: Enhance your blueberry patch by planting companion plants like azaleas, rhododendrons, and strawberries. These plants share similar soil requirements and can attract beneficial insects.
* Protecting Your Berries: Birds love blueberries just as much as we do! Invest in netting to protect your precious crop from feathered thieves.
* Soil Testing: Regularly test your soil pH to ensure it remains within the ideal range of 4.5 to 5.5. Amend the soil as needed with sulfur or peat moss.
Don’t be intimidated by the perceived complexity of growing blueberries. With a little preparation and the right knowledge, you can enjoy a thriving blueberry patch for years to come. This DIY trick simplifies the process, making it accessible to gardeners of all skill levels.
We wholeheartedly encourage you to try this DIY trick for growing blueberries at home. It’s an investment in your health, your well-being, and your taste buds. Once you’ve experienced the joy of harvesting your own blueberries, you’ll never look at store-bought berries the same way again.
And most importantly, we want to hear about your experience! Share your successes, your challenges, and your tips in the comments below. Let’s create a community of blueberry enthusiasts and learn from each other. Happy growing!
Frequently Asked Questions (FAQs)
Why is acidic soil so important for blueberries?
Blueberries are acid-loving plants, meaning they thrive in soil with a pH between 4.5 and 5.5. This acidity is crucial for their ability to absorb essential nutrients from the soil. In alkaline or neutral soil, blueberries struggle to take up iron, manganese, and other vital elements, leading to stunted growth, yellowing leaves (chlorosis), and poor fruit production. The DIY trick focuses on creating and maintaining this acidic environment, ensuring your blueberries get the nutrients they need to flourish.
How do I test the pH of my soil?
Testing your soil pH is a simple process. You can purchase a soil testing kit from most garden centers or online retailers. These kits typically involve mixing a soil sample with a solution and comparing the resulting color to a chart to determine the pH level. Alternatively, you can send a soil sample to a professional soil testing laboratory for a more accurate analysis. Regular soil testing is recommended, especially in the first few years of establishing your blueberry plants.
What if my soil is naturally alkaline?
If your soil is naturally alkaline, don’t despair! You can still grow blueberries successfully by amending the soil to lower its pH. The most common methods include:
* Adding Sulfur: Elemental sulfur is a slow-release amendment that gradually lowers the soil pH over time. Follow the instructions on the product label for application rates.
* Using Peat Moss: Peat moss is naturally acidic and can be incorporated into the soil to lower its pH. Mix it thoroughly with the existing soil before planting.
* Acidifying Fertilizers: Use fertilizers specifically formulated for acid-loving plants, such as azalea or rhododendron fertilizers. These fertilizers contain ammonium-based nitrogen, which helps to lower the soil pH.
* Container Gardening: As mentioned earlier, growing blueberries in containers allows you to control the soil environment more easily. Use a commercially available acidic potting mix.
How often should I water my blueberry plants?
Blueberries need consistent moisture, especially during the growing season. Water deeply and regularly, aiming to keep the soil consistently moist but not waterlogged. Check the soil moisture by sticking your finger into the soil a few inches deep. If the soil feels dry, it’s time to water. Avoid overhead watering, as this can promote fungal diseases. Drip irrigation or soaker hoses are excellent options for delivering water directly to the roots.
What kind of fertilizer should I use for blueberries?
Use a fertilizer specifically formulated for acid-loving plants, such as azaleas, rhododendrons, or camellias. These fertilizers typically contain ammonium sulfate or ammonium phosphate, which help to lower the soil pH. Apply fertilizer in early spring, just before new growth begins, and again after the first harvest. Follow the instructions on the product label for application rates. Avoid using fertilizers that contain nitrates, as these can raise the soil pH.
How do I prune my blueberry plants?
Pruning is essential for maintaining the health and productivity of your blueberry plants. Prune annually in late winter or early spring, before new growth begins. Remove any dead, damaged, or crossing branches. Also, thin out the center of the plant to improve air circulation and sunlight penetration. Focus on removing older, less productive canes to encourage new growth. Proper pruning will result in larger, more flavorful blueberries.
How long does it take for blueberry plants to produce fruit?
Blueberry plants typically take 2-3 years to begin producing fruit. However, you may get a small harvest in the second year. The plants will reach full production in 5-6 years. Be patient and continue to provide proper care, and you’ll be rewarded with a bountiful harvest for many years to come.
What are some common pests and diseases that affect blueberries?
Blueberries can be susceptible to various pests and diseases, including:
* Birds: As mentioned earlier, birds are a major threat to blueberry crops. Use netting to protect your plants.
* Japanese Beetles: These beetles can damage the leaves and fruit. Handpick them off the plants or use an insecticide specifically labeled for Japanese beetles.
* Blueberry Maggot: This pest lays its eggs inside the berries, causing them to rot. Use traps or insecticides to control blueberry maggot.
* Fungal Diseases: Blueberries can be affected by fungal diseases such as botrytis blight and mummy berry. Improve air circulation by pruning and avoid overhead watering. Use a fungicide if necessary.
Regularly inspect your plants for signs of pests or diseases and take appropriate action to prevent or control them.
Can I grow blueberries in a cold climate?
Yes, you can grow blueberries in cold climates, but you’ll need to choose cold-hardy varieties. Northern highbush blueberries are generally the most cold-hardy. Provide winter protection by mulching around the base of the plants and wrapping them in burlap if necessary. Container-grown blueberries can be moved to a sheltered location during the winter.
Where can I find more information about growing blueberries?
Your local agricultural extension office is a great resource for information about growing blueberries in your specific region. They can provide advice on soil testing, variety selection, pest and disease control, and other relevant topics. You can also find a wealth of information online from reputable sources such as university extension websites and gardening organizations.

Leave a Comment