

Grow Big Onions, that’s the dream, isn’t it? Imagine pulling colossal, juicy onions from your own backyard, the kind that make your eyes water just looking at them! Forget those tiny, flavorless onions from the grocery store. This isn’t just about gardening; it’s about unlocking the secrets to a truly rewarding harvest, and I’m here to guide you every step of the way.
Onions have been cultivated for thousands of years, with evidence suggesting their use dates back to ancient Egypt. They were even revered as symbols of eternity! While we might not be building pyramids for our onions, we can certainly give them the royal treatment in our gardens. But why bother with the effort? Well, beyond the bragging rights of growing behemoth bulbs, homegrown onions offer unparalleled flavor and freshness. Plus, knowing exactly where your food comes from is incredibly satisfying.
Many gardeners struggle to grow big onions, often facing challenges like poor soil, inconsistent watering, or pest infestations. That’s where these DIY tricks and hacks come in! I’ve compiled a collection of simple, yet effective techniques that will transform your onion-growing game. From soil preparation secrets to natural pest control methods, these tips will empower you to cultivate onions that are not only bigger but also healthier and more flavorful. So, grab your gardening gloves, and let’s get started on the path to onion-growing success!
Growing Giant Onions: My Foolproof DIY Guide
Okay, onion lovers, let’s talk about growing some seriously impressive onions. I’m not talking about your average grocery store bulbs; I’m talking about onions that will make your neighbors jealous and your dishes sing! This guide is based on my own experiences, and I’ve tweaked it over the years to get consistent, jaw-dropping results. Get ready to roll up your sleeves and grow some onion behemoths!
Choosing the Right Variety
First things first, you can’t just plant any old onion and expect it to become a giant. Variety matters! Here are a few of my favorite varieties known for their size:
* Ailsa Craig: This is a classic for a reason. It’s known for its mild flavor and impressive size. They can easily reach over a pound, and sometimes even two!
* Kelsae Sweet Giant: As the name suggests, this one is bred for size. Expect mild, sweet onions that are perfect for slicing and adding to salads or burgers.
* Walla Walla Sweet: Another sweet variety that gets quite large. They’re known for their juicy texture and mild flavor.
* Texas Supersweet: If you live in a warmer climate, this is a great choice. It’s adapted to long days and produces large, sweet onions.
Starting Your Onions from Seed (My Preferred Method)
While you can buy onion sets (small, immature onions), I’ve found that starting from seed gives you the best control over the size and quality of your onions. It requires a bit more patience, but trust me, it’s worth it!
When to Start Your Seeds
Timing is crucial. You’ll want to start your onion seeds indoors about 8-10 weeks before your last expected frost. I usually start mine in late January or early February.
Materials You’ll Need
* Onion seeds: Choose one of the giant varieties mentioned above.
* Seed starting trays or pots: I prefer trays with individual cells to minimize root disturbance when transplanting.
* Seed starting mix: This is a sterile, lightweight mix that’s perfect for delicate seedlings.
* Grow lights: Onions need plenty of light to grow strong and healthy.
* Heat mat (optional): This can help speed up germination.
* Spray bottle: For misting the seedlings.
* Liquid fertilizer: A balanced fertilizer diluted to half strength.
Step-by-Step Instructions
1. Prepare your seed starting trays: Fill each cell with seed starting mix, leaving about half an inch of space at the top. Gently tap the tray to settle the mix.
2. Sow the seeds: Place 2-3 seeds in each cell. Cover them with a thin layer of seed starting mix.
3. Water gently: Use a spray bottle to mist the soil until it’s evenly moist. Avoid overwatering, which can lead to damping off (a fungal disease that kills seedlings).
4. Provide warmth and light: Place the trays on a heat mat (if using) and under grow lights. The lights should be about 2-4 inches above the trays.
5. Maintain moisture: Check the soil daily and mist as needed to keep it moist but not soggy.
6. Thin the seedlings: Once the seedlings have their first true leaves (the second set of leaves), thin them to one seedling per cell. Choose the strongest, healthiest seedling and snip off the others at the soil line.
7. Fertilize regularly: Start fertilizing the seedlings with a diluted liquid fertilizer about 2 weeks after they germinate. Fertilize every 1-2 weeks.
8. Harden off the seedlings: About a week before you plan to transplant the seedlings outdoors, you’ll need to harden them off. This means gradually exposing them to outdoor conditions to help them adjust. Start by placing the trays outdoors in a sheltered location for a few hours each day, gradually increasing the amount of time they spend outside.
Preparing Your Garden Bed
Onions are heavy feeders, so preparing your garden bed properly is essential for growing giant onions.
Choosing the Right Location
Onions need at least 6-8 hours of sunlight per day. Choose a location that gets plenty of sun and has well-drained soil.
Soil Preparation
1. Amend the soil: Onions prefer a slightly acidic soil with a pH of 6.0-6.8. Amend the soil with plenty of compost or well-rotted manure. This will improve drainage, add nutrients, and help retain moisture. I usually add a generous amount – at least 4-6 inches of compost.
2. Add fertilizer: Incorporate a slow-release fertilizer that’s high in phosphorus and potassium. These nutrients are essential for bulb development. Follow the instructions on the fertilizer package. Bone meal is also a great addition for phosphorus.
3. Ensure good drainage: Onions don’t like t
Okay, onion lovers, let’s talk about growing some seriously impressive onions. I’m not talking about your average grocery store bulbs; I’m talking about onions that will make your neighbors jealous and your dishes sing! This guide is based on my own experiences, and I’ve tweaked it over the years to get consistent, jaw-dropping results. Get ready to roll up your sleeves and grow some onion behemoths!
Choosing the Right Variety
First things first, you can’t just plant any old onion and expect it to become a giant. Variety matters! Here are a few of my favorite varieties known for their size:
* Ailsa Craig: This is a classic for a reason. It’s known for its mild flavor and impressive size. They can easily reach over a pound, and sometimes even two!
* Kelsae Sweet Giant: As the name suggests, this one is bred for size. Expect mild, sweet onions that are perfect for slicing and adding to salads or burgers.
* Walla Walla Sweet: Another sweet variety that gets quite large. They’re known for their juicy texture and mild flavor.
* Texas Supersweet: If you live in a warmer climate, this is a great choice. It’s adapted to long days and produces large, sweet onions.
Starting Your Onions from Seed (My Preferred Method)
While you can buy onion sets (small, immature onions), I’ve found that starting from seed gives you the best control over the size and quality of your onions. It requires a bit more patience, but trust me, it’s worth it!
When to Start Your Seeds
Timing is crucial. You’ll want to start your onion seeds indoors about 8-10 weeks before your last expected frost. I usually start mine in late January or early February.
Materials You’ll Need
* Onion seeds: Choose one of the giant varieties mentioned above.
* Seed starting trays or pots: I prefer trays with individual cells to minimize root disturbance when transplanting.
* Seed starting mix: This is a sterile, lightweight mix that’s perfect for delicate seedlings.
* Grow lights: Onions need plenty of light to grow strong and healthy.
* Heat mat (optional): This can help speed up germination.
* Spray bottle: For misting the seedlings.
* Liquid fertilizer: A balanced fertilizer diluted to half strength.
Step-by-Step Instructions
1. Prepare your seed starting trays: Fill each cell with seed starting mix, leaving about half an inch of space at the top. Gently tap the tray to settle the mix.
2. Sow the seeds: Place 2-3 seeds in each cell. Cover them with a thin layer of seed starting mix.
3. Water gently: Use a spray bottle to mist the soil until it’s evenly moist. Avoid overwatering, which can lead to damping off (a fungal disease that kills seedlings).
4. Provide warmth and light: Place the trays on a heat mat (if using) and under grow lights. The lights should be about 2-4 inches above the trays.
5. Maintain moisture: Check the soil daily and mist as needed to keep it moist but not soggy.
6. Thin the seedlings: Once the seedlings have their first true leaves (the second set of leaves), thin them to one seedling per cell. Choose the strongest, healthiest seedling and snip off the others at the soil line.
7. Fertilize regularly: Start fertilizing the seedlings with a diluted liquid fertilizer about 2 weeks after they germinate. Fertilize every 1-2 weeks.
8. Harden off the seedlings: About a week before you plan to transplant the seedlings outdoors, you’ll need to harden them off. This means gradually exposing them to outdoor conditions to help them adjust. Start by placing the trays outdoors in a sheltered location for a few hours each day, gradually increasing the amount of time they spend outside.
Preparing Your Garden Bed
Onions are heavy feeders, so preparing your garden bed properly is essential for growing giant onions.
Choosing the Right Location
Onions need at least 6-8 hours of sunlight per day. Choose a location that gets plenty of sun and has well-drained soil.
Soil Preparation
1. Amend the soil: Onions prefer a slightly acidic soil with a pH of 6.0-6.8. Amend the soil with plenty of compost or well-rotted manure. This will improve drainage, add nutrients, and help retain moisture. I usually add a generous amount – at least 4-6 inches of compost.
2. Add fertilizer: Incorporate a slow-release fertilizer that’s high in phosphorus and potassium. These nutrients are essential for bulb development. Follow the instructions on the fertilizer package. Bone meal is also a great addition for phosphorus.
3. Ensure good drainage: Onions don’t like to sit in wet soil, so make sure your garden bed has good drainage. If your soil is heavy clay, consider adding sand or perlite to improve drainage. Raised beds are also a great option.
4. Remove weeds: Weeds compete with onions for nutrients and water, so it’s important to remove them before planting.
Transplanting Your Onion Seedlings
Once your seedlings are hardened off and the danger of frost has passed, it’s time to transplant them into your garden bed.
When to Transplant
Transplant your onion seedlings in the spring, about 2-4 weeks before your last expected frost. The soil should be warm and workable.
Transplanting Instructions
1. Water the seedlings: Water the seedlings thoroughly a few hours before transplanting. This will help them slide out of the cells more easily.
2. Dig holes: Dig holes about 4-6 inches apart in your prepared garden bed. The holes should be deep enough to accommodate the root ball of the seedlings.
3. Carefully remove the seedlings: Gently squeeze the bottom of the cell to loosen the seedling. Carefully lift the seedling out of the cell, being careful not to damage the roots.
4. Plant the seedlings: Place the seedling in the hole and backfill with soil. Make sure the top of the root ball is level with the soil surface.
5. Water thoroughly: Water the seedlings thoroughly after transplanting.
6. Mulch: Apply a layer of mulch around the onions to help retain moisture, suppress weeds, and regulate soil temperature. Straw, shredded leaves, or grass clippings are all good options.
Caring for Your Growing Onions
Once your onions are transplanted, it’s important to provide them with the care they need to grow big and healthy.
Watering
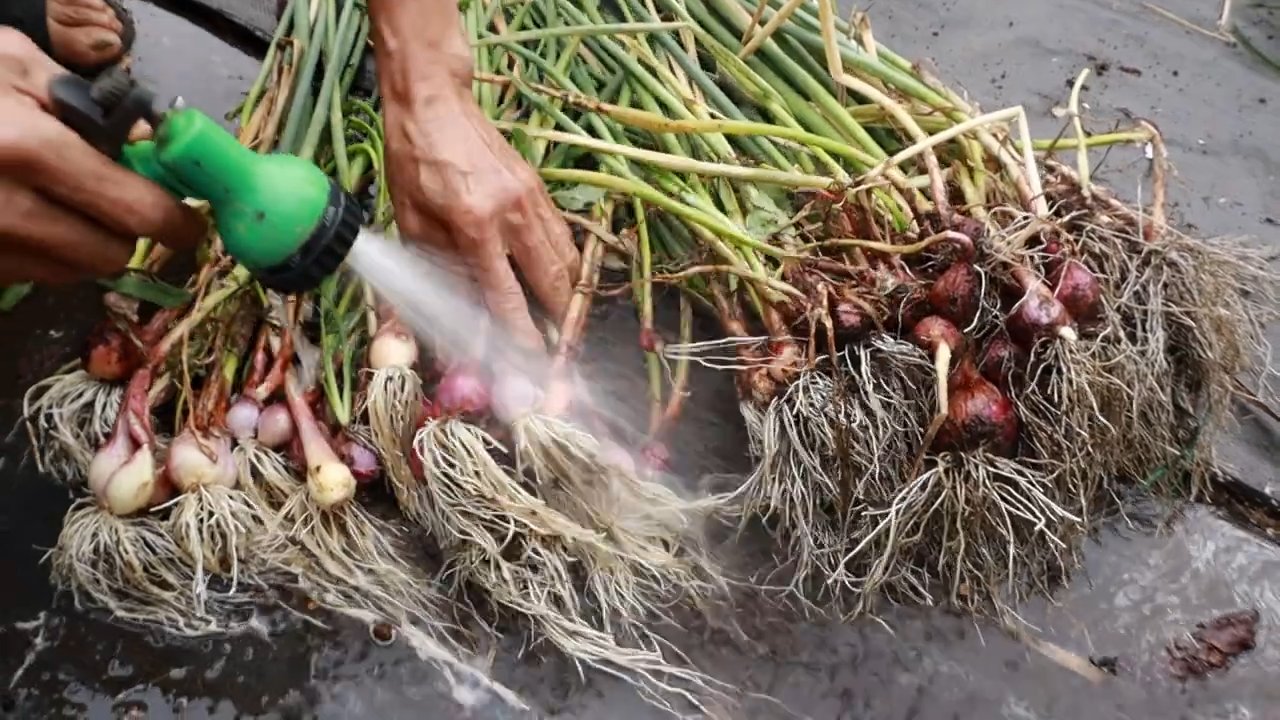
Onions need consistent moisture, especially during bulb development. Water deeply and regularly, especially during dry periods. Aim for about 1 inch of water per week. Avoid overhead watering, which can promote fungal diseases. Soaker hoses or drip irrigation are ideal.
Fertilizing
Continue to fertilize your onions every 2-3 weeks with a balanced liquid fertilizer. You can also side-dress them with compost or well-rotted manure. As the bulbs start to swell, switch to a fertilizer that’s higher in potassium.
Weeding
Keep your garden bed free of weeds. Weeds compete with onions for nutrients and water, so it’s important to remove them regularly. Hand-pull weeds carefully to avoid disturbing the onion roots.
Pest and Disease Control
Onions are relatively pest-resistant, but they can be susceptible to certain pests and diseases.
* Onion maggots: These are small, white larvae that feed on onion roots. To prevent onion maggots, use row covers or apply beneficial nematodes to the soil.
* Thrips: These are tiny, slender insects that suck sap from onion leaves. To control thrips, spray the plants with insecticidal soap or neem oil.
* Downy mildew: This is a fungal disease that causes yellow spots on onion leaves. To prevent downy mildew, provide good air circulation and avoid overhead watering. If you see signs of downy mildew, spray the plants with a fungicide.
Trimming the Tops (Optional)
Some gardeners recommend trimming the tops of their onions to encourage bulb development. I’ve tried this both ways and haven’t noticed a significant difference, but it’s something you can experiment with. If you choose to trim the tops, do so sparingly, removing only the tips of the leaves.
Harvesting Your Giant Onions
The moment you’ve been waiting for! Harvesting your giant onions is the most rewarding part of the process.
When to Harvest
Onions are typically ready to harvest when the tops start to fall over. This usually happens in late summer or early fall.
Harvesting Instructions
1. Loosen the soil: Use a garden fork to gently loosen the soil around the onions.
2. Pull the onions: Grasp
Conclusion
So, there you have it! Unlocking the secret to growing truly big onions isn’t about magic, but about understanding their needs and providing the right environment. This DIY trick, focusing on nutrient-rich soil amendments and strategic watering, is a game-changer for any gardener dreaming of prize-winning bulbs. We’ve shown you how to transform ordinary onions into extraordinary specimens, bursting with flavor and size.
Why is this a must-try? Because it’s effective, economical, and empowering. You’re not relying on expensive, pre-packaged solutions. Instead, you’re taking control of your garden’s ecosystem, nurturing your onions from the ground up. The satisfaction of harvesting onions you’ve personally coaxed to such impressive sizes is unparalleled. Imagine the envious glances from your neighbors and the delicious meals you’ll create with your homegrown giants!
But don’t stop there! Experiment with variations to tailor this method to your specific climate and soil conditions. Consider adding different types of organic matter, such as well-rotted composted manure or leaf mold, to further enrich the soil. You can also adjust the watering schedule based on rainfall and temperature. Some gardeners have found success by incorporating a diluted seaweed solution into their watering routine for an extra boost of micronutrients. Another variation is to try different onion varieties known for their size potential, such as Walla Walla Sweets or Ailsa Craig. Remember to always research the specific needs of the variety you choose.
This DIY trick to grow big onions is more than just a gardening technique; it’s an invitation to connect with nature, to learn about the intricate processes that govern plant growth, and to reap the rewards of your hard work. It’s about transforming your garden into a source of pride and abundance.
We wholeheartedly encourage you to try this method and witness the difference it makes. Don’t be afraid to get your hands dirty, to experiment, and to learn from your experiences. Gardening is a journey, and every step you take brings you closer to a deeper understanding of the natural world.
And most importantly, we want to hear from you! Share your results, your challenges, and your triumphs. Post pictures of your giant onions on social media using #GrowBigOnionsDIY and tag us! Let’s create a community of passionate gardeners, sharing knowledge and inspiring each other to achieve even greater success. Your experiences will help others refine their techniques and unlock the full potential of their onion crops. Together, we can cultivate a world of bigger, better, and more delicious onions! So, grab your gardening gloves, prepare your soil, and get ready to witness the magic of this simple yet powerful DIY trick. Happy gardening!
Frequently Asked Questions (FAQ)
Q: What kind of soil is best for growing big onions using this DIY trick?
A: Onions thrive in well-drained, fertile soil that is rich in organic matter. A slightly acidic to neutral pH (around 6.0 to 7.0) is ideal. Before planting, amend your soil with plenty of compost, well-rotted manure, or other organic materials to improve drainage, aeration, and nutrient content. Avoid heavy clay soils, as they can restrict bulb development. If you have clay soil, consider growing your onions in raised beds or containers. Soil testing is always recommended to determine the specific nutrient needs of your soil.
Q: How often should I water my onions when using this method?
A: Consistent watering is crucial for growing big onions. Aim to keep the soil consistently moist, but not waterlogged. Water deeply whenever the top inch of soil feels dry to the touch. During hot, dry periods, you may need to water more frequently. Avoid overhead watering, as it can promote fungal diseases. Instead, use a soaker hose or drip irrigation to deliver water directly to the roots. As the onions mature and the bulbs begin to swell, gradually reduce watering to prevent rot.
Q: What kind of fertilizer should I use to supplement the soil amendments?
A: While the DIY trick emphasizes soil amendments, a balanced fertilizer can provide an extra boost. Look for a fertilizer with a higher phosphorus content in the early stages of growth to promote root development. As the bulbs begin to form, switch to a fertilizer with a higher potassium content to encourage bulb enlargement. Avoid fertilizers with excessive nitrogen, as this can lead to excessive f
So, there you have it! Unlocking the secret to growing truly big onions isn’t about magic, but about understanding their needs and providing the right environment. This DIY trick, focusing on nutrient-rich soil amendments and strategic watering, is a game-changer for any gardener dreaming of prize-winning bulbs. We’ve shown you how to transform ordinary onions into extraordinary specimens, bursting with flavor and size.
Why is this a must-try? Because it’s effective, economical, and empowering. You’re not relying on expensive, pre-packaged solutions. Instead, you’re taking control of your garden’s ecosystem, nurturing your onions from the ground up. The satisfaction of harvesting onions you’ve personally coaxed to such impressive sizes is unparalleled. Imagine the envious glances from your neighbors and the delicious meals you’ll create with your homegrown giants!
But don’t stop there! Experiment with variations to tailor this method to your specific climate and soil conditions. Consider adding different types of organic matter, such as well-rotted composted manure or leaf mold, to further enrich the soil. You can also adjust the watering schedule based on rainfall and temperature. Some gardeners have found success by incorporating a diluted seaweed solution into their watering routine for an extra boost of micronutrients. Another variation is to try different onion varieties known for their size potential, such as Walla Walla Sweets or Ailsa Craig. Remember to always research the specific needs of the variety you choose.
This DIY trick to grow big onions is more than just a gardening technique; it’s an invitation to connect with nature, to learn about the intricate processes that govern plant growth, and to reap the rewards of your hard work. It’s about transforming your garden into a source of pride and abundance.
We wholeheartedly encourage you to try this method and witness the difference it makes. Don’t be afraid to get your hands dirty, to experiment, and to learn from your experiences. Gardening is a journey, and every step you take brings you closer to a deeper understanding of the natural world.
And most importantly, we want to hear from you! Share your results, your challenges, and your triumphs. Post pictures of your giant onions on social media using #GrowBigOnionsDIY and tag us! Let’s create a community of passionate gardeners, sharing knowledge and inspiring each other to achieve even greater success. Your experiences will help others refine their techniques and unlock the full potential of their onion crops. Together, we can cultivate a world of bigger, better, and more delicious onions! So, grab your gardening gloves, prepare your soil, and get ready to witness the magic of this simple yet powerful DIY trick. Happy gardening!
Frequently Asked Questions (FAQ)
Q: What kind of soil is best for growing big onions using this DIY trick?
A: Onions thrive in well-drained, fertile soil that is rich in organic matter. A slightly acidic to neutral pH (around 6.0 to 7.0) is ideal. Before planting, amend your soil with plenty of compost, well-rotted manure, or other organic materials to improve drainage, aeration, and nutrient content. Avoid heavy clay soils, as they can restrict bulb development. If you have clay soil, consider growing your onions in raised beds or containers. Soil testing is always recommended to determine the specific nutrient needs of your soil.
Q: How often should I water my onions when using this method?
A: Consistent watering is crucial for growing big onions. Aim to keep the soil consistently moist, but not waterlogged. Water deeply whenever the top inch of soil feels dry to the touch. During hot, dry periods, you may need to water more frequently. Avoid overhead watering, as it can promote fungal diseases. Instead, use a soaker hose or drip irrigation to deliver water directly to the roots. As the onions mature and the bulbs begin to swell, gradually reduce watering to prevent rot.
Q: What kind of fertilizer should I use to supplement the soil amendments?
A: While the DIY trick emphasizes soil amendments, a balanced fertilizer can provide an extra boost. Look for a fertilizer with a higher phosphorus content in the early stages of growth to promote root development. As the bulbs begin to form, switch to a fertilizer with a higher potassium content to encourage bulb enlargement. Avoid fertilizers with excessive nitrogen, as this can lead to excessive foliage growth at the expense of bulb development. Organic options like bone meal, rock phosphate, and kelp meal are excellent choices. Always follow the instructions on the fertilizer label and avoid over-fertilizing, which can damage your plants.
Q: How much sunlight do onions need to grow big?
A: Onions are sun-loving plants and require at least 6-8 hours of direct sunlight per day to grow to their full potential. Choose a planting location that receives ample sunlight throughout the day. If you live in a region with intense summer heat, some afternoon shade may be beneficial to prevent scorching. Insufficient sunlight can result in smaller bulbs and reduced yields.
Q: When is the best time to plant onions for optimal growth?
A: The timing of planting depends on your climate and the type of onions you are growing. In general, onions are classified as either long-day or short-day varieties. Long-day onions require 14-16 hours of daylight to form bulbs and are best suited for northern regions. Short-day onions require 10-12 hours of daylight and are better suited for southern regions. Plant onion sets or transplants in early spring, as soon as the soil can be worked. For seed-grown onions, start the seeds indoors 8-10 weeks before the last expected frost.
Q: How do I know when my onions are ready to harvest?
A: Onions are typically ready to harvest when the tops begin to fall over and turn yellow or brown. This indicates that the bulbs have reached their mature size. You can also gently dig around the base of the plant to check the size of the bulb. Once the tops have fallen over, stop watering the onions and allow them to dry out in the ground for a few days. Then, carefully pull the onions from the soil and cure them in a warm, dry, well-ventilated place for 2-3 weeks. Curing helps to toughen the outer skin and prevent rot during storage.
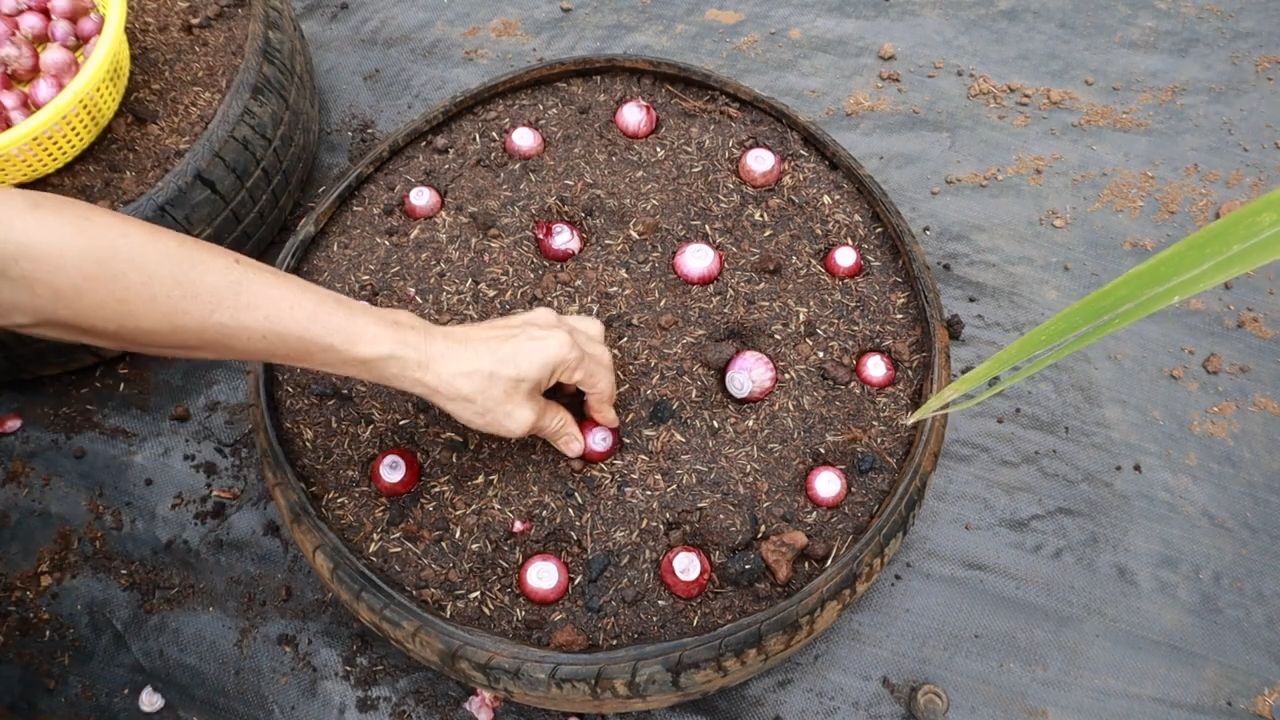
Q: Can I use this DIY trick for growing onions in containers?
A: Yes, this DIY trick can be adapted for growing onions in containers. Choose a large container with good drainage and fill it with a high-quality potting mix amended with compost or other organic matter. Ensure that the container receives plenty of sunlight and water regularly. Container-grown onions may require more frequent fertilization than those grown in the ground.
Q: What are some common pests and diseases that affect onions, and how can I prevent them?
A: Common pests of onions include onion maggots, thrips, and aphids. Diseases include onion rot, downy mildew, and purple blotch. To prevent these problems, practice good sanitation in your garden, rotate your crops regularly, and avoid overhead watering. Use insecticidal soap or neem oil to control pests. Apply a fungicide if necessary to prevent or treat diseases. Choose disease-resistant onion varieties whenever possible.
Q: Can I save the seeds from my big onions to grow more next year?
A: Saving onion seeds can be challenging, as onions are biennials, meaning they take two years to produce seeds. In the first year, they form bulbs, and in the second year, they flower and produce seeds. To save seeds, you need to overwinter the bulbs and allow them to flower in the spring. However, onions are cross-pollinated, so the seeds may not produce true-to-type onions. If you are interested in saving seeds, research the process thoroughly and be prepared for some variability in the resulting plants.

Leave a Comment