

Grow Bay Leaf Cuttings: Unlock the secrets to propagating your own fragrant bay laurel at home! Have you ever dreamt of having an endless supply of fresh bay leaves right at your fingertips, ready to elevate your culinary creations? Imagine the rich aroma filling your kitchen as you snip a few leaves from your very own plant, knowing you nurtured it from a simple cutting. This isn’t just about saving money; it’s about connecting with nature and experiencing the satisfaction of DIY gardening.
Bay laurel, or Laurus nobilis, has a rich history, revered since ancient times. The Greeks and Romans crowned victors and heroes with bay laurel wreaths, symbolizing honor and glory. Today, while we might not be crowning ourselves with bay leaves, we can certainly bring a touch of that ancient prestige into our homes and gardens. But why buy a mature plant when you can grow bay leaf cuttings yourself?
Many gardeners find bay laurel plants a bit pricey at nurseries. Plus, sometimes you just want to propagate a particularly vigorous or flavorful plant you already admire. That’s where this DIY guide comes in! I’m going to walk you through the simple steps to successfully propagate bay laurel from cuttings, even if you’re a complete beginner. We’ll cover everything from selecting the right cuttings to providing the ideal environment for root development. Get ready to expand your herb garden and enjoy the rewarding experience of growing your own bay leaf plants!
Propagating Bay Laurel: A DIY Guide to Growing Bay Leaf Cuttings
Hey there, fellow plant enthusiasts! I’m so excited to share my tried-and-true method for propagating bay laurel (Laurus nobilis) from cuttings. If you’re like me, you love the fresh, aromatic flavor of bay leaves in your cooking, and what’s better than having your own supply right in your backyard (or even on your balcony!)? This guide will walk you through every step, from selecting the right cuttings to nurturing them into thriving little bay trees. Let’s get started!
What You’ll Need
Before we dive in, let’s gather our supplies. Having everything ready beforehand will make the process much smoother.
* Healthy Bay Laurel Tree: This is your source! Choose a mature, healthy tree that’s free from pests and diseases.
* Sharp, Clean Pruning Shears or Knife: Sharpness is key to making clean cuts that heal quickly. Sterilize them with rubbing alcohol to prevent the spread of disease.
* Rooting Hormone: This isn’t strictly necessary, but it significantly increases your chances of success. I prefer a powdered rooting hormone, but gel or liquid versions work too.
* Small Pots or Containers: Choose pots that are about 3-4 inches in diameter. Good drainage is essential.
* Well-Draining Potting Mix: A mix specifically formulated for seedlings or cuttings is ideal. You can also make your own by combining equal parts peat moss (or coco coir), perlite, and vermiculite.
* Clear Plastic Bags or a Humidity Dome: These will help create a humid environment, which is crucial for rooting.
* Spray Bottle with Water: For misting the cuttings.
* Labels and a Permanent Marker: To keep track of your cuttings.
* Optional: Heating Mat: Bottom heat can speed up the rooting process, especially in cooler climates.
Choosing and Preparing Your Cuttings
This is a crucial step, so pay close attention! The quality of your cuttings will directly impact your success rate.
* Timing is Key: The best time to take bay laurel cuttings is in late spring or early summer, when the plant is actively growing. You can also try in early fall, but spring/summer cuttings tend to root more readily.
* Select Healthy Shoots: Look for new growth that’s semi-hardwood. This means the stems should be firm but still slightly flexible. Avoid very young, soft growth or old, woody stems.
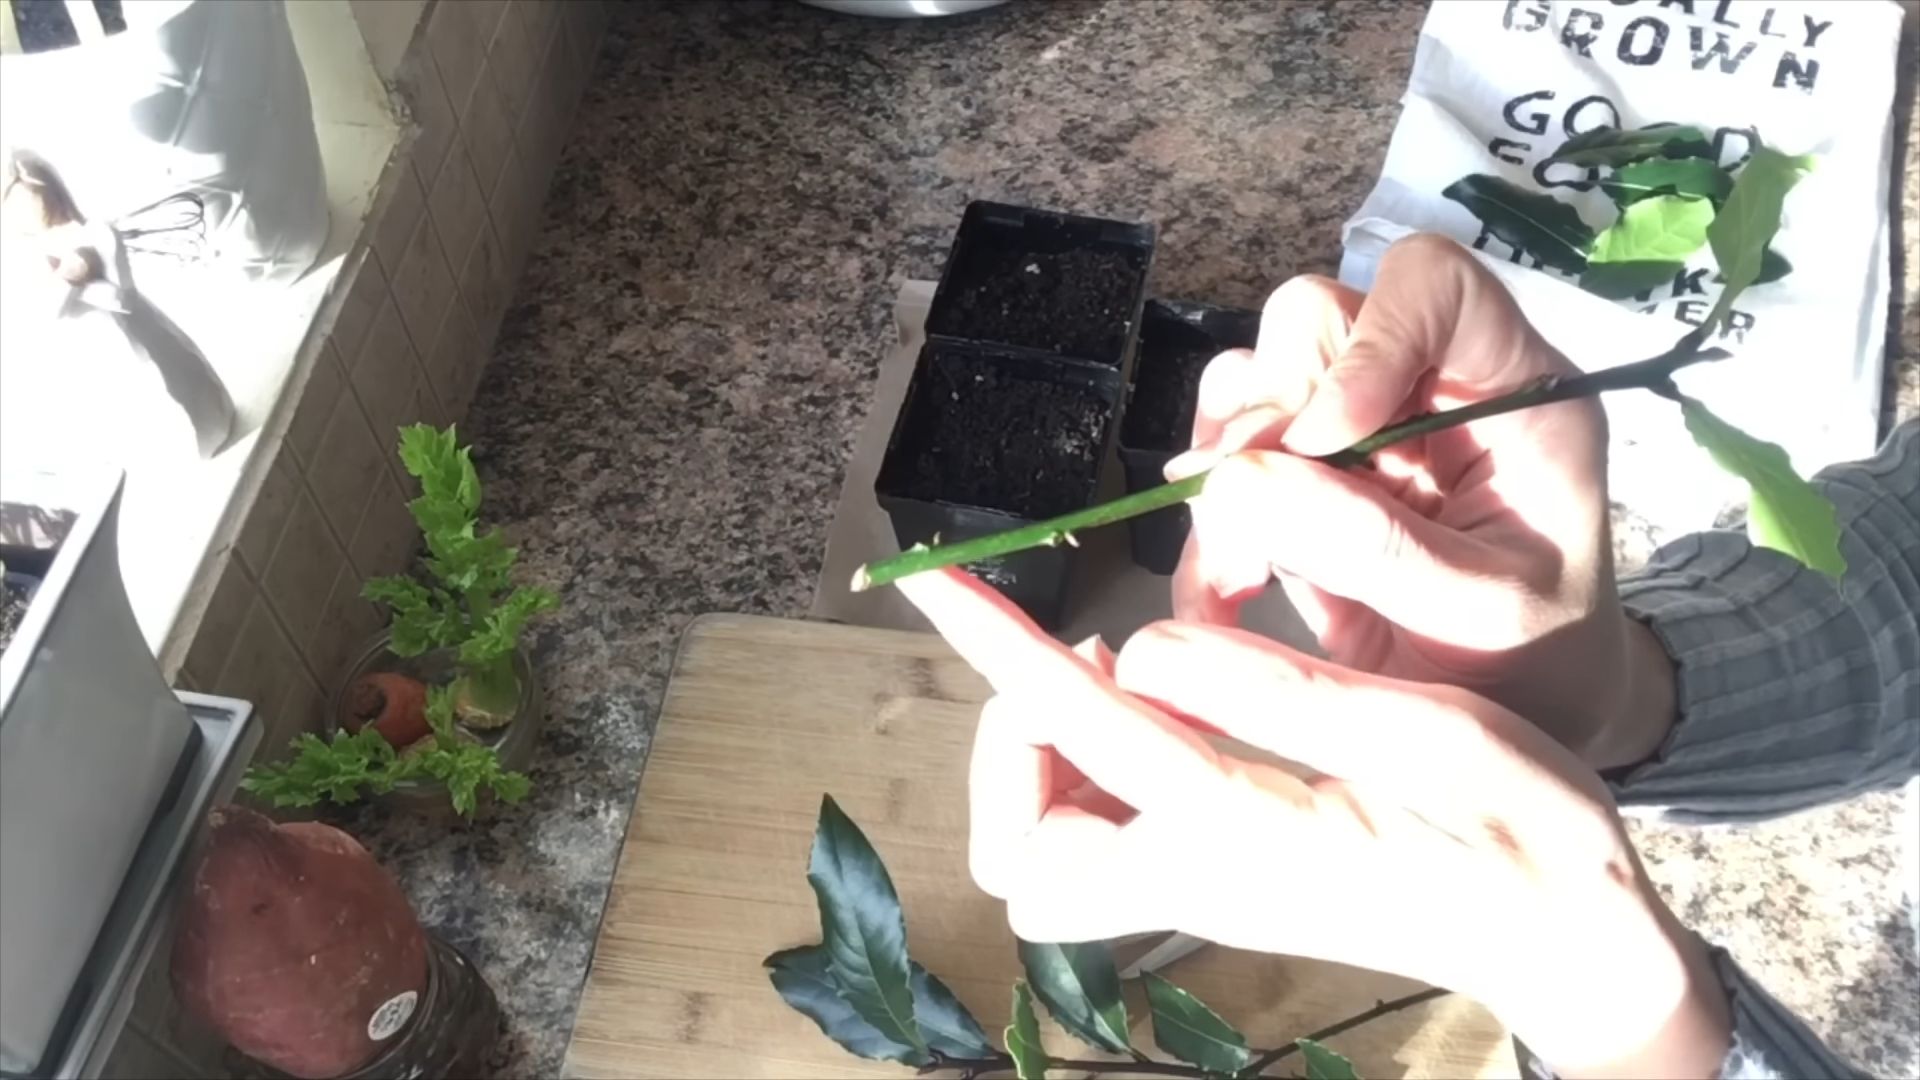
* Cutting Length: Aim for cuttings that are about 4-6 inches long.
* Making the Cut: Use your sterilized pruning shears or knife to make a clean cut just below a node (the point where leaves emerge from the stem). This is where roots are most likely to develop.
* Remove Lower Leaves: Strip off the leaves from the bottom half of the cutting. This prevents them from rotting in the soil and encourages the plant to focus its energy on root development.
* Optional: Scrape the Stem: Gently scrape the outer layer of the stem on one side near the bottom. This can help the rooting hormone penetrate and stimulate root growth.
Planting Your Cuttings
Now comes the fun part – getting those cuttings into their new homes!
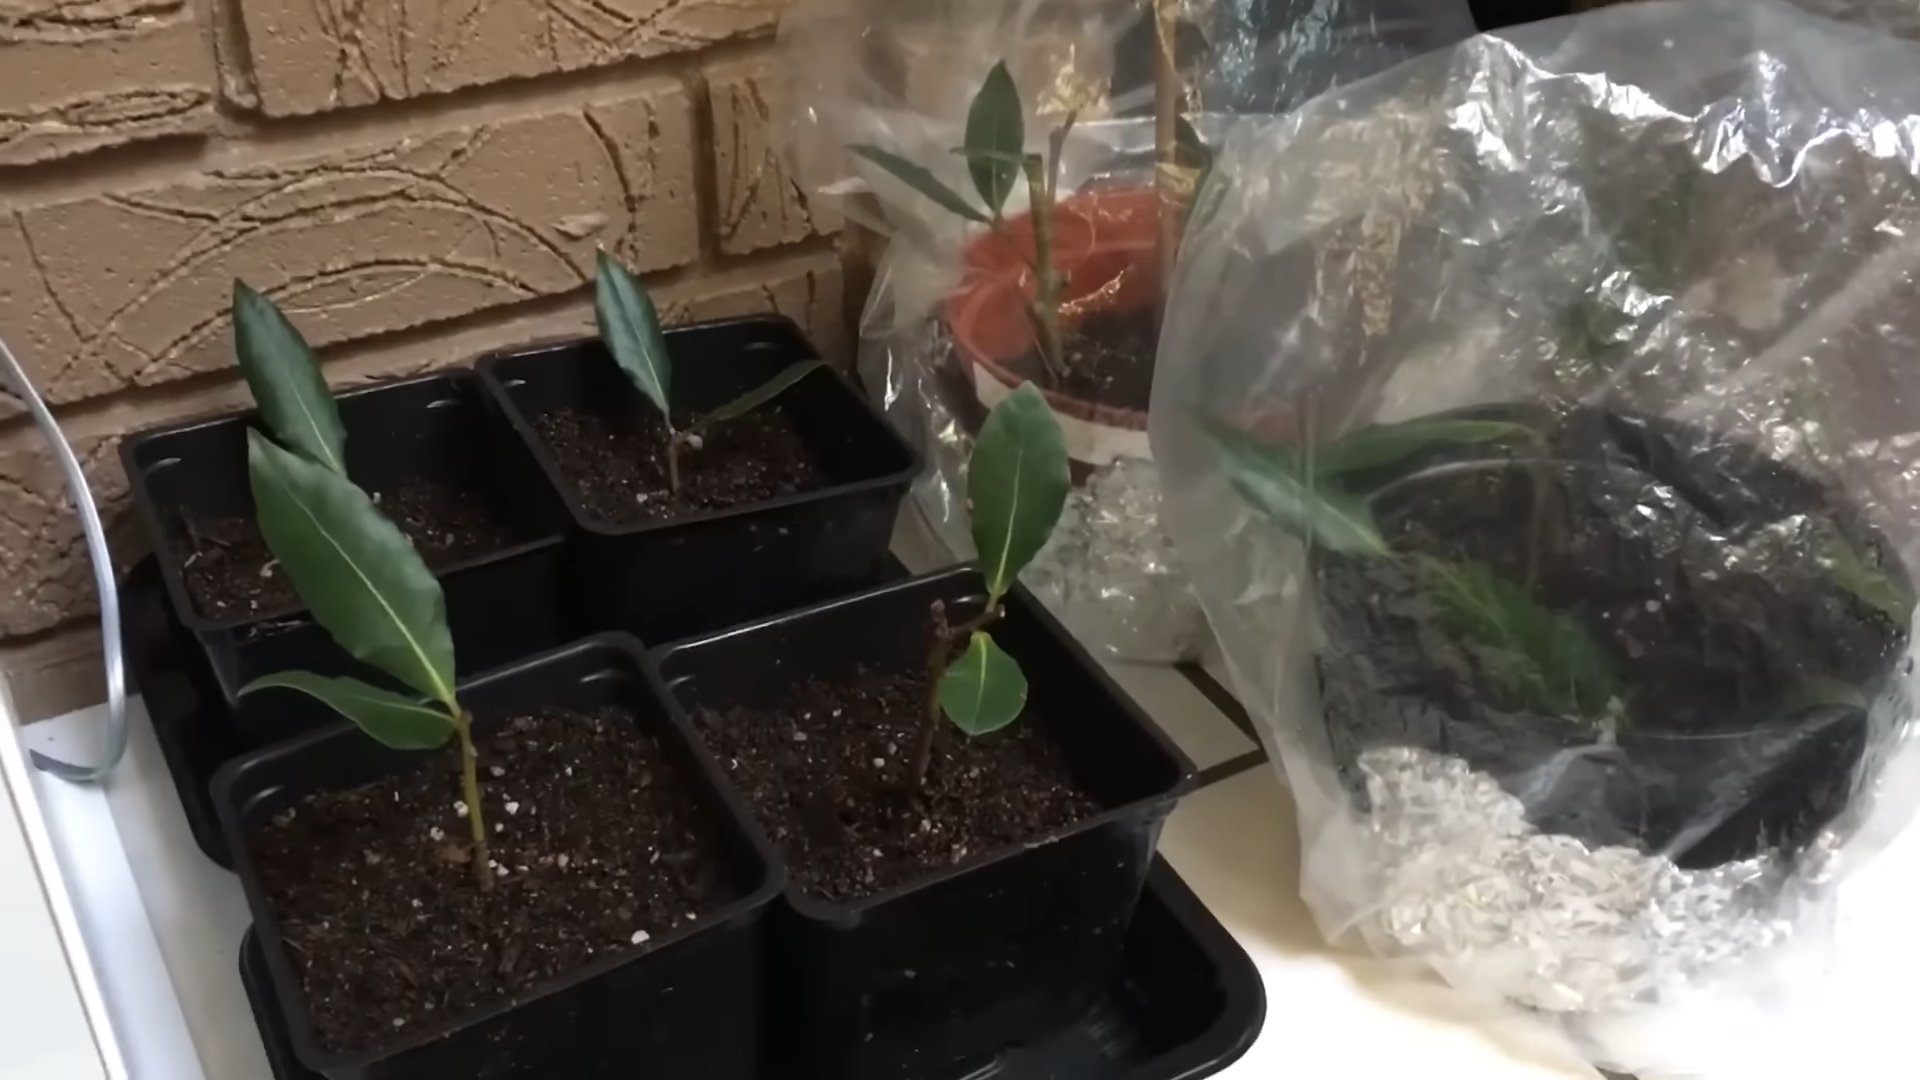
1. Prepare Your Pots: Fill your pots with the well-draining potting mix. Moisten the mix thoroughly, but don’t let it become waterlogged.
2. Apply Rooting Hormone: Dip the bottom inch of the cutting into the rooting hormone powder. Tap off any excess. If you’re using a gel or liquid rooting hormone, follow the instructions on the product label.
3. Plant the Cutting: Use a pencil or your finger to create a hole in the potting mix. Gently insert the cutting into the hole, making sure the bottom node is buried.
4. Firm the Soil: Gently firm the soil around the cutting to ensure good contact.
5. Water Gently: Water the cutting lightly to settle the soil.
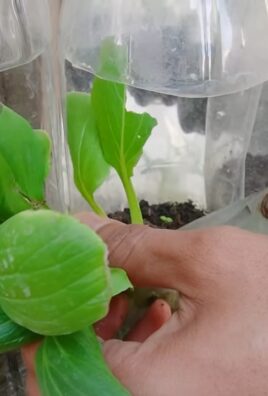
6. Create a Humid Environment: Place the pot inside a clear plastic bag or under a humidity dome. This will help maintain high humidity, which is essential for rooting. If using a plastic bag, make sure it doesn’t touch the leaves. You can use skewers or straws to prop it up.
Caring for Your Cuttings
Patience is key here! Rooting can take several weeks, so don’t get discouraged if you don’t see results immediately.
1. Location, Location, Location: Place your cuttings in a warm, bright location, but avoid direct sunlight. A north- or east-facing window is ideal.
2. Maintain Humidity: Keep the humidity high by misting the cuttings regularly with water. If you’re using a plastic bag or humidity dome, open it briefly every few days to allow for air circulation and prevent mold growth.
3. Watering: Keep the potting mix consistently moist, but not soggy. Check the moisture level regularly by sticking your finger into the soil. If it feels dry, water lightly.
4. Bottom Heat (Optional): If you’re using a heating mat, place the pots on the mat. This can speed up the rooting process, especially in cooler temperatures.
5. Be Patient: Rooting can take anywhere from 4 to 8 weeks, or even longer. Avoid the temptation to pull up the cuttings to check for roots, as this can disturb the rooting process.
Checking for Root Development
How do you know when your cuttings have rooted? Here are a few signs to look for:
* New Growth: The appearance of new leaves is a good sign that the cutting has rooted.
* Resistance: Gently tug on the cutting. If it resists being pulled out of the soil, it likely has roots.
* Root Observation (Carefully!): If you’re really curious, you can gently tip the pot and examine the bottom. If you see roots emerging from the drainage holes, congratulations!
Potting Up Your Rooted Cuttings
Once your cuttings have developed a good root system, it’s time to pot them up into larger containers.
1. Choose a Larger Pot: Select a pot that’s about 6-8 inches in diameter.
2. Prepare the Potting Mix: Use a well-draining potting mix similar to what you used for rooting.
3. Gently Remove the Cutting: Carefully remove the rooted cutting from its original pot. Be gentle to avoid damaging the roots.
4. Plant the Cutting: Place the cutting in the center of the new pot and fill in around it with potting mix.
5. Water Thoroughly: Water the newly potted plant thoroughly to settle the soil.
6. Acclimatize: Gradually acclimatize the plant to outdoor conditions by placing it in a sheltered location for a few hours each day, gradually increasing the amount of time it spends outdoors.
Ongoing Care for Your Bay Laurel Tree
Now that you have your own bay laurel tree, here’s how to keep it happy and healthy:
* Sunlight: Bay laurel prefers full sun to partial shade.
* Watering: Water regularly, especially during dry periods. Allow the soil to dry out slightly between waterings.
* Fertilizing: Fertilize your bay laurel tree in the spring and summer with a balanced fertilizer.
* Pruning: Prune your bay laurel tree regularly to maintain its shape and size. You can also harvest leaves for cooking as needed.
* Pest and Disease Control: Keep an eye out for pests and diseases, such as aphids, scale, and fungal infections. Treat any problems promptly.
* Winter Protection: In colder climates, protect your bay laurel tree from frost by bringing it indoors or wrapping it in burlap.
Troubleshooting
Sometimes, things don’t go as planned. Here are some common problems you might encounter and how to fix them:
* Cuttings Rotting: This is usually caused by overwatering or poor drainage. Make sure your potting mix is well-draining and avoid overwatering.
* Cuttings Not Rooting: This could be due to a number of factors, including poor cutting selection, low humidity, or lack of rooting hormone. Try taking cuttings from different parts of the plant, increasing the humidity, and using rooting hormone.
* Leaves Turning Yellow: This could be caused by overwatering, underwatering, or nutrient deficiencies. Check the moisture level of the soil and fertilize if necessary.
* Pests and Diseases: Treat any pest or disease problems promptly with appropriate insecticides or fungicides.
Final Thoughts
Propagating bay laurel from cuttings is a rewarding experience that allows you to expand your herb garden and enjoy the fresh flavor of bay leaves year-round. With a little patience and care, you can successfully grow your own bay laurel trees from cuttings. Happy gardening!
Conclusion
So, there you have it! Growing bay leaf cuttings isn’t just a fun gardening project; it’s a gateway to having a constant supply of fresh, aromatic bay leaves right at your fingertips. Forget those brittle, often flavorless dried leaves from the store. Imagine the vibrant, potent flavor you can infuse into your soups, stews, sauces, and roasts with homegrown bay. This DIY trick is a must-try for any home cook or gardening enthusiast looking to elevate their culinary creations and connect with nature.
The beauty of this method lies in its simplicity and cost-effectiveness. You’re essentially propagating new plants from existing ones, saving you money and expanding your bay leaf collection. Plus, it’s incredibly rewarding to watch those tiny roots emerge and witness your cuttings transform into thriving bay leaf plants.
Don’t be afraid to experiment! While we’ve outlined a straightforward approach, there are always variations you can explore. For instance, try using different rooting hormones to see which yields the best results for you. Some gardeners swear by willow water as a natural rooting stimulant. You could also experiment with different types of growing mediums, such as perlite or vermiculite, to find what works best in your specific climate and conditions. Consider using a humidity dome or plastic bag to create a mini-greenhouse environment for your cuttings, especially if you live in a drier climate. This will help retain moisture and encourage root development.
Another exciting variation is to try propagating different varieties of bay leaf. While the common bay laurel (Laurus nobilis) is the most widely used, there are other cultivars with slightly different flavor profiles. Research local nurseries or online suppliers to see if you can find unique bay leaf varieties to add to your collection.
This method of growing bay leaf cuttings is not just about saving money; it’s about connecting with the process of growing your own food and herbs. It’s about understanding the life cycle of plants and appreciating the effort that goes into producing the ingredients we use every day.
We wholeheartedly encourage you to give this DIY trick a try. It’s a relatively low-risk, high-reward project that can bring joy and flavor to your life. And most importantly, don’t be discouraged if your first attempt isn’t a resounding success. Gardening is a learning process, and every failure is an opportunity to learn and improve.
Once you’ve successfully grown your own bay leaf cuttings, we’d love to hear about your experience! Share your tips, tricks, and photos in the comments section below. Let’s create a community of bay leaf enthusiasts who can learn from each other and celebrate the joys of homegrown herbs. What rooting hormone did you find most effective? What growing medium worked best for you? Did you encounter any challenges, and how did you overcome them? Your insights could be invaluable to other readers who are just starting out. So, get your gardening gloves on, grab some bay leaf cuttings, and embark on this exciting journey of propagation! You’ll be amazed at how easy and rewarding it is to grow your own bay leaf plants.
Frequently Asked Questions (FAQ)
What is the best time of year to take bay leaf cuttings?
The ideal time to take bay leaf cuttings is typically in late spring or early summer. This is when the plant is actively growing, and the cuttings are more likely to root successfully. However, you can also take cuttings in early fall, although the rooting process may be slower. Avoid taking cuttings during the dormant winter months.
How long does it take for bay leaf cuttings to root?
Rooting time can vary depending on several factors, including the time of year, the temperature, the humidity, and the specific rooting method used. Generally, you can expect to see roots develop within 4-8 weeks. Be patient and continue to provide the cuttings with the proper care, and you should eventually see signs of growth.
What type of rooting hormone should I use?
There are many different types of rooting hormones available, both synthetic and natural. Synthetic rooting hormones typically contain indole-3-butyric acid (IBA) or naphthaleneacetic acid (NAA), which are plant hormones that stimulate root growth. Natural rooting hormones, such as willow water or honey, can also be effective. Experiment with different options to see which works best for you.
What kind of soil should I use for rooting bay leaf cuttings?
A well-draining potting mix is essential for rooting bay leaf cuttings. You can use a commercially available seed starting mix or create your own by combining equal parts peat moss, perlite, and vermiculite. Avoid using garden soil, as it can be too heavy and may contain pathogens that can harm the cuttings.
How often should I water the bay leaf cuttings?
Keep the rooting medium consistently moist, but not waterlogged. Water the cuttings when the top inch of soil feels dry to the touch. Avoid overwatering, as this can lead to root rot. A spray bottle can be helpful for misting the cuttings and maintaining humidity.
How much sunlight do bay leaf cuttings need?
Bay leaf cuttings need bright, indirect sunlight. Avoid placing them in direct sunlight, as this can scorch the leaves. A north- or east-facing window is typically a good location. You can also use a grow light to provide supplemental light, especially during the winter months.
How do I know when the bay leaf cuttings are ready to be transplanted?
You’ll know the cuttings are ready to be transplanted when they have developed a healthy root system. Gently tug on the cuttings to see if they resist. If they do, that means the roots have anchored themselves in the soil. You should also be able to see roots emerging from the drainage holes in the pot.
What size pot should I use for transplanting the bay leaf cuttings?
Start with a small pot, such as a 4-inch pot, and gradually increase the size as the plant grows. Choose a pot with good drainage holes to prevent waterlogging.
What kind of soil should I use for transplanting the bay leaf cuttings?
Use a well-draining potting mix that is specifically formulated for herbs or shrubs. You can also amend the potting mix with compost or other organic matter to improve drainage and fertility.
How often should I fertilize bay leaf plants?
Fertilize bay leaf plants sparingly, as they are not heavy feeders. You can use a balanced liquid fertilizer diluted to half strength every 2-4 weeks during the growing season. Avoid fertilizing during the dormant winter months.
Can I grow bay leaf plants indoors?
Yes, bay leaf plants can be grown indoors, but they need plenty of sunlight and good air circulation. Place the plant near a sunny window or use a grow light to provide supplemental light. Make sure to water the plant regularly and fertilize it sparingly.
How do I prune bay leaf plants?
Prune bay leaf plants in the spring to maintain their shape and size. You can also prune them to remove any dead or damaged branches. Use sharp, clean pruning shears to make clean cuts.
Are bay leaf plants susceptible to any pests or diseases?
Bay leaf plants are generally resistant to pests and diseases, but they can occasionally be affected by aphids, scale, or spider mites. If you notice any signs of infestation, treat the plant with insecticidal soap or neem oil. Root rot can also be a problem if the plant is overwatered.
Can I use bay leaves fresh or do they need to be dried?
You can use bay leaves fresh or dried. Fresh bay leaves have a more subtle flavor than dried bay leaves. To dry bay leaves, simply spread them out on a screen or tray in a cool, dry place. Allow them to air dry for several weeks, or until they are brittle. Store dried bay leaves in an airtight container.
Is growing bay leaf cuttings difficult?
No, growing bay leaf cuttings is not difficult, but it does require patience and attention to detail. By following the steps outlined in this article and providing the cuttings with the proper care, you should be able to successfully propagate your own bay leaf plants. Remember to experiment and learn from your mistakes, and you’ll be enjoying fresh, homegrown bay leaves in no time!
Leave a Comment