

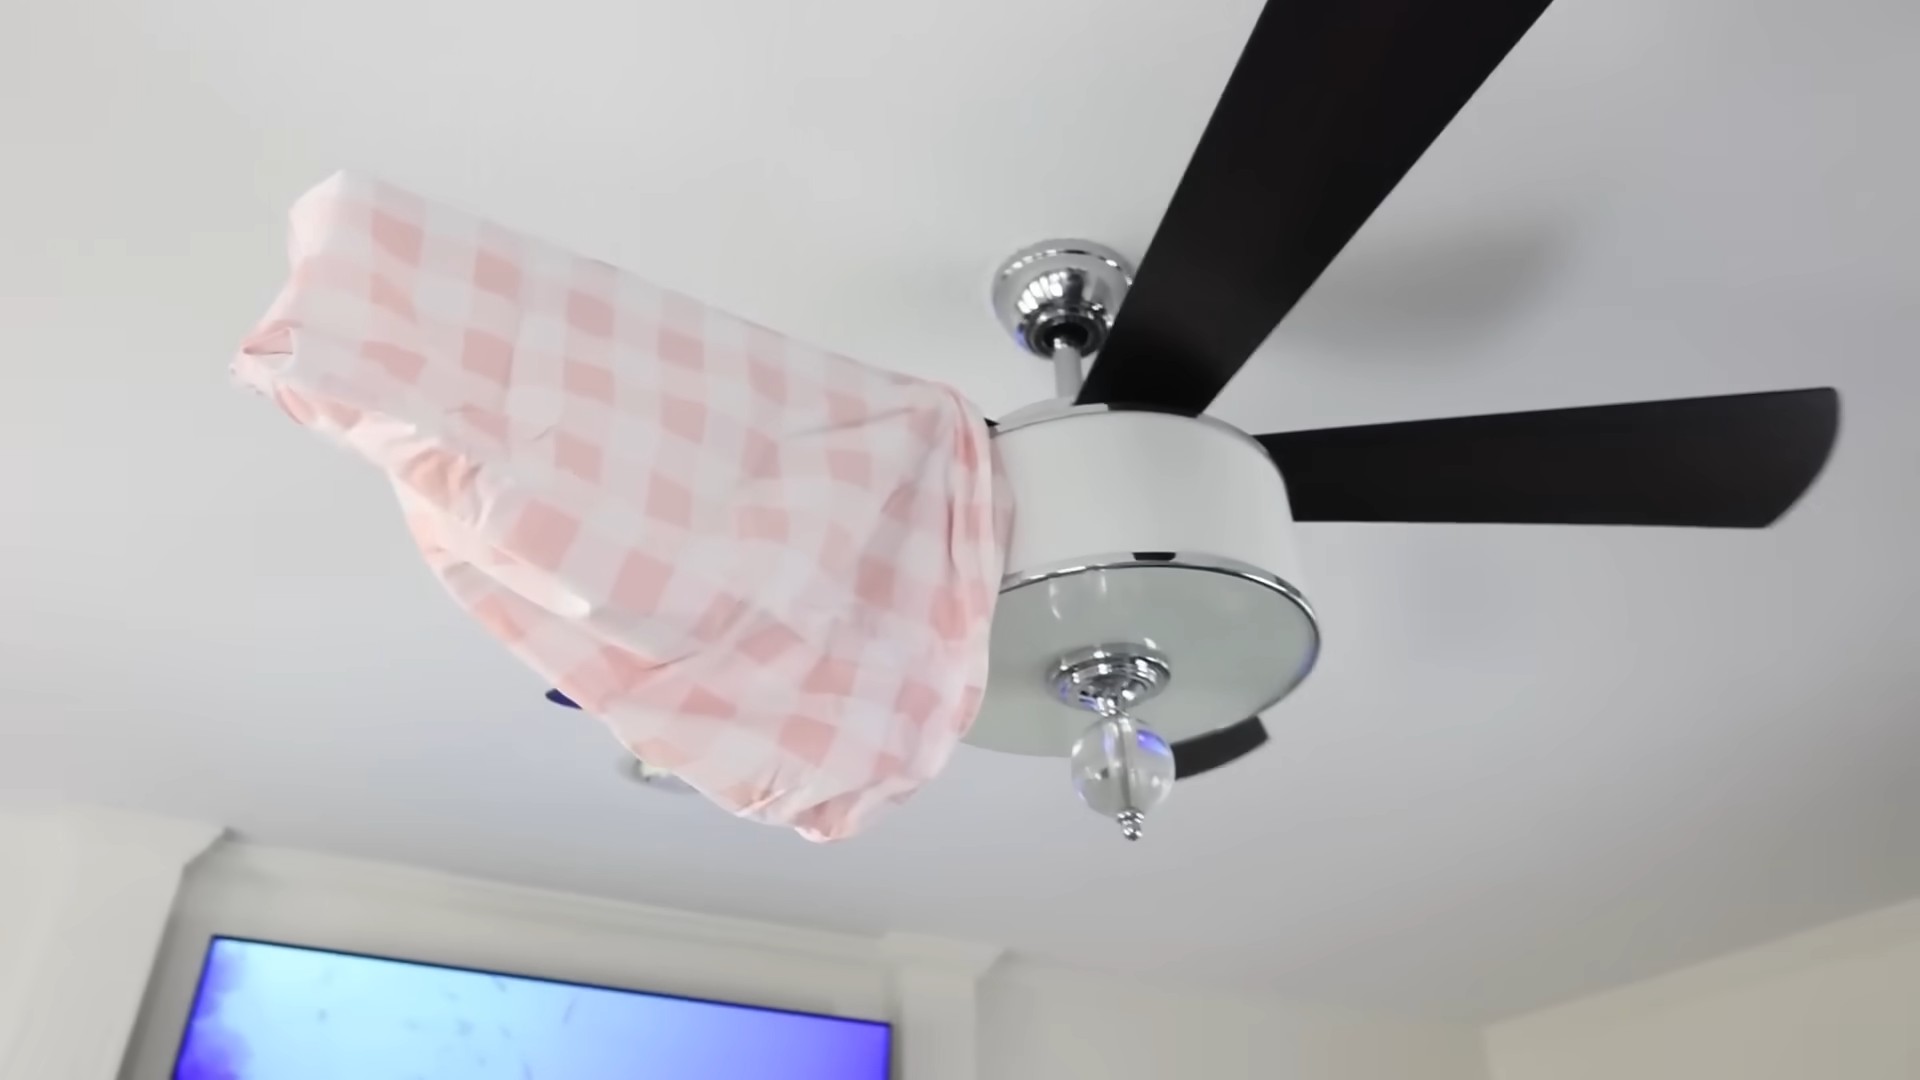
Clean pillowcase quickly – that’s the magic phrase we all want to hear, right? Let’s be honest, laundry day can feel like a never-ending chore, and pillowcases often get overlooked. But think about it: your face spends a good chunk of the night nestled against that fabric! Over time, oils, sweat, and even makeup can build up, leading to breakouts and dingy-looking linens.
Historically, keeping linens clean was a sign of wealth and status. While we might not be royalty, we can certainly treat ourselves like it by ensuring our sleep space is fresh and inviting. Plus, who doesn’t love the feeling of slipping into bed with a crisp, clean pillowcase?
This DIY trick is a game-changer because it’s all about efficiency. I’m going to show you a super simple method to clean pillowcase quickly, saving you time and effort. No more endless scrubbing or complicated routines! This hack is perfect for busy individuals, students, or anyone who wants to maintain a clean and healthy sleep environment without spending hours on laundry. Get ready to say goodbye to dull, stained pillowcases and hello to a brighter, fresher bedtime routine!
Grow Your Own Celery: From Kitchen Scraps to Crunchy Stalks!
Hey there, fellow gardening enthusiasts! Ever wondered if you could regrow that celery stalk you just chopped up for your soup? Well, guess what? You absolutely can! It’s a super easy and rewarding project, perfect for beginners and seasoned gardeners alike. Plus, it’s a fantastic way to reduce food waste. Let’s dive into how you can grow your own celery from kitchen scraps.
What You’ll Need
Before we get started, let’s gather our supplies. This is a pretty low-key project, so you probably have most of this stuff already:
* A celery stalk base (the part you usually chop off and discard). Make sure it’s firm and healthy-looking.
* A shallow dish or bowl.
* Water (tap water is fine).
* A sunny windowsill or well-lit area.
* Potting soil.
* A pot or container (at least 6 inches in diameter).
* A spray bottle (optional, but helpful).
Section 1: Sprouting Your Celery
This is where the magic begins! We’re going to coax that celery base into sprouting new roots and leaves.
1. Prepare the Celery Base: Carefully cut off the celery stalk about 2 inches from the bottom. You want to keep the base intact, as this is where the new growth will emerge. Don’t worry about being perfectly precise; just make sure you have a solid base to work with.
2. Place in Water: Put the celery base in your shallow dish or bowl. Add enough water to cover the bottom inch or so of the base. You don’t want to submerge the entire thing, just the bottom part where the roots will grow.
3. Find a Sunny Spot: Place the dish on a sunny windowsill or in a well-lit area. Celery needs plenty of light to thrive, so make sure it gets at least 6 hours of sunlight per day. If you don’t have a sunny windowsill, you can use a grow light.
4. Change the Water Regularly: This is crucial! Change the water every 1-2 days to prevent bacteria growth and keep the celery base healthy. You’ll notice the water getting cloudy or discolored after a while, so fresh water is key.
5. Observe and Wait: Now comes the patience part. Over the next few days, you should start to see small roots emerging from the bottom of the celery base. You’ll also notice new leaves sprouting from the top. This process usually takes about 5-7 days, but it can vary depending on the temperature and light conditions.
Section 2: Planting Your Celery
Once your celery has developed a good root system and some new leaves, it’s time to move it to a pot with soil.
1. Prepare the Pot: Fill your pot or container with potting soil. Make sure the pot has drainage holes at the bottom to prevent waterlogging. Waterlogging can lead to root rot, which is a big no-no for celery.
2. Create a Hole: Use your finger or a small trowel to create a hole in the center of the pot, large enough to accommodate the celery base and its roots.
3. Carefully Transplant: Gently remove the celery base from the water and carefully place it in the hole. Make sure the roots are spread out and not bunched up.
4. Cover with Soil: Fill the hole with potting soil, gently pressing down around the celery base to secure it in place. You want to cover the base up to where the new leaves are emerging, but don’t bury the leaves themselves.
5. Water Thoroughly: Water the soil thoroughly until water drains out of the bottom of the pot. This will help settle the soil and ensure that the roots are well-hydrated.
Section 3: Caring for Your Celery Plant
Now that your celery is planted, it’s time to provide it with the care it needs to grow into a healthy, crunchy stalk.
1. Sunlight: Celery loves sunlight, so continue to keep it in a sunny location. Aim for at least 6 hours of direct sunlight per day. If you’re growing it indoors, you may need to supplement with a grow light.
2. Watering: Celery needs consistent moisture, but it doesn’t like to be waterlogged. Water the plant whenever the top inch of soil feels dry to the touch. Use a spray bottle to mist the leaves occasionally, as this will help keep them hydrated.
3. Fertilizing: To encourage healthy growth, fertilize your celery plant every 2-3 weeks with a balanced liquid fertilizer. Follow the instructions on the fertilizer packaging for proper dilution.
4. Pest Control: Keep an eye out for common garden pests like aphids and slugs. If you notice any pests, you can try spraying the plant with insecticidal soap or neem oil. You can also hand-pick the pests off the plant.
5. Blanching (Optional): Blanching is a technique used to make celery stalks whiter and milder in flavor. About two weeks before you plan to harvest, you can blanch your celery by wrapping the stalks with newspaper or cardboard, leaving the top leaves exposed. This will block sunlight from reaching the stalks, which will reduce chlorophyll production and make them paler.
Section 4: Harvesting Your Celery
After a few months of care, your celery should be ready to harvest!
1. Harvest Time: Celery is typically ready to harvest when the stalks are about 6-8 inches long. You can harvest the entire plant at once, or you can harvest individual stalks as needed.
2. Harvesting Individual Stalks: To harvest individual stalks, simply cut them off at the base of the plant with a sharp knife. Be careful not to damage the remaining stalks.
3. Harvesting the Entire Plant: To harvest the entire plant, cut it off at the base with a sharp knife.
4. Enjoy Your Harvest: Wash your harvested celery thoroughly and enjoy it in salads, soups, stews, or as a crunchy snack with your favorite dip.
Troubleshooting Tips
* Celery not sprouting roots: Make sure the celery base is fresh and healthy. Also, ensure that it’s getting enough light and that you’re changing the water regularly.
* Celery leaves turning yellow: This could be a sign of overwatering or underwatering. Adjust your watering schedule accordingly. It could also be a sign of nutrient deficiency, so try fertilizing the plant.
* Celery stalks are thin and weak: This could be due to lack of sunlight or nutrients. Make sure the plant is getting enough light and fertilize it regularly.
* Pests attacking my celery: Inspect your plant regularly for pests and take action as soon as you notice them. Insecticidal soap and neem oil are effective treatments for many common garden pests.
Extra Tips for Celery Success
* Choose the right celery: When selecting a celery stalk to regrow, choose one that is firm, crisp, and has a healthy-looking base. Avoid stalks that are wilted, discolored, or have signs of rot.
* Start multiple stalks: To increase your chances of success, start multiple celery stalks at the same time. This way, if one doesn’t sprout, you’ll still have others to work with.
* Be patient: Regrowing celery takes time and patience. Don’t get discouraged if you don’t see results immediately. Just keep providing the plant with the care it needs, and eventually, you’ll be rewarded with a delicious harvest.
* Consider your climate: Celery prefers cooler temperatures, so if you live in a hot climate, you may need to provide it with some shade during the hottest part of the day.
* Experiment with different varieties: There are many different varieties of celery, each with its own unique flavor and texture. Experiment with different varieties to find your favorite.
Growing celery from kitchen scraps is a fun and rewarding project that anyone can do. With a little bit of patience and care, you can enjoy fresh, crunchy celery right from your own home. Happy gardening!

Conclusion
So, there you have it! This simple, yet incredibly effective DIY trick for quickly cleaning your pillowcases is a game-changer. No more dreading laundry day or settling for less-than-fresh bedding. This method is not only faster than a full washing machine cycle, but it’s also gentler on your pillowcases, extending their lifespan and keeping them looking their best.
Why is this a must-try? Because clean pillowcases are essential for healthy skin and a restful night’s sleep. Think about it: your face spends hours pressed against your pillowcase every night, absorbing oils, sweat, and dead skin cells. A dirty pillowcase can contribute to breakouts, allergies, and even exacerbate existing skin conditions. This quick cleaning method allows you to maintain a consistently clean sleep surface without the hassle of constant full laundry loads. It’s a small change that can make a big difference in your overall well-being.
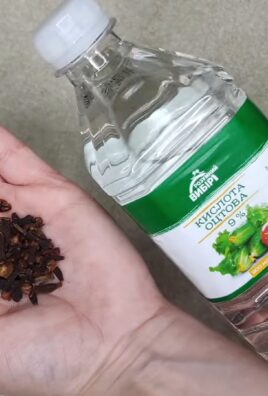
Beyond the basic method, there are several variations you can explore to customize your cleaning routine. For instance, if you prefer a more natural approach, substitute the laundry detergent with a mixture of white vinegar and baking soda. The vinegar acts as a natural disinfectant and deodorizer, while the baking soda helps to lift away dirt and grime. For an extra boost of freshness, add a few drops of your favorite essential oil, such as lavender or eucalyptus, to the water. These oils not only smell wonderful but also have calming properties that can promote relaxation and better sleep.
Another variation involves using a specialized laundry bag for delicate fabrics. This can provide an extra layer of protection for your pillowcases, especially if they are made of silk or other delicate materials. Simply place the pillowcase inside the laundry bag before submerging it in the cleaning solution.
If you’re dealing with stubborn stains, pre-treating the affected area with a stain remover before soaking can significantly improve the results. Be sure to choose a stain remover that is safe for the fabric of your pillowcase.
We are confident that once you try this quick and easy DIY trick for cleaning your pillowcases, you’ll wonder how you ever lived without it. It’s a time-saving, cost-effective, and environmentally friendly way to keep your bedding fresh and clean.
Don’t just take our word for it – give it a try! We encourage you to experiment with different variations and find what works best for you. And most importantly, we want to hear about your experience. Share your results, tips, and tricks in the comments section below. Let’s create a community of clean pillowcase enthusiasts! Your feedback will not only help other readers but also inspire us to continue developing and sharing helpful DIY solutions. So go ahead, try this clean pillowcase quickly method and let us know what you think!
Frequently Asked Questions (FAQ)
How often should I clean my pillowcases using this method?
We recommend cleaning your pillowcases using this quick method at least two to three times per week. This frequency will help to prevent the buildup of dirt, oil, and bacteria, keeping your skin healthy and your bedding fresh. If you have oily skin or are prone to breakouts, you may want to clean your pillowcases even more frequently. Consider having multiple sets of pillowcases so you can easily swap them out between cleanings.
What type of laundry detergent is best for this DIY trick?
A mild, fragrance-free laundry detergent is generally the best choice for cleaning pillowcases, especially if you have sensitive skin. Avoid using harsh detergents or those containing bleach, as these can damage the fabric and irritate your skin. Look for detergents specifically designed for delicate fabrics or those labeled as hypoallergenic. Powdered detergents can sometimes leave residue, so liquid detergents are often preferred.
Can I use this method for all types of pillowcases?
This method is generally safe for most types of pillowcases, including cotton, linen, and synthetic blends. However, if you have pillowcases made of silk or other delicate materials, it’s essential to take extra precautions. Use a gentle detergent specifically designed for delicate fabrics and avoid using hot water, as this can damage the fibers. Consider using a laundry bag for added protection. Always check the care label on your pillowcase for specific cleaning instructions.
What if I don’t have laundry detergent? Can I use something else?
If you don’t have laundry detergent on hand, you can use a mild dish soap as a substitute. However, be sure to use only a small amount, as dish soap can be more concentrated than laundry detergent. Rinse the pillowcase thoroughly to remove any soap residue. As mentioned earlier, a mixture of white vinegar and baking soda can also be used as a natural alternative.
How long should I soak the pillowcases?
The soaking time will depend on how dirty your pillowcases are. For lightly soiled pillowcases, 15-20 minutes may be sufficient. For more heavily soiled pillowcases, you may need to soak them for up to 30 minutes. Avoid soaking them for longer than 30 minutes, as this can damage the fabric.
How do I dry my pillowcases after cleaning them?
You can either air dry your pillowcases or tumble dry them on a low heat setting. Air drying is generally the gentlest option, as it avoids exposing the fabric to high temperatures. If you choose to tumble dry your pillowcases, be sure to remove them from the dryer as soon as they are dry to prevent wrinkles.
Can I use this method to clean other small items, like face towels or washcloths?
Yes, this method can be used to clean other small items, such as face towels, washcloths, and even delicate clothing items. Just be sure to adjust the amount of detergent and soaking time accordingly.
What if my pillowcases have stubborn stains?
For stubborn stains, pre-treating the affected area with a stain remover before soaking can significantly improve the results. Choose a stain remover that is safe for the fabric of your pillowcase. You can also try using a paste of baking soda and water to gently scrub the stain before soaking.
Is this method environmentally friendly?
This method is more environmentally friendly than using a full washing machine cycle, as it uses less water and energy. To further reduce your environmental impact, consider using a biodegradable laundry detergent and air drying your pillowcases.
How can I prevent my pillowcases from getting dirty so quickly?
There are several things you can do to prevent your pillowcases from getting dirty so quickly. Wash your face thoroughly before going to bed to remove any makeup, dirt, or oil. Avoid sleeping with wet hair, as this can transfer moisture and bacteria to your pillowcase. Consider using a silk or satin pillowcase, as these materials are less absorbent than cotton and can help to reduce friction and prevent wrinkles. And of course, clean your pillowcases regularly using this quick and easy DIY trick!


Leave a Comment