

DIY Hard Floor Shine: Are your once-gleaming hard floors looking dull and lifeless? Do you dream of a showroom-worthy shine without breaking the bank on expensive professional cleaning services? I know I do! You’re not alone. For centuries, people have sought ways to maintain the beauty and hygiene of their homes, and a sparkling floor has always been a symbol of cleanliness and pride. Think about the meticulously polished floors of ancient palaces or the lovingly cared-for wooden floors in your grandmother’s house – a shining floor speaks volumes.
But let’s face it, modern life is busy! Who has time for hours of scrubbing and polishing? That’s where these amazing DIY hard floor shine tricks come in. I’m going to share some simple, effective, and budget-friendly methods to restore your floors to their former glory. These aren’t just quick fixes; they’re tried-and-true techniques that will leave your hard floors looking their absolute best. Plus, you’ll save money and avoid harsh chemicals found in many commercial cleaners. Get ready to transform your home with a radiant, long-lasting DIY hard floor shine that will impress your guests and make you feel fantastic every time you walk through the door!
DIY Hard Floor Shine: Revive Your Floors with Natural Ingredients!
Hey there, fellow DIY enthusiasts! Are your hard floors looking a little dull and lifeless? Tired of expensive, chemical-laden floor cleaners that promise the world but deliver… well, nothing spectacular? I totally get it! I was in the same boat not too long ago. That’s why I embarked on a mission to find a natural, effective, and budget-friendly way to bring back the shine to my hard floors. And guess what? I cracked the code!
This guide will walk you through my tried-and-true method for creating a DIY hard floor shine solution that will leave your floors sparkling and looking brand new. We’re talking about a shine that rivals those expensive commercial cleaners, but without the harsh chemicals and hefty price tag. Plus, you probably already have most of the ingredients in your pantry!
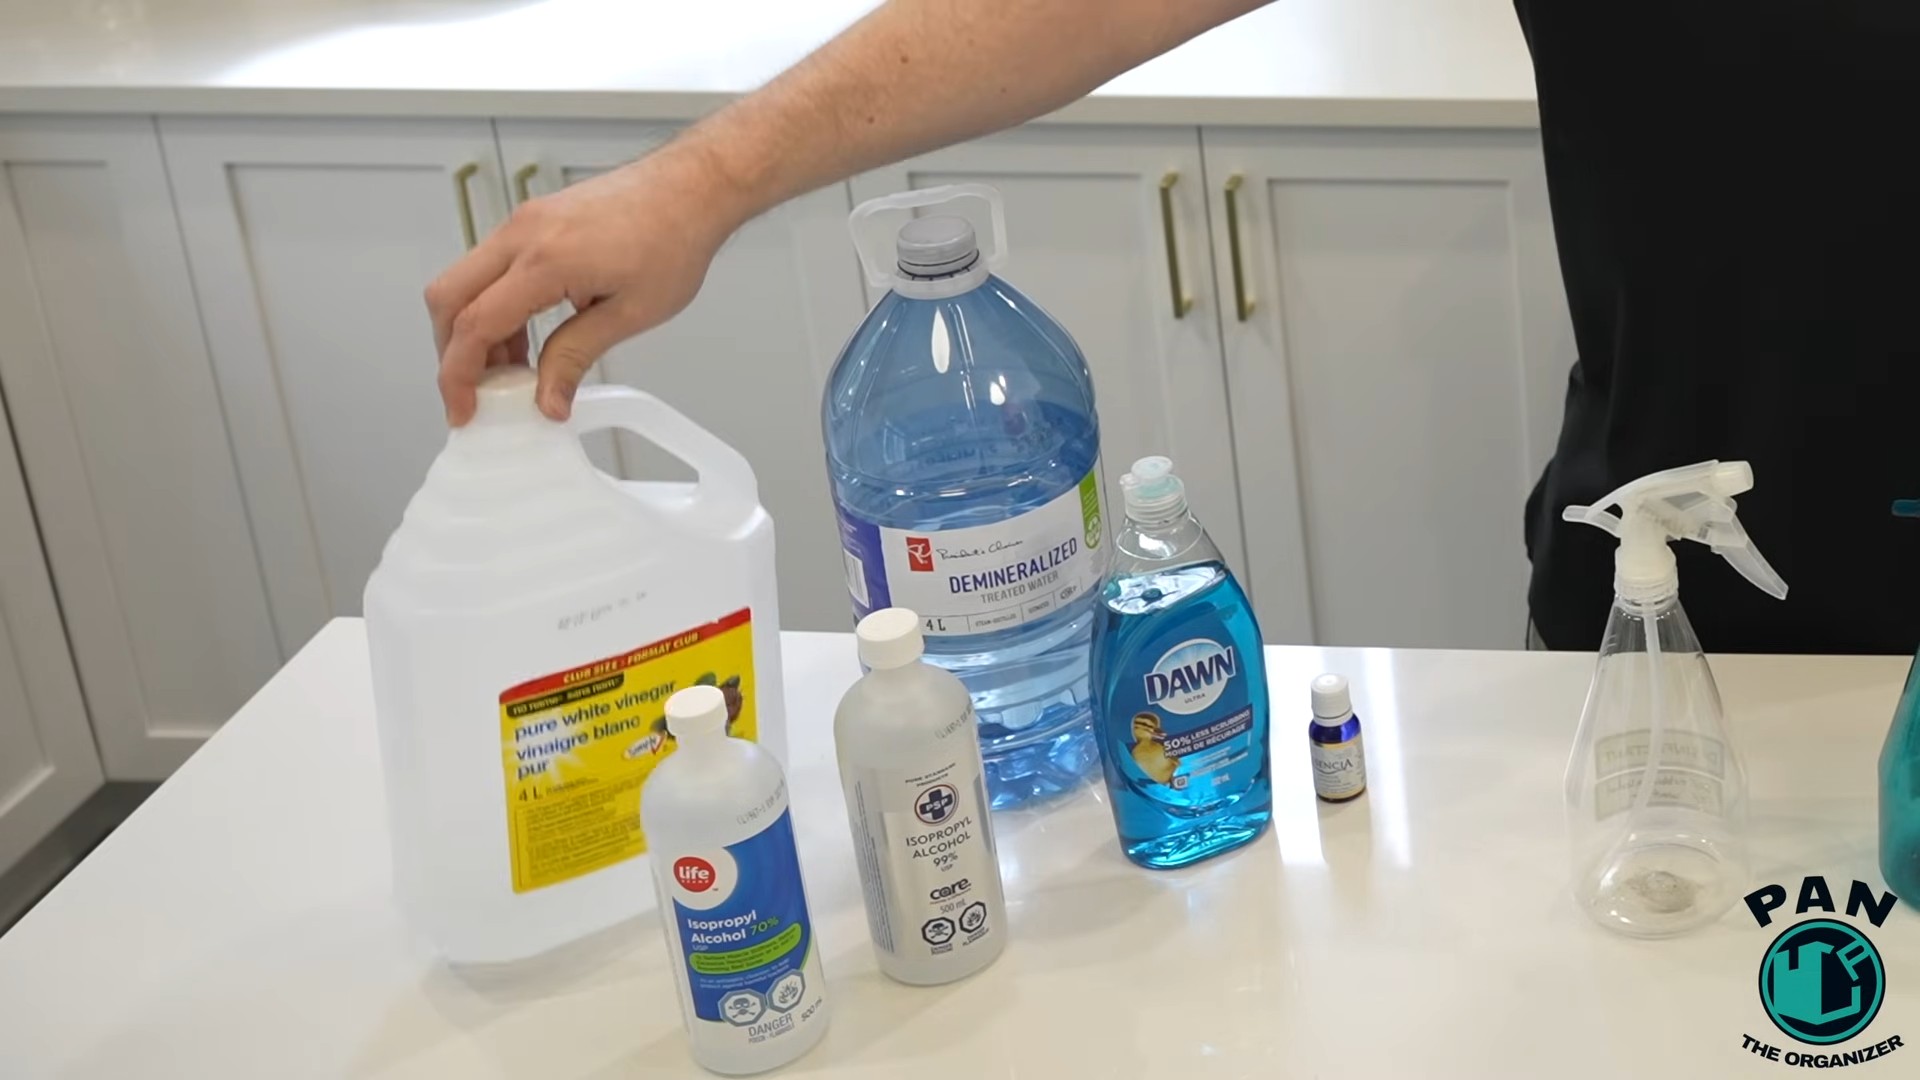
What You’ll Need: The Essential Ingredients
Before we dive into the mixing and mopping, let’s gather our supplies. Here’s what you’ll need to create this amazing floor shine solution:
* White Vinegar: This is our secret weapon! Vinegar is a natural disinfectant and degreaser that helps to remove dirt, grime, and buildup without leaving a residue.
* Olive Oil: Yes, you read that right! Olive oil adds a beautiful shine and helps to protect your floors. Don’t worry, it won’t make them slippery if used in the right proportion.
* Essential Oil (Optional): For a fresh, clean scent, add a few drops of your favorite essential oil. Lemon, orange, lavender, or tea tree oil are all great choices.
* Warm Water: This acts as the base for our cleaning solution.
* Spray Bottle: For easy application.
* Microfiber Mop: Microfiber mops are gentle on hard floors and effectively pick up dirt and grime.
* Bucket: To mix the cleaning solution.
* Soft Cloth or Towel: For buffing the floors after mopping.
Step-by-Step Instructions: The Magic Formula
Alright, let’s get down to business! Follow these steps carefully to create your own DIY hard floor shine solution:
1. Prepare Your Floors: Before you start mopping, it’s crucial to prepare your floors. This means sweeping or vacuuming thoroughly to remove any loose dirt, dust, or debris. This will prevent you from just pushing the dirt around during the mopping process. I like to use a vacuum with a hard floor attachment to get into all the nooks and crannies.
2. Mix the Cleaning Solution: In your bucket, combine the following ingredients:
* 1/2 cup white vinegar
* 1/4 cup olive oil
* 1 gallon warm water
* 10-15 drops of your favorite essential oil (optional)
Important Note: The ratio of vinegar to olive oil is crucial. Too much olive oil can make your floors slippery, while too much vinegar can dull the finish. Stick to the recommended proportions for the best results.
3. Test in an Inconspicuous Area: Before applying the solution to your entire floor, it’s always a good idea to test it in a small, inconspicuous area. This will ensure that the solution doesn’t damage or discolor your floors. Apply a small amount of the solution to the test area, let it sit for a few minutes, and then wipe it away with a clean cloth. Check for any adverse reactions before proceeding.
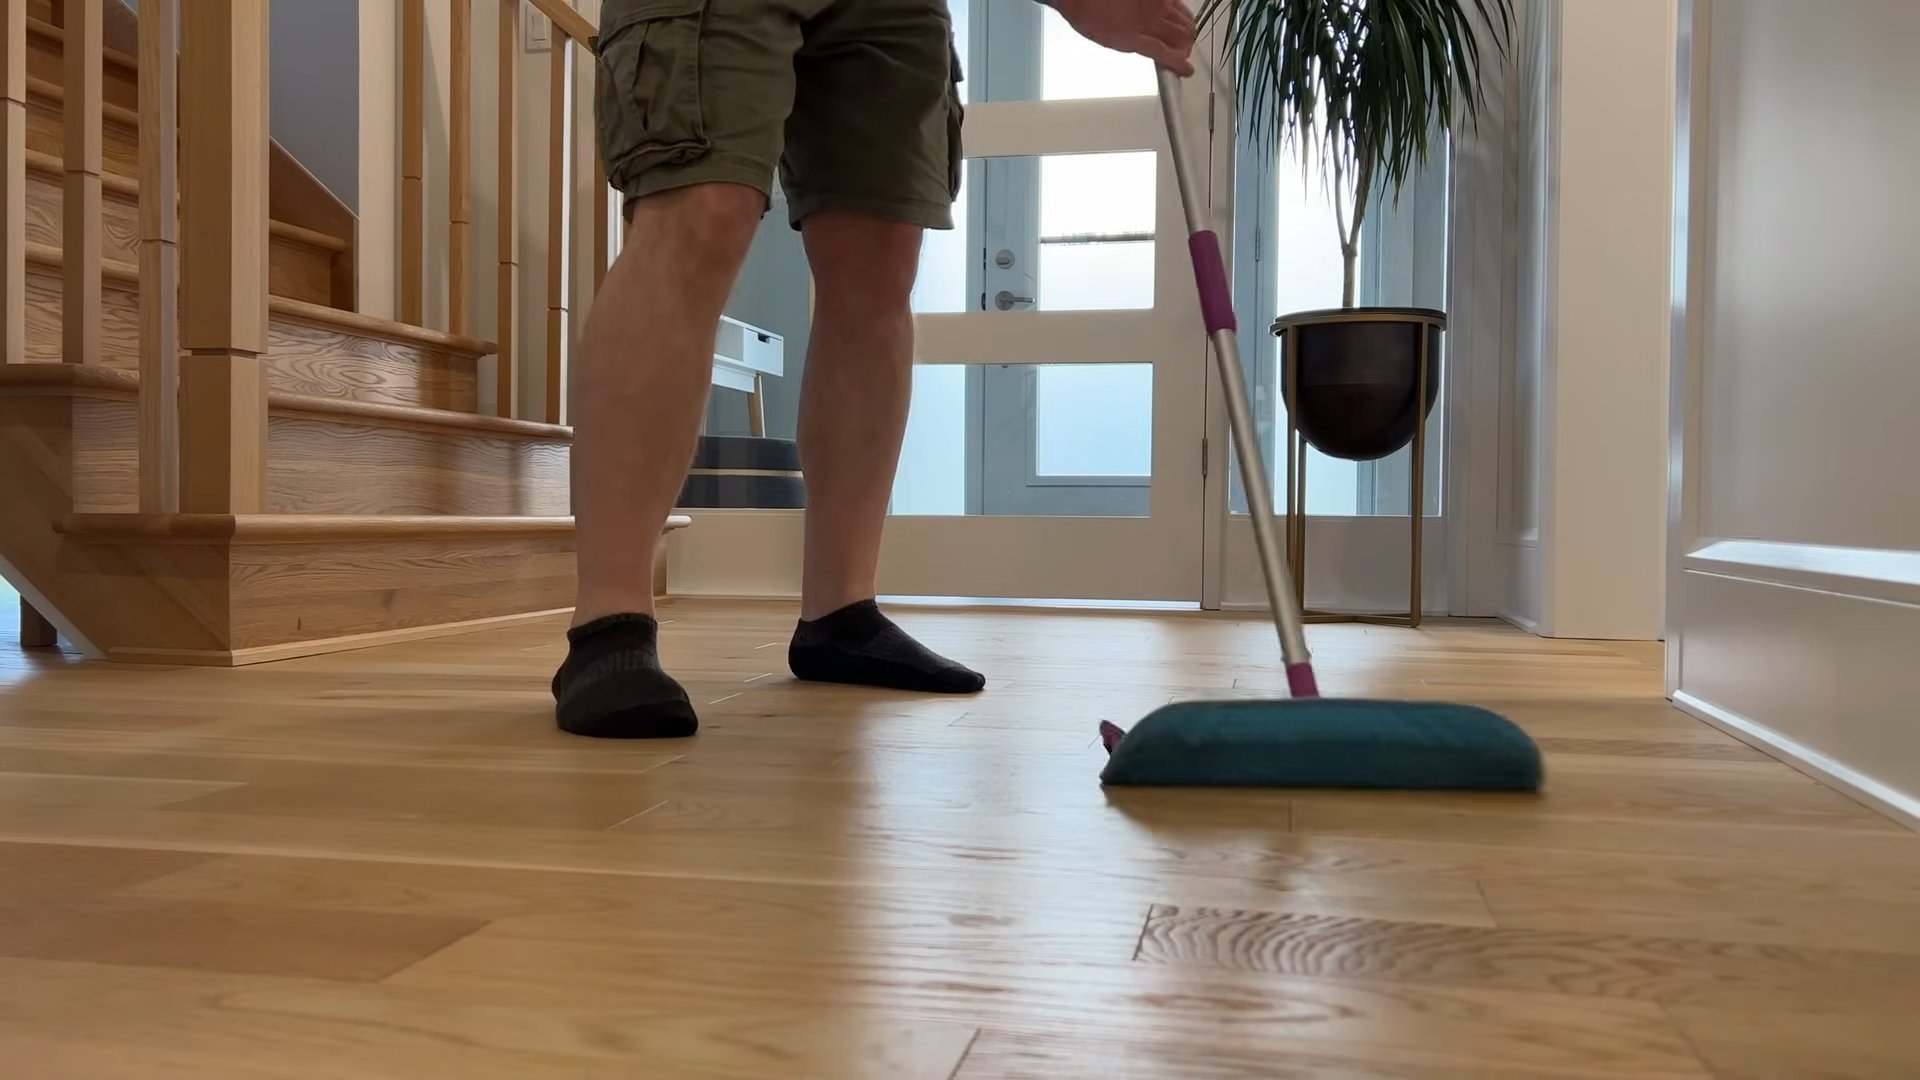
4. Dampen Your Mop: Dip your microfiber mop into the cleaning solution and wring it out thoroughly. You want the mop to be damp, not soaking wet. Excess water can damage your floors and leave streaks.
5. Mop Your Floors: Starting in one corner of the room, mop your floors in overlapping strokes. Be sure to cover the entire surface, paying attention to areas that are particularly dirty or stained.
6. Rinse Your Mop (Optional): If your floors are very dirty, you may need to rinse your mop in clean water periodically. This will prevent you from spreading the dirt around.
7. Dry Your Floors: After mopping, allow your floors to air dry completely. This usually takes about 15-30 minutes. You can speed up the drying process by opening windows or using a fan.
8. Buff for Extra Shine: Once your floors are completely dry, use a soft cloth or towel to buff them. This will help to remove any remaining streaks and enhance the shine. I personally love using an old, clean t-shirt for this step.
Troubleshooting: Common Issues and Solutions
Even with the best instructions, sometimes things don’t go exactly as planned. Here are some common issues you might encounter and how to fix them:
* Streaky Floors: If your floors are streaky after mopping, it could be due to several factors:
* Too much cleaning solution: Make sure you’re wringing out your mop thoroughly before mopping.
* Dirty mop: Rinse your mop frequently in clean water.
* Hard water: If you have hard water, try using distilled water in your cleaning solution.
* Not buffing: Buffing your floors after they’re dry can help to remove streaks.
* Slippery Floors: If your floors are slippery after mopping, it’s likely due to too much olive oil in the cleaning solution.
* Remop with plain water: Mop your floors again with plain warm water to remove the excess oil.
* Reduce olive oil: Next time, reduce the amount of olive oil in your cleaning solution.
* Dull Floors: If your floors still look dull after mopping, it could be due to:
* Too much vinegar: Reduce the amount of vinegar in your cleaning solution.
* Buildup: If you’ve been using commercial floor cleaners, there may be a buildup of residue on your floors. Try using a stronger cleaning solution (like a mixture of vinegar and baking soda) to remove the buildup before using the DIY shine solution.
Floor Type Considerations: Is This Solution Right for You?
While this DIY floor shine solution is generally safe for most hard floors, it’s important to consider your floor type before using it.
* Hardwood Floors: This solution is generally safe for sealed hardwood floors. However, it’s important to test it in an inconspicuous area first to make sure it doesn’t damage the finish. Avoid using this solution on unsealed hardwood floors, as the water can seep into the wood and cause damage.
* Laminate Floors: This solution is also generally safe for laminate floors. However, it’s important to avoid using too much water, as this can cause the laminate to swell.
* Tile Floors: This solution is perfect for tile floors! The vinegar helps to remove dirt and grime, while the olive oil adds a beautiful shine.
* Vinyl Floors: This solution is also safe for vinyl floors.
Important Disclaimer: I am not a flooring expert. Always consult with a professional if you have any concerns about cleaning your specific type of flooring.
Extra Tips and Tricks: Taking Your Shine to the Next Level
Here are a few extra tips and tricks to help you achieve the ultimate floor shine:
* Use a Clean Mop Head: Always start with a clean mop head to avoid spreading dirt and grime. I recommend having a few different mop heads on hand so you can switch them out as needed.
* Change Your Water Frequently: If your water becomes dirty, change it out for fresh water. This will prevent you from just pushing the dirt around.
* Spot Clean Stains: For stubborn stains, try spot cleaning them with a mixture of baking soda and water. Apply the paste to the stain, let it sit for a few minutes, and then wipe it away with a clean cloth.
* Regular Maintenance: To keep your floors looking their best, mop them regularly (at least once a week). This will prevent dirt and grime from building up and making your floors look dull.
* Consider a Steam Mop: For an even deeper clean, consider using a steam mop. Steam mops use hot steam to sanitize and clean your floors without the need for harsh chemicals.
Why This Works: The Science Behind the Shine
You might be wondering, “Why does this simple solution work so well?” Let’s break down the science:
* Vinegar: The acetic acid in vinegar is a natural disinfectant and degreaser. It helps to break down dirt, grime, and buildup without leaving a residue.
* Olive Oil: Olive oil is a natural moisturizer and polisher. It helps to protect your floors and add a beautiful shine. The oil fills in microscopic scratches, reflecting light and creating a glossy appearance.
* Warm Water: Warm water helps to dissolve dirt and grime, making it easier to remove.
* Essential Oils: Essential oils add a pleasant scent and can also have antibacterial
Conclusion
So, there you have it! A simple, effective, and budget-friendly way to achieve a dazzling shine on your hard floors without resorting to harsh chemicals or expensive professional services. This DIY hard floor shine solution is more than just a cleaning hack; it’s a commitment to a healthier home environment and a more sustainable lifestyle.
Why is this a must-try? Because it delivers impressive results using ingredients you likely already have in your pantry. Forget about lugging heavy bottles of commercial floor cleaners from the store, only to be disappointed by their lingering chemical odors and questionable ingredients. Our method is not only gentler on your floors but also on your wallet and the planet.
But the beauty of this DIY approach lies in its adaptability. Feel free to experiment with variations to suit your specific needs and preferences. For instance, if you have particularly stubborn stains, consider adding a tablespoon of baking soda to the mixture for extra cleaning power. For a more fragrant clean, infuse your water with a few drops of your favorite essential oil, such as lemon, lavender, or tea tree oil (known for its antibacterial properties). Just be sure to test the essential oil on an inconspicuous area first to ensure it doesn’t react negatively with your flooring.
Another variation involves the type of vinegar you use. While white vinegar is a reliable all-purpose cleaner, apple cider vinegar can add a subtle, pleasant scent. Remember to always dilute the vinegar properly to avoid damaging your floors. The ratio of water to vinegar is crucial, so stick to the recommended proportions unless you’re confident in your floor’s resistance to acidity.
For those with sealed wood floors, a touch of olive oil can be added to the mixture to help nourish the wood and enhance its natural shine. However, use olive oil sparingly, as too much can leave a greasy residue. A teaspoon or two per gallon of water is usually sufficient.
Ultimately, the best way to discover the perfect DIY hard floor shine solution for your home is to experiment and adjust the recipe to your liking. We encourage you to give this method a try and see the difference it can make.
Don’t just take our word for it! We’re confident that you’ll be amazed by the results. Once you’ve tried this DIY trick, we’d love to hear about your experience. Share your before-and-after photos, your favorite variations, and any tips or tricks you’ve discovered along the way. Let’s create a community of DIY enthusiasts who are passionate about clean, healthy, and beautiful homes. Share your experiences in the comments below or on social media using #DIYHardFloorShine. We can’t wait to see your sparkling floors!
Frequently Asked Questions (FAQ)
What type of floors is this DIY hard floor shine suitable for?
This DIY solution is generally safe and effective for most hard floor surfaces, including tile, linoleum, vinyl, and sealed hardwood. However, it’s crucial to exercise caution and test the solution on an inconspicuous area first, especially if you have delicate or antique flooring. Avoid using this method on unsealed wood floors, as the water and vinegar can seep into the wood and cause damage. For stone floors like marble or granite, it’s best to consult with a professional cleaner, as vinegar can etch these surfaces over time. Always check your flooring manufacturer’s recommendations before using any DIY cleaning solution.
How often should I use this DIY hard floor shine?
The frequency of cleaning depends on the amount of foot traffic and dirt your floors are exposed to. For high-traffic areas, you may need to clean your floors once or twice a week. For less frequently used areas, cleaning every other week or once a month may be sufficient. Regular sweeping or vacuuming is essential to remove loose dirt and debris before mopping, as this will prevent scratching and ensure a more effective clean. Over-cleaning can strip the floor’s finish, so it’s best to err on the side of caution.
Can I use this DIY solution on laminate floors?
While some sources suggest that a diluted vinegar solution can be used on laminate floors, it’s generally not recommended. Laminate floors are susceptible to water damage, and the vinegar can seep into the seams and cause swelling or warping. If you choose to use this method on laminate floors, use a very small amount of vinegar (no more than 1/4 cup per gallon of water) and ensure that the mop is only slightly damp, not wet. Immediately dry the floor with a clean towel after mopping. It’s always best to consult your laminate flooring manufacturer’s recommendations before using any cleaning solution.
What if I don’t have vinegar? Can I use something else?
Vinegar is a key ingredient in this DIY solution due to its acidity, which helps to cut through grease and grime. However, if you don’t have vinegar on hand, you can try using lemon juice as a substitute. Lemon juice has similar cleaning properties to vinegar and can also leave a fresh, citrusy scent. Use the same amount of lemon juice as you would vinegar in the recipe. Another alternative is to use a mild dish soap, but be sure to use only a very small amount (a few drops per gallon of water) to avoid leaving a soapy residue. Rinse the floor thoroughly with clean water after mopping with dish soap.
My floors are still streaky after using this DIY hard floor shine. What am I doing wrong?
Streaky floors can be caused by several factors. First, ensure that you’re using a clean mop and bucket. A dirty mop will simply spread dirt around, leaving streaks. Second, make sure you’re using the correct ratio of water to vinegar. Too much vinegar can leave a residue that causes streaks. Third, try rinsing the floor with clean water after mopping with the DIY solution. This will remove any remaining residue and help to prevent streaks. Finally, use a microfiber mop, as these mops are more effective at picking up dirt and leaving a streak-free finish.
Can I add essential oils to this DIY hard floor shine?
Yes, adding essential oils can enhance the cleaning power and fragrance of this DIY solution. Some popular essential oils for floor cleaning include lemon, lavender, tea tree, and eucalyptus. Lemon oil has antibacterial and degreasing properties, while lavender oil has a calming scent and antibacterial properties. Tea tree oil is a powerful disinfectant, and eucalyptus oil has a refreshing scent and antiviral properties. Add a few drops of your chosen essential oil to the water and vinegar mixture. Be sure to test the essential oil on an inconspicuous area first to ensure it doesn’t react negatively with your flooring.
How do I store the leftover DIY hard floor shine solution?
You can store the leftover DIY hard floor shine solution in a clean, airtight container. Label the container clearly with the contents and date. Store the solution in a cool, dark place away from direct sunlight and heat. The solution should be good for several weeks, but it’s best to use it within a month for optimal effectiveness. Before each use, give the solution a good shake to ensure that the ingredients are properly mixed.
Is this DIY hard floor shine safe for pets and children?
This DIY solution is generally considered safe for pets and children, as it uses natural ingredients like vinegar and water. However, it’s still important to exercise caution. Keep pets and children away from the area while you’re mopping, and allow the floor to dry completely before allowing them to walk on it. If you’re using essential oils, be sure to choose pet-safe oils and use them sparingly. Some essential oils can be toxic to pets if ingested or inhaled in large quantities. Always consult with your veterinarian before using essential oils around pets.


Leave a Comment