

Container Brussel Sprouts: Ever dreamt of harvesting your own miniature cabbages right from your patio? I know I have! There’s something incredibly satisfying about growing your own food, and Brussel sprouts, despite their sometimes-questionable reputation, are surprisingly easy and rewarding to cultivate, especially in containers.
While Brussel sprouts might not have the ancient history of, say, tomatoes, they’ve been a staple in European cuisine since at least the 16th century, gaining popularity in Belgium (hence the name!). For centuries, gardeners have been perfecting the art of growing these nutritious little gems, and now, I’m excited to share some of my favorite DIY tricks and hacks to help you succeed, even if you’re short on space.
Why container gardening for Brussel sprouts? Well, let’s face it, not everyone has a sprawling backyard. Apartment dwellers, balcony enthusiasts, and even those with limited garden space can enjoy the fresh, homegrown taste of container Brussel sprouts. Plus, growing in containers gives you more control over soil quality, watering, and pest management. This article is packed with simple, effective DIY solutions to common problems, ensuring you’ll be enjoying a delicious harvest in no time. Get ready to roll up your sleeves and discover the joy of growing your own Brussel sprouts – it’s easier than you think!
Growing Brussels Sprouts in Containers: A Step-by-Step Guide
Hey there, fellow gardening enthusiasts! I’m so excited to share my experience growing Brussels sprouts in containers. It’s a surprisingly rewarding project, even if you don’t have a sprawling garden. Trust me, there’s nothing quite like harvesting your own little cabbages right from your patio! Let’s dive in.
Choosing the Right Container and Soil
First things first, you need to set the stage for success. Brussels sprouts need space to grow, so selecting the right container and soil is crucial.
* Container Size: Opt for a large container, at least 12 inches in diameter and 12 inches deep. A 5-gallon bucket or a similarly sized pot works wonders. Remember, these plants get pretty big!
* Drainage: Make sure your container has excellent drainage holes. Brussels sprouts hate sitting in soggy soil.
* Soil Mix: Use a high-quality potting mix. Avoid using garden soil directly in containers, as it can compact and hinder drainage. I prefer a mix that includes compost, peat moss (or coco coir), and perlite or vermiculite for aeration.
Starting Your Brussels Sprouts
You have two main options here: starting from seed or buying transplants. I’ve done both, and each has its pros and cons.
* Starting from Seed: This gives you more control over the variety and can be more economical. Start seeds indoors about 6-8 weeks before the last expected frost.
* Buying Transplants: This is a quicker route and can be especially helpful if you’re short on time or space for indoor seed starting. Choose healthy-looking transplants with sturdy stems and no signs of disease or pests.
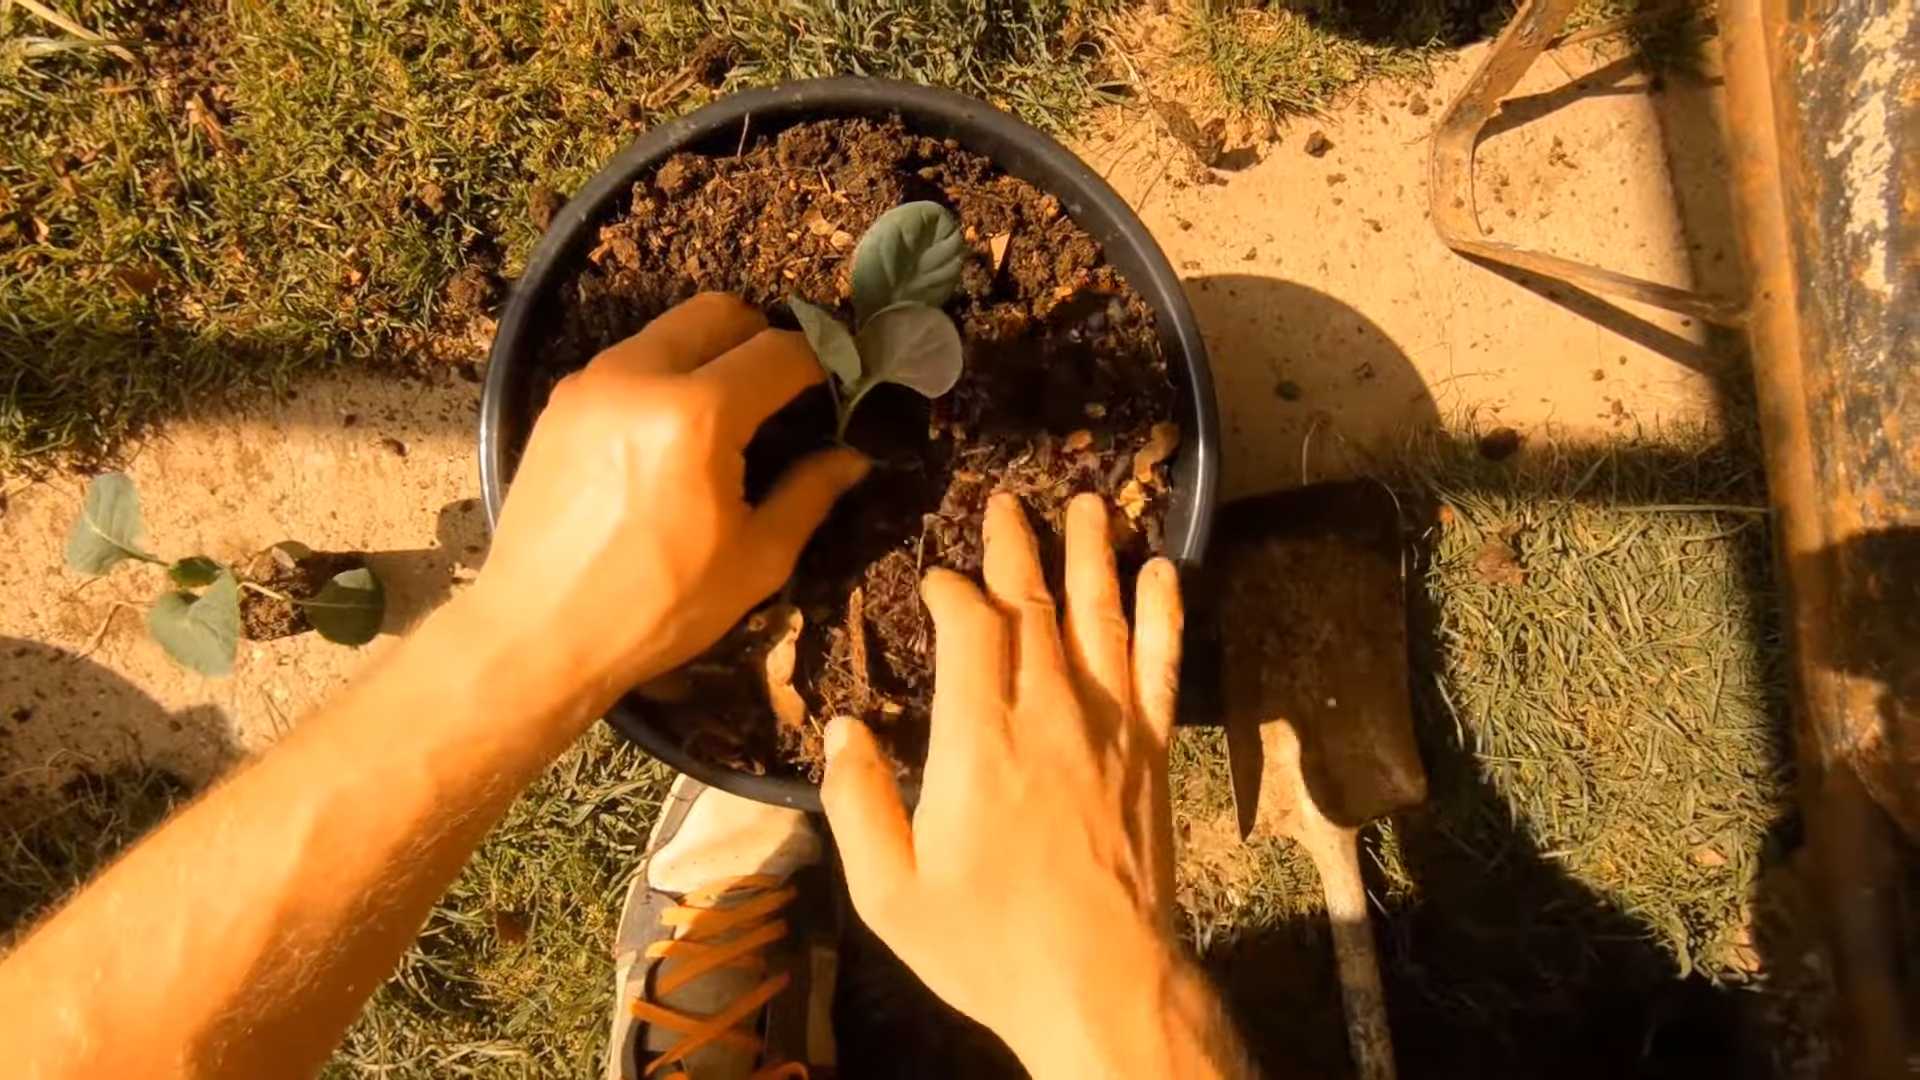
Planting Your Brussels Sprouts
Okay, now for the fun part – getting those little guys into their new home!
1. Prepare the Container: Fill your chosen container with the potting mix, leaving about an inch or two of space at the top.
2. Planting Seeds (if starting from seed): Sow seeds about ½ inch deep and 2-3 inches apart. Once the seedlings emerge and have a few true leaves, thin them to one plant per container.
3. Planting Transplants: Gently remove the transplant from its nursery pot. Loosen the roots slightly if they’re tightly bound. Dig a hole in the potting mix large enough to accommodate the root ball. Place the transplant in the hole, ensuring the top of the root ball is level with the soil surface. Backfill with potting mix and gently firm the soil around the plant.
4. Water Thoroughly: After planting, water the container thoroughly until water drains out of the bottom. This helps settle the soil and encourages root growth.
Caring for Your Brussels Sprouts
Brussels sprouts need consistent care to thrive. Here’s what you need to keep in mind:
* Sunlight: Brussels sprouts need at least 6 hours of direct sunlight per day. Place your container in a sunny spot on your patio, balcony, or in your garden.
* Watering: Water regularly, especially during hot, dry weather. Check the soil moisture by sticking your finger about an inch into the soil. If it feels dry, it’s time to water. Avoid overwatering, as this can lead to root rot.
* Fertilizing: Brussels sprouts are heavy feeders. Fertilize every 2-3 weeks with a balanced liquid fertilizer. I like to use a fertilizer specifically formulated for vegetables. You can also amend the soil with compost tea.
* Support: As your Brussels sprouts grow, they may need support to prevent them from toppling over. You can use stakes or a tomato cage to provide support.
* Pest Control: Keep an eye out for common pests like aphids, cabbage worms, and flea beetles. Handpick pests off the plants or use insecticidal soap or neem oil to control infestations. Cabbage moths can be particularly problematic, so consider using row covers to protect your plants.
* Weed Control: Keep the container free of weeds. Weeds compete with your Brussels sprouts for nutrients and water.
Pruning and Maintenance
Pruning can help improve the size and quality of your Brussels sprouts.
1. Remove Lower Leaves: As the plant grows, remove the lower leaves that turn yellow or brown. This helps improve air circulation and prevents disease.
2. Top the Plant: About a month before you want to harvest, you can top the plant by cutting off the top few inches of the stem. This encourages the plant to put more energy into developing the sprouts.
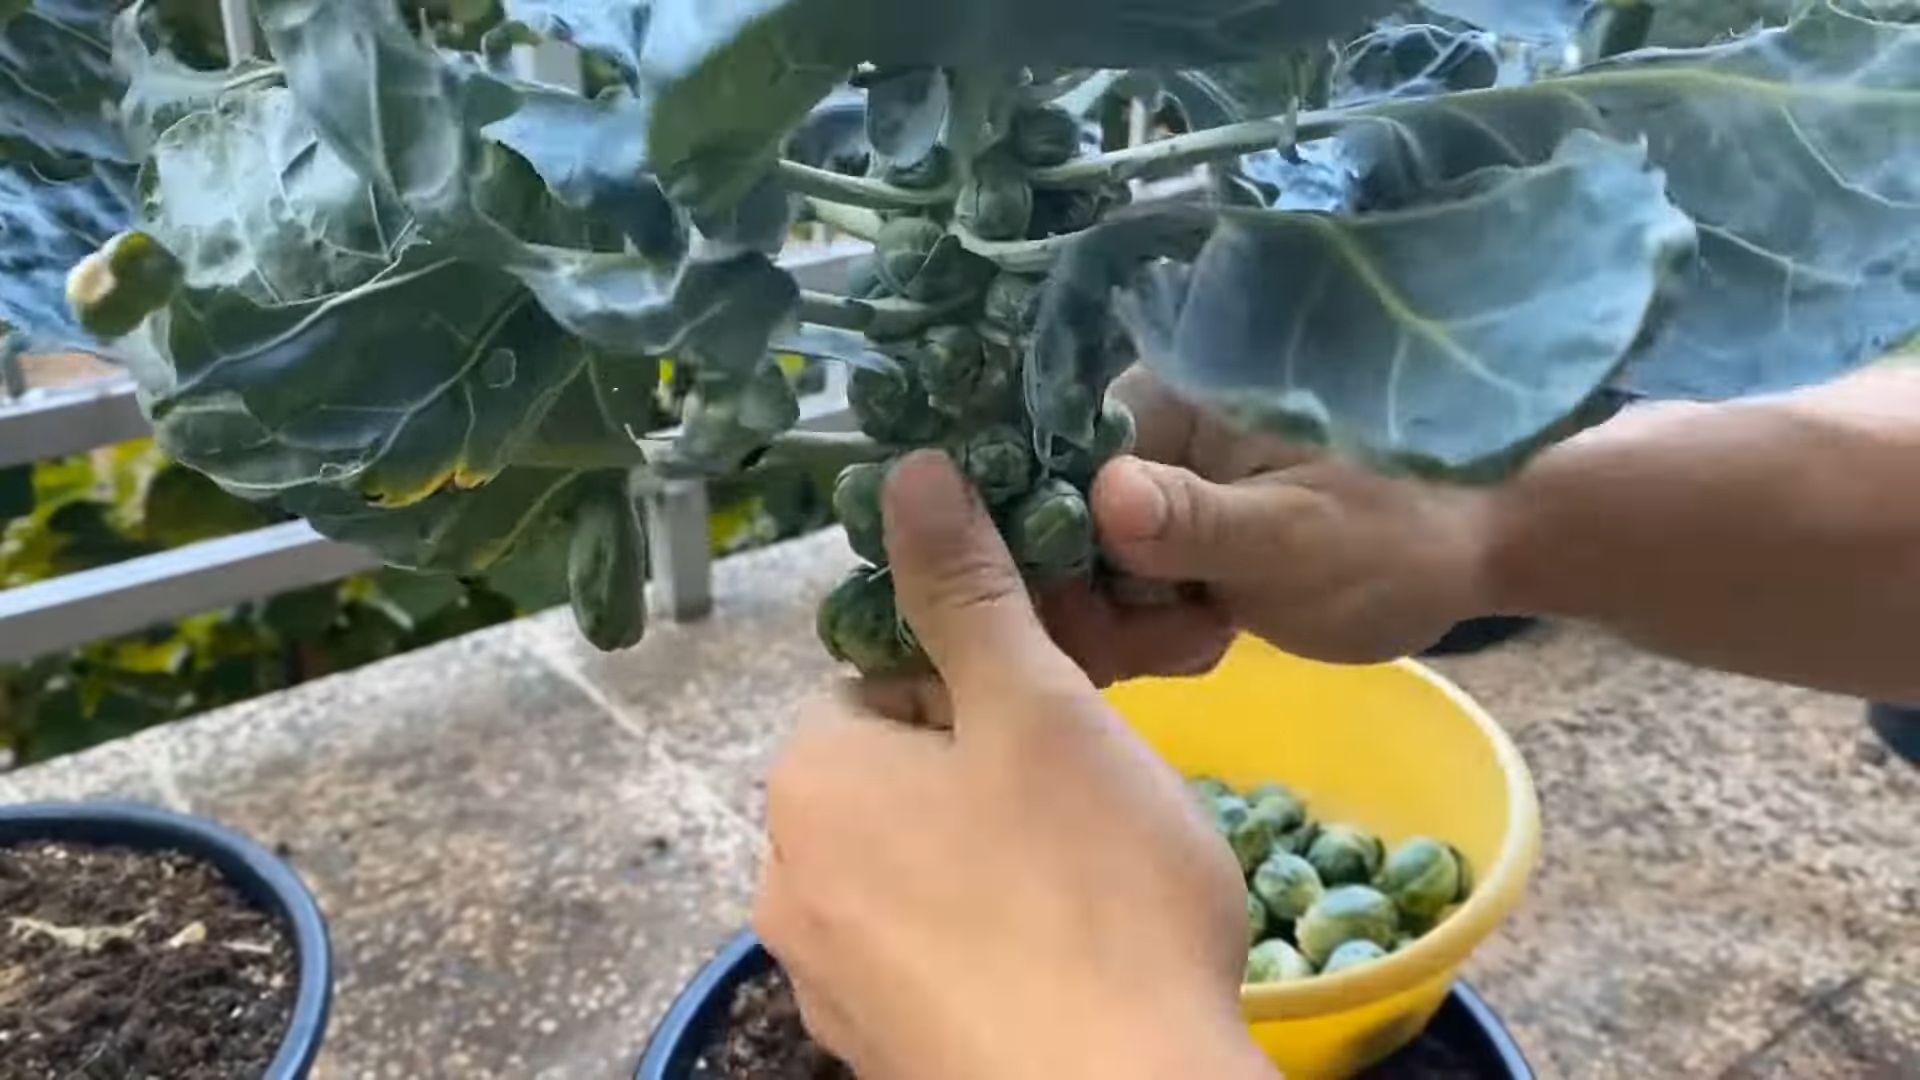
Harvesting Your Brussels Sprouts
The moment you’ve been waiting for! Harvesting Brussels sprouts is so satisfying.
1. Timing: Brussels sprouts are typically ready to harvest in the fall or early winter, after a few light frosts. Frost actually improves their flavor, making them sweeter.
2. Harvesting Technique: Start harvesting from the bottom of the plant, working your way up. The sprouts should be firm and about 1-2 inches in diameter. Twist or cut the sprouts off the stem.
3. Storage: Store harvested Brussels sprouts in the refrigerator for up to a week.
Troubleshooting
Even with the best care, you might encounter some challenges. Here are a few common problems and how to address them:
* Yellowing Leaves: This could be a sign of overwatering, nutrient deficiency, or pest infestation. Check the soil moisture, fertilize if needed, and inspect the plant for pests.
* Small Sprouts: This could be due to insufficient sunlight, water, or nutrients. Make sure your plant is getting enough sun, water regularly, and fertilize every 2-3 weeks.
* Pest Infestations: Regularly inspect your plants for pests and take action promptly. Insecticidal soap, neem oil, and handpicking are effective control methods.
Choosing the Right Brussels Sprouts Variety
Selecting the right variety can significantly impact your success. Here are a few of my favorites for container gardening:
* ‘Long Island Improved’: A classic variety that produces good yields of medium-sized sprouts.
* ‘Jade Cross’: A hybrid variety known for its disease resistance and uniform sprouts.
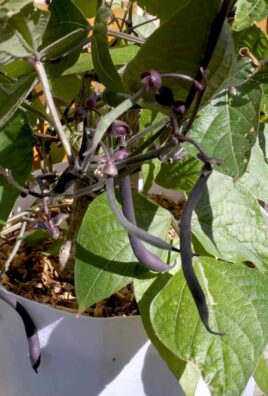
* ‘Redarling’: A unique variety with reddish-purple sprouts that add a pop of color to your garden.
* ‘Divino F1’: A compact variety that is well-suited for container gardening.
Optimizing Your Container Garden for Brussels Sprouts
To maximize your Brussels sprouts harvest, consider these tips:
* Companion Planting: Plant companion plants like marigolds, nasturtiums, or herbs around your Brussels sprouts to deter pests and attract beneficial insects.
* Succession Planting: Plant a new batch of Brussels sprouts every few weeks to extend your harvest season.
* Crop Rotation: Avoid planting Brussels sprouts in the same container year after year. Rotate with other vegetables to prevent soilborne diseases.
* Mulching: Apply a layer of mulch around the base of the plant to help retain moisture, suppress weeds, and regulate soil temperature.
Understanding Brussels Sprouts Growth Cycle
Knowing the growth cycle of Brussels sprouts can help you anticipate their needs and provide the best care.
1. Germination: Seeds typically germinate in 5-10 days.
2. Vegetative Growth: During this phase, the plant focuses on developing its leaves and stem.
3. Sprout Formation: As the plant matures, sprouts begin to form along the stem.
4. Maturation: The sprouts continue to grow and develop until they are ready to harvest.
Enhancing Flavor and Texture
Want to take your Brussels sprouts to the next level? Try these tips:
* Roasting: Roasting Brussels sprouts brings out their natural sweetness and creates a crispy texture. Toss them with olive oil, salt, pepper, and your favorite herbs before roasting.
* Sautéing: Sautéing Brussels sprouts with bacon or pancetta adds a smoky flavor.
* Shredding: Shredded Brussels sprouts can be used in salads or slaws.
* Adding Acid: A squeeze of lemon juice or a splash of balsamic vinegar can brighten the flavor of Brussels sprouts.
Dealing with Extreme Weather
Container gardens are more susceptible to extreme weather conditions than in-ground gardens. Here’s how to protect your Brussels sprouts:
* Heat: During heat waves, move your container to a shadier location or provide shade with a shade cloth. Water more frequently to prevent the soil from drying out.
* Cold: During cold snaps, move your container to a sheltered location or cover it with a blanket or frost cloth.
* Wind: Strong winds can damage Brussels sprouts plants. Place your container in a sheltered location or provide support with stakes or a windbreak.
Documenting Your Progress
Keep a gardening journal to track your progress and learn from your experiences. Note the planting date, variety, watering schedule, fertilization schedule, pest control measures, and harvest
Conclusion
So, there you have it! Growing your own Brussels sprouts in containers is not only achievable, but it’s also a deeply rewarding experience. We’ve walked you through the process, from selecting the right container and soil to nurturing your plants and harvesting those delicious little cabbages. Why is this DIY trick a must-try? Because it puts fresh, flavorful, and nutritious Brussels sprouts right at your fingertips, regardless of whether you have a sprawling garden or just a sunny balcony. Imagine stepping outside and picking the exact number of sprouts you need for dinner, knowing they haven’t traveled miles and miles to reach your plate. That’s the power of container gardening.
Beyond the convenience and freshness, growing your own Brussels sprouts offers a level of control you simply can’t get with store-bought produce. You dictate the growing conditions, ensuring your plants are free from harmful pesticides and herbicides. You can choose organic fertilizers and soil amendments, creating a truly healthy and sustainable food source. Plus, let’s be honest, there’s a certain satisfaction that comes from nurturing a plant from seed to harvest. It’s a connection to nature that can be incredibly grounding and fulfilling.
But the benefits don’t stop there. Container gardening allows for experimentation and customization. Feel free to try different varieties of Brussels sprouts. Some are known for their sweetness, others for their nutty flavor, and still others for their vibrant color. You could even try growing dwarf varieties specifically bred for containers.
Consider companion planting to further enhance your container garden. Marigolds can help deter pests, while herbs like rosemary and thyme can improve the flavor of your Brussels sprouts. Get creative and see what combinations work best for you.
And speaking of creativity, don’t be afraid to experiment with different cooking methods once you’ve harvested your bounty. Roasted Brussels sprouts with balsamic glaze are a classic for a reason, but you can also shred them for salads, sauté them with garlic and bacon, or even add them to soups and stews. The possibilities are endless!
Ultimately, growing Brussels sprouts in containers is about more than just producing food. It’s about connecting with nature, learning new skills, and enjoying the satisfaction of creating something with your own hands. It’s about having access to fresh, healthy produce, regardless of your living situation. And it’s about adding a touch of green to your life, both literally and figuratively.
We wholeheartedly encourage you to give this DIY trick a try. It’s easier than you might think, and the rewards are well worth the effort. Once you’ve harvested your first batch of homegrown Brussels sprouts, we’d love to hear about your experience. Share your photos, tips, and recipes with us in the comments below. Let’s build a community of container gardening enthusiasts and inspire others to grow their own food! Let us know what kind of container Brussels sprouts you grew and what your favorite recipe is!
Frequently Asked Questions (FAQs)
1. What is the best size container for growing Brussels sprouts?
The ideal container size for Brussels sprouts is at least 12 inches in diameter and 12 inches deep, but larger is generally better. A 5-gallon container is a good starting point, but a 10-gallon container will provide even more room for the roots to grow and support a larger plant. Remember that Brussels sprouts can get quite tall and top-heavy, so a sturdy container is essential to prevent tipping.
2. What type of soil should I use for container Brussels sprouts?
Use a high-quality potting mix that is well-draining and rich in organic matter. Avoid using garden soil, as it can become compacted in containers and restrict root growth. Look for a potting mix that contains ingredients like peat moss, perlite, vermiculite, and compost. You can also amend your potting mix with additional compost or aged manure to provide extra nutrients.
3. How much sunlight do Brussels sprouts need?
Brussels sprouts require at least 6 hours of direct sunlight per day to thrive. Choose a location for your container garden that receives plenty of sunlight throughout the day. If you live in a particularly hot climate, you may need to provide some afternoon shade to prevent the plants from overheating.
4. How often should I water my container Brussels sprouts?
Water your Brussels sprouts regularly, especially during hot, dry weather. The soil should be kept consistently moist, but not waterlogged. Check the soil moisture level by sticking your finger into the soil. If the top inch feels dry, it’s time to water. Water deeply, allowing the water to drain out of the bottom of the container.
5. What kind of fertilizer should I use for Brussels sprouts?
Brussels sprouts are heavy feeders and require regular fertilization. Use a balanced fertilizer with an NPK ratio of 10-10-10 or 14-14-14. You can also use an organic fertilizer, such as compost tea or fish emulsion. Fertilize your plants every 2-3 weeks during the growing season.
6. How do I deal with pests and diseases on my Brussels sprouts?
Brussels sprouts can be susceptible to pests like aphids, cabbage worms, and flea beetles. Inspect your plants regularly for signs of infestation. You can control pests by handpicking them off the plants, using insecticidal soap, or applying Bacillus thuringiensis (Bt), a natural bacterium that is effective against cabbage worms. Common diseases that affect Brussels sprouts include clubroot and blackleg. To prevent these diseases, choose disease-resistant varieties and practice good sanitation.
7. When are Brussels sprouts ready to harvest?
Brussels sprouts are typically ready to harvest 90-100 days after planting. The sprouts should be firm, green, and about 1-2 inches in diameter. Start harvesting from the bottom of the plant and work your way up. You can harvest the sprouts gradually as they mature, or you can harvest the entire plant at once.
8. Can I grow Brussels sprouts in containers indoors?
While it’s possible to grow Brussels sprouts indoors, it’s not ideal. Brussels sprouts require a lot of sunlight and space, which can be difficult to provide indoors. If you do decide to grow them indoors, you’ll need to use grow lights and provide adequate ventilation.
9. What are some good companion plants for Brussels sprouts?
Good companion plants for Brussels sprouts include marigolds, nasturtiums, rosemary, thyme, and dill. These plants can help deter pests, attract beneficial insects, and improve the flavor of your Brussels sprouts.
10. Can I save seeds from my Brussels sprouts?
Saving seeds from Brussels sprouts can be tricky, as they are cross-pollinated. This means that the seeds may not produce plants that are true to type. If you want to save seeds, you’ll need to isolate your plants from other members of the Brassica family, such as cabbage, broccoli, and kale.
Leave a Comment