

Cleaning Hacks You Wish You Knew – wouldn’t it be amazing to wave a magic wand and banish dirt, grime, and clutter from your home in an instant? While I can’t offer you a spell, I *can* give you the next best thing: a treasure trove of cleaning hacks that will transform your cleaning routine from a chore into a breeze!
For centuries, people have sought clever ways to maintain clean and healthy homes. From ancient civilizations using natural remedies to modern innovations, the quest for effective cleaning solutions is a timeless pursuit. Think about it – our grandmothers probably had a secret weapon or two up their sleeves, passed down through generations. Now, it’s my turn to share some of those secrets, along with some modern marvels, with you.
Let’s face it, nobody *loves* cleaning. We all lead busy lives, and spending hours scrubbing and polishing is often the last thing we want to do. That’s where these cleaning hacks you wish you knew come in. They’re designed to save you time, money, and effort, allowing you to reclaim your weekends and enjoy a sparkling clean home without the stress. I’m going to show you how to tackle those stubborn stains, conquer clutter, and make your home shine, all with simple, affordable, and often surprising solutions. Get ready to unlock the secrets to a cleaner, happier home!
Cleaning Hacks You Wish You Knew
Okay, friends, let’s dive into some cleaning hacks that’ll seriously change your life (or at least your cleaning routine!). I’m talking about those little tricks that make you slap your forehead and say, “Why didn’t I think of that?!” Get ready to make your home sparkle with minimal effort.
Cleaning Your Microwave Like a Pro
Microwaves are notorious for becoming splattered messes. But fear not! This hack is so easy, you’ll wonder why you ever scrubbed at baked-on food.
What you’ll need:
* 1 cup of water
* 1 tablespoon of white vinegar or lemon juice
* Microwave-safe bowl
Step-by-step instructions:
1. Combine water and vinegar/lemon juice: In your microwave-safe bowl, mix the water and vinegar (or lemon juice). The vinegar or lemon juice helps to loosen the grime.
2. Microwave the mixture: Place the bowl in the microwave and heat it on high for 5-7 minutes. You want the mixture to boil and create steam.
3. Let it sit: Don’t open the microwave door immediately! Let the steam work its magic for another 3-5 minutes. This allows the condensation to loosen all the stuck-on food particles.
4. Wipe it clean: Carefully remove the bowl (it will be hot!). Use a clean cloth or sponge to wipe down the inside of the microwave. You’ll be amazed at how easily the grime comes off. For stubborn spots, you might need a little extra elbow grease, but it should be significantly easier than before.
5. Clean the turntable: Don’t forget to remove and wash the turntable! You can usually just wash it with soap and water in the sink.
Unclogging Drains with Baking Soda and Vinegar
Clogged drains are a pain, and those chemical drain cleaners can be harsh and expensive. This natural alternative is surprisingly effective.
What you’ll need:
* 1 cup of baking soda
* 2 cups of white vinegar
* Boiling water
Step-by-step instructions:
1. Pour in the baking soda: Carefully pour the baking soda down the clogged drain. Try to get as much of it down the drain as possible.
2. Add the vinegar: Next, pour the vinegar down the drain. You’ll hear a fizzing sound – that’s the chemical reaction between the baking soda and vinegar, which helps to break down the clog.
3. Let it fizz: Let the mixture fizz and work its magic for about 30 minutes. This gives the baking soda and vinegar time to dissolve the gunk causing the blockage.
4. Flush with boiling water: After 30 minutes, carefully pour a pot of boiling water down the drain. The hot water helps to flush away the loosened debris.
5. Repeat if necessary: If the drain is still clogged, repeat the process. For really stubborn clogs, you might need to repeat it a couple of times.
Cleaning Grout Like a Boss
Grungy grout can make even the cleanest bathroom look dirty. This simple paste will brighten your grout lines in no time.
What you’ll need:
* Baking soda
* Water
* Old toothbrush or grout brush
Step-by-step instructions:
1. Make a paste: Mix baking soda and water to form a thick paste. The consistency should be similar to toothpaste.
2. Apply the paste: Apply the paste to the grout lines. You can use your fingers (wear gloves!) or a small spatula to spread it evenly.
3. Scrub the grout: Use an old toothbrush or a grout brush to scrub the grout lines. Apply some pressure and scrub in a back-and-forth motion.
4. Let it sit: Let the paste sit on the grout for about 10-15 minutes. This allows the baking soda to further loosen the dirt and grime.
5. Rinse thoroughly: Rinse the grout lines thoroughly with water. You can use a sponge or a damp cloth to wipe away the remaining paste.
6. Dry and admire: Dry the area with a clean towel and admire your sparkling clean grout!
Making Your Stainless Steel Shine
Stainless steel appliances are beautiful, but they’re also magnets for fingerprints and smudges. Here’s how to keep them looking their best.
What you’ll need:
* White vinegar
* Microfiber cloth
* Olive oil (optional)
Step-by-step instructions:
1. Spray with vinegar: Lightly spray your stainless steel appliances with white vinegar.
2. Wipe with the grain: Use a microfiber cloth to wipe the vinegar off, always wiping in the direction of the grain of the stainless steel. This prevents streaks.
3. Buff with a clean cloth: Use a clean, dry microfiber cloth to buff the surface.
4. Optional: Add shine with olive oil: For extra shine, put a tiny amount of olive oil on a clean microfiber cloth and buff the stainless steel. Be careful not to use too much, or it will look greasy.
Freshening Up Your Mattress
Mattresses can harbor dust mites and odors. This simple trick will leave your mattress smelling fresh and clean.
What you’ll need:
* Baking soda
* Essential oil (optional)
* Vacuum cleaner with upholstery attachment
Step-by-step instructions:
1. Sprinkle with baking soda: Sprinkle a generous layer of baking soda over your entire mattress.
2. Add essential oil (optional): If you want to add a pleasant scent, mix a few drops of your favorite essential oil (like lavender or eucalyptus) with the baking soda before sprinkling it on the mattress.
3. Let it sit: Let the baking soda sit on the mattress for at least 30 minutes, or even longer for a deeper clean. The baking soda will absorb odors and moisture.
4. Vacuum thoroughly: Use the upholstery attachment on your vacuum cleaner to thoroughly vacuum the entire mattress, removing all the baking soda.
Cleaning Your Showerhead for Better Water Pressure
Mineral buildup can clog your showerhead and reduce water pressure. This easy soak will restore it to its former glory.
What you’ll need:
* White vinegar
* Plastic bag
* Rubber band or twist tie
Step-by-step instructions:
1. Fill the bag with vinegar: Fill a plastic bag with enough white vinegar to completely submerge your showerhead.
2. Attach the bag to the showerhead: Secure the bag to the showerhead using a rubber band or twist tie. Make sure the showerhead is fully immersed in the vinegar.
3. Soak overnight: Let the showerhead soak in the vinegar overnight. This allows the vinegar to dissolve the mineral buildup.
4. Remove and rinse: Remove the bag and rinse the showerhead thoroughly with water.
5. Wipe clean: Wipe the showerhead clean with a cloth.
6. Run the shower: Run the shower for a few minutes to flush out any remaining debris.
Cleaning Blinds Without the Hassle
Cleaning blinds can be tedious, but this hack makes it much easier.
What you’ll need:
* Old sock
* White vinegar
* Spray bottle
Step-by-step instructions:
1. Prepare the sock: Turn an old sock inside out and put it on your hand like a glove.
2. Spray with vinegar: Lightly spray the sock with white vinegar.
3. Wipe the blinds: Use the sock-covered hand to wipe each slat of the blinds. The sock will trap the dust and dirt.
4. Rinse and repeat: If the sock gets too dirty, rinse it with water and re-spray with vinegar. Repeat until all the blinds are clean.
Removing Water Stains from Wood Furniture
Those pesky white rings left by glasses on your wood furniture are annoying, but easily fixed!
What you’ll need:
* Hair dryer
* Soft cloth
Step-by-step instructions:
1. Set the hair dryer to low: Set your hair dryer to the lowest heat setting.
2. Direct heat at the stain: Hold the hair dryer a few inches away from the water stain and direct the heat at it.
3. Wipe with a soft cloth: As the heat is applied, gently wipe the stain with a soft cloth.
4. Repeat as needed: Continue heating and wiping until the stain disappears. Be careful not to overheat the wood.
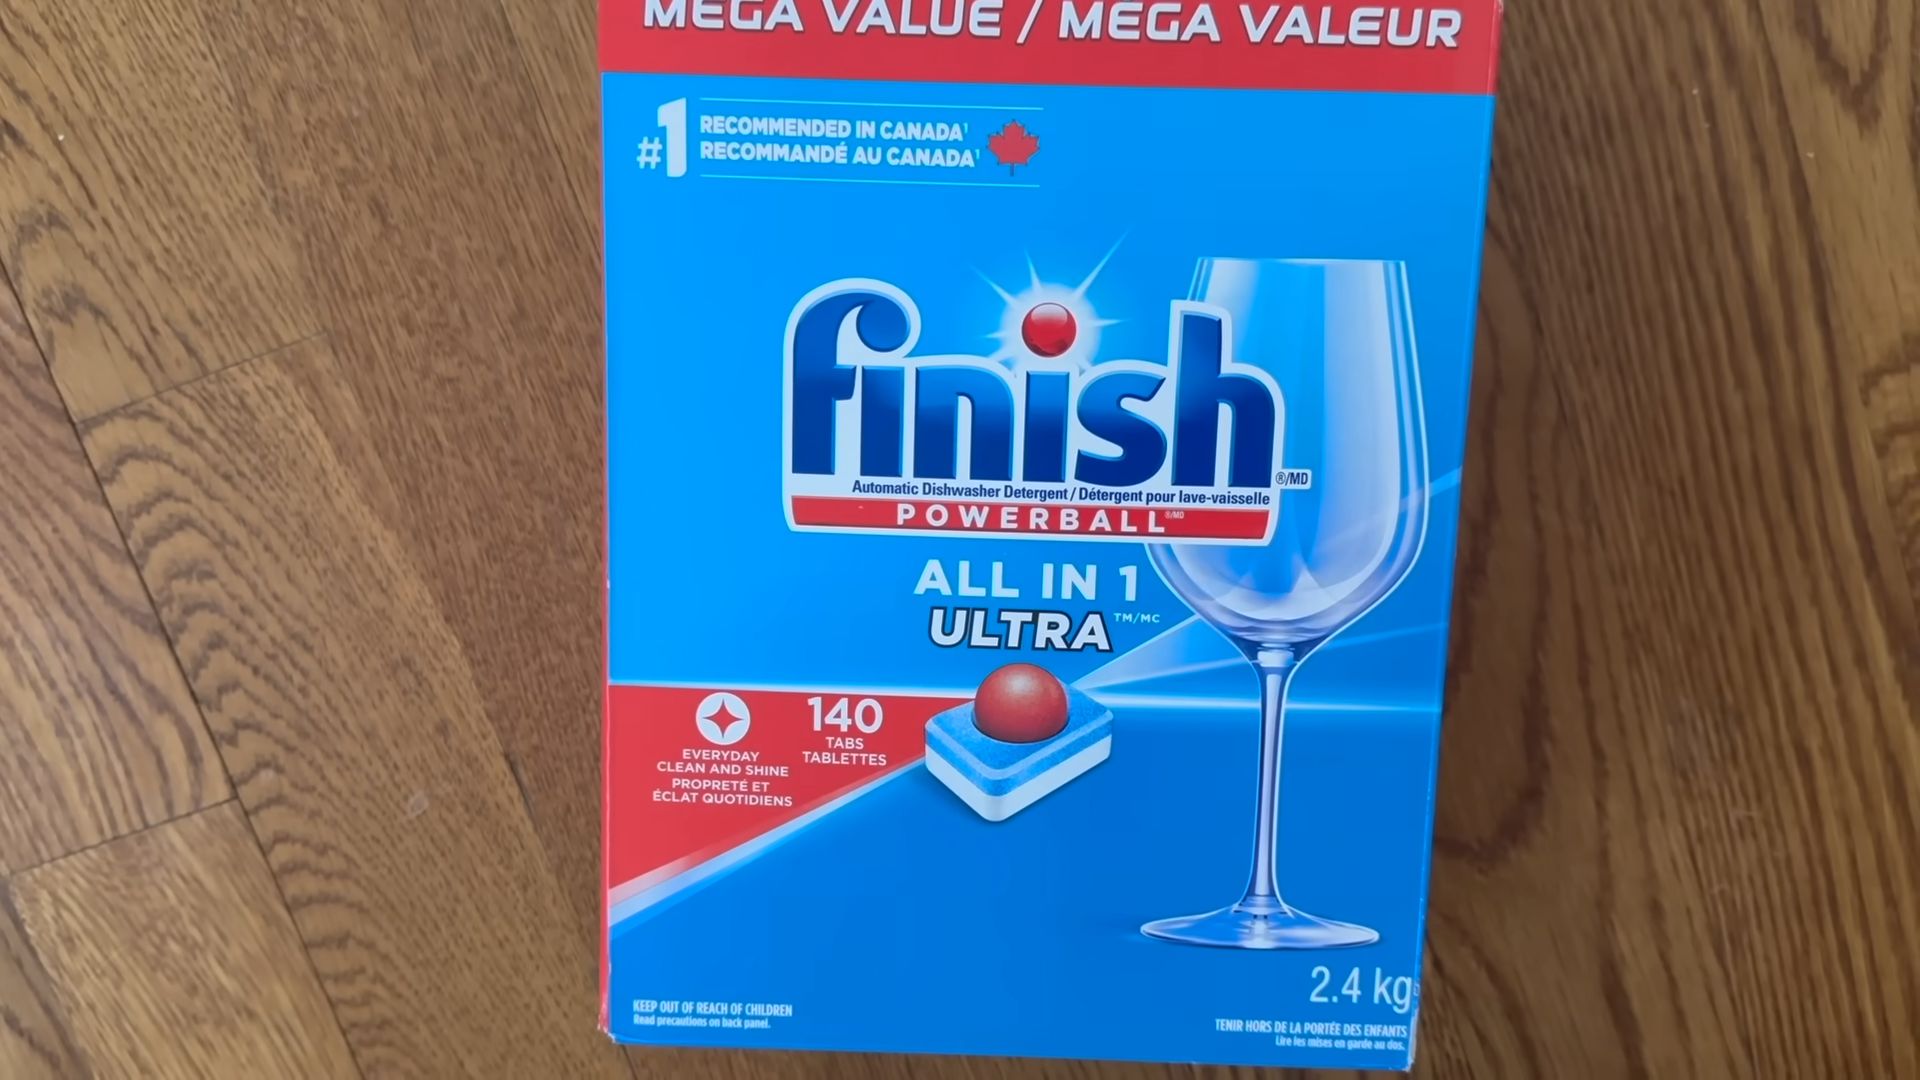
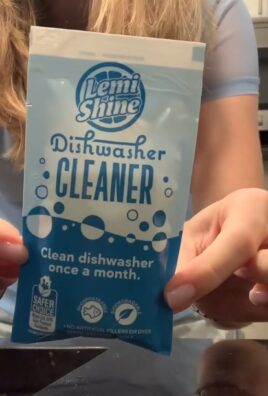
Cleaning Your Dishwasher for Sparkling Dishes
A clean dishwasher means cleaner dishes! This simple cleaning routine will keep your dishwasher running smoothly.
What you’ll need:

Conclusion
So, there you have it! These cleaning hacks aren’t just about saving money; they’re about reclaiming your time and sanity. We’ve explored simple, effective ways to tackle common household messes using ingredients you likely already have in your pantry. From banishing stubborn stains to revitalizing tired surfaces, these DIY solutions offer a powerful alternative to harsh chemicals and expensive cleaning products.
But why are these cleaning hacks a must-try? Because they work! They’re gentle on your home, tough on grime, and easy on your wallet. Think about it: no more running to the store for specialized cleaners every time a spill happens. No more worrying about the fumes harming your family or pets. Instead, you have a readily available arsenal of natural cleaning power at your fingertips.
Consider the possibilities! For a refreshing twist on the all-purpose cleaner, add a few drops of your favorite essential oil, like lemon or lavender, for a delightful scent boost. If you’re dealing with particularly stubborn grease, a paste of baking soda and water can work wonders as an abrasive scrub. And for those delicate surfaces, remember to always test your DIY cleaner in an inconspicuous area first.
These cleaning hacks are more than just recipes; they’re a gateway to a cleaner, healthier, and more sustainable lifestyle. They empower you to take control of your cleaning routine and create a home environment that you can truly feel good about.
We’ve covered a lot of ground, from tackling grimy ovens to revitalizing dull floors. But the real magic happens when you put these cleaning hacks into practice. So, we urge you to give them a try! Start with one or two that resonate with you and see the difference they can make.
Don’t be afraid to experiment and adapt these recipes to suit your specific needs and preferences. The beauty of DIY is that it’s all about customization. And most importantly, don’t keep these secrets to yourself! Share your experiences with friends, family, and online communities. Let’s spread the word about the power of natural cleaning and inspire others to embrace a more eco-friendly approach to home care.
We are confident that once you experience the effectiveness and simplicity of these cleaning hacks, you’ll wonder how you ever lived without them. They are a game-changer for anyone looking to simplify their cleaning routine, save money, and create a healthier home environment. So, grab your ingredients, roll up your sleeves, and get ready to transform your cleaning routine with these amazing cleaning hacks! We can’t wait to hear about your success stories!
Frequently Asked Questions (FAQs)
Q: Are these cleaning hacks safe for all surfaces?
A: While most of these cleaning hacks are generally safe for a wide range of surfaces, it’s always best to test them in an inconspicuous area first, especially on delicate materials like wood, marble, or painted surfaces. This will help you ensure that the cleaner doesn’t cause any discoloration or damage. For example, vinegar, while a powerful cleaner, can be too acidic for certain types of stone. Similarly, abrasive cleaners like baking soda should be used with caution on easily scratched surfaces. When in doubt, err on the side of caution and dilute the cleaner or use a gentler alternative.
Q: Can I use these cleaning hacks if I have allergies or sensitivities?
A: If you have allergies or sensitivities, it’s crucial to be mindful of the ingredients used in these cleaning hacks. Always read the labels carefully and avoid using any ingredients that you know you’re allergic to. For example, if you’re allergic to citrus fruits, avoid using lemon juice as a cleaner. You can also consider wearing gloves and a mask while cleaning to minimize exposure to potential allergens. If you experience any adverse reactions, such as skin irritation or respiratory problems, discontinue use immediately and consult with a healthcare professional.
Q: How long will these DIY cleaners last?
A: The shelf life of these DIY cleaners can vary depending on the ingredients used. Cleaners made with fresh ingredients like lemon juice or vinegar tend to have a shorter shelf life than those made with dry ingredients like baking soda or borax. As a general rule, it’s best to store DIY cleaners in airtight containers in a cool, dark place to prolong their shelf life. You can also label the containers with the date they were made to keep track of their freshness. If you notice any changes in color, odor, or consistency, it’s best to discard the cleaner and make a fresh batch.
Q: Can I use these cleaning hacks to clean my entire house?
A: Absolutely! These cleaning hacks can be used to clean virtually every area of your house, from the kitchen and bathroom to the living room and bedrooms. However, it’s important to choose the right cleaner for the specific task at hand. For example, a degreasing cleaner like vinegar and water is ideal for cleaning kitchen countertops and stovetops, while a gentle cleaner like baking soda and water is better suited for cleaning bathroom fixtures and tiles. By using the right cleaner for the right job, you can effectively clean your entire house without resorting to harsh chemicals.
Q: Are these cleaning hacks environmentally friendly?
A: Yes, one of the biggest advantages of these cleaning hacks is that they are environmentally friendly. By using natural ingredients like vinegar, baking soda, and lemon juice, you can avoid the harmful chemicals found in many commercial cleaning products. This not only reduces your exposure to toxins but also helps to protect the environment. Additionally, using DIY cleaners can help you reduce your reliance on single-use plastic bottles, which can contribute to pollution. By making the switch to natural cleaning, you can create a cleaner, healthier home and a more sustainable planet.
Q: What is the best way to store these DIY cleaning solutions?
A: Proper storage is key to maintaining the effectiveness and longevity of your DIY cleaning solutions. Always store them in airtight containers to prevent evaporation and contamination. Glass bottles or jars are ideal, especially for solutions containing essential oils, as plastic can sometimes react with the oils. Label each container clearly with the name of the solution and the date it was made. Store the containers in a cool, dark place away from direct sunlight and heat, as these can degrade the ingredients over time. For solutions containing perishable ingredients like lemon juice, consider storing them in the refrigerator to extend their shelf life.
Q: Can I mix different cleaning ingredients together to create even more powerful solutions?
A: While it might seem tempting to mix different cleaning ingredients together to create a super-powered solution, it’s generally not recommended. Mixing certain chemicals can create dangerous and even toxic fumes. For example, never mix bleach with ammonia or vinegar, as this can produce chlorine gas, which is highly poisonous. It’s always best to use cleaning ingredients separately and follow the instructions carefully. If you’re unsure about whether two ingredients can be safely mixed, err on the side of caution and avoid combining them.
Q: How often should I use these cleaning hacks?
A: The frequency with which you use these cleaning hacks will depend on your individual needs and preferences. For daily cleaning tasks, such as wiping down countertops or cleaning up spills, you can use these solutions as often as needed. For more intensive cleaning tasks, such as cleaning the oven or scrubbing the bathroom, you may only need to use them once a week or once a month. Pay attention to the condition of your home and adjust your cleaning schedule accordingly. Remember, consistency is key to maintaining a clean and healthy home environment.

Leave a Comment