

Calendula Seed Starting Guide: Your Path to Vibrant Blooms! Ever dream of a garden bursting with cheerful, sunny flowers that also happen to be incredibly useful? I know I have! That’s where calendula comes in. This DIY guide will unlock the secrets to successfully starting calendula seeds, ensuring you have a thriving patch of these golden beauties in no time.
Calendula, also known as pot marigold, boasts a rich history, dating back to ancient civilizations where it was prized for its medicinal properties and vibrant color. From Roman garlands to traditional herbal remedies, calendula has been a trusted companion to gardeners and healers alike. But beyond its historical significance, calendula offers so much to the modern home gardener.
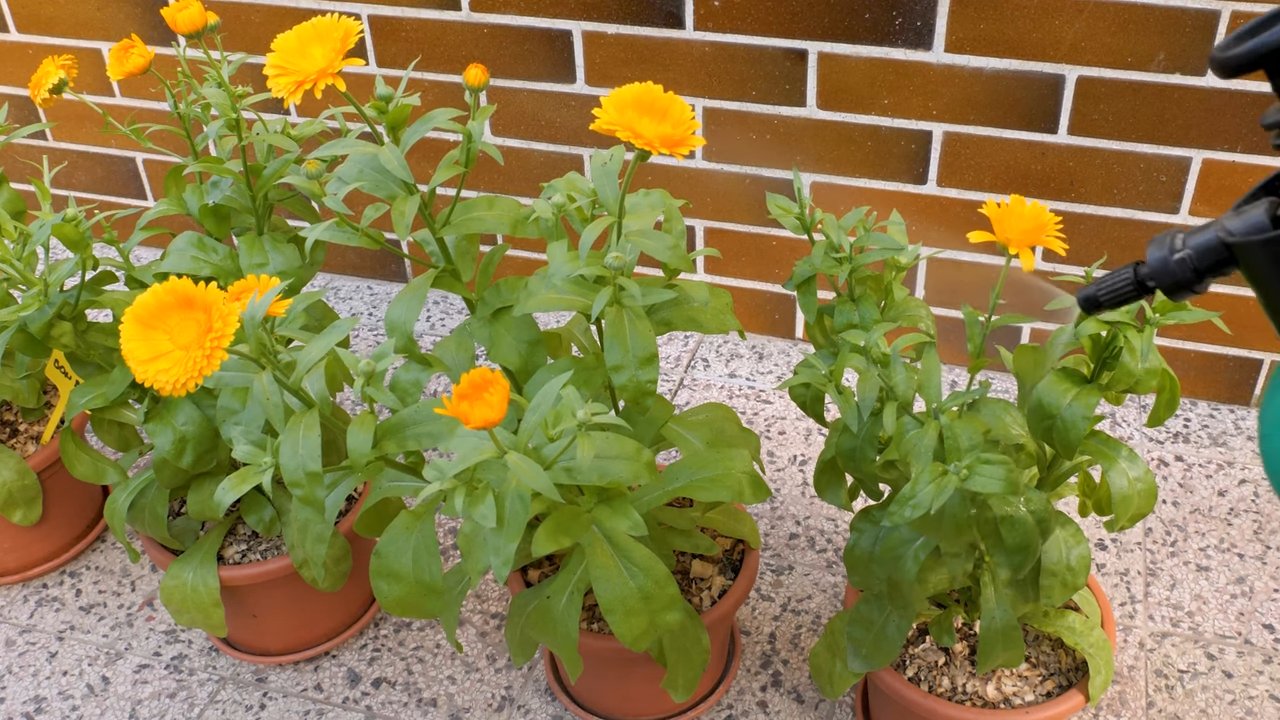
Why should you bother with this calendula seed starting guide? Well, for starters, calendula is incredibly easy to grow! Plus, it attracts beneficial insects to your garden, helping to keep pests at bay. And let’s not forget the stunning visual appeal – those bright orange and yellow blooms are guaranteed to brighten any space. But the real magic lies in its versatility. You can use calendula petals in salads, teas, and even homemade skincare products. So, if you’re looking for a beautiful, beneficial, and budget-friendly addition to your garden, learning how to master the calendula seed starting guide is the perfect place to begin. Let’s get started and transform your garden into a calendula paradise!
Calendula Seed Starting: A Gardener’s Guide to Sunshine Blooms
Hey there, fellow garden enthusiasts! I’m so excited you’re diving into the wonderful world of calendula. These cheerful, daisy-like flowers are not only beautiful but also incredibly useful in the garden and even in homemade remedies. Starting them from seed is surprisingly easy, and I’m here to guide you through every step. Let’s get those calendula seeds sprouting!
Choosing Your Calendula Variety
Before we get our hands dirty, let’s talk about calendula varieties. There’s a whole spectrum of colors and sizes to choose from, so picking the right one is key to achieving your garden goals.
* Color: Calendula comes in shades of yellow, orange, and even some with reddish hues. Consider what colors will complement your existing garden palette.
* Size: Some varieties are compact and bushy, perfect for containers, while others grow taller and more sprawling, ideal for garden beds.
* Petal Type: You can find calendula with single, semi-double, or fully double flowers. Double flowers tend to have more petals and a fuller appearance.
* Purpose: Are you growing calendula for its medicinal properties, culinary uses, or simply for its beauty? Some varieties are known for their higher resin content, making them better suited for medicinal purposes.
Some popular varieties include ‘Pacific Beauty’ (a mix of yellows and oranges), ‘Bronzed Beauty’ (with unique bronze-tinged petals), and ‘Radio Extra Curled’ (with deeply curled petals). I personally love ‘Pink Surprise’ for its unexpected blush of pink!
Materials You’ll Need
Alright, let’s gather our supplies. Here’s what you’ll need to successfully start your calendula seeds:
* Calendula Seeds: Obviously! Make sure you’re getting them from a reputable source to ensure good germination rates.
* Seed Starting Trays or Pots: I prefer using seed starting trays with individual cells, but small pots work just as well. Aim for something around 2-3 inches in diameter.
* Seed Starting Mix: This is crucial! Don’t use regular garden soil, as it’s too heavy and can compact around the delicate seedlings. Seed starting mix is light, airy, and sterile.
* Watering Can or Spray Bottle: Gentle watering is key to avoid disturbing the seeds.
* Heat Mat (Optional): Calendula seeds germinate best with slightly warmer soil temperatures (around 70-75°F). A heat mat can help speed up the process, especially if you’re starting seeds indoors in a cooler environment.
* Grow Lights (Optional): If you’re starting seeds indoors, grow lights will provide the seedlings with the light they need to grow strong and healthy.
* Plant Labels: Trust me, you’ll want to label your seedlings! It’s easy to forget which variety is which.
* Small Trowel or Spoon: For filling the trays or pots with seed starting mix.
Step-by-Step Seed Starting Guide
Now for the fun part! Let’s get those seeds planted.
1. Prepare Your Seed Starting Trays or Pots: Fill your chosen containers with seed starting mix. Gently press down on the mix to remove any air pockets, but don’t pack it too tightly. You want it to be light and airy. Leave about half an inch of space at the top of the container.
2. Sow the Seeds: Calendula seeds are relatively large and easy to handle. I usually sow 2-3 seeds per cell or pot, just in case some don’t germinate. Make a small indentation in the soil (about ¼ inch deep) with your finger or a pencil. Drop the seeds into the indentation and gently cover them with seed starting mix.
3. Water Thoroughly: Use a watering can or spray bottle to gently water the soil. You want to moisten the soil evenly without washing away the seeds. The soil should be damp but not soggy.
4. Provide Warmth and Light: If you’re using a heat mat, place your seed starting trays on top of it. If you’re using grow lights, position them a few inches above the trays. If you’re not using either, find a warm, sunny spot in your home.
5. Maintain Moisture: Keep the soil consistently moist but not waterlogged. Check the soil daily and water as needed. A spray bottle is great for this, as it allows you to mist the soil without disturbing the seeds.
6. Be Patient: Calendula seeds typically germinate in 5-14 days, depending on the temperature and moisture levels. Don’t be discouraged if you don’t see sprouts right away. Just keep the soil moist and wait patiently.
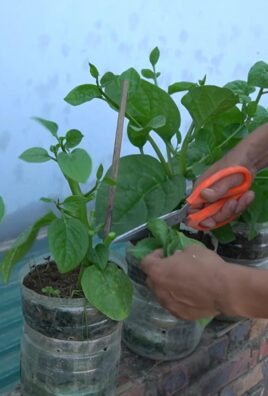
7. Thin Seedlings (If Necessary): Once the seedlings have emerged and have a couple of sets of true leaves (the leaves that look like miniature versions of the adult plant’s leaves), you may need to thin them out. If you planted multiple seeds per cell or pot, choose the strongest seedling and gently snip off the others at the soil line with small scissors. This will give the remaining seedling more room to grow.
8. Harden Off Seedlings: Before transplanting your calendula seedlings outdoors, you’ll need to “harden them off.” This process gradually acclimates them to the outdoor environment, preventing shock. Start by placing the seedlings outdoors in a sheltered location for a few hours each day, gradually increasing the amount of time they spend outside over the course of a week or two. Protect them from direct sunlight and strong winds during this process.
Transplanting Your Calendula Seedlings
Once your seedlings are hardened off and the danger of frost has passed, it’s time to transplant them into your garden or containers.
1. Choose a Sunny Location: Calendula thrives in full sun, but it can tolerate partial shade. Choose a location that receives at least 6 hours of sunlight per day.
2. Prepare the Soil: Calendula prefers well-drained soil that is rich in organic matter. Amend your soil with compost or other organic material before planting.
3. Dig Holes: Dig holes that are slightly larger than the root balls of your seedlings. Space the holes according to the mature size of your chosen variety.
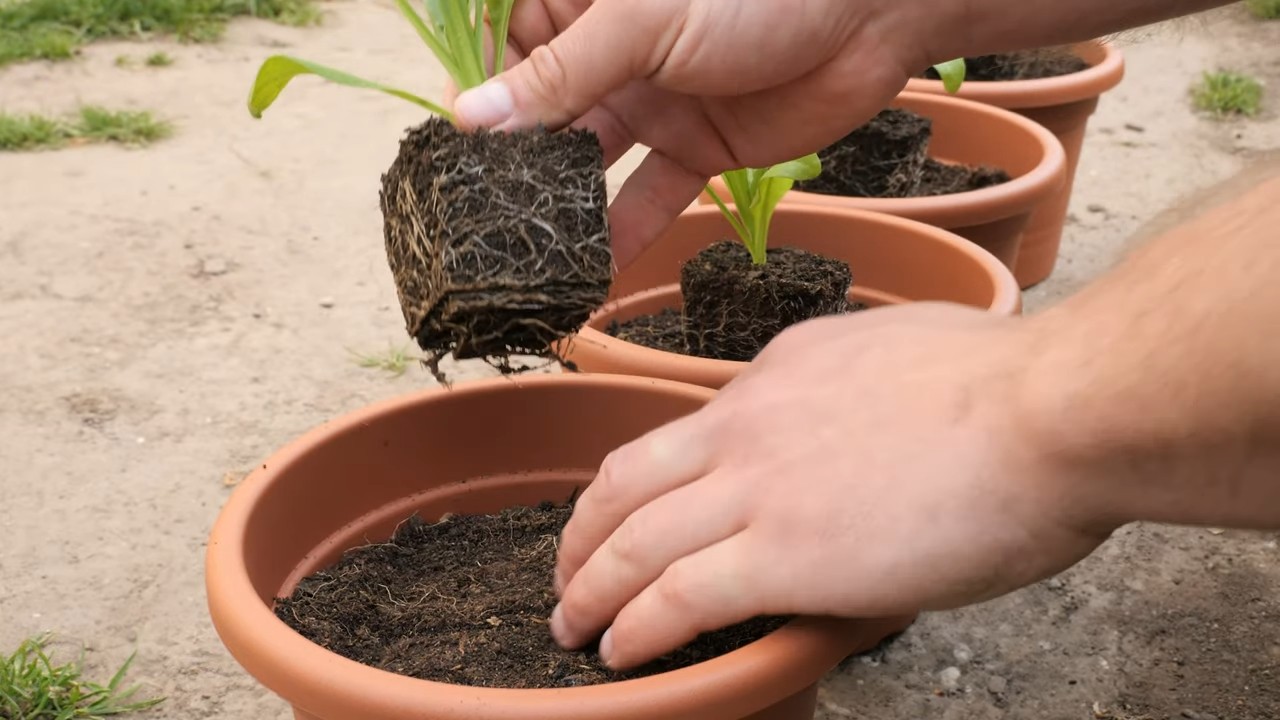
4. Gently Remove Seedlings: Carefully remove the seedlings from their trays or pots. Gently loosen the root ball with your fingers.
5. Plant Seedlings: Place the seedlings in the holes and backfill with soil. Gently firm the soil around the base of the plants.
6. Water Thoroughly: Water the newly transplanted seedlings thoroughly.
7. Mulch (Optional): Apply a layer of mulch around the base of the plants to help retain moisture and suppress weeds.
Caring for Your Calendula Plants
Once your calendula plants are established, they’re relatively low-maintenance. Here are a few tips to keep them thriving:
* Watering: Water regularly, especially during dry spells. Avoid overwatering, as this can lead to root rot.
* Fertilizing: Calendula doesn’t require heavy fertilization. A light feeding with a balanced fertilizer every few weeks is sufficient.
* Deadheading: Regularly deadhead (remove) spent flowers to encourage more blooms. This will also prevent the plants from going to seed too quickly.
* Pest Control: Calendula is generally pest-resistant, but it can occasionally be affected by aphids or spider mites. If you notice any pests, treat them with insecticidal soap or neem oil.
* Harvesting: You can harvest calendula flowers throughout the growing season. Pick the flowers when they are fully open and dry. Use them fresh or dry them for later use in teas, salves, and other remedies.
Troubleshooting Common Issues
Even with the best care, you might encounter a few challenges along the way. Here are some common issues and how to address them:
* Poor Germination: If your seeds aren’t germinating, make sure the soil is warm enough and consistently moist. You can also try scarifying the seeds (gently scratching the surface) before planting to help them absorb water more easily.
* Leggy Seedlings: Leggy seedlings are tall and spindly, usually due to insufficient light. Make sure your seedlings are getting enough light, either from grow lights or a sunny window.
* Yellowing Leaves: Yellowing leaves can be a sign of overwatering, underwatering, or nutrient deficiency. Adjust your watering schedule and fertilize as needed.
* Powdery Mildew: Powdery mildew is a fungal disease that can affect calendula, especially in humid conditions. Improve air circulation around the plants and treat with a fungicide if necessary.
Enjoying Your Calendula Blooms
Congratulations! You’ve successfully started calendula from seed and are now enjoying the beauty and benefits of these wonderful flowers. Use them to brighten up your garden, attract pollinators, create homemade remedies, or simply enjoy their cheerful presence. I hope this guide has been helpful,
Conclusion
So, there you have it – a comprehensive guide to starting your own calendula seeds! We’ve walked through everything from selecting the right seeds and preparing your soil to nurturing those tiny seedlings into vibrant, blooming plants. But why should you bother with all this, especially when you could just buy calendula plants from a nursery? The answer is simple: control, cost-effectiveness, and unparalleled satisfaction.
Starting your own calendula seeds gives you complete control over the entire process. You choose the specific varieties you want, ensuring you get the colors, sizes, and medicinal properties that best suit your needs. You know exactly what kind of soil your plants are growing in, avoiding any unwanted chemicals or fertilizers. And perhaps most importantly, you get to witness the miracle of life unfolding before your eyes, from a tiny seed to a flourishing plant.
Beyond the control aspect, starting your own seeds is also incredibly cost-effective. A packet of calendula seeds is significantly cheaper than buying multiple mature plants. This is especially beneficial if you plan on using calendula extensively for medicinal purposes, crafting, or simply to add a splash of color to your garden. You can grow a whole patch of calendula for the price of just a few nursery plants.
But perhaps the most compelling reason to try this DIY trick is the sheer satisfaction it brings. There’s something deeply rewarding about nurturing a plant from seed to bloom. It’s a connection to nature that’s hard to replicate any other way. And when you finally harvest those beautiful, vibrant petals, knowing that you grew them yourself, the sense of accomplishment is truly unmatched.
Don’t be afraid to experiment with variations! Try starting your seeds in different types of containers, from peat pots to recycled egg cartons. See which method works best for you. You can also try direct sowing some seeds in your garden after the last frost, comparing the results to your indoor-started seedlings. Consider companion planting your calendula with other beneficial herbs and vegetables to attract pollinators and deter pests.
And remember, the journey of growing calendula from seed is a learning experience. Don’t be discouraged if you encounter challenges along the way. Every gardener faces setbacks, but the key is to learn from your mistakes and keep trying. The rewards are well worth the effort.
We encourage you to embrace this DIY project and experience the joy of growing your own calendula. Share your experiences with us! Let us know what varieties you’re growing, what challenges you’ve faced, and what successes you’ve celebrated. Post pictures of your seedlings and blooming plants on social media using #CalendulaSeedStarting and inspire others to join the fun. Let’s create a community of calendula enthusiasts, sharing our knowledge and passion for this amazing plant. So, grab your seeds, prepare your soil, and get ready to embark on a rewarding gardening adventure. Happy growing!
Frequently Asked Questions (FAQ)
Q: How long does it take for calendula seeds to germinate?
A: Calendula seeds typically germinate within 5 to 14 days, depending on the temperature and moisture levels. Warmer temperatures (around 70-75°F or 21-24°C) will generally result in faster germination. Ensure the soil remains consistently moist but not waterlogged during this period. Using a humidity dome or plastic wrap can help retain moisture.
Q: What is the best soil to use for starting calendula seeds?
A: A well-draining seed starting mix is ideal for calendula seeds. You can purchase a pre-made mix or create your own by combining equal parts peat moss (or coconut coir), vermiculite, and perlite. Avoid using garden soil, as it can be too heavy and may contain pathogens that can harm young seedlings. The goal is to provide a light, airy medium that allows for good root development.
Q: How much light do calendula seedlings need?
A: Calendula seedlings require plenty of light to thrive. If you’re starting seeds indoors, provide them with 14-16 hours of light per day using grow lights. Place the lights a few inches above the seedlings to prevent them from becoming leggy. If you’re growing them near a window, choose a south-facing window that receives ample sunlight. Rotate the seedlings regularly to ensure even growth.
Q: When should I transplant my calendula seedlings?
A: Transplant your calendula seedlings when they have developed their first set of true leaves (the leaves that appear after the initial seed leaves, or cotyledons). This usually happens a few weeks after germination. Gently remove the seedlings from their starting containers and transplant them into larger pots or directly into your garden, spacing them about 12-18 inches apart.
Q: Can I start calendula seeds directly in the garden?
A: Yes, you can direct sow calendula seeds in your garden after the last frost. Choose a sunny location with well-draining soil. Prepare the soil by loosening it and removing any weeds or debris. Sow the seeds about ¼ inch deep and 1 inch apart. Keep the soil consistently moist until the seedlings emerge. Thin the seedlings to 12-18 inches apart once they are a few inches tall. Direct sowing can be a simpler method, but it may result in a slightly later bloom time compared to starting seeds indoors.
Q: What are some common problems when starting calendula seeds, and how can I fix them?
A: Some common problems include damping off (a fungal disease that causes seedlings to collapse), leggy seedlings (due to insufficient light), and slow germination (due to cold temperatures or dry soil). To prevent damping off, use a sterile seed starting mix and avoid overwatering. Provide adequate light to prevent leggy seedlings. Ensure the soil remains consistently moist and the temperature is warm enough for germination. If you encounter pests, such as aphids, you can treat them with insecticidal soap or neem oil.
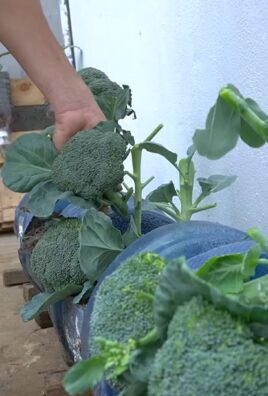
Q: What are some good companion plants for calendula?
A: Calendula is a great companion plant for many vegetables and herbs. It attracts beneficial insects, such as pollinators and predatory insects, and can help deter pests. Some good companion plants for calendula include tomatoes, cucumbers, carrots, lettuce, and basil. Planting calendula near these plants can help improve their growth and yield.
Q: How do I harvest calendula flowers?
A: Harvest calendula flowers when they are fully open, ideally in the morning after the dew has dried. Gently pluck the entire flower head from the stem. You can use the fresh flowers immediately or dry them for later use. To dry calendula flowers, spread them out in a single layer on a screen or tray in a cool, dark, and well-ventilated area. Allow them to dry completely, which may take several days or weeks. Once dry, store the flowers in an airtight container in a cool, dark place.
Q: What are the medicinal uses of calendula?
A: Calendula has a long history of medicinal use. It is known for its anti-inflammatory, antiseptic, and wound-healing properties. Calendula can be used topically to treat skin irritations, burns, cuts, and bruises. It can also be used internally to support the immune system and promote digestive health. Calendula is available in various forms, including creams, ointments, teas, and tinctures. Always consult with a healthcare professional before using calendula for medicinal purposes.
Q: Can I eat calendula flowers?
A: Yes, calendula flowers are edible and can be used to add color and flavor to salads, soups, and other dishes. The petals have a slightly peppery taste and can be used as a substitute for saffron. Use only organically grown calendula flowers that have not been treated with pesticides or herbicides. Remove the green base of the flower, as it can be bitter.
Leave a Comment