

Bell Peppers in Plastic Bottles: Sounds a little crazy, right? But trust me, this quirky DIY trick might just revolutionize your home garden! I know, I know, you’re probably thinking, “Plastic bottles? Really?” But before you dismiss it, let me tell you why this surprisingly effective method is gaining popularity among gardening enthusiasts, and why you absolutely *need* to try it.
For centuries, gardeners have been experimenting with innovative techniques to maximize yields and protect their precious plants. While the exact origins of using plastic bottles in this way are a little murky, the spirit of resourcefulness and upcycling definitely resonates with the “victory garden” ethos of past generations. Remember how people used every scrap during wartime to grow their own food? This feels like a modern, eco-conscious extension of that same ingenuity!
So, why should you bother growing bell peppers in plastic bottles? Well, for starters, it’s a fantastic way to recycle those bottles that would otherwise end up in a landfill. But more importantly, this method offers several key advantages. It provides a mini-greenhouse effect, warming the soil and protecting your peppers from harsh weather, pests, and even those pesky late frosts. Plus, it’s a space-saving solution perfect for balconies, patios, or small gardens. I’m excited to show you how to get started, so you can enjoy a bountiful harvest of delicious, homegrown bell peppers, all thanks to a little bit of DIY magic!
Growing Bell Peppers Upside Down in Plastic Bottles: A DIY Guide
Hey there, fellow gardening enthusiasts! I’m super excited to share one of my favorite DIY gardening hacks with you: growing bell peppers upside down in recycled plastic bottles. It’s a fun, space-saving, and surprisingly effective way to get a bountiful harvest. Plus, it’s a great way to reuse those plastic bottles that might otherwise end up in the landfill. Let’s dive in!
Why Grow Bell Peppers Upside Down?
Before we get started, you might be wondering why you’d even want to grow bell peppers upside down. Well, there are several advantages:
* Space Saving: This method is perfect if you have limited garden space, like a balcony or small patio. You can hang the bottles from a railing, hook, or even a sturdy tree branch.
* Pest Control: Hanging the peppers can help deter some ground-dwelling pests, making it easier to keep your plants healthy.
* Improved Air Circulation: The elevated position allows for better air circulation around the plant, which can reduce the risk of fungal diseases.
* Unique Aesthetic: Let’s be honest, it looks pretty cool! It’s a conversation starter and adds a unique touch to your garden.
* Better Drainage: Upside-down planters often have better drainage than traditional pots, preventing root rot.
Materials You’ll Need
Okay, let’s gather our supplies. Here’s what you’ll need to create your upside-down bell pepper planters:
* Plastic Bottles: 2-liter soda bottles or similar sized bottles work best. Make sure they’re clean and free of any residue. You’ll need one bottle per pepper plant.
* Bell Pepper Seedlings: Choose healthy seedlings from your local nursery or start your own from seeds. I recommend starting with smaller plants, as they’ll adapt better to the upside-down environment.
* Potting Soil: Use a high-quality potting mix that drains well. Avoid using garden soil, as it can become compacted in the bottle.
* Landscape Fabric or Burlap: This will help prevent the soil from falling out of the bottle.
* Scissors or Utility Knife: For cutting the plastic bottles.
* Drill or Awl: To create drainage holes and hanging holes.
* Hanging Material: Strong rope, wire, or chain for hanging the bottles.
* Watering Can or Hose: For watering your plants.
* Gloves: To protect your hands.
* Measuring Tape or Ruler: To ensure accurate cuts.
Step-by-Step Instructions
Alright, let’s get our hands dirty! Here’s how to create your upside-down bell pepper planters:
1. Preparing the Plastic Bottle
1. Clean the Bottle: Thoroughly wash the plastic bottle with soap and water to remove any residue. Rinse it well and let it dry completely.
2. Cut the Bottle: Using your scissors or utility knife, carefully cut off the bottom of the bottle. You’ll want to remove about one-third of the bottle, creating a large opening. Be careful when using the knife!
3. Prepare the Neck: This is where the pepper plant will go. If the bottle neck is too narrow, carefully widen it slightly with your scissors or knife. You want the seedling to fit comfortably without being too loose.
4. Drill Drainage Holes: Drill or poke several small drainage holes in the bottle cap. This will allow excess water to drain out and prevent root rot.
5. Drill Hanging Holes: Drill two holes on opposite sides of the bottle, near the cut edge. These holes will be used to hang the planter. Make sure the holes are large enough to accommodate your chosen hanging material.
2. Creating the Soil Barrier
1. Cut the Landscape Fabric: Cut a circle of landscape fabric or burlap that’s slightly larger than the bottle neck opening. This will act as a barrier to prevent the soil from falling out.
2. Make a Slit: Cut a small slit in the center of the fabric circle. This is where you’ll insert the pepper seedling.
3. Secure the Fabric: Place the fabric circle over the bottle neck, ensuring the slit is centered. You can use a rubber band or twine to secure the fabric in place, if needed.
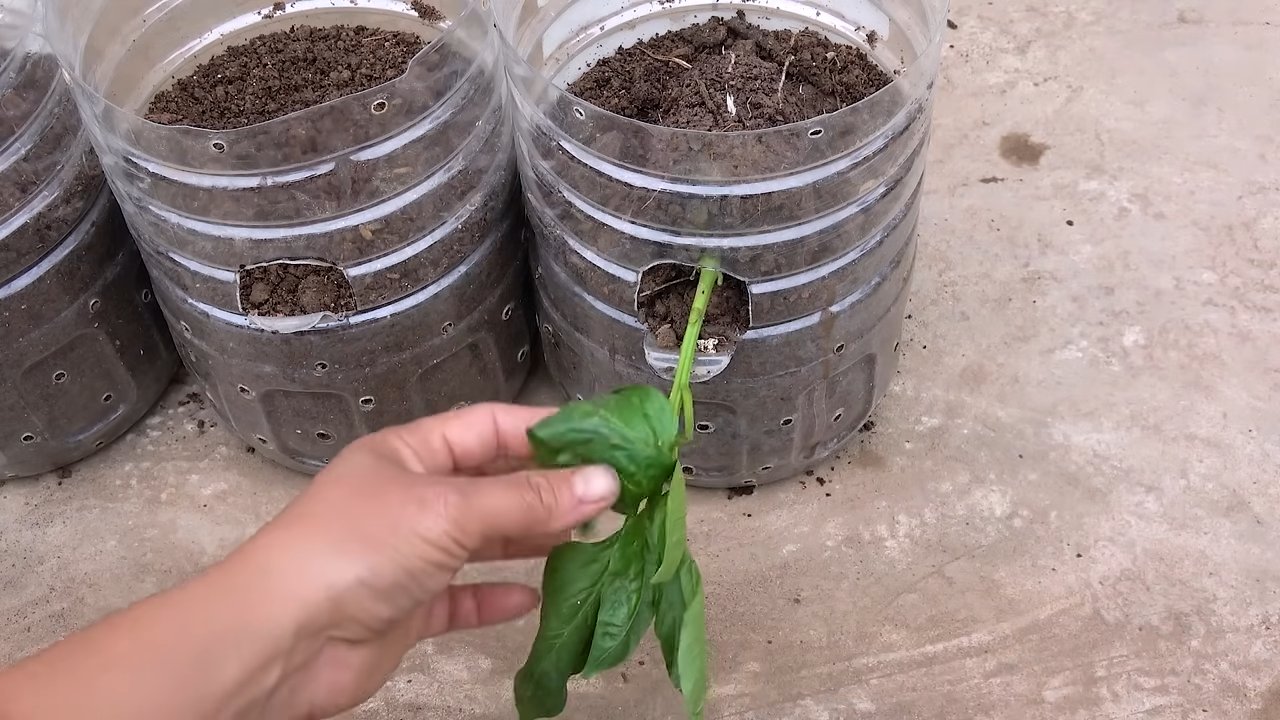
3. Planting the Bell Pepper Seedling
1. Gently Remove the Seedling: Carefully remove the bell pepper seedling from its container. Gently loosen the roots with your fingers.
2. Insert the Seedling: Carefully insert the seedling through the slit in the landscape fabric and into the bottle neck. Make sure the roots are pointing upwards into the bottle.
3. Add Potting Soil: Slowly add potting soil to the bottle, filling it up to the top. Gently pat the soil down to remove any air pockets.
4. Water Thoroughly: Water the plant thoroughly until water drains out of the drainage holes in the bottle cap. This will help settle the soil and ensure the roots are properly hydrated.
4. Hanging the Planter
1. Attach Hanging Material: Thread your chosen hanging material (rope, wire, or chain) through the hanging holes you drilled earlier.
2. Secure the Hanging Material: Tie the hanging material securely, ensuring it can support the weight of the bottle and the plant.
3. Hang the Planter: Hang the planter in a sunny location that receives at least 6-8 hours of sunlight per day. Make sure the hanging structure is sturdy and can support the weight of the planter.
Caring for Your Upside-Down Bell Pepper Plant
Now that your bell pepper plant is hanging upside down, it’s important to provide proper care to ensure it thrives.
* Watering: Water your plant regularly, especially during hot and dry weather. Check the soil moisture by sticking your finger into the soil. If it feels dry, it’s time to water. Water until water drains out of the drainage holes.
* Fertilizing: Feed your plant with a balanced liquid fertilizer every 2-3 weeks. Follow the instructions on the fertilizer packaging.
* Sunlight: Bell peppers need plenty of sunlight to thrive. Make sure your plant is in a location that receives at least 6-8 hours of sunlight per day.
* Pest Control: Regularly inspect your plant for pests, such as aphids or whiteflies. If you find any pests, treat them with an organic insecticide or insecticidal soap.
* Pruning: Prune your plant regularly to encourage bushier growth and more fruit production. Remove any yellowing or dead leaves.
* Support: As the bell peppers grow, they may become heavy and cause the plant to droop. You may need to provide additional support by tying the plant to the hanging structure.
Troubleshooting
Sometimes, things don’t go exactly as planned. Here are some common problems you might encounter and how to fix them:
* Soil Falling Out: If soil is falling out of the bottle neck, make sure the landscape fabric is securely in place. You may need to add an extra layer of fabric or use a tighter rubber band.
* Plant Wilting: If your plant is wilting, it could be due to lack of water or too much sun. Check the soil moisture and water accordingly. If the plant is getting too much sun, move it to a slightly shadier location.
* Yellowing Leaves: Yellowing leaves can be a sign of nutrient deficiency. Fertilize your plant with a balanced liquid fertilizer.
* Pest Infestation: If you notice pests on your plant, treat them with an organic insecticide or insecticidal soap.
* Slow Growth: Slow growth can be due to lack of sunlight, poor soil, or nutrient deficiency. Make sure your plant is getting enough sunlight, use a high-quality potting mix, and fertilize regularly.
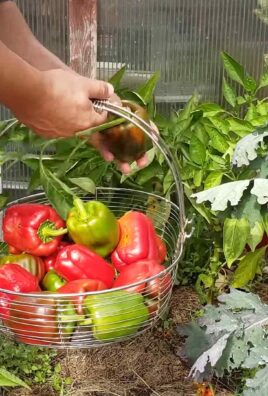
Harvesting Your Bell Peppers
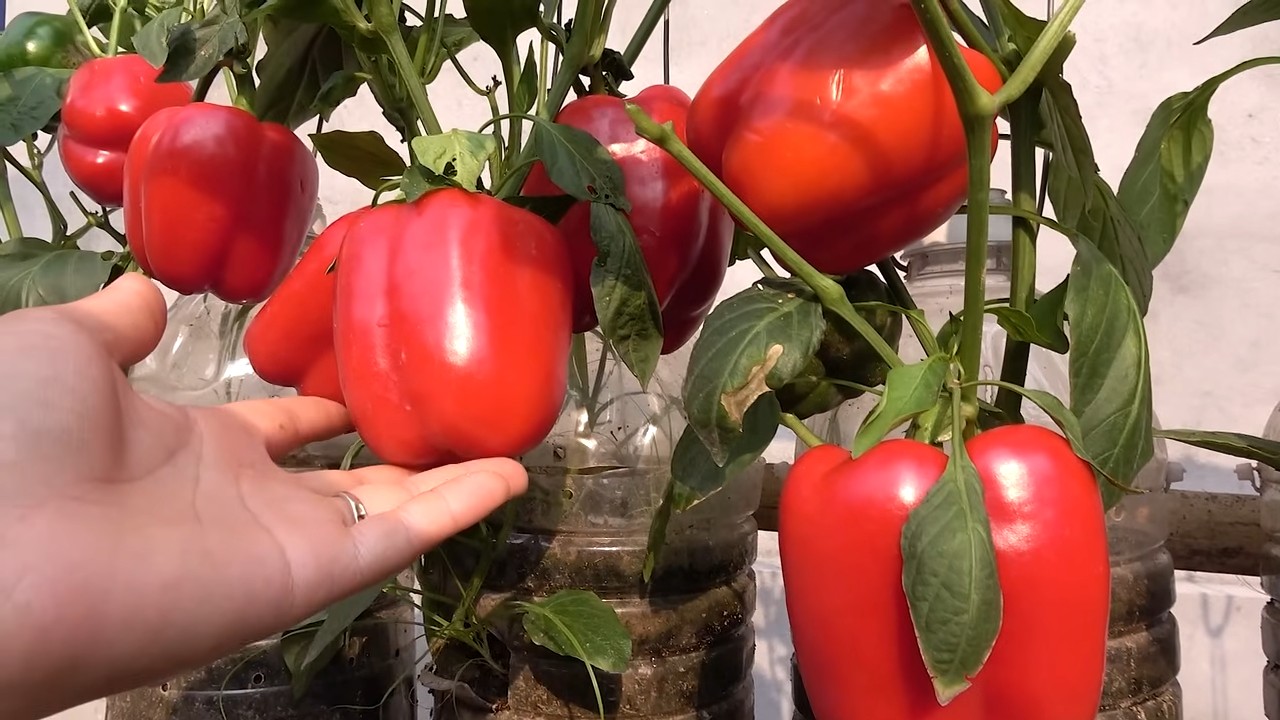
The best part of growing bell peppers is, of course, harvesting them! Bell peppers are typically ready to harvest when they are fully colored and firm to the touch.
1. Check for Ripeness: Look for bell peppers that are fully colored (green, red, yellow, or orange, depending on the variety) and firm to the touch.
2. Cut the Pepper: Use a sharp knife or scissors to cut the pepper from the plant, leaving a small stem attached.
3. Enjoy Your Harvest: Enjoy your fresh, homegrown bell peppers in salads, stir-fries, or any of your favorite recipes!
Tips for Success
Here are a few extra tips to help you succeed with your upside-down bell pepper garden:
* Choose the Right Variety: Some bell pepper varieties are better suited for container gardening than others. Look for compact or dwarf varieties.
* Start Small: Start with smaller seedlings, as they’ll adapt better to the upside-down environment.
* Use
Conclusion
So, there you have it! Transforming ordinary plastic bottles into miniature greenhouses for your bell peppers is not just a quirky gardening hack; it’s a game-changer. This DIY trick offers a multitude of benefits, from extending the growing season and protecting your precious plants from unpredictable weather, to maximizing space and minimizing waste. It’s a sustainable and cost-effective solution that empowers even novice gardeners to achieve impressive results.
Why is this a must-try? Because it works! Imagine harvesting vibrant, juicy bell peppers weeks earlier than your neighbors, all thanks to a few repurposed plastic bottles. The enclosed environment fosters faster growth, shields against frost, and creates a microclimate that bell peppers absolutely thrive in. Plus, it’s incredibly satisfying to witness the transformation of discarded materials into something so productive and beautiful.
But don’t stop there! Experiment with different variations to tailor this technique to your specific needs and environment. Try using larger bottles for bigger pepper varieties, or cut ventilation holes in the sides for increased airflow during warmer days. You can even paint the bottles white to reflect sunlight and prevent overheating in hotter climates. Consider adding a layer of mulch around the base of the bottle to retain moisture and suppress weeds. The possibilities are endless!
We wholeheartedly encourage you to give this DIY bell pepper bottle greenhouse a try. It’s a simple, rewarding project that will undoubtedly enhance your gardening experience. Don’t be afraid to get creative and adapt the method to suit your unique circumstances.
And most importantly, we want to hear about your results! Share your experiences, tips, and photos with us in the comments below. Let’s build a community of resourceful gardeners who are passionate about growing their own food sustainably. Did you find a particular type of bottle worked best? Did you encounter any challenges and how did you overcome them? Your insights could be invaluable to other aspiring bell pepper growers. Let’s unlock the full potential of this simple yet effective DIY trick together and cultivate a bountiful harvest of delicious, homegrown bell peppers. Embrace the joy of gardening, the satisfaction of repurposing, and the delicious reward of fresh, homegrown produce. This DIY bell pepper bottle greenhouse is more than just a gardening technique; it’s a step towards a more sustainable and fulfilling lifestyle.
Frequently Asked Questions (FAQs)
What type of plastic bottles are best for this project?
The ideal plastic bottles are clear, two-liter soda bottles or similar sizes. Clear bottles allow maximum sunlight penetration, which is crucial for plant growth. Avoid using colored or opaque bottles, as they will block sunlight and hinder the development of your bell peppers. Make sure the bottles are clean and free of any residue before using them. Thoroughly rinse them with soap and water to remove any sugary or acidic remnants from previous contents.
How do I prepare the plastic bottles for planting?
First, carefully cut off the bottom of the plastic bottle. You can use a utility knife or a pair of scissors for this task. Be cautious and avoid cutting yourself. The size of the opening will depend on the size of your bell pepper plant. You want an opening large enough to accommodate the plant’s stem and allow for easy watering. Next, remove the bottle cap or loosen it slightly to provide ventilation. This will prevent excessive heat buildup inside the bottle.
When is the best time to start bell peppers in plastic bottles?
The timing depends on your local climate and the specific bell pepper variety you’re growing. Generally, you can start bell peppers indoors 6-8 weeks before the last expected frost. Once the weather warms up and the risk of frost has passed, you can transplant the seedlings into the plastic bottle greenhouses outdoors. The plastic bottles will provide extra protection during the initial stages of growth and help extend the growing season.
How do I water bell peppers growing in plastic bottles?
Watering is essential for healthy bell pepper growth. Water the plants regularly, ensuring that the soil remains consistently moist but not waterlogged. You can water directly into the opening at the top of the bottle or through the bottom opening if you’ve created one. Check the soil moisture level regularly by sticking your finger into the soil. If the top inch feels dry, it’s time to water. Avoid overwatering, as this can lead to root rot.
How do I provide ventilation for bell peppers in plastic bottles?
Ventilation is crucial to prevent overheating and maintain optimal growing conditions inside the plastic bottles. You can provide ventilation by removing the bottle cap or loosening it slightly. You can also cut small ventilation holes in the sides of the bottle, especially during warmer days. Monitor the temperature inside the bottle and adjust the ventilation accordingly. If the leaves start to wilt or the soil feels excessively hot, increase ventilation.
Can I use this method for other plants besides bell peppers?
Yes, this method can be adapted for other plants that benefit from a warm, protected environment, such as tomatoes, eggplants, and cucumbers. However, you may need to adjust the size of the plastic bottle and the ventilation based on the specific needs of each plant. Experiment and see what works best for you.
What if the plastic bottle gets too hot in direct sunlight?
If the plastic bottle gets too hot, it can damage your bell pepper plants. To prevent overheating, you can paint the bottles white to reflect sunlight. You can also provide shade during the hottest part of the day by using shade cloth or moving the bottles to a partially shaded location. Monitor the temperature inside the bottle and take action if it gets too high.
How do I protect the plastic bottles from strong winds?
Strong winds can knock over the plastic bottles and damage your bell pepper plants. To protect them from wind, you can secure the bottles to the ground using stakes or by burying the bottom of the bottle slightly in the soil. You can also group the bottles together to provide mutual support.
What are the benefits of using plastic bottles for growing bell peppers?
There are several benefits to using plastic bottles for growing bell peppers:
* **Extends the growing season:** The plastic bottles provide a warm, protected environment that allows you to start growing bell peppers earlier in the spring and extend the harvest into the fall.
* **Protects plants from frost:** The bottles act as mini-greenhouses, shielding the plants from frost and cold temperatures.
* **Maximizes space:** The bottles can be placed close together, allowing you to grow more bell peppers in a smaller area.
* **Reduces waste:** Repurposing plastic bottles is an environmentally friendly way to reduce waste.
* **Cost-effective:** This method is a low-cost alternative to traditional greenhouses or cold frames.
How do I deal with pests and diseases when growing bell peppers in plastic bottles?
Monitor your bell pepper plants regularly for signs of pests and diseases. If you notice any problems, take action immediately to prevent them from spreading. You can use organic pest control methods, such as insecticidal soap or neem oil, to control pests. Ensure good air circulation to prevent fungal diseases. Remove any infected leaves or plants to prevent the spread of disease.
Leave a Comment