

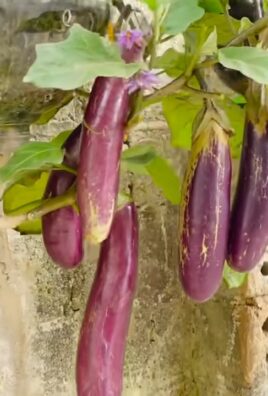
Bell Pepper Small Pot Setup: Dreaming of fresh, vibrant bell peppers right outside your door, even if you’re short on space? You’re not alone! For centuries, humans have cultivated gardens in even the most unlikely places, from window boxes in bustling cities to rooftop oases. The desire to connect with nature and grow our own food is deeply ingrained in us.
But let’s face it, not everyone has acres of land for a sprawling garden. That’s where the magic of container gardening comes in! And that’s where I come in! I’m here to share some amazing DIY tricks and hacks that will help you achieve a thriving bell pepper small pot setup, regardless of your limited space.
Why is this so important? Well, imagine the satisfaction of harvesting your own juicy bell peppers, knowing exactly where they came from and what went into growing them. Plus, growing your own food is a fantastic way to save money, reduce your carbon footprint, and enjoy the freshest, most flavorful produce imaginable. This DIY guide will provide you with the knowledge and confidence to create a successful and bountiful bell pepper garden, even in the smallest of pots. Let’s get started!
DIY Bell Pepper Small Pot Setup: A Beginner’s Guide
Hey there, fellow gardening enthusiasts! Ever dreamt of growing your own vibrant bell peppers but thought you didn’t have the space? Well, I’m here to tell you that you absolutely can, even in a small pot! This guide will walk you through setting up a thriving bell pepper plant in a container, perfect for balconies, patios, or even a sunny windowsill. Let’s get our hands dirty!
Choosing the Right Pot and Soil
Before we even think about seeds, let’s talk about the foundation of our pepper plant’s home: the pot and the soil. These are crucial for success, so let’s get it right.
* Pot Size Matters: For a single bell pepper plant, I recommend a pot that’s at least 12 inches in diameter and 12 inches deep. This gives the roots enough room to spread out and access nutrients. Smaller pots can work, but you’ll need to water and fertilize more frequently.
* Drainage is Key: Make sure your pot has drainage holes! Bell peppers hate sitting in soggy soil, which can lead to root rot. If your pot doesn’t have enough holes, you can drill a few extra.
* Choosing the Right Soil: Don’t use garden soil! It’s often too dense and doesn’t drain well in containers. Instead, opt for a high-quality potting mix specifically designed for containers. These mixes are usually a blend of peat moss, perlite, and vermiculite, which provide good drainage and aeration. I personally love using a mix that also includes some compost for added nutrients.
Starting from Seed or Seedling?
You have two options here: starting from seed or buying a seedling from a nursery. Both have their pros and cons.
* Starting from Seed: This is the more economical option, and it gives you more control over the entire process. However, it requires more time and effort. You’ll need to start the seeds indoors about 6-8 weeks before the last expected frost.
* Buying a Seedling: This is the easier and faster option. You can skip the seed-starting process and get a head start. Just make sure to choose a healthy-looking seedling with no signs of disease or pests.
Step-by-Step Planting Guide
Alright, let’s get down to the nitty-gritty of planting! Whether you’re transplanting a seedling or starting from seed, these steps will guide you.
Transplanting a Seedling
1. Prepare the Pot: Fill your chosen pot with potting mix, leaving about an inch or two of space at the top.
2. Gently Remove the Seedling: Carefully remove the seedling from its nursery container. Gently loosen the roots if they’re tightly packed.
3. Plant the Seedling: Dig a hole in the center of the pot that’s large enough to accommodate the seedling’s root ball. Place the seedling in the hole and backfill with potting mix. Make sure the top of the root ball is level with the soil surface.
4. Water Thoroughly: Water the newly planted seedling thoroughly until water drains out of the drainage holes. This helps settle the soil and encourages root growth.
5. Add Support (Optional): Bell pepper plants can get quite heavy when they’re loaded with fruit. Consider adding a stake or small tomato cage to provide support and prevent the plant from toppling over.
Starting from Seed (If you chose to start from seed)
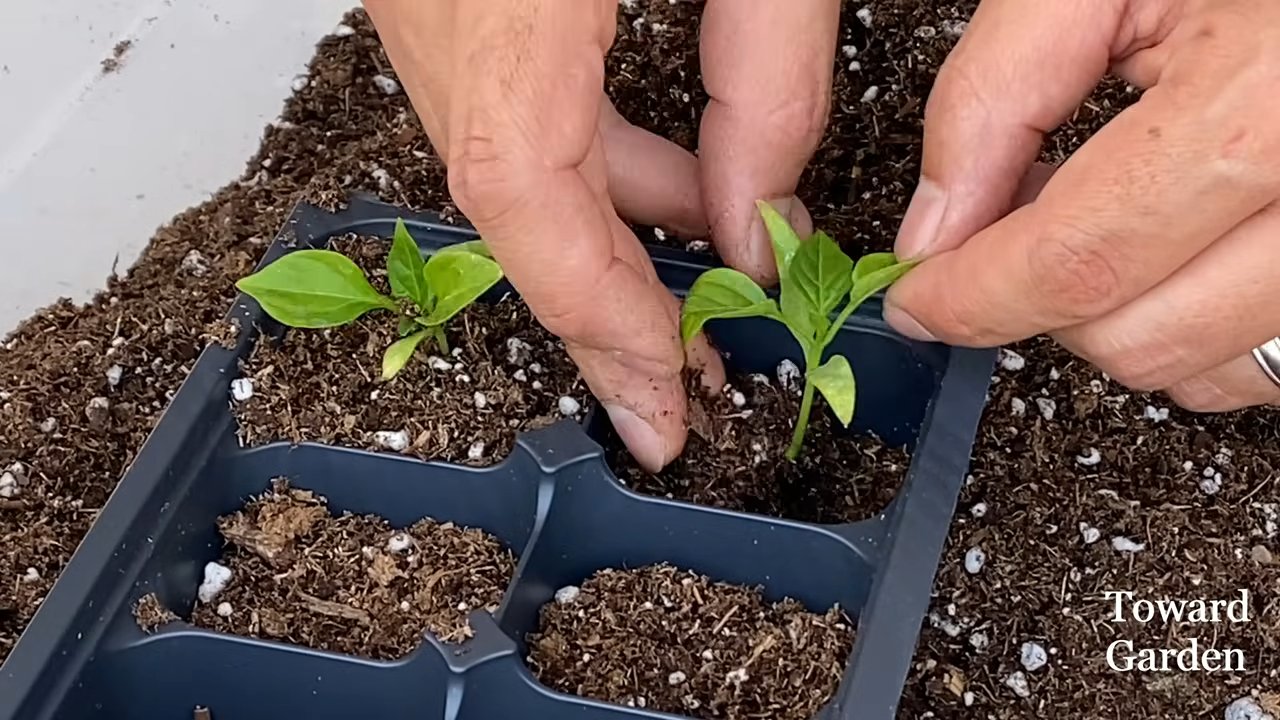
1. Sow the Seeds: Fill a small seed starting tray or small pots with seed starting mix. Sow the seeds about 1/4 inch deep.
2. Keep Moist: Keep the soil consistently moist, but not soggy. You can use a spray bottle to mist the soil.
3. Provide Warmth: Bell pepper seeds need warmth to germinate. A heat mat can help speed up the process.
4. Provide Light: Once the seedlings emerge, they need plenty of light. Place them under a grow light or in a sunny window.
5. Transplant: Once the seedlings have developed a few sets of true leaves, they can be transplanted into their final pot, following the steps above for transplanting a seedling.
Caring for Your Bell Pepper Plant
Now that your bell pepper plant is happily settled in its pot, it’s time to provide it with the care it needs to thrive.
* Watering: Bell peppers need consistent moisture, but they don’t like to be waterlogged. Water deeply when the top inch of soil feels dry to the touch. Avoid watering the foliage, as this can encourage fungal diseases.
* Sunlight: Bell peppers need at least 6-8 hours of sunlight per day. Place your pot in a sunny location where it will receive plenty of direct sunlight.
* Fertilizing: Bell peppers are heavy feeders, meaning they need a lot of nutrients to produce fruit. Fertilize your plant every 2-3 weeks with a balanced fertilizer. Look for a fertilizer that’s specifically formulated for vegetables. I like to use a liquid fertilizer that I can mix with water.
* Pruning: Pruning isn’t essential, but it can help improve air circulation and encourage fruit production. Remove any suckers (small shoots that grow from the base of the plant) and any yellowing or dead leaves.
* Pest and Disease Control: Keep an eye out for common pests like aphids, spider mites, and whiteflies. You can usually control these pests with insecticidal soap or neem oil. Also, watch out for fungal diseases like powdery mildew and blossom end rot. Good air circulation and proper watering can help prevent these diseases.
Troubleshooting Common Problems
Even with the best care, you might encounter some problems along the way. Here are a few common issues and how to address them.
* Blossom End Rot: This is a common problem that causes the bottom of the pepper to rot. It’s usually caused by a calcium deficiency. You can prevent blossom end rot by adding calcium to the soil or using a calcium-rich fertilizer. Also, ensure consistent watering, as fluctuations in soil moisture can exacerbate the problem.
* Yellowing Leaves: Yellowing leaves can be a sign of several problems, including nutrient deficiencies, overwatering, or underwatering. Check the soil moisture and adjust your watering accordingly. Also, make sure you’re fertilizing your plant regularly.
* Lack of Fruit: If your plant is growing well but not producing fruit, it could be due to a lack of pollination. Bell peppers are self-pollinating, but sometimes they need a little help. You can hand-pollinate the flowers by gently shaking the plant or using a small paintbrush to transfer pollen from one flower to another.
* Pests: As mentioned earlier, keep an eye out for pests. Early detection and treatment are key to preventing serious infestations.
Harvesting Your Bell Peppers
The moment you’ve been waiting for! Harvesting your own homegrown bell peppers is incredibly rewarding.
* When to Harvest: Bell peppers can be harvested at any stage of maturity, but they’re usually harvested when they’re fully colored and firm to the touch. Green bell peppers are simply unripe red, yellow, or orange peppers.
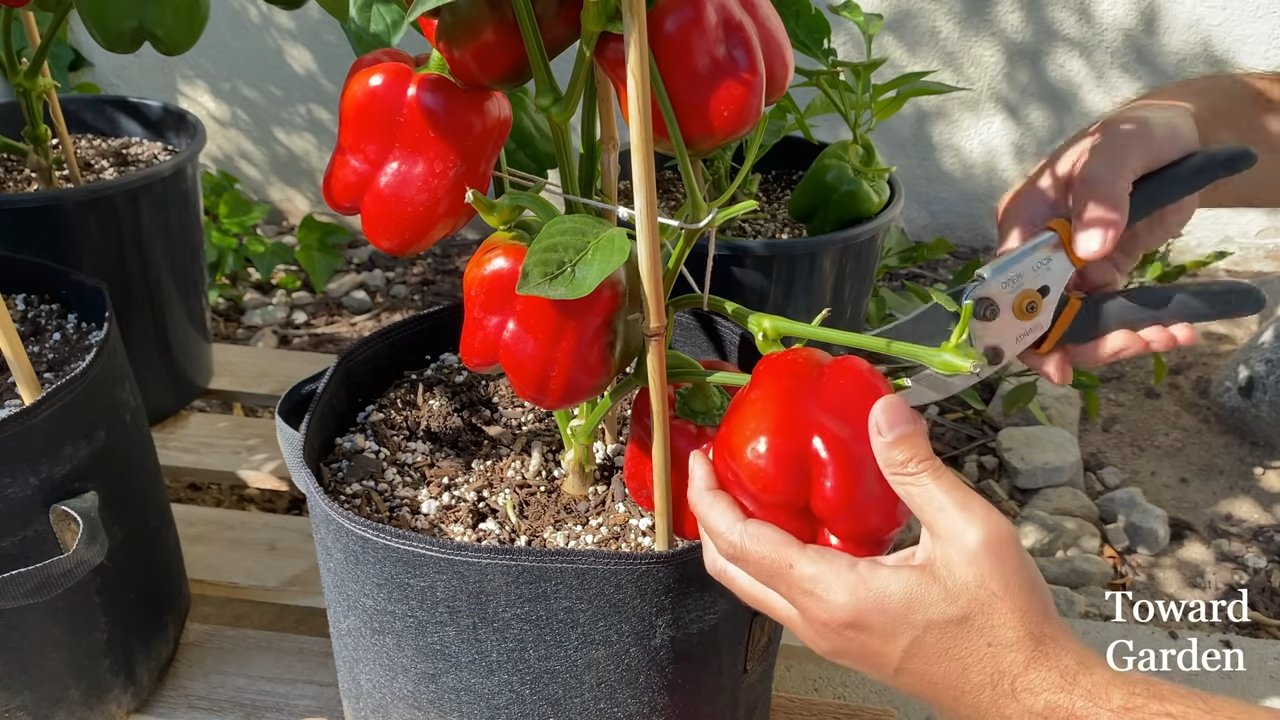
* How to Harvest: Use a sharp knife or pruning shears to cut the pepper from the plant. Leave a small stem attached to the pepper.
* Enjoy Your Harvest: Use your homegrown bell peppers in your favorite recipes! They’re delicious in salads, stir-fries, omelets, and so much more.
Choosing the Right Bell Pepper Variety
While the general care is the same, some bell pepper varieties are better suited for container gardening than others. Here are a few of my favorites:
* ‘Patio Bell’: As the name suggests, this variety is specifically bred for container gardening. It’s a compact plant that produces small to medium-sized peppers.
* ‘Mini Bell’: These varieties produce small, bite-sized peppers that are perfect for snacking. They’re also relatively compact and well-suited for containers.
* ‘Sweet Chocolate’: This variety produces dark brown peppers that turn red when fully ripe. It’s a compact plant that’s easy to grow in containers.
* ‘Golden Bell’: A classic yellow bell pepper that does well in pots.
Extra Tips for Success
Here are a few extra tips to help you grow the best bell peppers possible in your small pot setup:
* Rotate Your Plant: Rotate your pot regularly to ensure that all sides of the plant receive equal sunlight.
* Mulch the Soil: Add a layer of mulch to the soil surface to help retain moisture and suppress weeds.
* Provide Support: As mentioned earlier, bell pepper plants can get heavy when they’re loaded with fruit. Provide support with a stake or tomato cage.
* Don’t Overcrowd: Only plant one bell pepper plant per pot. Overcrowding can lead to competition for resources and reduced yields.
* Have Fun!
Conclusion
So, there you have it! Transforming a simple bell pepper into a self-contained small pot setup is not just a fun project; it’s a game-changer for anyone looking to add a touch of green to their lives, regardless of space or gardening experience. We’ve walked you through the process, highlighting the ease and accessibility of this innovative DIY trick. But why is this a must-try?
Firstly, it’s incredibly cost-effective. Instead of purchasing expensive pots and soil, you’re repurposing a readily available vegetable into a functional and biodegradable container. This makes it an environmentally conscious choice, reducing waste and promoting sustainable practices.
Secondly, it’s a fantastic way to introduce children (or even reluctant adults!) to the joys of gardening. The visual appeal of a sprouting plant emerging from a bell pepper is undeniable, sparking curiosity and fostering a connection with nature. It’s a hands-on learning experience that teaches responsibility and patience.
Thirdly, and perhaps most importantly, it’s adaptable. While we’ve focused on using the bell pepper as a starter pot for herbs or small flowers, the possibilities are truly endless. Consider using different colored bell peppers for a vibrant display, or experimenting with various seed types to see what thrives best in this unique environment. You could even try using larger bell peppers to accommodate slightly bigger plants.
Variations to Explore:
* Spice it up: Use different varieties of bell peppers – red, yellow, orange – to create a colorful mini-garden.
* Herb Haven: Plant your favorite herbs like basil, mint, or parsley for a readily available supply in your kitchen.
* Floral Fantasy: Opt for small flowering plants like pansies or petunias for a burst of color.
* Seed Starting Station: Use the bell pepper pot to start seeds for your larger garden, giving them a head start before transplanting.
* Vertical Gardening: Attach multiple bell pepper pots to a wall or fence for a unique vertical garden display.
We encourage you to embrace your inner gardener and give this DIY trick a try. It’s a simple, rewarding, and sustainable way to bring a little bit of nature into your home. Don’t be afraid to experiment and personalize the process to suit your own preferences and needs.
But the journey doesn’t end here! We want to hear about your experiences. Did you encounter any challenges? Did you discover any clever modifications? Share your photos, tips, and stories in the comments below. Let’s create a community of bell pepper pot enthusiasts and inspire others to embrace this innovative gardening technique. Your insights could be invaluable to fellow gardeners, helping them overcome obstacles and achieve even greater success with their own bell pepper small pot setups. So, get planting, get creative, and get sharing! Let’s grow together!
Frequently Asked Questions (FAQ)
What kind of soil should I use for my bell pepper pot?
The best soil to use is a well-draining potting mix. Avoid using garden soil, as it can be too heavy and compact, hindering root growth. A mix specifically formulated for containers will provide the necessary nutrients and aeration for your plants to thrive. You can also amend the potting mix with perlite or vermiculite to further improve drainage.
How often should I water my bell pepper pot?
Watering frequency depends on several factors, including the type of plant, the climate, and the size of the bell pepper. Generally, you should water when the top inch of soil feels dry to the touch. Avoid overwatering, as this can lead to root rot. Ensure the bell pepper pot has adequate drainage to prevent water from pooling at the bottom. A good rule of thumb is to water thoroughly until water drains out of the bottom, then allow the soil to dry slightly before watering again.
How long will the bell pepper pot last?
The lifespan of the bell pepper pot depends on the humidity and watering habits. Typically, it will last for several weeks to a couple of months. As the bell pepper decomposes, it will actually provide nutrients to the plant. However, keep an eye on it and transplant the seedling to a larger pot when the bell pepper starts to break down significantly or when the plant outgrows the space.
What types of plants are best suited for a bell pepper pot?
Bell pepper pots are ideal for starting seeds or growing small plants like herbs (basil, mint, chives), succulents, and small flowering plants (pansies, petunias). Avoid planting large or fast-growing plants, as the bell pepper pot will not provide enough space for their roots to develop properly. Consider the mature size of the plant before planting it in a bell pepper pot.
Can I use any color of bell pepper for this project?
Yes, you can use any color of bell pepper – red, yellow, orange, or green. The color of the bell pepper will not affect its ability to function as a pot. In fact, using different colored bell peppers can add a visually appealing element to your mini-garden.
What do I do when the plant outgrows the bell pepper pot?
When the plant’s roots start to outgrow the bell pepper pot, or when the bell pepper begins to decompose significantly, it’s time to transplant the plant to a larger pot or into the garden. Gently remove the plant from the bell pepper pot, being careful not to damage the roots. Plant it in a new pot with fresh potting mix, or directly into the garden soil, ensuring it has adequate space to grow.
Will the bell pepper decompose and harm the plant?
No, the decomposing bell pepper will not harm the plant. In fact, as the bell pepper breaks down, it will release nutrients into the soil, which can benefit the plant’s growth. However, it’s important to monitor the bell pepper and transplant the plant when it starts to decompose excessively, as it may become unstable or attract pests.
How do I prevent pests from attacking my bell pepper pot?
To prevent pests from attacking your bell pepper pot, keep the area clean and free of debris. Regularly inspect the plant for signs of pests, such as aphids, spider mites, or whiteflies. If you notice any pests, you can try using insecticidal soap or neem oil to control them. You can also introduce beneficial insects, such as ladybugs, to help keep pest populations in check.
Can I use this method for starting seeds indoors?
Absolutely! This method is perfect for starting seeds indoors. The bell pepper pot provides a warm and humid environment that is ideal for seed germination. Once the seedlings have developed a few sets of true leaves, you can transplant them to larger pots or into the garden.
Is this method environmentally friendly?
Yes, this method is very environmentally friendly. It repurposes a food waste product (the bell pepper) into a functional and biodegradable container. This reduces waste and promotes sustainable gardening practices. As the bell pepper decomposes, it returns nutrients to the soil, further benefiting the environment.
Leave a Comment