

Bag Grown Watermelons: Imagine sinking your teeth into a juicy, homegrown watermelon, bursting with sweetness, all thanks to your own ingenuity and a simple bag! Forget sprawling vines taking over your entire garden; we’re about to unlock a secret to cultivating these summer delights in even the smallest of spaces.
For centuries, watermelons have been a symbol of summer abundance and shared joy, gracing picnics and family gatherings worldwide. From their origins in Africa to their global cultivation today, these refreshing fruits have always been a cherished treat. But what if you thought growing your own was out of reach due to limited space? That’s where this DIY magic comes in!
Many of us dream of harvesting our own fresh produce, but the reality of limited garden space or challenging soil conditions can quickly dampen that enthusiasm. That’s why I’m so excited to share this game-changing trick. Growing bag grown watermelons is not only space-saving but also allows for better control over soil quality and watering, leading to healthier, more productive plants. This DIY project is perfect for apartment dwellers, balcony gardeners, or anyone looking to maximize their harvest without sacrificing precious yard space. Get ready to ditch the garden woes and embrace the sweet success of homegrown watermelons, one bag at a time!
Growing Watermelons in Bags: A DIY Guide for Bountiful Harvests
Hey there, fellow gardening enthusiasts! Ever dreamt of harvesting juicy, homegrown watermelons but thought you didn’t have the space? Well, I’m here to tell you that you absolutely can, even without a sprawling garden! We’re going to dive into the wonderful world of growing watermelons in bags. It’s a surprisingly effective method, and I’m excited to share my tips and tricks with you.
Why Grow Watermelons in Bags?
Before we get our hands dirty, let’s talk about why this method is so great:
* Space-Saving: Perfect for balconies, patios, or small yards. You don’t need acres of land to enjoy homegrown watermelon.
* Portability: You can move your watermelon plants to chase the sun or protect them from harsh weather.
* Soil Control: You have complete control over the soil composition, ensuring your watermelons get the nutrients they need.
* Reduced Weeding: Bags minimize weed growth, saving you time and effort.
* Earlier Harvest: The soil in bags tends to warm up faster, potentially leading to an earlier harvest.
Choosing the Right Watermelon Variety
Not all watermelons are created equal, especially when it comes to container gardening. Here are some varieties that thrive in bags:
* Sugar Baby: A classic, compact variety that produces small, sweet watermelons. It’s a reliable choice for beginners.
* Bush Sugar Baby: Even more compact than the original Sugar Baby, making it ideal for smaller bags.
* Golden Midget: A unique variety with yellow skin and pink flesh. It’s early-maturing and relatively small.
* Tiger Baby: A small, striped watermelon with a sweet, crisp flavor.
* Blacktail Mountain: A cold-hardy variety that matures quickly, making it suitable for shorter growing seasons.
When selecting your seeds, consider your local climate and the size of your bags. Smaller varieties will generally perform better in bags.
Materials You’ll Need
Alright, let’s gather our supplies! Here’s what you’ll need to get started:
* Watermelon Seeds: Choose a variety suitable for container gardening.
* Large Grow Bags: I recommend using bags that are at least 20 gallons in size. Fabric grow bags are excellent because they allow for good drainage and aeration.
* High-Quality Potting Mix: A well-draining mix is crucial. You can buy a pre-made mix or create your own by combining equal parts of compost, peat moss (or coco coir), and perlite.
* Slow-Release Fertilizer: Watermelons are heavy feeders, so a slow-release fertilizer will provide them with a steady supply of nutrients. Look for a fertilizer with a balanced NPK ratio (e.g., 10-10-10).
* Water-Soluble Fertilizer: For supplemental feeding during the growing season.
* Trellis or Support System: Watermelon vines can get quite long, so you’ll need a trellis or other support system to keep them off the ground.
* Watering Can or Hose: For watering your plants.
* Gardening Gloves: To protect your hands.
* Trowel or Shovel: For filling the bags with soil.
* Optional: Mulch (straw, wood chips, or plastic) to help retain moisture and suppress weeds.
Step-by-Step Instructions: Planting Your Watermelon Seeds
Now for the fun part! Let’s get those watermelon seeds planted.
1. Prepare Your Grow Bags: Unfold your grow bags and place them in a sunny location where they will receive at least 6-8 hours of direct sunlight per day. Remember, watermelons are sun-loving plants!
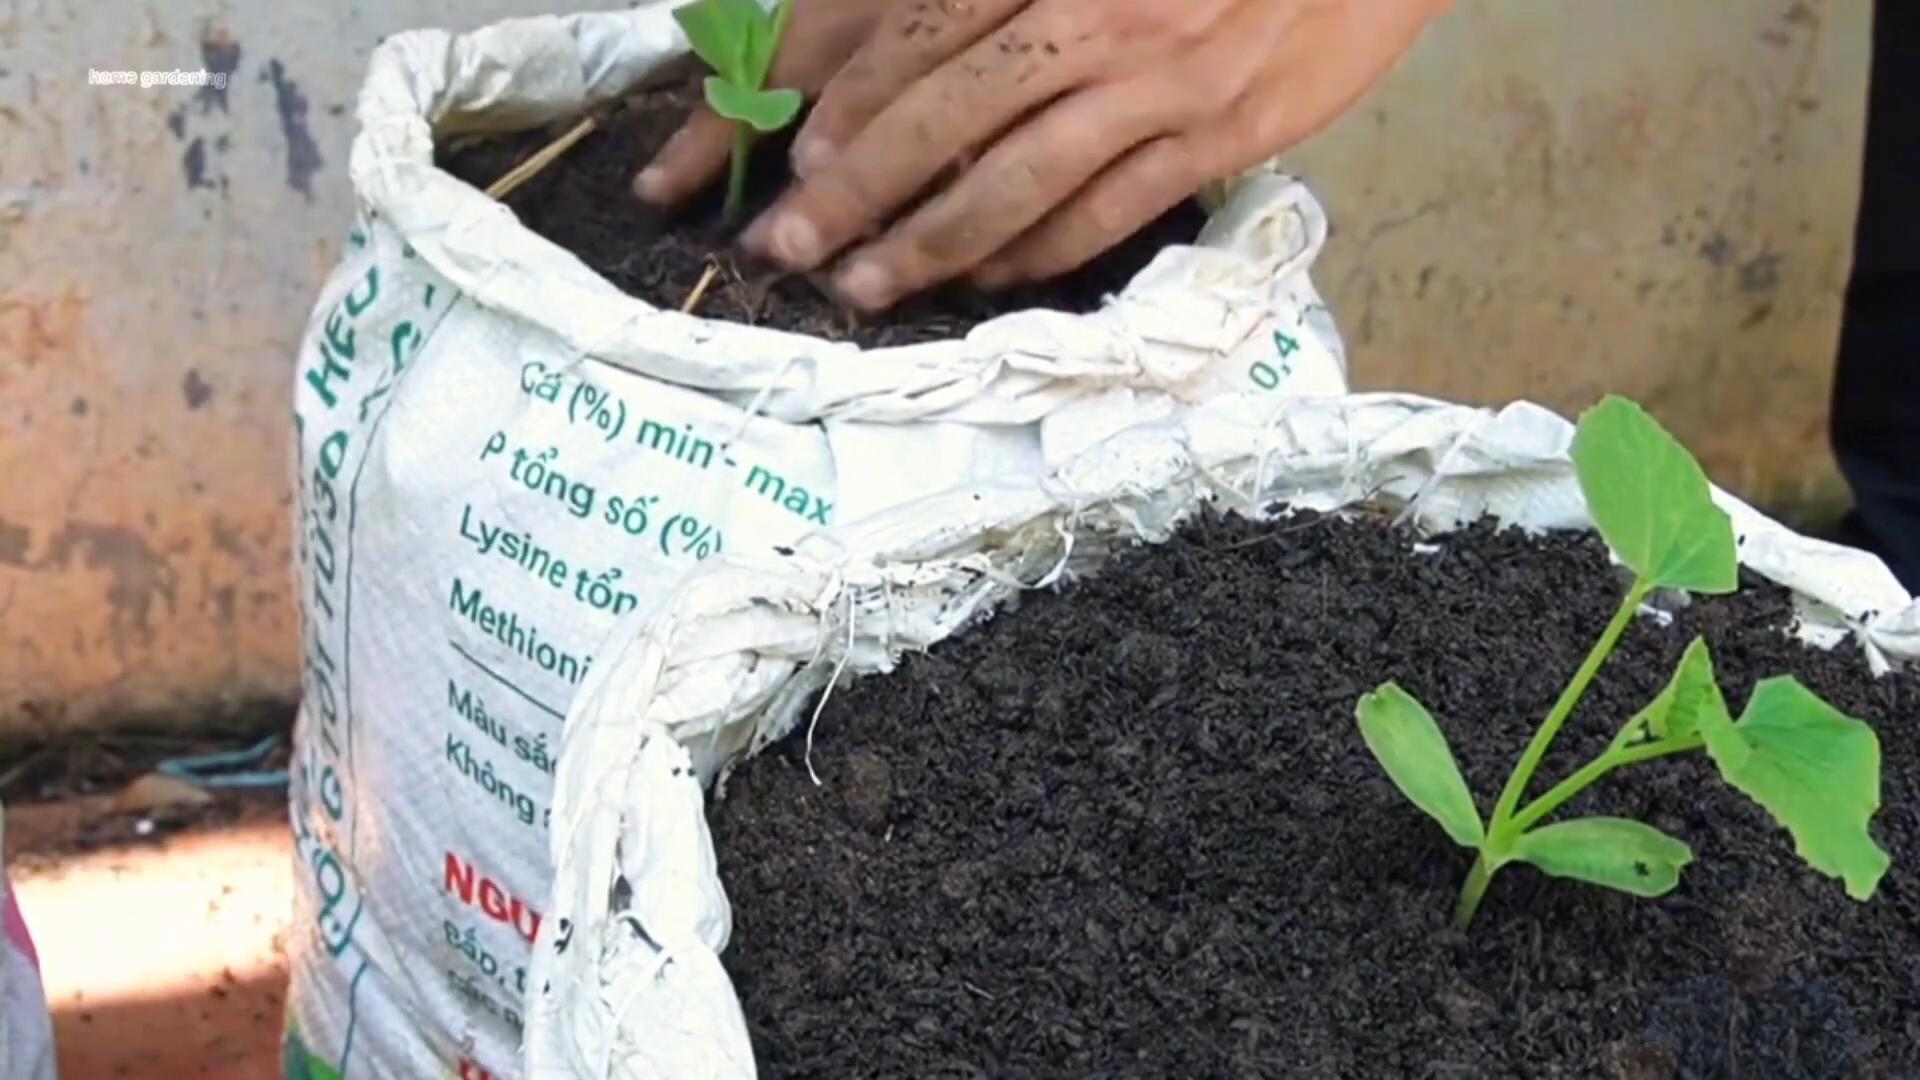
2. Fill the Bags with Potting Mix: Fill each bag with your high-quality potting mix, leaving about 2-3 inches of space at the top. Gently pat down the soil to remove any air pockets.
3. Add Slow-Release Fertilizer: Sprinkle the slow-release fertilizer evenly over the surface of the soil, following the instructions on the fertilizer package. Gently mix it into the top inch or two of the soil.
4. Sow the Seeds: Make a small hole (about 1 inch deep) in the center of each bag. Place 2-3 watermelon seeds in each hole. This increases the chances of at least one seed germinating. Cover the seeds with soil and gently water the area.
5. Water Thoroughly: Water the bags thoroughly until the water drains out of the bottom. This will help to settle the soil and ensure that the seeds have adequate moisture to germinate.
6. Keep the Soil Moist: Keep the soil consistently moist, but not waterlogged, until the seeds germinate. You can cover the bags with plastic wrap to help retain moisture, but be sure to remove the plastic wrap once the seedlings emerge.
Caring for Your Watermelon Plants
Once your watermelon seedlings have emerged, it’s time to provide them with the care they need to thrive.
1. Thin the Seedlings: Once the seedlings have developed a few true leaves (the leaves that look like miniature watermelon leaves), thin them to one plant per bag. Choose the strongest, healthiest-looking seedling and gently snip off the others at the soil line.
2. Water Regularly: Watermelons need plenty of water, especially during hot weather. Water deeply and regularly, aiming to keep the soil consistently moist. Check the soil moisture regularly by sticking your finger into the soil. If the top inch or two feels dry, it’s time to water.
3. Fertilize Regularly: In addition to the slow-release fertilizer you added at planting, you’ll need to supplement with a water-soluble fertilizer every 2-3 weeks. Follow the instructions on the fertilizer package. A fertilizer with a higher potassium content can promote fruit development.
4. Provide Support: As your watermelon vines grow, they will need support to keep the fruits off the ground. Install a trellis or other support system near the bags. You can gently train the vines to climb the trellis. For heavier watermelons, you may need to provide additional support by using slings made from pantyhose or netting to support the fruits.
5. Prune the Vines (Optional): Some gardeners prune their watermelon vines to encourage fruit production. You can prune off any side shoots (vines that grow from the main vine) to direct the plant’s energy towards fruit development. However, pruning is not essential, and you can still get a good harvest without it.
6. Protect from Pests and Diseases: Keep an eye out for common watermelon pests, such as aphids, squash bugs, and cucumber beetles. You can control these pests with insecticidal soap or neem oil. Watermelons can also be susceptible to fungal diseases, such as powdery mildew and fusarium wilt. To prevent these diseases, provide good air circulation around the plants and avoid overhead watering.
7. Pollination: Watermelons require pollination to produce fruit. If you don’t see bees or other pollinators visiting your plants, you may need to hand-pollinate the flowers. To hand-pollinate, use a small paintbrush to transfer pollen from the male flowers (which have a long, thin stem) to the female flowers (which have a small, immature watermelon at the base).
Harvesting Your Watermelons
The moment we’ve all been waiting for! Knowing when to harvest your watermelons is key to enjoying their sweet, juicy flavor. Here are some signs that your watermelons are ripe:
* The Tendril Near the Stem Dries Up: The tendril closest to the point where the watermelon attaches to the vine will turn brown and dry up.
* The Bottom Spot Turns Yellow: The spot where the watermelon rests on the ground (or the bag) will turn from white to a creamy yellow.
* The Watermelon Sounds Hollow: When you thump the watermelon, it should sound hollow and resonant.
* The Skin Becomes Dull: The shiny, bright green skin of an unripe watermelon will become dull and slightly waxy when it’s ripe.
Once you’ve determined that your watermelon is ripe, use a sharp knife to cut it from the vine, leaving a few inches of stem attached.
Tips for Success
Here are a few extra tips to help you succeed with growing watermelons in bags:
* Choose the Right Bag Size: Don’t skimp on the bag size! A 20-gallon bag is the minimum I recommend. Larger bags will provide more room for the roots to grow and will help to retain moisture.
* Use High-Quality Potting Mix: The quality of your potting mix is crucial. Avoid using garden soil, as it can be too heavy and may not drain well.
* Water Consistently: Watermelons need plenty of water,
Conclusion
So, there you have it! Growing watermelons in bags might sound unconventional, but as we’ve explored, it’s a surprisingly effective and rewarding method, especially for those with limited space or challenging soil conditions. This DIY trick isn’t just about circumventing traditional gardening limitations; it’s about unlocking the potential to enjoy fresh, homegrown watermelons regardless of your circumstances.
Why is this a must-try? Because it democratizes watermelon cultivation. No longer is this juicy summer fruit the exclusive domain of sprawling farms. With a few bags, some quality soil, and a little dedication, you can transform your balcony, patio, or even a sunny corner of your yard into a miniature watermelon patch. Imagine the satisfaction of harvesting your own sweet, refreshing watermelons, knowing you nurtured them from seed to fruit, all within the confines of a bag.
But the benefits extend beyond mere convenience. Bag growing offers superior control over the growing environment. You can tailor the soil composition to perfectly suit the needs of your watermelon plants, ensuring optimal drainage and nutrient availability. This can lead to healthier, more vigorous plants and, ultimately, more delicious watermelons. Furthermore, the portability of bags allows you to chase the sun, maximizing sunlight exposure and promoting faster growth.
Looking for variations? Consider experimenting with different watermelon varieties. Smaller, bush-type watermelons are particularly well-suited for bag growing, as they require less space and produce manageable-sized fruits. You could also try adding companion plants to your bags, such as basil or marigolds, to deter pests and attract beneficial insects. Another exciting variation is to explore vertical gardening techniques, using trellises or supports to train your watermelon vines upwards, further maximizing space utilization. Think about using self-watering bags to reduce the amount of time you spend watering the plants.
We’ve covered the essentials, from selecting the right bags and soil to providing adequate sunlight and water. We’ve also addressed potential challenges and offered solutions to ensure your success. Now, it’s your turn to put this knowledge into practice.
Don’t be intimidated by the prospect of growing watermelons in bags. It’s a relatively simple and straightforward process, and the rewards are well worth the effort. The taste of a homegrown watermelon, bursting with sweetness and flavor, is simply unmatched.
We wholeheartedly encourage you to give this DIY trick a try. Embrace the challenge, experiment with different techniques, and most importantly, have fun! And once you’ve harvested your first bag-grown watermelon, we’d love to hear about your experience. Share your photos, tips, and stories with us in the comments section below. Let’s create a community of bag-grown watermelon enthusiasts and inspire others to discover the joys of homegrown produce. Let us know what kind of fertilizer you used and how often you watered your plants. Did you have any problems with pests? What did you do to solve them?
The key to successful **bag grown watermelons** lies in consistent care and attention. Monitor your plants regularly, adjust your watering schedule as needed, and don’t be afraid to experiment. With a little patience and perseverance, you’ll be enjoying delicious, homegrown watermelons in no time. So, grab your bags, seeds, and soil, and get ready to embark on a rewarding gardening adventure!
Frequently Asked Questions (FAQ)
What size bag is best for growing watermelons?
The ideal bag size depends on the watermelon variety you choose. For smaller, bush-type watermelons, a 15-20 gallon bag should suffice. For larger varieties, opt for a 25-30 gallon bag or even larger. The key is to provide ample space for the roots to develop and support the growing plant. Make sure the bag is sturdy and has drainage holes to prevent waterlogging. Fabric grow bags are a great option as they allow for good aeration and drainage.
What type of soil should I use?
Watermelons thrive in well-draining, nutrient-rich soil. A good mix consists of equal parts potting soil, compost, and perlite or vermiculite. The potting soil provides a base for the plants to grow, the compost adds essential nutrients, and the perlite or vermiculite improves drainage and aeration. Avoid using heavy clay soil, as it can become waterlogged and inhibit root growth. You can also amend your soil with slow-release fertilizer to provide a steady supply of nutrients throughout the growing season.
How much sunlight do watermelons need?
Watermelons are sun-loving plants and require at least 6-8 hours of direct sunlight per day. Choose a location for your bags that receives ample sunlight throughout the day. If you live in a particularly hot climate, you may need to provide some afternoon shade to prevent the plants from overheating. The portability of bags makes it easy to move your plants to follow the sun or provide shade as needed.
How often should I water my watermelons?
Watermelons need consistent moisture, especially during fruit development. Water deeply and regularly, ensuring that the soil remains consistently moist but not waterlogged. The frequency of watering will depend on the weather conditions and the type of soil you’re using. Check the soil moisture regularly by sticking your finger into the soil. If the top inch feels dry, it’s time to water. During hot, dry weather, you may need to water daily or even twice a day.
How do I fertilize my watermelons?
Watermelons are heavy feeders and require regular fertilization to produce abundant fruit. Start fertilizing your plants a few weeks after transplanting them into the bags. Use a balanced fertilizer, such as a 10-10-10 or a fertilizer specifically formulated for fruiting plants. Follow the instructions on the fertilizer package for application rates. You can also supplement with organic fertilizers, such as compost tea or fish emulsion. Fertilize every 2-3 weeks throughout the growing season.
How do I prevent pests and diseases?
Watermelons can be susceptible to various pests and diseases, such as aphids, squash bugs, and powdery mildew. To prevent problems, start by choosing disease-resistant varieties. Inspect your plants regularly for signs of pests or diseases. If you spot any problems, take action immediately. You can use insecticidal soap or neem oil to control pests. For fungal diseases, use a fungicide. Good air circulation can also help prevent fungal problems. Consider companion planting with herbs like basil or marigolds to deter pests.
How do I know when my watermelons are ripe?
Determining when a watermelon is ripe can be tricky, but there are a few telltale signs to look for. The tendril closest to the fruit should be brown and dry. The spot where the watermelon rests on the ground (the belly spot) should be yellow or cream-colored. The watermelon should also sound hollow when you thump it. With practice, you’ll develop a knack for knowing when your watermelons are perfectly ripe.
Can I grow watermelons in bags indoors?
While it’s possible to grow watermelons in bags indoors, it’s challenging. Watermelons require a lot of sunlight, which can be difficult to provide indoors. You would need to supplement with strong grow lights. Additionally, indoor spaces often lack the air circulation needed to prevent fungal diseases. If you’re determined to grow watermelons indoors, choose a small, bush-type variety and provide ample light, ventilation, and humidity control.
What are some good watermelon varieties for bag growing?
Several watermelon varieties are well-suited for bag growing, particularly smaller, bush-type varieties. Some popular choices include Sugar Baby, Bush Sugar Baby, and Golden Midget. These varieties produce manageable-sized fruits and don’t require as much space as larger varieties. You can also try growing personal-sized watermelons, such as Little Darling or Yellow Doll.
How do I support the weight of the watermelons as they grow?
As your watermelons grow larger, they may need support to prevent them from breaking off the vine. You can use slings made from old t-shirts or pantyhose to support the fruits. Tie the slings to a sturdy support, such as a trellis or stake. This will help distribute the weight of the watermelons and prevent them from damaging the vines.

Leave a Comment