

Salt and Detergent Cleaning Hack: Are you tired of stubborn stains and grime that just won’t budge, no matter how hard you scrub? I know I am! We’ve all been there, battling with burnt-on food, greasy surfaces, or dingy laundry. But what if I told you there’s a simple, cost-effective solution hiding in your pantry and laundry room?
For generations, resourceful homemakers have relied on clever combinations of everyday ingredients to tackle household chores. Think of your grandmother’s secret cleaning recipes, passed down through families, often involving simple, natural elements. This tradition of resourcefulness is what inspires us today to find innovative ways to keep our homes sparkling clean without breaking the bank or resorting to harsh chemicals.
That’s where this salt and detergent cleaning hack comes in! This DIY trick is a game-changer because it combines the abrasive power of salt with the degreasing properties of detergent to create a potent cleaning solution. You need this hack because it’s not only incredibly effective on a wide range of surfaces, from kitchen counters to bathroom tiles, but it’s also a budget-friendly and eco-conscious alternative to many commercial cleaners. I’m excited to share this simple yet powerful method that will save you time, money, and effort while keeping your home looking its best!
DIY Cleaning Powerhouse: Salt and Detergent Hack
Hey everyone! I’m so excited to share this super simple, yet incredibly effective cleaning hack with you. I stumbled upon this trick a while back, and it has seriously revolutionized my cleaning routine. Forget expensive cleaning products loaded with harsh chemicals; this DIY solution uses just two ingredients you probably already have in your pantry and laundry room: salt and detergent!
This combination is surprisingly powerful. The salt acts as a gentle abrasive, helping to scrub away stubborn grime and stains without scratching surfaces. The detergent, of course, provides the cleaning power to lift dirt and grease. Together, they create a dynamic duo that can tackle a wide range of cleaning tasks around your home.
What You’ll Need
Before we dive in, let’s gather our supplies. This is a pretty low-key project, so you won’t need much:
* **Table Salt:** Plain old table salt is perfect. No need for anything fancy!
* **Liquid Dish Detergent:** Any brand will do. I usually use whatever I have on hand.
* **Spray Bottle (Optional):** This is great for applying the mixture to larger surfaces.
* **Cleaning Cloths or Sponges:** Microfiber cloths are my go-to for most cleaning tasks.
* **Small Bowl or Container:** For mixing the salt and detergent.
* **Gloves (Optional):** If you have sensitive skin, gloves are always a good idea.
* **Old Toothbrush (Optional):** Perfect for scrubbing grout or tight spaces.
Mixing the Magic Potion
Okay, let’s get to the fun part – creating our cleaning solution! The ratio of salt to detergent is key, so pay attention to these measurements.
1. **Grab your bowl or container.** I usually use a small mixing bowl that I keep specifically for cleaning projects.
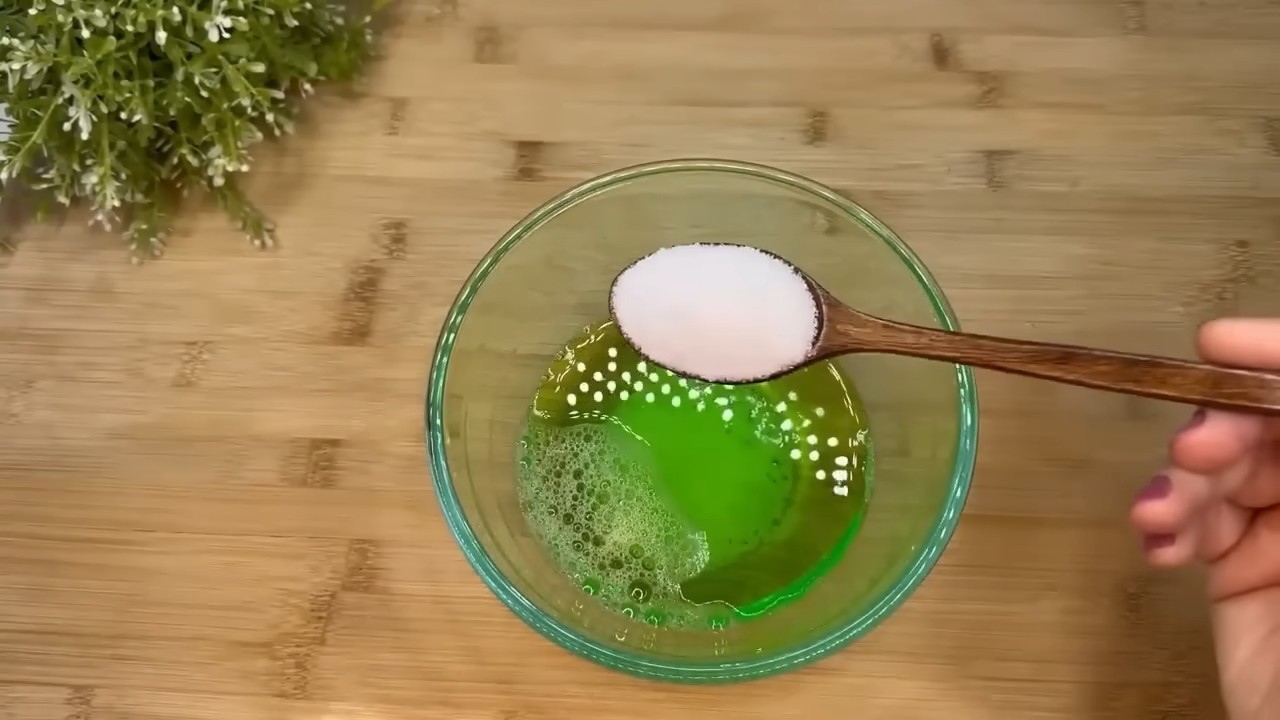
2. **Add the salt.** Pour about 1/2 cup of table salt into the bowl.
3. **Add the detergent.** Now, add about 1/4 cup of liquid dish detergent to the salt.
4. **Mix it up!** Use a spoon or your gloved hand to thoroughly mix the salt and detergent together. You want to create a thick paste. If the mixture seems too dry, add a little more detergent, a teaspoon at a time, until you reach the desired consistency. If it’s too runny, add a bit more salt.
Important Note: The consistency should be like a thick scrub. It shouldn’t be too watery or too dry.
Cleaning Applications: Where to Use Your DIY Cleaner
Now that we have our cleaning paste, let’s talk about where you can use it. This stuff is surprisingly versatile!
* **Sinks and Faucets:** This is one of my favorite uses. It easily removes water spots and soap scum, leaving your sink sparkling.
* **Bathtubs and Showers:** Say goodbye to stubborn soap scum and mildew! The salt helps to scrub away the grime, while the detergent cleans and disinfects.
* **Tile and Grout:** This is where the old toothbrush comes in handy. The salt and detergent combo works wonders on dirty grout.
* **Stovetops:** Baked-on food and grease are no match for this cleaning solution.
* **Ovens:** While it might require a bit more elbow grease, this mixture can help loosen baked-on grime in your oven.
* **Pots and Pans:** Burnt food on pots and pans? Give this a try!
* **Toilet Bowls:** Yes, you can even use it to clean your toilet bowl!
* **Shoes:** I’ve used it to clean the rubber soles of my sneakers with great success.
* **Outdoor Furniture:** For resin or plastic outdoor furniture, this can help remove dirt and grime.
Always test in an inconspicuous area first! Before using this mixture on any surface, especially delicate ones, test it in a small, hidden area to make sure it doesn’t cause any damage or discoloration.
Step-by-Step Cleaning Instructions
Alright, let’s get down to the nitty-gritty and walk through the cleaning process step-by-step. I’ll use the sink as an example, but the general process is the same for most surfaces.
1. **Wet the Surface:** Start by wetting the surface you’re going to clean with water. This helps to loosen any loose dirt and grime.
2. **Apply the Cleaning Paste:** Using a cleaning cloth, sponge, or your fingers (with gloves!), apply a generous amount of the salt and detergent paste to the surface.
3. **Scrub, Scrub, Scrub!** Now, put a little elbow grease into it and scrub the surface in a circular motion. The salt will act as a gentle abrasive, helping to lift away stubborn stains and grime. For grout or tight spaces, use an old toothbrush to get into those hard-to-reach areas.
4. **Let it Sit (Optional):** For really tough stains, you can let the paste sit on the surface for a few minutes before scrubbing. This allows the salt and detergent to penetrate the grime and loosen it up. I usually let it sit for about 5-10 minutes.
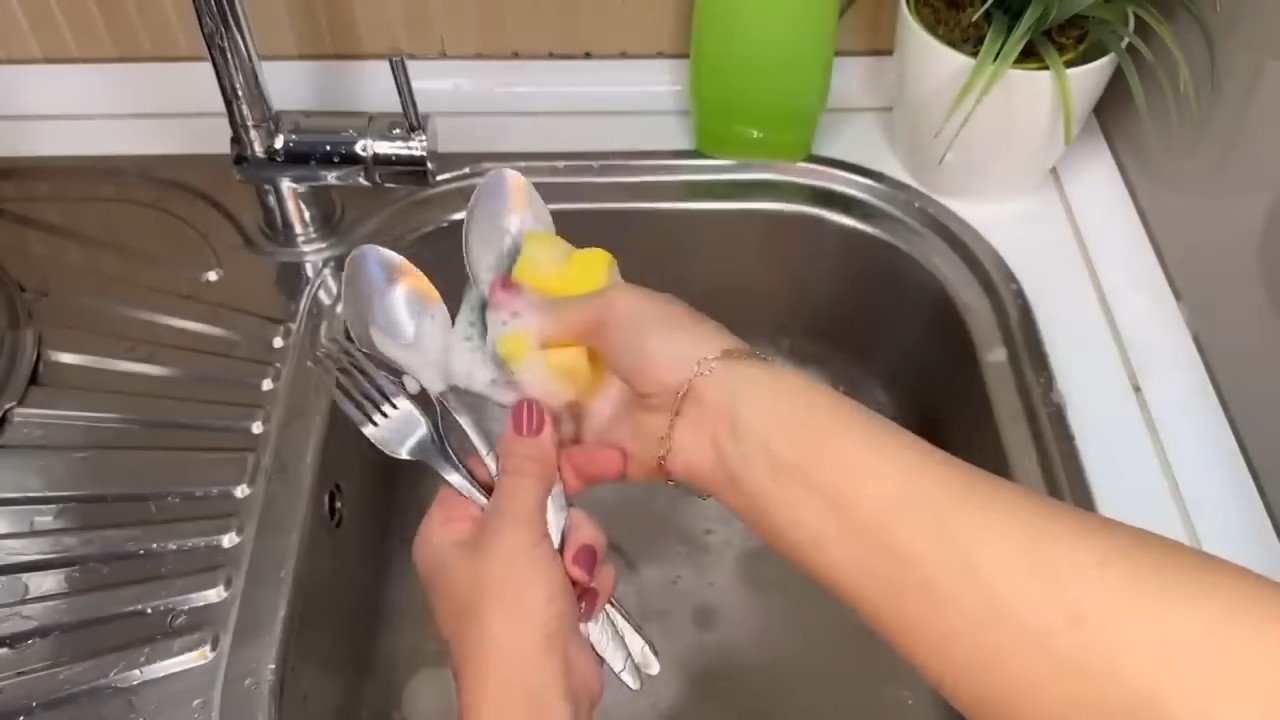
5. **Rinse Thoroughly:** Once you’ve scrubbed the surface, rinse it thoroughly with water. Make sure to remove all traces of the salt and detergent paste.
6. **Dry the Surface:** Finally, dry the surface with a clean cloth. This will help to prevent water spots and leave your surface sparkling clean.
Specific Cleaning Applications in Detail
Let’s dive a little deeper into how to use this cleaning hack for some specific areas of your home.
Cleaning Your Sink
1. Wet the sink thoroughly.
2. Apply the salt and detergent paste to the entire sink surface, including the faucet and drain.
3. Scrub the sink with a sponge or cleaning cloth, paying special attention to areas with water spots or soap scum.
4. Use an old toothbrush to scrub around the faucet and drain.
5. Rinse the sink thoroughly with water.
6. Dry the sink with a clean cloth.
Cleaning Your Bathtub or Shower
1. Wet the bathtub or shower walls and floor.
2. Apply the salt and detergent paste to the entire surface, focusing on areas with soap scum or mildew.
3. Scrub the surface with a sponge or cleaning cloth. For stubborn mildew, let the paste sit for 10-15 minutes before scrubbing.
4. Rinse the bathtub or shower thoroughly with water.
5. Dry the surface with a clean cloth or squeegee.
Cleaning Tile and Grout
1. Wet the tile and grout.
2. Apply the salt and detergent paste to the grout lines.
3. Use an old toothbrush to scrub the grout lines, working in small sections.
4. Rinse the tile and grout thoroughly with water.
5. Dry the tile and grout with a clean cloth.
Cleaning Your Stovetop
1. Make sure the stovetop is cool to the touch.
Hey everyone! I’m so excited to share this super simple, yet incredibly effective cleaning hack with you. I stumbled upon this trick a while back, and it has seriously revolutionized my cleaning routine. Forget expensive cleaning products loaded with harsh chemicals; this DIY solution uses just two ingredients you probably already have in your pantry and laundry room: salt and detergent!
This combination is surprisingly powerful. The salt acts as a gentle abrasive, helping to scrub away stubborn grime and stains without scratching surfaces. The detergent, of course, provides the cleaning power to lift dirt and grease. Together, they create a dynamic duo that can tackle a wide range of cleaning tasks around your home.
What You’ll Need
Before we dive in, let’s gather our supplies. This is a pretty low-key project, so you won’t need much:
* **Table Salt:** Plain old table salt is perfect. No need for anything fancy!
* **Liquid Dish Detergent:** Any brand will do. I usually use whatever I have on hand.
* **Spray Bottle (Optional):** This is great for applying the mixture to larger surfaces.
* **Cleaning Cloths or Sponges:** Microfiber cloths are my go-to for most cleaning tasks.
* **Small Bowl or Container:** For mixing the salt and detergent.
* **Gloves (Optional):** If you have sensitive skin, gloves are always a good idea.
* **Old Toothbrush (Optional):** Perfect for scrubbing grout or tight spaces.
Mixing the Magic Potion
Okay, let’s get to the fun part – creating our cleaning solution! The ratio of salt to detergent is key, so pay attention to these measurements.
1. **Grab your bowl or container.** I usually use a small mixing bowl that I keep specifically for cleaning projects.
2. **Add the salt.** Pour about 1/2 cup of table salt into the bowl.
3. **Add the detergent.** Now, add about 1/4 cup of liquid dish detergent to the salt.
4. **Mix it up!** Use a spoon or your gloved hand to thoroughly mix the salt and detergent together. You want to create a thick paste. If the mixture seems too dry, add a little more detergent, a teaspoon at a time, until you reach the desired consistency. If it’s too runny, add a bit more salt.
Important Note: The consistency should be like a thick scrub. It shouldn’t be too watery or too dry.
Cleaning Applications: Where to Use Your DIY Cleaner
Now that we have our cleaning paste, let’s talk about where you can use it. This stuff is surprisingly versatile!
* **Sinks and Faucets:** This is one of my favorite uses. It easily removes water spots and soap scum, leaving your sink sparkling.
* **Bathtubs and Showers:** Say goodbye to stubborn soap scum and mildew! The salt helps to scrub away the grime, while the detergent cleans and disinfects.
* **Tile and Grout:** This is where the old toothbrush comes in handy. The salt and detergent combo works wonders on dirty grout.
* **Stovetops:** Baked-on food and grease are no match for this cleaning solution.
* **Ovens:** While it might require a bit more elbow grease, this mixture can help loosen baked-on grime in your oven.
* **Pots and Pans:** Burnt food on pots and pans? Give this a try!
* **Toilet Bowls:** Yes, you can even use it to clean your toilet bowl!
* **Shoes:** I’ve used it to clean the rubber soles of my sneakers with great success.
* **Outdoor Furniture:** For resin or plastic outdoor furniture, this can help remove dirt and grime.
Always test in an inconspicuous area first! Before using this mixture on any surface, especially delicate ones, test it in a small, hidden area to make sure it doesn’t cause any damage or discoloration.
Step-by-Step Cleaning Instructions
Alright, let’s get down to the nitty-gritty and walk through the cleaning process step-by-step. I’ll use the sink as an example, but the general process is the same for most surfaces.
1. **Wet the Surface:** Start by wetting the surface you’re going to clean with water. This helps to loosen any loose dirt and grime.
2. **Apply the Cleaning Paste:** Using a cleaning cloth, sponge, or your fingers (with gloves!), apply a generous amount of the salt and detergent paste to the surface.
3. **Scrub, Scrub, Scrub!** Now, put a little elbow grease into it and scrub the surface in a circular motion. The salt will act as a gentle abrasive, helping to lift away stubborn stains and grime. For grout or tight spaces, use an old toothbrush to get into those hard-to-reach areas.
4. **Let it Sit (Optional):** For really tough stains, you can let the paste sit on the surface for a few minutes before scrubbing. This allows the salt and detergent to penetrate the grime and loosen it up. I usually let it sit for about 5-10 minutes.
5. **Rinse Thoroughly:** Once you’ve scrubbed the surface, rinse it thoroughly with water. Make sure to remove all traces of the salt and detergent paste.
6. **Dry the Surface:** Finally, dry the surface with a clean cloth. This will help to prevent water spots and leave your surface sparkling clean.
Specific Cleaning Applications in Detail
Let’s dive a little deeper into how to use this cleaning hack for some specific areas of your home.
Cleaning Your Sink
1. Wet the sink thoroughly.
2. Apply the salt and detergent paste to the entire sink surface, including the faucet and drain.
3. Scrub the sink with a sponge or cleaning cloth, paying special attention to areas with water spots or soap scum.
4. Use an old toothbrush to scrub around the faucet and drain.
5. Rinse the sink thoroughly with water.
6. Dry the sink with a clean cloth.
Cleaning Your Bathtub or Shower
1. Wet the bathtub or shower walls and floor.
2. Apply the salt and detergent paste to the entire surface, focusing on areas with soap scum or mildew.
3. Scrub the surface with a sponge or cleaning cloth. For stubborn mildew, let the paste sit for 10-15 minutes before scrubbing.
4. Rinse the bathtub or shower thoroughly with water.
5. Dry the surface with a clean cloth or squeegee.
Cleaning Tile and Grout
1. Wet the tile and grout.
2. Apply the salt and detergent paste to the grout lines.
3. Use an old toothbrush to scrub the grout lines, working in small sections.
4. Rinse the tile and grout thoroughly with water.
5. Dry the tile and grout with a clean cloth.
Cleaning Your Stovetop
1. Make sure the stovetop is cool to the touch.
2. Apply the salt and detergent paste to the stovetop surface, focusing on areas with baked-on food or grease.
3. Let the paste sit for 5-10 minutes to loosen the grime.
4. Scrub the stovetop with a sponge or cleaning cloth.
5. Rinse the stovetop thoroughly with water.
6. Dry the stovetop with a clean cloth.
Cleaning Pots and Pans
1. Wet the pot or pan.
2. Apply the salt and detergent paste to the burnt food.
3. Let the paste sit for 15-30 minutes, or even longer for really stubborn burnt food.
4. Scrub the pot or pan with a sponge or scouring pad.
5. Rinse the pot or pan thoroughly with water.
6. Dry the pot or pan with a clean cloth.
Safety Precautions
While this cleaning hack is relatively safe, it’s always a good idea to take a few precautions:
* **Wear Gloves:** If you have sensitive skin, wear gloves to protect your hands from irritation.
* **Avoid Contact with Eyes:** Avoid getting the mixture in your eyes. If contact occurs, rinse thoroughly with water.
* **Test on Delicate Surfaces:** As mentioned before, always test the mixture on a small, inconspicuous area before using it on delicate surfaces.
* **Don’t Mix with Bleach:** Never mix this cleaning solution with bleach or other harsh chemicals, as this could create dangerous fumes.
* **Keep Out of Reach of Children and Pets:** As with all cleaning products, keep this mixture out of reach of children and pets.
Troubleshooting
Sometimes, things don’t go exactly as planned. Here are a few common issues you might encounter and how to fix them:
* **Paste is too dry:** Add a little more detergent, a teaspoon at a time, until you reach the desired consistency.
* **Paste is too runny:** Add a bit more salt.
* **Stains are not coming off:** Let the paste sit on
Conclusion
So, there you have it! The salt and detergent cleaning hack – a simple, effective, and surprisingly powerful way to tackle stubborn stains and grime around your home. We’ve explored how this dynamic duo can transform your cleaning routine, offering a cost-effective alternative to harsh chemicals and expensive store-bought cleaners.
Why is this DIY trick a must-try? Because it’s more than just a cleaning method; it’s a testament to the power of simple ingredients working in harmony. The abrasive nature of salt, combined with the degreasing properties of detergent, creates a synergistic effect that lifts dirt and grime with ease. Think about it: you likely already have these ingredients in your pantry and laundry room. No special trips to the store, no complicated formulas, just pure, unadulterated cleaning power at your fingertips.
But the beauty of this hack lies not only in its simplicity but also in its versatility. Feel free to experiment with different types of salt. Coarse sea salt can provide extra scrubbing power for tough stains on surfaces like grout, while finer table salt is gentler for more delicate materials. Similarly, you can adjust the type of detergent you use based on the cleaning task. A mild dish soap is perfect for everyday cleaning, while a stronger laundry detergent can tackle tougher stains on fabrics.
Consider these variations to tailor the hack to your specific needs:
* For extra stubborn stains: Create a paste of salt, detergent, and a small amount of baking soda. The baking soda adds an extra boost of cleaning power and helps to deodorize.
* For cleaning burnt pots and pans: Sprinkle a generous amount of salt into the pot or pan, add a squirt of detergent, and then add just enough water to cover the burnt area. Let it soak for a few hours or overnight, then scrub away the residue.
* For cleaning bathroom tiles: Mix salt and detergent with a little water to form a paste. Apply the paste to the tiles, let it sit for a few minutes, then scrub with a brush and rinse thoroughly.
* For refreshing sponges: Soak your sponges in a solution of warm water, salt, and detergent to kill bacteria and remove odors.
We’re confident that once you try this salt and detergent cleaning hack, you’ll be amazed by the results. It’s a game-changer for anyone looking for a natural, effective, and affordable way to keep their home sparkling clean.
Don’t just take our word for it, though. We encourage you to try this DIY trick for yourself and see the difference it can make. We’re eager to hear about your experiences! Share your before-and-after photos, your favorite variations, and any tips or tricks you discover along the way. Let’s build a community of clean-home enthusiasts who are passionate about finding simple, effective solutions. So, grab your salt, grab your detergent, and get ready to experience the cleaning power of this incredible hack! We can’t wait to hear your success stories.
Frequently Asked Questions (FAQ)
Is the salt and detergent cleaning hack safe for all surfaces?
While the salt and detergent cleaning hack is generally safe for many surfaces, it’s always a good idea to test it in an inconspicuous area first, especially on delicate or sensitive materials. Avoid using it on surfaces that are easily scratched, such as polished wood or certain types of plastic. The abrasiveness of salt can potentially damage these surfaces. For painted surfaces, use a diluted solution and test it in a hidden spot to ensure it doesn’t affect the paint. When in doubt, err on the side of caution and opt for a gentler cleaning method.
What type of salt and detergent should I use?
The beauty of this hack is its flexibility. You can use common table salt, sea salt (fine or coarse), or even Epsom salt, depending on the cleaning task. Coarse salt is great for scrubbing tough stains, while finer salt is gentler on more delicate surfaces. As for detergent, dish soap is a good all-purpose option for general cleaning. For tougher stains or laundry, you can use laundry detergent. Just be sure to use a detergent that is safe for the surface you are cleaning. Avoid using detergents with bleach on colored surfaces, as it can cause discoloration.
Can I use this hack to clean my clothes?
Yes, you can use the salt and detergent cleaning hack to pre-treat stains on clothes. Create a paste of salt, detergent, and a little water, and apply it directly to the stain. Let it sit for 30 minutes to an hour before washing the garment as usual. This can be particularly effective for removing grease stains, food stains, and dirt. However, always test the paste on a hidden area of the fabric first to ensure it doesn’t cause any discoloration or damage. For delicate fabrics, use a milder detergent and avoid excessive scrubbing.
How does this cleaning hack work?
The salt and detergent cleaning hack works through a combination of physical and chemical actions. The salt acts as a mild abrasive, helping to scrub away dirt, grime, and stains. The detergent, on the other hand, acts as a surfactant, which means it reduces the surface tension of water, allowing it to penetrate and lift dirt and grease more effectively. The combination of these two ingredients creates a powerful cleaning solution that can tackle a wide range of cleaning tasks.
Is this cleaning hack environmentally friendly?
Compared to many commercial cleaning products, the salt and detergent cleaning hack is a more environmentally friendly option. It uses simple, readily available ingredients and avoids the harsh chemicals often found in store-bought cleaners. However, it’s still important to be mindful of the type of detergent you use. Opt for biodegradable and phosphate-free detergents whenever possible to minimize your environmental impact. Additionally, using less product overall is always a good practice for reducing waste and pollution.
How often can I use this cleaning hack?
You can use the salt and detergent cleaning hack as often as needed, depending on your cleaning needs. However, it’s important to be mindful of the surfaces you are cleaning and avoid excessive scrubbing, which can cause damage over time. For everyday cleaning, a diluted solution of salt and detergent is usually sufficient. For tougher stains, you may need to use a more concentrated solution and scrub more vigorously, but always test in an inconspicuous area first.
Can I add other ingredients to this cleaning hack?
Yes, you can definitely add other ingredients to enhance the cleaning power of this hack. Baking soda is a popular addition for its deodorizing and extra cleaning properties. Vinegar can also be added for its disinfecting and stain-removing abilities. Lemon juice is another great option for its natural cleaning and brightening properties. However, be careful when mixing different cleaning agents, as some combinations can be harmful. Never mix bleach with vinegar or ammonia, as this can create toxic fumes.
What are some safety precautions I should take when using this cleaning hack?
While the salt and detergent cleaning hack is generally safe, it’s always a good idea to take some basic safety precautions. Wear gloves to protect your hands from irritation, especially if you have sensitive skin. Avoid getting the solution in your eyes, and if you do, rinse immediately with plenty of water. Keep the cleaning solution out of reach of children and pets. And as mentioned before, always test the solution in an inconspicuous area before applying it to the entire surface.

Leave a Comment