

Growing Watermelons Successfully can feel like a daunting task, but trust me, with a few clever tricks and a little DIY spirit, you can be biting into juicy, homegrown watermelon this summer! I remember my first attempt – a tiny, pale fruit that barely resembled the watermelons I envisioned. But don’t let that discourage you!
Watermelons have a rich history, dating back thousands of years to Africa, where they were prized for their hydrating properties in arid climates. Over time, they’ve become a symbol of summer and a delicious treat enjoyed worldwide. But let’s face it, store-bought watermelons can be expensive and sometimes lack that intense flavor we crave. That’s where the magic of DIY comes in!
This article is packed with easy-to-follow home gardening tricks and DIY hacks that will help you growing watermelons successfully, even if you’re a beginner. We’ll cover everything from choosing the right variety for your climate to creating the perfect soil conditions and protecting your precious melons from pests. Imagine the satisfaction of serving a slice of your own, perfectly ripe watermelon at your next barbecue. So, grab your gardening gloves, and let’s get started on this rewarding journey!
Growing Watermelons: My Foolproof DIY Guide to Juicy Success!
Okay, let’s talk watermelons! I absolutely adore them, and there’s nothing quite like biting into a sweet, juicy watermelon you’ve grown yourself. It’s easier than you might think, and I’m going to walk you through my tried-and-true method for growing watermelons that are bursting with flavor. Get ready for some serious watermelon goodness!
Choosing the Right Watermelon Variety
Before we even think about planting, we need to pick the right watermelon variety for your climate and space. This is super important!
* Consider your climate: Some varieties thrive in shorter growing seasons, while others need long, hot summers.
* Think about space: Watermelons need room to sprawl. Bush varieties are great for smaller gardens, while vining types need plenty of space.
* Flavor preferences: Do you prefer a super sweet, red-fleshed watermelon, or something a little different like a yellow or orange variety?
Some of my personal favorites include:
* Sugar Baby: A classic, compact variety that’s perfect for smaller gardens. It matures quickly, which is great for cooler climates.
* Crimson Sweet: A larger, oblong watermelon with a deep red flesh and excellent flavor. It needs a longer growing season.
* Yellow Doll: A unique variety with a bright yellow flesh and a super sweet taste. It’s a real conversation starter!
* Blacktail Mountain: This is a great choice for cooler climates. It matures early and produces smaller, but very sweet, watermelons.
Once you’ve picked your variety, it’s time to get started!
Preparing the Soil: The Foundation for Success
Watermelons are heavy feeders, so preparing the soil is crucial. They need well-drained soil that’s rich in organic matter.
* Sunlight is key: Watermelons need at least 6-8 hours of direct sunlight per day. Choose a sunny spot in your garden.
* Soil testing: Ideally, you should test your soil to determine its pH and nutrient levels. Watermelons prefer a slightly acidic soil (pH 6.0-6.8).
* Amend the soil: If your soil is lacking in nutrients or doesn’t drain well, amend it with compost, well-rotted manure, or other organic matter. I usually add a generous amount of compost to my watermelon patch.
* Create mounds or rows: Watermelons grow best on raised mounds or rows. This helps with drainage and warms the soil faster.
Starting Watermelon Seeds: Indoors or Out?
You can either start watermelon seeds indoors or direct sow them in the garden. I prefer starting them indoors, especially if you have a shorter growing season.
Starting Seeds Indoors: A Head Start
1. Timing is everything: Start your seeds about 4-6 weeks before the last expected frost.
2. Choose your containers: Use peat pots or biodegradable pots to avoid disturbing the roots when transplanting.
3. Sow the seeds: Plant 2-3 seeds per pot, about 1 inch deep.
4. Keep them warm: Watermelon seeds need warm temperatures to germinate (70-85°F). Use a heat mat if necessary.
5. Provide light: Once the seeds germinate, provide plenty of light. A grow light is ideal, but a sunny windowsill can also work.
6. Thin the seedlings: Once the seedlings have a few true leaves, thin them to one plant per pot. Choose the strongest seedling.
7. Harden off the seedlings: Before transplanting, gradually acclimate the seedlings to outdoor conditions. Start by placing them outside for a few hours each day, gradually increasing the time over a week or two.
Direct Sowing Seeds: A Simpler Approach
1. Wait for warm weather: Direct sow seeds only after the soil has warmed up to at least 70°F.
2. Prepare the soil: Make sure the soil is well-drained and amended with compost.
3. Sow the seeds: Plant 4-5 seeds per hill, about 1 inch deep.
4. Water gently: Keep the soil moist but not soggy.
5. Thin the seedlings: Once the seedlings have a few true leaves, thin them to 1-2 plants per hill.
Transplanting Watermelon Seedlings: Giving Them Room to Grow
Whether you started your seeds indoors or direct sowed them, you’ll eventually need to transplant the seedlings to their final location.
1. Choose a sunny day: Transplant on a cloudy day or in the late afternoon to avoid shocking the seedlings.
2. Dig the holes: Dig holes that are slightly larger than the root balls of the seedlings. Space the holes according to the variety’s recommendations (usually 2-3 feet apart for bush varieties and 4-6 feet apart for vining varieties).
3. Carefully remove the seedlings: Gently remove the seedlings from their pots, being careful not to damage the roots. If you used peat pots, you can plant the entire pot.
4. Plant the seedlings: Place the seedlings in the holes and backfill with soil.
5. Water thoroughly: Water the seedlings well after transplanting.
6. Mulch: Apply a layer of mulch around the plants to help retain moisture and suppress weeds. I like to use straw or shredded leaves.
Watering and Fertilizing: Keeping Them Happy and Healthy
Watermelons need consistent watering, especially during hot weather. They also benefit from regular fertilization.
* Water deeply and regularly: Water deeply at the base of the plants, avoiding wetting the foliage. Aim for about 1-2 inches of water per week.
* Fertilize regularly: Use a balanced fertilizer (e.g., 10-10-10) every 2-3 weeks. You can also use a liquid fertilizer or compost tea.
* Side-dress with compost: Side-dress the plants with compost every few weeks to provide a slow-release source of nutrients.
* Reduce watering as the fruits ripen: Once the watermelons start to ripen, reduce watering to prevent them from splitting.
Pollination: Ensuring Fruit Set
Watermelons need to be pollinated in order to produce fruit. Bees are the primary pollinators, so it’s important to attract them to your garden.
* Plant pollinator-friendly flowers: Plant flowers that attract bees, such as sunflowers, zinnias, and lavender.
* Avoid using pesticides: Pesticides can harm bees and other pollinators.
* Hand-pollinate if necessary: If you’re not seeing enough bees in your garden, you can hand-pollinate the flowers. Use a small paintbrush to transfer pollen from the male flowers to the female flowers. Female flowers have a small fruit at the base of the flower.
Pest and Disease Control: Protecting Your Crop
Watermelons can be susceptible to various pests and diseases. Here’s how to protect your crop:
* Common pests: Aphids, squash bugs, and cucumber beetles can damage watermelon plants. Use insecticidal soap or neem oil to control these pests.
* Common diseases: Powdery mildew and fusarium wilt are common diseases that can affect watermelons. Use a fungicide or choose disease-resistant varieties.
* Crop rotation: Rotate your crops each year to prevent soilborne diseases from building up.
* Good sanitation: Remove any diseased or dead plant material from your garden to prevent the spread of disease.
Harvesting Watermelons: The Sweet Reward
Knowing when to harvest a watermelon can be tricky, but here are a few signs to look for:
* The tendril closest to the fruit turns brown and dries up.
* The bottom of the watermelon (the “ground spot”) turns from white to yellow.
* The watermelon sounds hollow when you thump it.
* The rind becomes dull and loses its shine.
Once you think your watermelon is ripe, give it a try! Cut it from the vine with a sharp knife, leaving a few inches of stem attached.
Enjoying Your Watermelon: The Best Part!
Now for the best part – enjoying the fruits (or rather, the watermelon!) of your labor. There’s nothing quite like a slice of homegrown watermelon on a hot summer day. You can eat it plain, add it to salads, or even make watermelon juice or smoothies.
Tips for Extra Sweetness
* Don’t overwater as it ripens: Reducing water near harvest concentrates the sugars.
* Harvest in the afternoon: Sugar content is often highest after a sunny day.
* Chill before serving: A chilled watermelon is always more refreshing.
Growing watermelons is a rewarding experience. With a little bit of planning and effort, you
Conclusion
So, there you have it! Mastering the art of growing watermelons successfully isn’t some unattainable dream reserved for seasoned farmers. With a little planning, the right techniques, and a dash of patience, you can cultivate your own juicy, refreshing watermelons right in your backyard. We’ve covered everything from selecting the perfect variety for your climate to nurturing those delicate seedlings and protecting your precious fruits from pests and diseases.
Why is this DIY approach a must-try? Because nothing beats the taste of a homegrown watermelon, bursting with flavor and sweetness that you simply can’t find in store-bought varieties. Plus, you have complete control over the growing process, ensuring that your watermelons are free from harmful chemicals and pesticides. You’ll also experience the immense satisfaction of nurturing a plant from seed to harvest, a truly rewarding experience for any gardener.
But don’t stop there! Experiment with different watermelon varieties to discover your favorites. Try growing smaller, personal-sized watermelons like Sugar Baby or explore unique heirloom varieties for a burst of unexpected flavor. Consider companion planting with herbs like basil or marigolds to deter pests and attract beneficial insects. You can even try vertical gardening techniques to save space and add a visually stunning element to your garden.
Remember, growing watermelons successfully is a journey of learning and discovery. Don’t be afraid to make mistakes and adapt your approach as needed. The most important thing is to get your hands dirty, enjoy the process, and savor the fruits (literally!) of your labor.
We’re confident that with the knowledge and tips shared in this guide, you’ll be well on your way to harvesting a bountiful crop of delicious watermelons. Now it’s your turn! Grab your seeds, prepare your garden, and embark on this exciting adventure.
Don’t forget to share your experiences with us! We’d love to hear about your successes, challenges, and any unique tips or tricks you discover along the way. Post photos of your watermelon harvests on social media and tag us – we can’t wait to see what you grow! Happy gardening!
Frequently Asked Questions (FAQ)
Q: What is the best time to start watermelon seeds indoors?
A: The ideal time to start watermelon seeds indoors is typically 4-6 weeks before the last expected frost in your area. This allows the seedlings to develop a strong root system before being transplanted outdoors. Check your local weather forecasts and planting calendars to determine the appropriate timing for your region. Starting too early can result in leggy, weak seedlings, while starting too late may delay your harvest.
Q: How much space do watermelons need to grow?
A: Watermelons are sprawling plants that require ample space to thrive. Generally, allow at least 3-4 feet between plants and 6-8 feet between rows. This spacing allows for proper air circulation and sunlight penetration, which are essential for healthy growth and fruit development. If you’re growing watermelons in containers, choose large pots (at least 20 gallons) and provide support for the vines to climb.
Q: What kind of soil is best for growing watermelons?
A: Watermelons prefer well-drained, sandy loam soil that is rich in organic matter. The soil should have a pH level between 6.0 and 6.8. Before planting, amend the soil with compost, aged manure, or other organic materials to improve its fertility and drainage. Avoid heavy clay soils, as they can become waterlogged and hinder root growth.
Q: How often should I water my watermelon plants?
A: Watermelons need consistent moisture, especially during fruit development. Water deeply and regularly, aiming for about 1-2 inches of water per week. Avoid overhead watering, as it can promote fungal diseases. Instead, water at the base of the plants, using a soaker hose or drip irrigation system. Reduce watering as the fruits ripen to prevent them from cracking.
Q: What are some common pests and diseases that affect watermelons?
A: Common pests that can affect watermelons include aphids, squash bugs, cucumber beetles, and vine borers. Diseases include powdery mildew, fusarium wilt, and anthracnose. Regularly inspect your plants for signs of pests or diseases and take appropriate action. Use organic pest control methods, such as insecticidal soap or neem oil, to control pests. Ensure good air circulation and avoid overhead watering to prevent diseases. Consider using disease-resistant watermelon varieties.
Q: How do I know when a watermelon is ripe?
A: Determining when a watermelon is ripe can be tricky, but there are several indicators to look for. First, check the tendril closest to the fruit stem. When this tendril turns brown and dries up, it’s a good sign that the watermelon is nearing ripeness. Second, look at the spot where the watermelon rests on the ground. This spot should turn from white to a creamy yellow color. Finally, thump the watermelon with your knuckles. A ripe watermelon will sound hollow and deep.
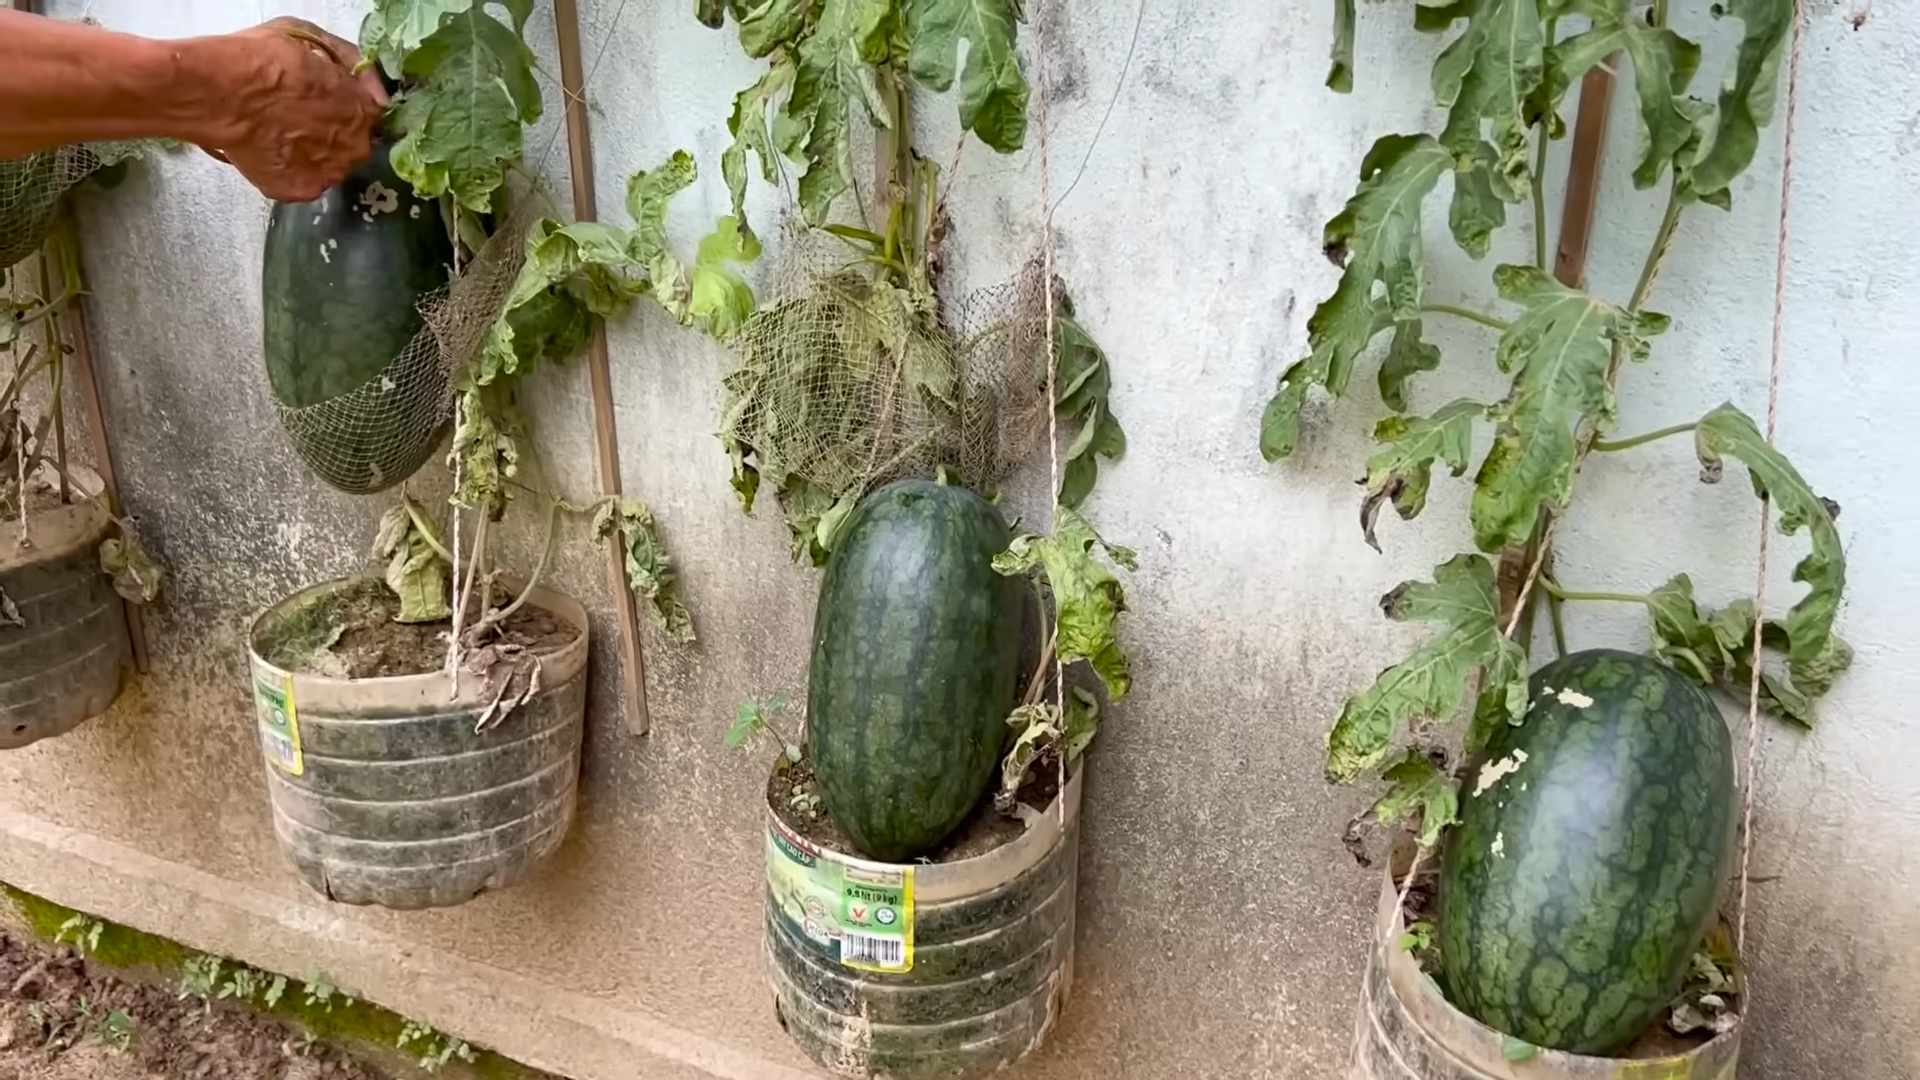
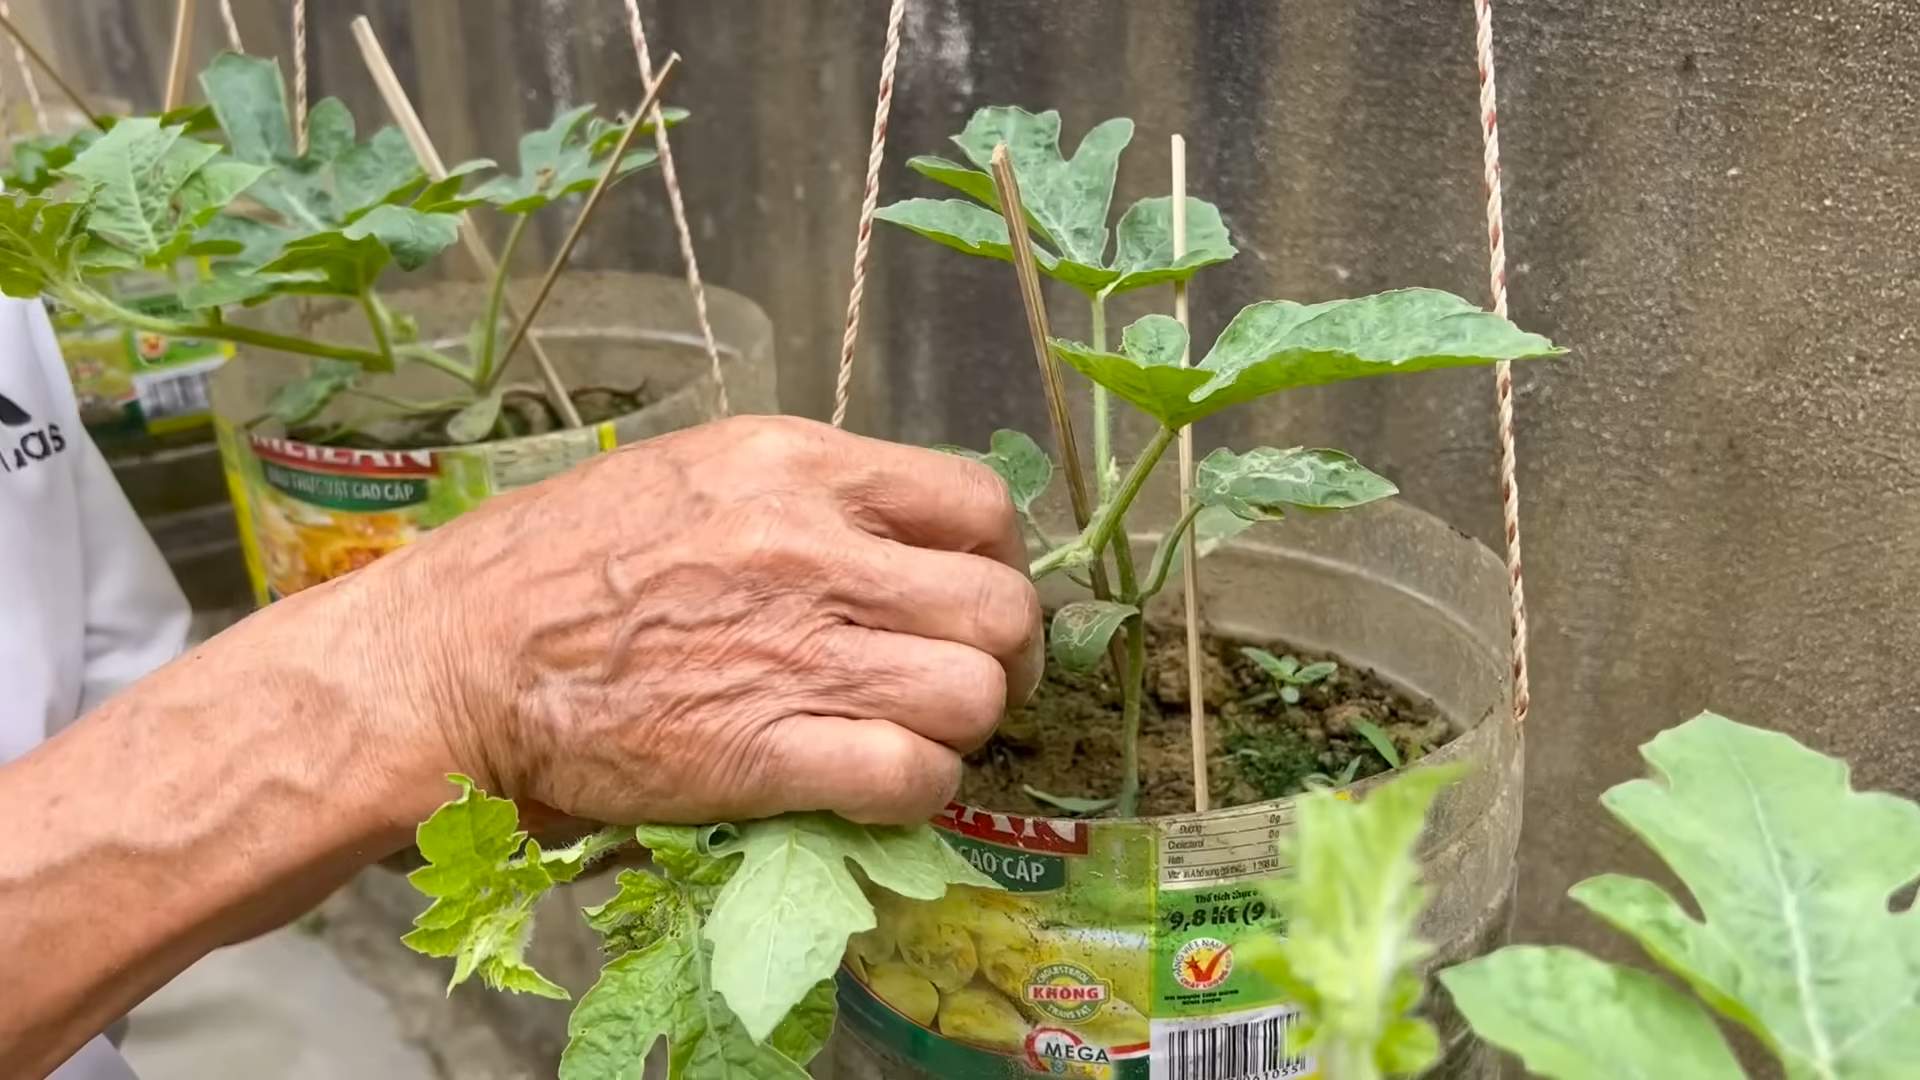
Q: Can I grow watermelons in containers?
A: Yes, you can grow watermelons in containers, but it requires careful planning and attention. Choose a large container (at least 20 gallons) with good drainage. Select a compact or bush-type watermelon variety that is suitable for container growing. Use a high-quality potting mix and provide regular watering and fertilization. You may also need to provide support for the vines to climb.
Q: What are some good companion plants for watermelons?
A: Companion planting can help improve the health and productivity of your watermelon plants. Good companion plants for watermelons include basil, marigolds, nasturtiums, and oregano. Basil repels aphids and other pests, while marigolds deter nematodes. Nasturtiums attract beneficial insects, and oregano helps to prevent fungal diseases. Avoid planting watermelons near potatoes or tomatoes, as they can compete for nutrients.
Q: How can I improve the sweetness of my watermelons?
A: Several factors can influence the sweetness of watermelons. First, choose a watermelon variety that is known for its sweetness. Second, ensure that your plants receive adequate sunlight (at least 6-8 hours per day). Third, provide regular watering and fertilization, but avoid over-fertilizing with nitrogen, as it can promote leafy growth at the expense of fruit development. Finally, allow the watermelons to ripen fully on the vine before harvesting.
Q: My watermelon plant is producing flowers, but no fruit. What could be the problem?
A: There are several reasons why your watermelon plant may be producing flowers but no fruit. One common reason is a lack of pollination. Watermelons require pollination to set fruit, and this is typically done by bees. Attract pollinators to your garden by planting flowers that provide nectar and pollen. You can also hand-pollinate the flowers by transferring pollen from the male flowers to the female flowers using a small brush. Other possible causes include nutrient deficiencies, insufficient sunlight, or extreme temperatures.

Leave a Comment