

Cleaning Grout with Peroxide: Are you tired of staring at dingy, discolored grout lines that make your otherwise sparkling tiles look… well, less than sparkling? I know I am! It’s a common household woe, and believe me, I’ve tried my fair share of solutions. But before you reach for those harsh chemicals with questionable fumes, let’s talk about a simple, effective, and surprisingly gentle solution: hydrogen peroxide.
Grout, that porous material between your tiles, has been a staple in construction and design for centuries. From the intricate mosaics of ancient Rome to the modern kitchens and bathrooms of today, grout has played a crucial role. However, its very nature makes it a magnet for dirt, grime, and mildew. Over time, these invaders can leave your grout looking stained and unappealing, no matter how diligently you clean your tiles.
That’s where the magic of cleaning grout with peroxide comes in. This readily available household item is a powerful oxidizing agent, meaning it breaks down stains and kills mold without the harshness of bleach. In this article, I’m going to share my favorite DIY tricks and hacks for using hydrogen peroxide to restore your grout to its former glory. You’ll learn how to create effective cleaning solutions, apply them like a pro, and maintain your grout’s pristine appearance for longer. Say goodbye to stubborn stains and hello to a brighter, cleaner home!
DIY Grout Cleaning with Hydrogen Peroxide: A Sparkling Solution!
Hey there, fellow DIY enthusiasts! Are you tired of staring at dingy, discolored grout lines in your bathroom or kitchen? I know I was! No matter how much I scrubbed, those stubborn stains just wouldn’t budge. That’s when I discovered the magic of hydrogen peroxide. It’s a safe, effective, and surprisingly affordable way to bring your grout back to life. Let me walk you through my tried-and-true method for sparkling clean grout using hydrogen peroxide.
What You’ll Need
Before we dive in, let’s gather our supplies. This is a pretty straightforward project, so you probably already have most of these items on hand.
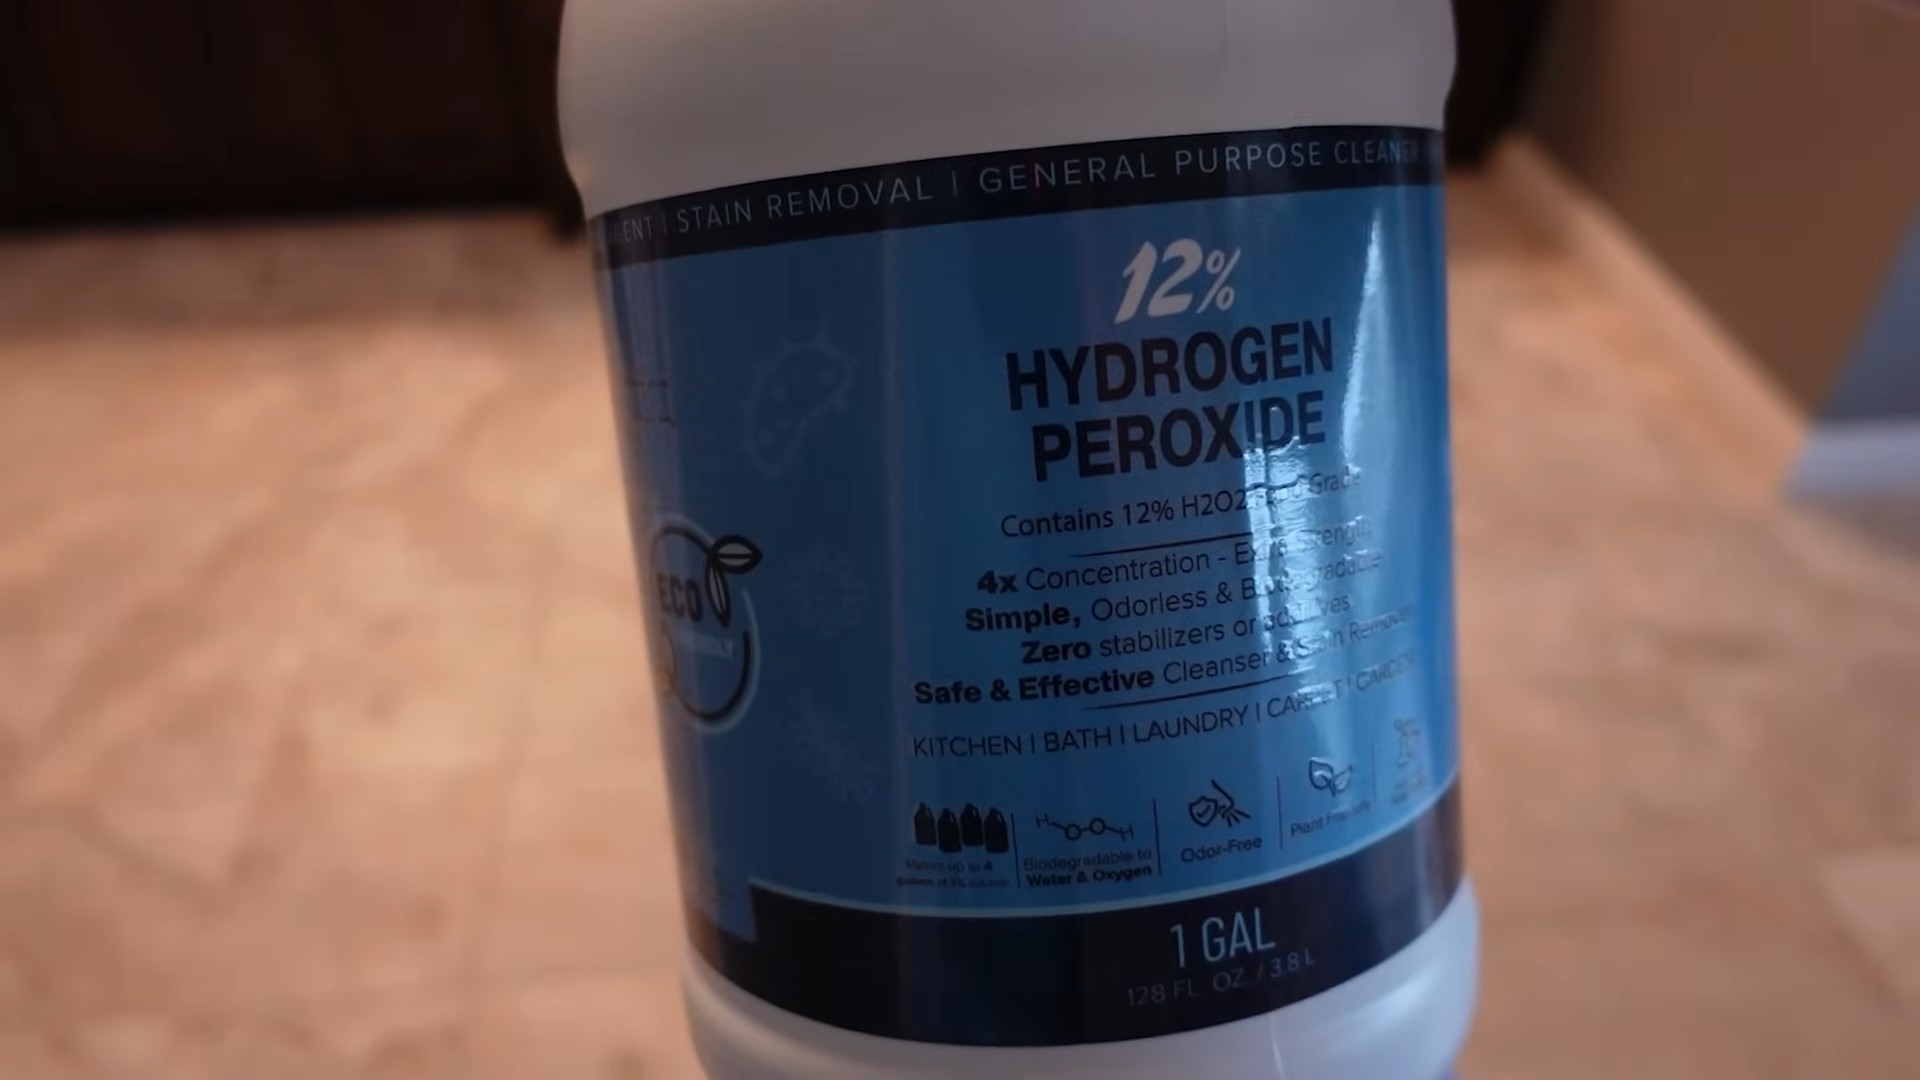
* **Hydrogen Peroxide (3% solution):** This is the standard concentration you find at the drugstore. Don’t go for anything stronger unless you’re experienced and know what you’re doing.
* **Spray Bottle:** A clean spray bottle is essential for even application.
* **Old Toothbrush or Grout Brush:** An old toothbrush works great for smaller areas, but a grout brush with a longer handle will save your back if you’re tackling a larger space.
* **Baking Soda (Optional):** For extra stubborn stains, baking soda can create a powerful cleaning paste.
* **Dish Soap (Optional):** A drop or two of dish soap can help cut through grease and grime.
* **Clean Cloth or Sponge:** For wiping away the peroxide and loosened dirt.
* **Gloves:** Protect your hands from prolonged exposure to hydrogen peroxide.
* **Eye Protection (Optional):** While not strictly necessary, eye protection is always a good idea when working with cleaning solutions.
* **Small Bowl (If using baking soda paste):** For mixing the baking soda and peroxide.
* **Paper Towels (Optional):** For soaking up excess liquid.
Preparing Your Grout for Cleaning
Before you start spraying and scrubbing, it’s important to prep the area. This will help the hydrogen peroxide work its magic more effectively.
1. **Clear the Area:** Remove any rugs, mats, or other items that might get in the way. You want to have easy access to all the grout lines.
2. **Sweep or Vacuum:** Get rid of any loose dirt, dust, or debris on the tile surface. This will prevent you from just pushing the dirt around when you start cleaning.
3. **Wipe Down the Tiles:** Use a damp cloth or sponge to wipe down the tiles surrounding the grout. This will remove any surface grime and allow the hydrogen peroxide to focus on the grout itself.
Cleaning Grout with Hydrogen Peroxide: The Step-by-Step Guide
Alright, let’s get down to the nitty-gritty! Here’s how I clean my grout using hydrogen peroxide:
1. **Pour Hydrogen Peroxide into Spray Bottle:** Carefully pour the hydrogen peroxide into your clean spray bottle. Make sure you don’t overfill it.
2. **Spray the Grout Lines:** Generously spray the hydrogen peroxide directly onto the grout lines. Make sure you saturate the grout, but avoid spraying excessively onto the surrounding tiles.
3. **Let it Sit (Important!):** This is the key to success! Allow the hydrogen peroxide to sit on the grout for at least 10-15 minutes. For heavily stained grout, you can let it sit for up to 30 minutes. The longer it sits, the more time it has to break down the stains.
4. **Scrub the Grout:** Using your old toothbrush or grout brush, scrub the grout lines thoroughly. Apply firm pressure and work in small sections. You should start to see the dirt and grime lifting away.
5. **Wipe Away the Peroxide and Dirt:** Use a clean, damp cloth or sponge to wipe away the hydrogen peroxide and loosened dirt. Rinse the cloth or sponge frequently to avoid spreading the dirt around.
6. **Repeat if Necessary:** For stubborn stains, you may need to repeat steps 2-5. Don’t be discouraged if the grout doesn’t look perfect after the first try.
7. **Rinse Thoroughly:** Once you’re satisfied with the results, rinse the entire area with clean water to remove any remaining hydrogen peroxide residue.
8. **Dry the Area:** Use a clean towel or let the area air dry completely.
Tackling Stubborn Stains: The Baking Soda Paste Method
Sometimes, hydrogen peroxide alone isn’t enough to tackle those really tough stains. That’s where baking soda comes in! This simple paste can add some extra cleaning power.
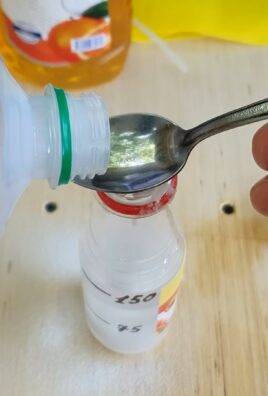
1. **Make the Paste:** In a small bowl, mix together baking soda and hydrogen peroxide to form a thick paste. The consistency should be similar to toothpaste. I usually start with about 1/4 cup of baking soda and add hydrogen peroxide a little at a time until I get the right consistency.
2. **Apply the Paste:** Using your fingers or a small spatula, apply the baking soda paste directly to the stained grout lines. Make sure you cover the entire stain.
3. **Let it Sit (Longer this Time!):** Allow the paste to sit on the grout for at least 30 minutes, or even longer for really stubborn stains. I’ve even left it on overnight in some cases!
4. **Scrub the Grout:** Using your old toothbrush or grout brush, scrub the grout lines thoroughly. The baking soda will act as a mild abrasive, helping to lift away the stains.
5. **Rinse Thoroughly:** Rinse the area thoroughly with clean water to remove all traces of the baking soda paste.
6. **Dry the Area:** Use a clean towel or let the area air dry completely.
Adding Dish Soap for Extra Cleaning Power (Optional)
If your grout is particularly greasy or grimy, adding a drop or two of dish soap to the hydrogen peroxide can help cut through the grease and improve the cleaning power.
1. **Mix the Solution:** Add a drop or two of dish soap to your spray bottle of hydrogen peroxide. Don’t add too much, or you’ll end up with a foamy mess.
2. **Follow the Cleaning Steps:** Follow the same cleaning steps as outlined above, using the hydrogen peroxide and dish soap mixture instead of plain hydrogen peroxide.
Important Tips and Considerations
* **Test in an Inconspicuous Area:** Before cleaning your entire grout surface, test the hydrogen peroxide in a small, inconspicuous area to make sure it doesn’t damage or discolor the grout or tiles.
* **Ventilation is Key:** Make sure the area is well-ventilated while you’re cleaning. Open windows or turn on a fan to circulate the air.
* **Avoid Mixing with Other Cleaners:** Never mix hydrogen peroxide with other cleaning products, especially bleach. This can create dangerous fumes.
* **Be Patient:** Cleaning grout can be a bit time-consuming, especially if it’s heavily stained. Don’t get discouraged if it takes a few tries to get the results you want.
* **Consider Sealing Your Grout:** Once your grout is clean, consider sealing it to help prevent future stains. Grout sealers create a protective barrier that makes it easier to clean and maintain your grout. You can find grout sealers at most home improvement stores.
* Safety First! Always wear gloves to protect your hands and consider eye protection, especially when using the baking soda paste.
Maintaining Your Sparkling Clean Grout
Once you’ve achieved that sparkling clean grout, you’ll want to keep it that way! Here are a few tips for maintaining your grout and preventing future stains:
* **Wipe Up Spills Immediately:** The sooner you wipe up spills, the less likely they are to stain your grout.
* **Regular Cleaning:** Clean your grout regularly with a mild cleaner and a grout brush. This will prevent dirt and grime from building up.
* **Ventilate Your Bathroom:** After showering, ventilate your bathroom to help prevent mold and mildew growth.
* **Reseal Your Grout Periodically:** Reseal your grout every year or two to maintain its protective barrier.
I hope this guide helps you achieve the sparkling clean grout you’ve always dreamed of! It might take a little elbow grease, but the results are definitely worth it. Happy cleaning!
Conclusion
So, there you have it! Cleaning grout can feel like a Herculean task, a never-ending battle against grime and discoloration. But with this simple, effective, and surprisingly affordable DIY trick using peroxide, you can reclaim your grout and restore your tile surfaces to their former glory. We’ve shown you how to harness the power of hydrogen peroxide to lift away years of accumulated dirt, mildew, and stains, leaving you with a sparkling clean finish that will brighten your entire space.
Why is this a must-try? Because it’s a game-changer! Forget spending hours scrubbing with harsh chemicals that can damage your grout and leave behind unpleasant odors. This method is gentle, yet powerful, and utilizes a readily available household item. It’s also significantly cheaper than hiring professional cleaners or purchasing expensive grout cleaning products. Plus, the satisfaction of seeing your grout transform before your eyes is incredibly rewarding.
But the beauty of this DIY trick lies in its adaptability. While we’ve outlined a straightforward method, feel free to experiment with variations to suit your specific needs and preferences. For particularly stubborn stains, consider creating a paste of hydrogen peroxide and baking soda for extra scrubbing power. You can also use a grout brush with stiffer bristles for more aggressive cleaning, but be mindful not to damage the grout itself. If you’re dealing with colored grout, test the peroxide in an inconspicuous area first to ensure it doesn’t affect the color. And for those who prefer a more natural approach, adding a few drops of essential oils like tea tree or eucalyptus can provide an extra boost of cleaning power and a refreshing scent.
This method of cleaning grout with peroxide is not only effective but also environmentally friendly. By reducing your reliance on harsh chemicals, you’re contributing to a healthier home and a cleaner planet.
We’re confident that once you try this DIY trick, you’ll be amazed by the results. It’s a simple, cost-effective, and satisfying way to revitalize your tile surfaces and create a cleaner, brighter living space. So, grab your hydrogen peroxide, gather your supplies, and get ready to transform your grout!
Don’t just take our word for it – give it a try and see for yourself! We’re eager to hear about your experiences and see your before-and-after photos. Share your results, tips, and variations in the comments below. Let’s build a community of grout-cleaning enthusiasts and help each other achieve sparkling clean homes! We encourage you to share this article with your friends and family who are also struggling with dirty grout. Together, we can conquer the grout grime and enjoy the beauty of clean, refreshed tile surfaces.
Frequently Asked Questions (FAQs)
What concentration of hydrogen peroxide should I use for cleaning grout?
The recommended concentration of hydrogen peroxide for cleaning grout is typically 3%. This is the standard concentration found in most drugstores and supermarkets. Higher concentrations can be more effective for stubborn stains, but they also pose a greater risk of damaging the grout or causing skin irritation. If you choose to use a higher concentration, be sure to wear gloves and eye protection, and test it in an inconspicuous area first. Always dilute higher concentrations to a 3% solution for safer use.
Is hydrogen peroxide safe to use on all types of grout?
While hydrogen peroxide is generally safe for most types of grout, it’s always a good idea to test it in an inconspicuous area first, especially if you have colored grout. Some colored grouts may be susceptible to fading or discoloration when exposed to hydrogen peroxide. If you notice any adverse effects, discontinue use immediately. For epoxy grout, hydrogen peroxide is generally safe, but always refer to the manufacturer’s instructions for specific cleaning recommendations.
How long should I let the hydrogen peroxide sit on the grout before scrubbing?
The ideal dwell time for hydrogen peroxide on grout is typically 10-15 minutes. This allows the peroxide to penetrate the grout and break down the dirt and stains. For heavily soiled grout, you can let it sit for up to 30 minutes, but be sure to monitor it closely to prevent any damage. Avoid letting the peroxide dry completely on the grout, as this can make it more difficult to remove.
What type of brush is best for scrubbing grout?
A grout brush with stiff nylon bristles is generally the best choice for scrubbing grout. These brushes are designed to effectively remove dirt and grime from the grout lines without damaging the grout itself. You can also use an old toothbrush for smaller areas or hard-to-reach places. Avoid using metal brushes or abrasive scrub pads, as these can scratch or damage the grout.
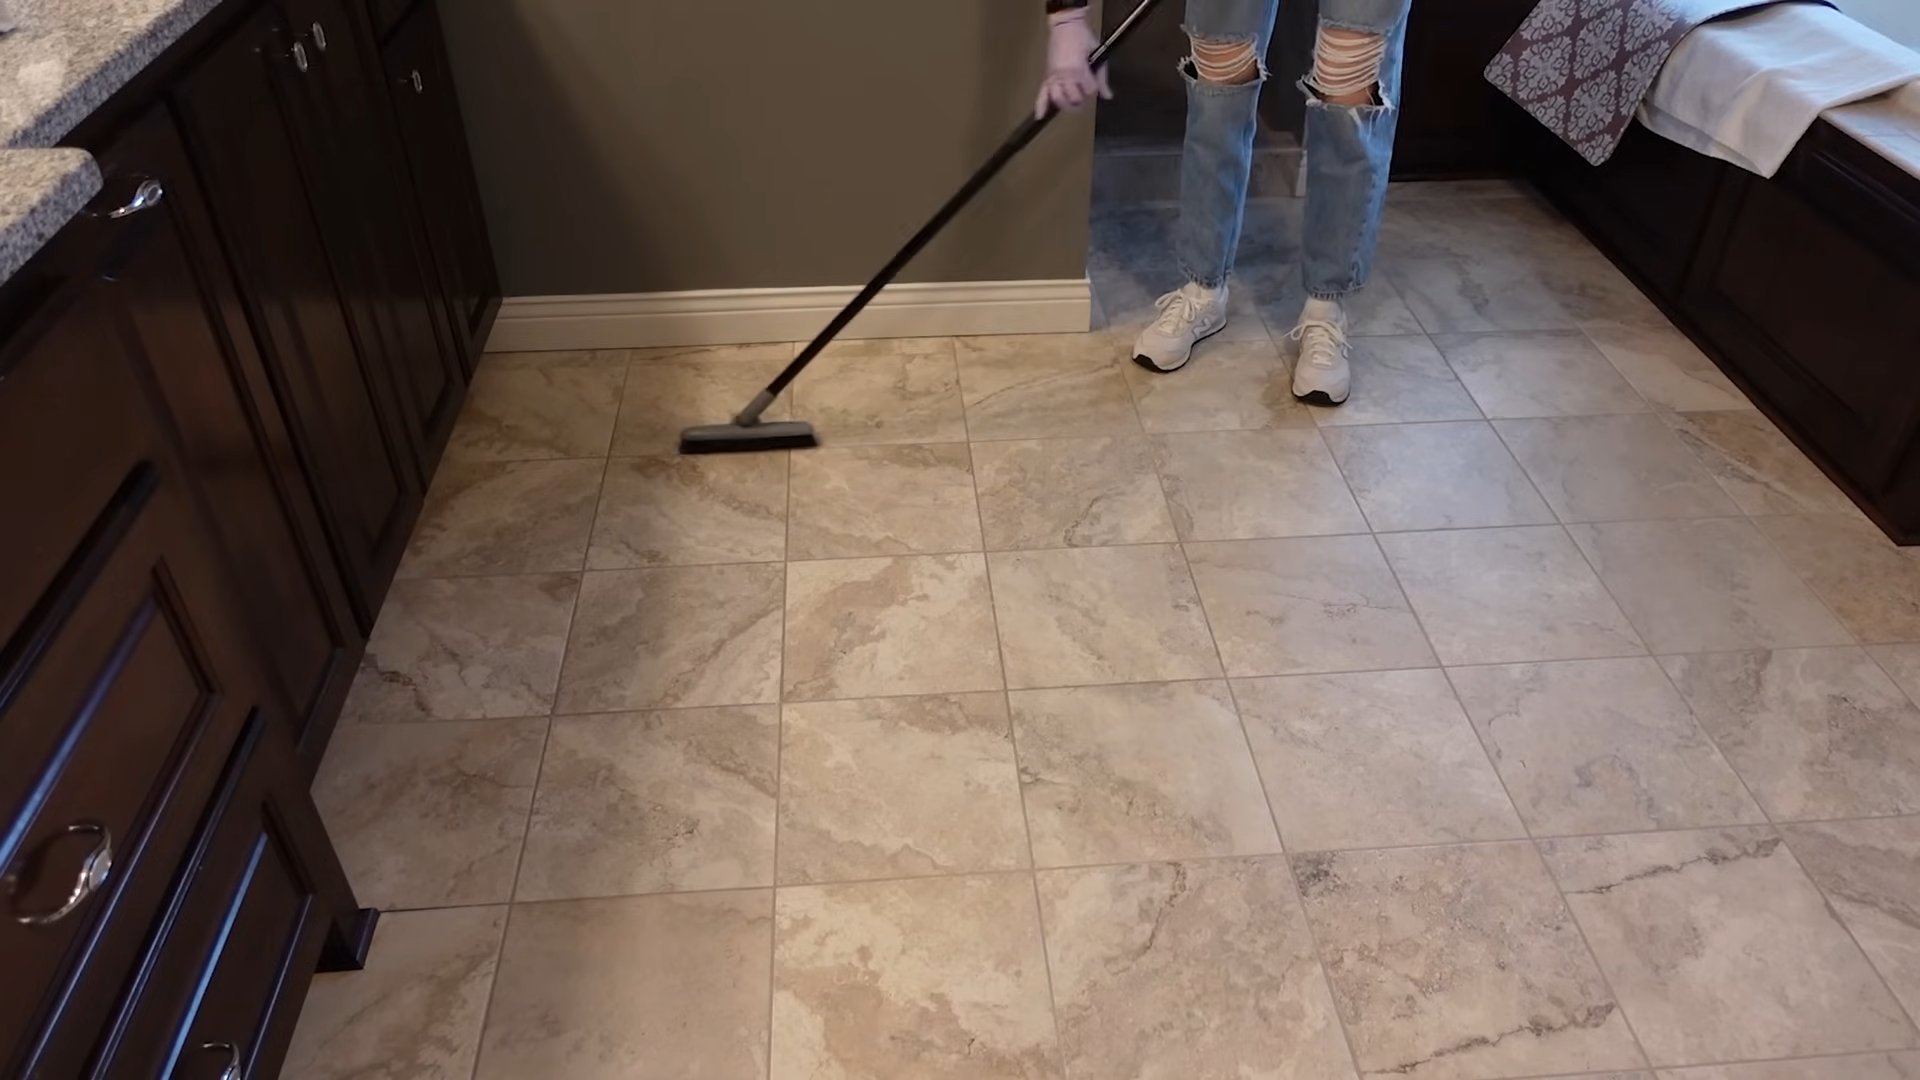
Can I use hydrogen peroxide to clean grout on floors?
Yes, hydrogen peroxide can be used to clean grout on floors. However, it’s important to take precautions to prevent slipping. After applying the peroxide, wipe up any excess liquid with a clean cloth or mop. You can also place a fan in the room to help dry the floor more quickly. Be sure to wear shoes with good traction while cleaning the floor.
How often should I clean my grout with hydrogen peroxide?
The frequency of cleaning your grout with hydrogen peroxide will depend on the amount of traffic and exposure to dirt and moisture. In general, it’s a good idea to clean your grout every 1-3 months to prevent the buildup of dirt and stains. For high-traffic areas like bathrooms and kitchens, you may need to clean it more frequently. Regular cleaning will help keep your grout looking its best and prevent the need for more aggressive cleaning methods.
What are some alternatives to hydrogen peroxide for cleaning grout?
While hydrogen peroxide is an effective and readily available option, there are other alternatives you can use to clean grout. Baking soda paste, vinegar, and commercial grout cleaners are all popular choices. Baking soda is a gentle abrasive that can help scrub away dirt and stains. Vinegar is a natural disinfectant that can help kill mold and mildew. Commercial grout cleaners are specifically formulated to remove tough stains and grime. Be sure to follow the manufacturer’s instructions when using commercial grout cleaners.
How can I prevent grout from getting dirty in the first place?
Preventing grout from getting dirty is the best way to avoid the need for frequent cleaning. Sealing your grout is a great way to protect it from stains and moisture. Grout sealers create a barrier that prevents dirt and liquids from penetrating the grout. You can also wipe up spills and messes immediately to prevent them from soaking into the grout. Regular sweeping and mopping can also help keep your grout clean.
Is it necessary to rinse the grout after cleaning with hydrogen peroxide?
While not always necessary, rinsing the grout after cleaning with hydrogen peroxide is generally recommended. Rinsing helps remove any residual peroxide and loosened dirt, leaving your grout cleaner and brighter. Simply wipe the grout with a damp cloth or mop after scrubbing.
Can I use hydrogen peroxide to remove mold from grout?
Yes, hydrogen peroxide is effective at killing mold and mildew on grout. Its oxidizing properties help break down the mold spores and prevent them from returning. For best results, spray the affected area with hydrogen peroxide and let it sit for 10-15 minutes before scrubbing. You may need to repeat the process for stubborn mold stains. Be sure to ventilate the area well while cleaning to avoid inhaling mold spores.


Leave a Comment