

Growing Sweet Potatoes can seem daunting, but trust me, with a few clever tricks and a little DIY spirit, you can harvest a bounty of these delicious and nutritious tubers right in your own backyard! Forget those bland, store-bought sweet potatoes – imagine the satisfaction of digging up your own, bursting with flavor and freshness.
Sweet potatoes have a rich history, dating back thousands of years in Central and South America. They were a staple food for many indigenous cultures and eventually made their way across the globe, becoming a beloved ingredient in cuisines worldwide. From sweet potato pie in the American South to roasted sweet potatoes with spices in India, their versatility is undeniable.
But why bother with the effort of growing them yourself? Well, for starters, homegrown sweet potatoes taste infinitely better! Plus, you have complete control over the growing process, ensuring they’re free from harmful pesticides and chemicals. In this article, I’m going to share some easy-to-follow DIY tricks and hacks that will make growing sweet potatoes a breeze, even if you’re a beginner gardener. We’ll cover everything from starting slips (those little sprouts that grow from the potato) to choosing the right soil and providing the perfect amount of sunlight. So, grab your gardening gloves, and let’s get started on your sweet potato adventure!
Growing Sweet Potatoes: A Beginner’s Guide to a Bountiful Harvest
Alright, let’s dive into the wonderful world of growing sweet potatoes! I’m going to walk you through everything you need to know to get those delicious, orange (or purple, or white!) tubers growing in your own backyard. It’s easier than you might think, and the reward of harvesting your own sweet potatoes is incredibly satisfying.
Getting Started: From Slips to Soil
Before we even think about planting, we need to talk about “slips.” Sweet potato slips are basically sprouts that grow from the sweet potato itself. You can’t just plant a sweet potato and expect it to grow (well, you *can*, but you won’t get the yield you’re hoping for). Slips are the key!
Here’s how to get your slips going:
* Choosing Your Sweet Potato: Select a healthy, organic sweet potato from the grocery store or farmer’s market. Organic is important because non-organic potatoes are often treated to prevent sprouting. Look for one that’s firm and free from blemishes.
* The Water Method: This is the most common and, in my opinion, the easiest method.
* Materials: You’ll need your sweet potato, a glass or jar, toothpicks, and water.
* Procedure:
1. Fill the glass or jar with water, leaving about an inch of space at the top.
2. Insert toothpicks around the middle of the sweet potato, spacing them evenly. These will act as supports to suspend the potato in the water.
3. Place the sweet potato in the glass, pointy end down, so that the bottom half is submerged in water.
4. Place the glass in a warm, sunny location. A windowsill is perfect!
5. Change the water every few days to keep it fresh.
6. Wait patiently! It can take several weeks for slips to start sprouting. You’ll see little roots emerging from the bottom and sprouts (the slips) growing from the top.
* The Soil Method: This method involves burying the sweet potato in soil.
* Materials: You’ll need a container (a large pot or even a plastic storage bin will work), potting soil, and your sweet potato.
* Procedure:
1. Fill the container with potting soil, leaving a few inches of space at the top.
2. Bury the sweet potato horizontally in the soil, leaving the top third exposed.
3. Water the soil thoroughly.
4. Place the container in a warm, sunny location.
5. Keep the soil consistently moist, but not waterlogged.
6. Again, be patient! Slips will emerge from the soil in a few weeks.
* Harvesting Your Slips: Once the slips are about 6-8 inches tall, they’re ready to be harvested.
* Gently twist or cut the slips off the sweet potato, as close to the base as possible. Try to get as much of the stem as possible.
* Place the slips in a glass of water to encourage root growth. Change the water daily.
* Wait about a week for the slips to develop a good root system. They’re ready to plant when the roots are about an inch or two long.
Preparing Your Garden Bed: Location, Location, Location!
Sweet potatoes are sun-loving plants, so you’ll need to choose a location that gets at least 6-8 hours of direct sunlight per day. They also prefer well-drained soil. If your soil is heavy clay, you’ll need to amend it with compost or other organic matter to improve drainage.
Here’s a breakdown of what to consider:
* Sunlight: Full sun is essential for a good sweet potato harvest.
* Soil: Well-drained, sandy loam is ideal. Avoid heavy clay soils that retain too much water.
* Soil pH: Sweet potatoes prefer a slightly acidic soil pH of 5.5 to 6.5. You can test your soil pH with a soil testing kit.
* Space: Sweet potatoes need plenty of space to spread out. Allow at least 12-18 inches between plants and 3-4 feet between rows.
* Weed Control: Clear the area of weeds before planting. Weeds can compete with your sweet potatoes for nutrients and water.
Now, let’s get that garden bed ready:
1. Clear the Area: Remove any weeds, rocks, or debris from the planting area.
2. Amend the Soil: If your soil is poor, amend it with compost, aged manure, or other organic matter. This will improve drainage, fertility, and overall soil health. I usually add a generous layer of compost and till it into the top 6-8 inches of soil.
3. Create Ridges or Hills: Sweet potatoes grow best in raised ridges or hills. This helps with drainage and allows the tubers to expand easily. Create ridges that are about 8-12 inches high and 3-4 feet apart.
4. Water the Soil: Water the soil thoroughly before planting. This will help the slips establish themselves quickly.
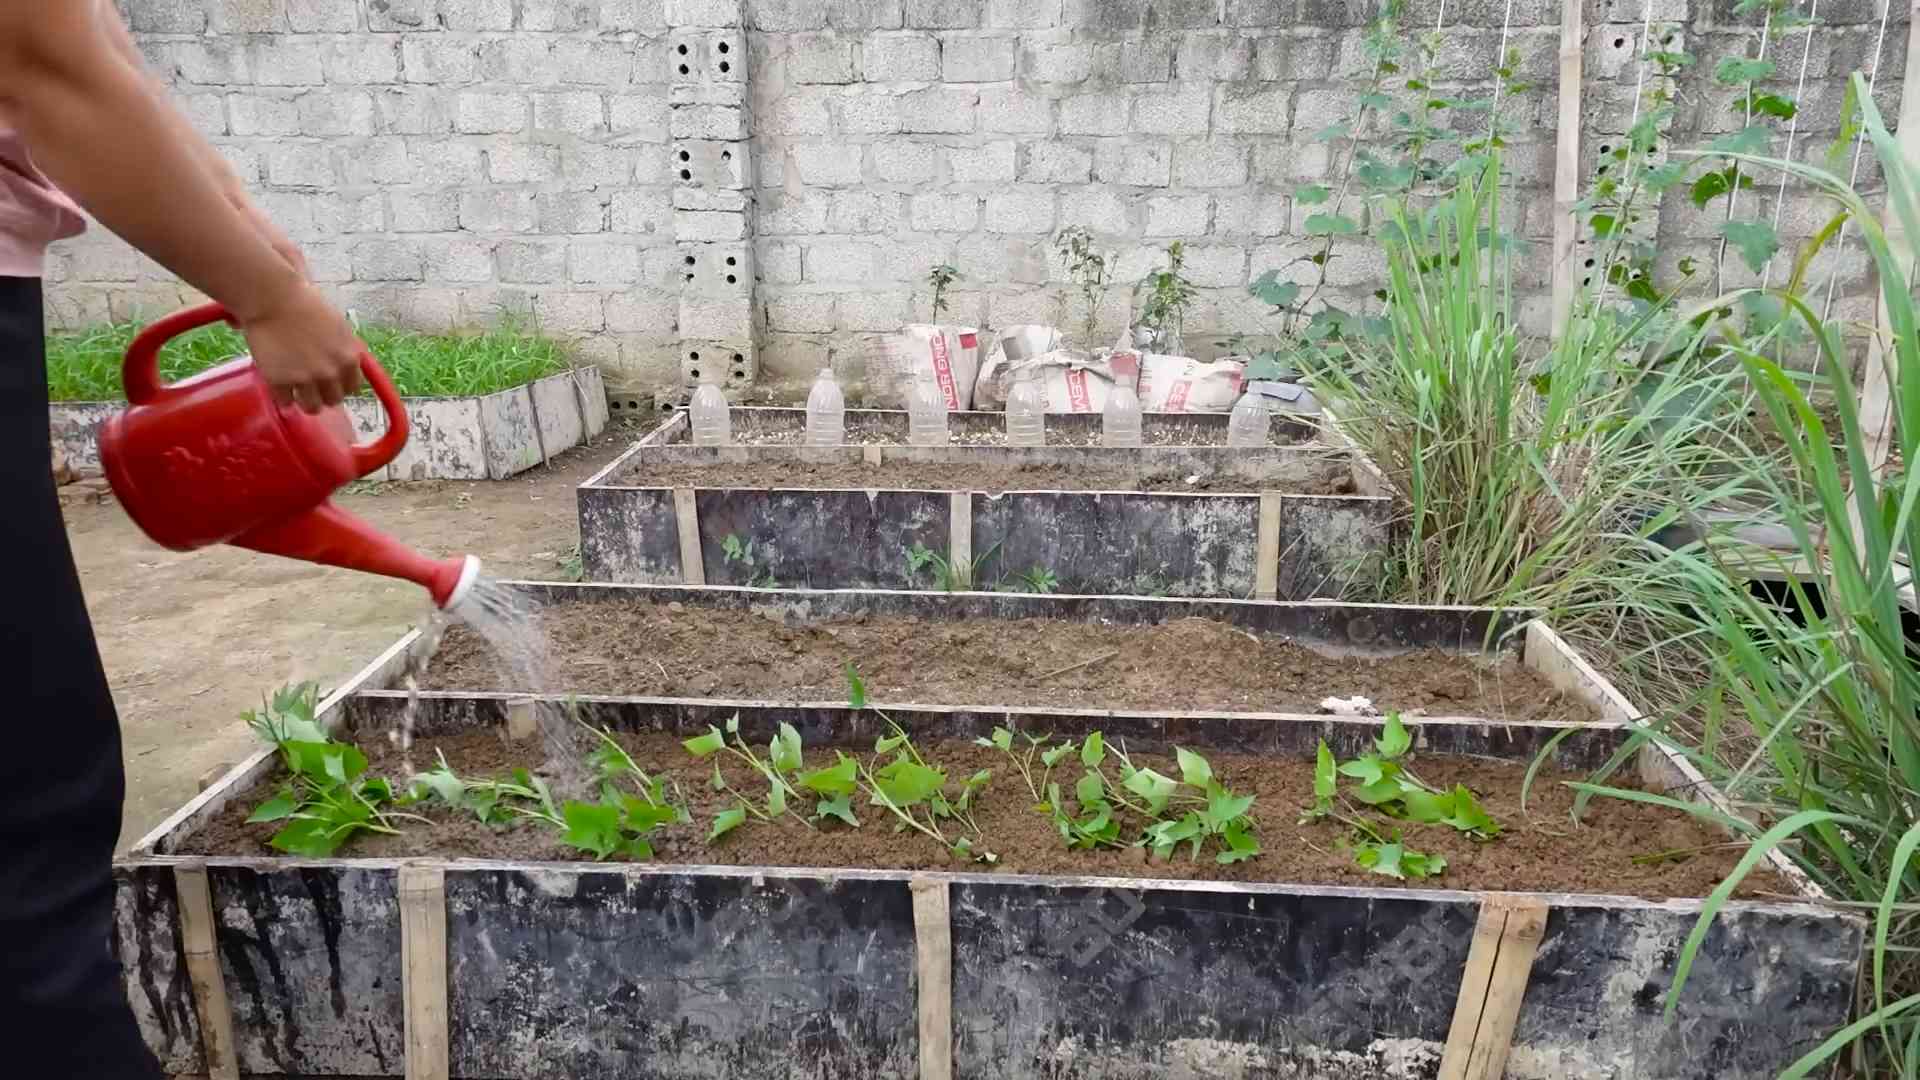
Planting Your Sweet Potato Slips: Time to Get Your Hands Dirty!
Now for the fun part – planting those slips! This is where all your hard work pays off.
1. Choose a Planting Day: Wait until the danger of frost has passed and the soil has warmed up to at least 60°F (15°C). Sweet potatoes are sensitive to cold temperatures.
2. Prepare the Slips: Just before planting, soak the roots of the slips in water for about an hour. This will help them rehydrate and get off to a good start.
3. Planting Technique:
* Dig a hole in the top of the ridge or hill, deep enough to bury the roots of the slip.
* Plant the slip at an angle, with only the top few leaves above the soil.
* Gently firm the soil around the slip.
* Water the newly planted slip thoroughly.
4. Spacing: Space the slips 12-18 inches apart along the ridge or hill.
5. Mulching (Optional): Mulching around the plants with straw or hay can help retain moisture, suppress weeds, and regulate soil temperature.
Caring for Your Sweet Potato Plants: Watering, Weeding, and Watching Them Grow
Once your sweet potato slips are planted, it’s important to provide them with the care they need to thrive.
* Watering: Water regularly, especially during dry periods. Sweet potatoes need consistent moisture to develop healthy tubers. Aim for about 1 inch of water per week. Water deeply and less frequently, rather than shallowly and often.
* Weeding: Keep the area around your sweet potato plants free of weeds. Weeds can compete for nutrients and water, reducing your yield. Hand-pull weeds regularly or use a hoe to cultivate the soil.
* Fertilizing (Optional): Sweet potatoes don’t require a lot of fertilizer, but a side dressing of a balanced fertilizer (like 10-10-10) a few weeks after planting can give them a boost. Avoid over-fertilizing, as this can lead to excessive vine growth and fewer tubers.
* Vine Management: Sweet potato vines can grow quite long and spread out. You can prune them back if they’re taking over your garden, but be careful not to damage the tubers. Some people even lift the vines occasionally to prevent them from rooting at the nodes, which can divert energy away from tuber development. I usually just let them do their thing!
* Pest and Disease Control: Sweet potatoes are generally resistant to pests and diseases, but keep an eye out for common problems like sweet potato weevils and fungal diseases. If you notice any problems, take action promptly to prevent them from spreading. Organic pest control methods, such as insecticidal soap or neem oil, can be effective.
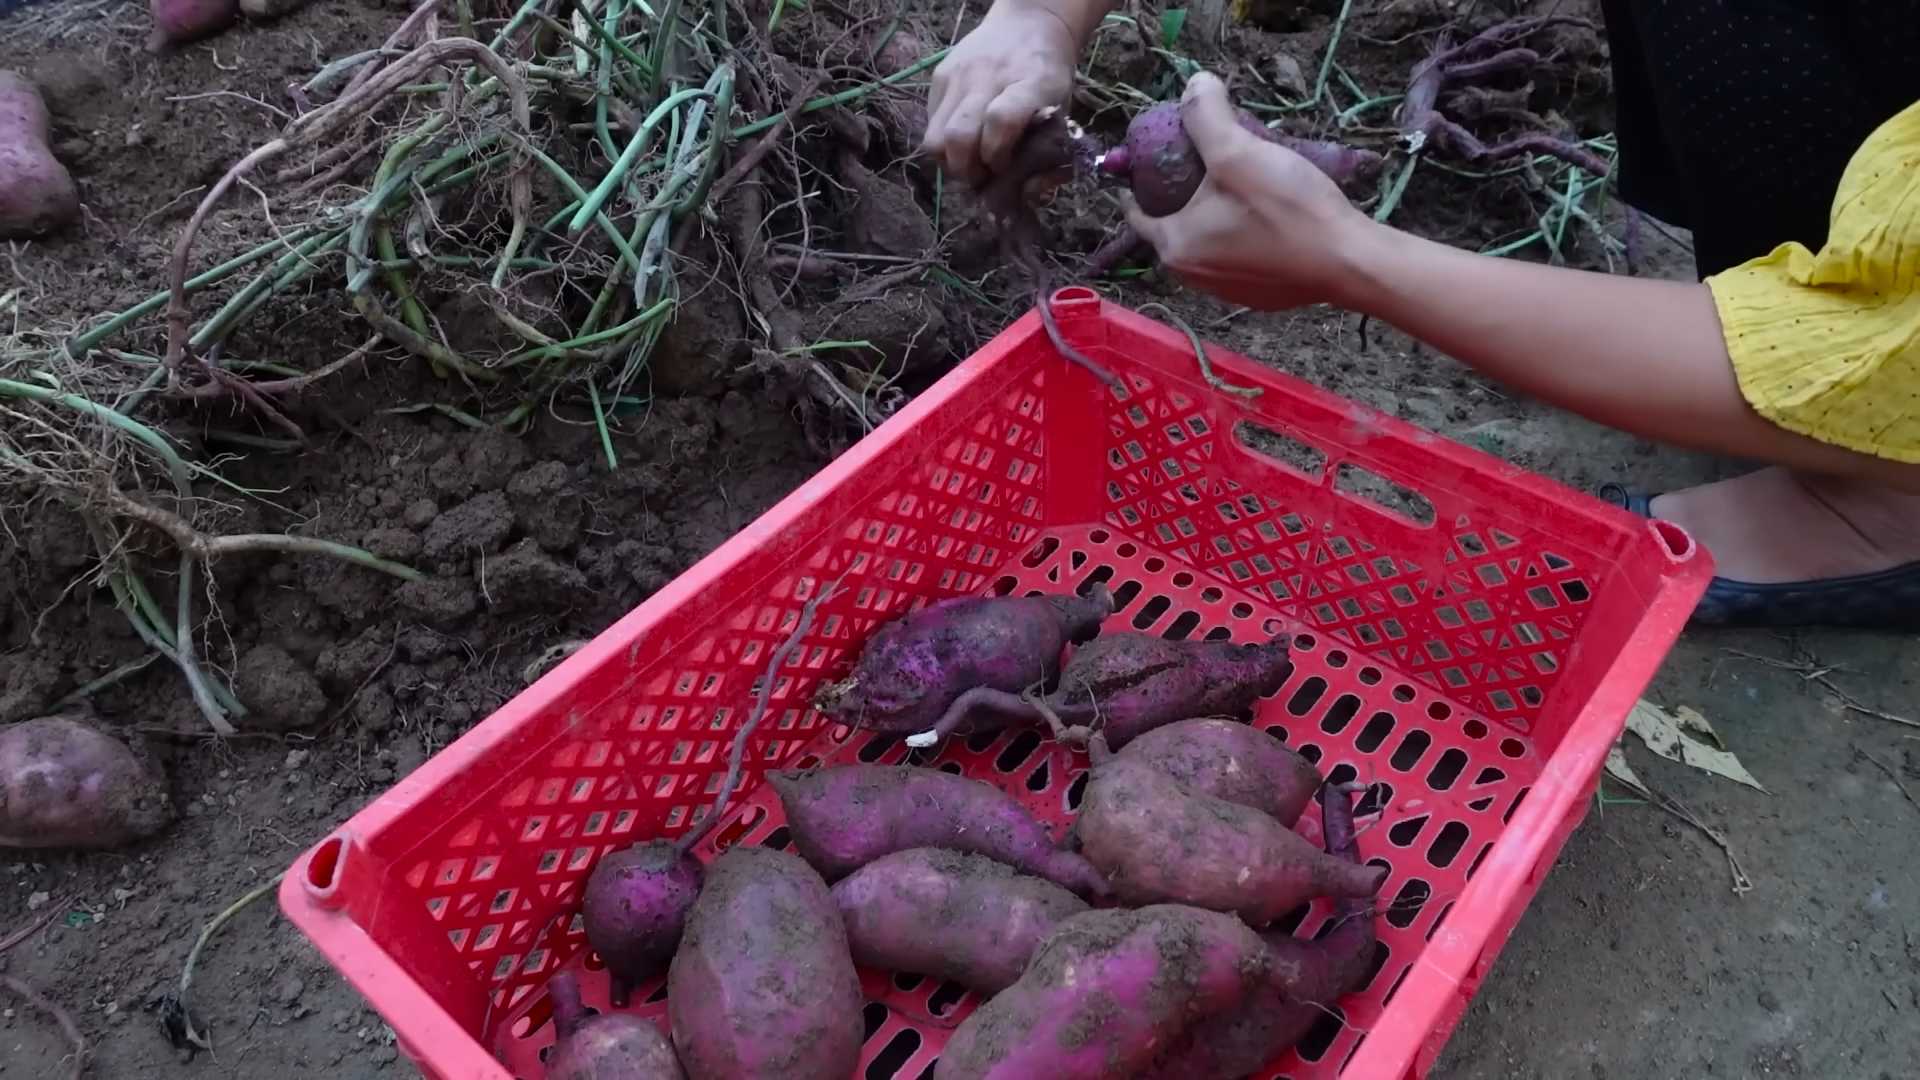
Harvesting Your Sweet Potatoes: The Grand Finale!
After about 90-120 days, your sweet potatoes should be ready to harvest. The exact timing will depend on the variety you’re growing and your local climate.
Here’s how to tell when it’s time to harvest:
* The Vines Start to Yellow: This is a sign that the plants are nearing the end of their growth cycle.
* Test Dig: Dig up a few plants to check the size and maturity of the tubers. If they’re a good size and the skins are firm, it’s time to harvest.
Here’s the harvesting process:
1. Choose a Dry Day: Harvest your sweet potatoes on a dry day to prevent them from rotting.
2. Cut Back the Vines: Cut back the vines a few days before harvesting to make it
Conclusion
So, there you have it! Growing sweet potatoes at home, while it might seem daunting at first, is a surprisingly rewarding and accessible endeavor. We’ve walked through the entire process, from sprouting slips to harvesting those beautiful, nutrient-packed tubers. But why should you dedicate your precious garden space to this particular crop?
The answer lies in a combination of factors. First, the unparalleled flavor of homegrown sweet potatoes simply can’t be matched by store-bought varieties. The freshness and the care you put into nurturing them translate directly into a richer, sweeter, and more complex taste. Imagine roasting them with a touch of cinnamon and maple syrup, or transforming them into a creamy, comforting soup on a chilly evening. The possibilities are endless!
Second, growing your own sweet potatoes gives you complete control over the growing process. You can avoid harmful pesticides and herbicides, ensuring that your family is consuming only the healthiest and most natural food. This is especially important for those concerned about the environmental impact of conventional agriculture.
Third, and perhaps most importantly, growing sweet potatoes is a fantastic learning experience. It connects you to the natural world, teaches you about plant life cycles, and provides a sense of accomplishment that’s hard to replicate. Watching those tiny slips transform into sprawling vines and eventually yield a bountiful harvest is truly magical.
But don’t just take our word for it! We encourage you to embark on your own sweet potato growing adventure. Experiment with different varieties, such as the classic Beauregard, the vibrant Japanese sweet potato with its purple skin and white flesh, or the more exotic Okinawan sweet potato. Try different growing methods, such as raised beds, containers, or even vertical gardening techniques.
Consider adding companion plants like beans or peas to improve soil health and deter pests. You can also amend your soil with compost or aged manure to provide your sweet potatoes with the nutrients they need to thrive.
Remember, gardening is all about experimentation and learning from your mistakes. Don’t be afraid to try new things and adapt your approach as needed.
And finally, we want to hear about your experiences! Share your tips, tricks, and successes (and even your failures!) in the comments below. Let’s build a community of sweet potato enthusiasts and learn from each other. Together, we can unlock the secrets to growing the most delicious and abundant sweet potatoes possible. So, get your hands dirty, embrace the challenge, and enjoy the fruits (or rather, the tubers!) of your labor. Happy growing!
Frequently Asked Questions (FAQ)
Q: How long does it take to grow sweet potatoes?
A: Sweet potatoes typically take between 90 and 120 days to mature, depending on the variety and growing conditions. The growing season is relatively long, so it’s important to start your slips indoors or purchase them from a reputable nursery to get a head start. Keep a close eye on the weather and be prepared to protect your plants from frost if necessary.
Q: What kind of soil is best for growing sweet potatoes?
A: Sweet potatoes prefer well-drained, sandy loam soil with a pH between 5.5 and 6.5. Avoid heavy clay soils, as they can restrict root growth and lead to misshapen tubers. Before planting, amend your soil with compost or aged manure to improve drainage and fertility. Raised beds are an excellent option for growing sweet potatoes, especially in areas with poor soil drainage.
Q: How much sun do sweet potatoes need?
A: Sweet potatoes require at least 6-8 hours of direct sunlight per day to thrive. Choose a planting location that receives plenty of sunshine throughout the growing season. Insufficient sunlight can result in smaller tubers and reduced yields.
Q: How often should I water sweet potatoes?
A: Sweet potatoes need consistent moisture, especially during the first few weeks after planting. Water deeply and regularly, keeping the soil consistently moist but not waterlogged. Once the plants are established, you can reduce watering frequency, but be sure to monitor the soil moisture levels and water when the top inch or two of soil feels dry. Avoid overhead watering, as it can promote fungal diseases.
Q: What are common pests and diseases that affect sweet potatoes?
A: Common pests that can affect sweet potatoes include sweet potato weevils, flea beetles, and aphids. Diseases include fungal diseases like stem rot and scurf. Regularly inspect your plants for signs of pests or diseases and take appropriate action if necessary. Organic pest control methods, such as neem oil or insecticidal soap, can be effective for controlling many common pests. Crop rotation and good sanitation practices can help prevent diseases.
Q: How do I know when my sweet potatoes are ready to harvest?
A: Sweet potatoes are typically ready to harvest when the vines begin to yellow and die back, usually in the fall before the first frost. You can also test harvest a few tubers to check their size and maturity. To harvest, carefully dig around the plants with a garden fork or shovel, being careful not to damage the tubers. Gently lift the plants from the soil and brush off any excess dirt.
Q: How should I cure and store sweet potatoes?
A: Curing sweet potatoes is essential for improving their flavor and storage life. After harvesting, allow the tubers to dry in a warm, humid place (80-85°F and 85-90% humidity) for 7-10 days. This process allows the skins to harden and heal any minor cuts or bruises. After curing, store the sweet potatoes in a cool, dry, and well-ventilated place (55-60°F) for several months. Avoid storing them in the refrigerator, as this can cause them to develop a hard core.
Q: Can I grow sweet potatoes in containers?
A: Yes, you can grow sweet potatoes in containers, but you’ll need a large container (at least 20 gallons) with good drainage. Choose a bush-type variety of sweet potato, as they tend to be more compact and better suited for container growing. Fill the container with a well-draining potting mix and provide plenty of sunlight and water.
Q: Are sweet potato leaves edible?
A: Yes, sweet potato leaves are edible and nutritious! They can be eaten raw in salads or cooked like spinach. Choose young, tender leaves for the best flavor and texture. Be sure to wash them thoroughly before eating.
Q: What are some creative ways to use homegrown sweet potatoes?
A: The possibilities are endless! You can roast them, bake them, mash them, fry them, or grill them. Use them in soups, stews, casseroles, and pies. Make sweet potato fries, chips, or even sweet potato ice cream. Get creative and experiment with different flavors and spices. Don’t forget to share your delicious creations with friends and family!

Leave a Comment